Manage Users and Users Group
Things to Know Before You Start:
Before deleting a user, it’s important to be aware of certain implications:
- Once SSO is enabled, user must login using ‘Log In With SSO’ option for the conversion to occur
- Post conversion, user will be unable to login to the application using their existing credentials
Manage Users
This guide will help you understand how to manage users and user groups in Prolaborate.
To know how to manage Active Directory Users and Groups, refer to this guide.
To know how to manage SAML based Single Sign-On apps, refer to this guide.
In case you don’t use Active Directory or a Single Sign-On, you can let users sign up on their own rather than asking the admins to add them one by one. refer to this guide to learn more.
Prerequisite
- You should have created at least one repository before adding a user to a repository. Refer to the guide “how to add Repository” to learn more.
- You can add users in Prolaborate at “Application Level” and at “Repository Level”.
- If you add a user at the repository level the user will be a member at the repository level only.
- If you add a user at the application level the user will be a member of Prolaborate.
- You can manage the user’s profiles using Manage Profiles. To learn more please click here
Adding users at the application level enables you to manage users with ease if you have or plan to have multiple repositories. The following are the advantage of adding a user at the application level
- Adding users at the application level is a one-time enrolment of a user.
- Through access control profiles you can assign a user to any number of repositories and user groups.
- You can assign a super admin role for a user
- You can import users while assigning a repository to a user.
Adding users at the repository level enables you to manage users only at the repository level. However, once a user is added at the repository level the user will be added automatically at the application level, hence if you want to add the same user to a new repository you can simply find the users from the existing list of users in Prolaborate.
| Scenario | Application Level | Repository Level |
|---|---|---|
| When to use for adding? | When you have multiple EA repositories | When you have a single EA repository |
| Best Practice | If Access Control Profiles (ACP) is created, you can choose the profile so that the user can get immediate access upon signing in | When you have a User Group you can add users to the user group simultaneously so that the user will get immediate access |
| Credential Required | You should be an Application Admin | You should be an application admin or should be a part of user group which has administrative access to Users and User Groups |
Steps to Add New User at Application Level
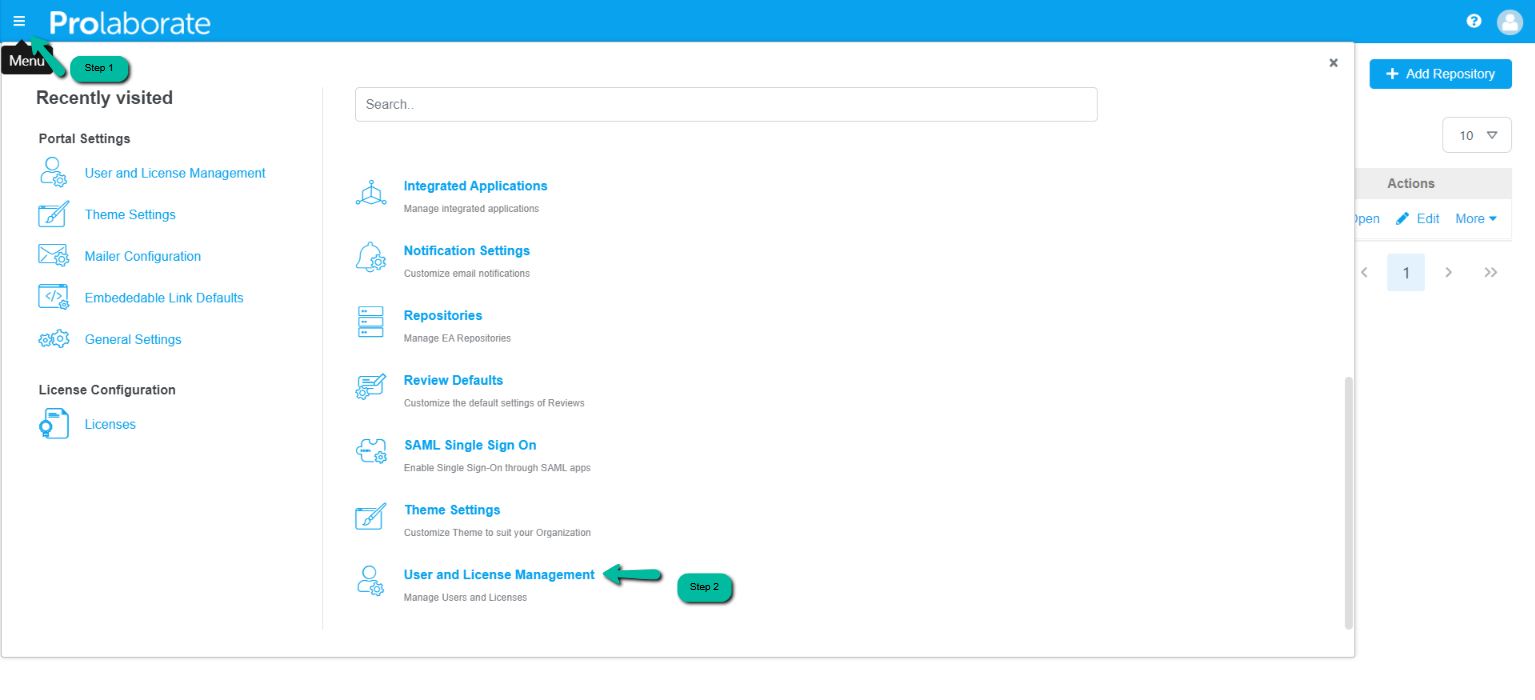
To add a user at the application level, Click on Menu > User and License Management under Portal Settings.


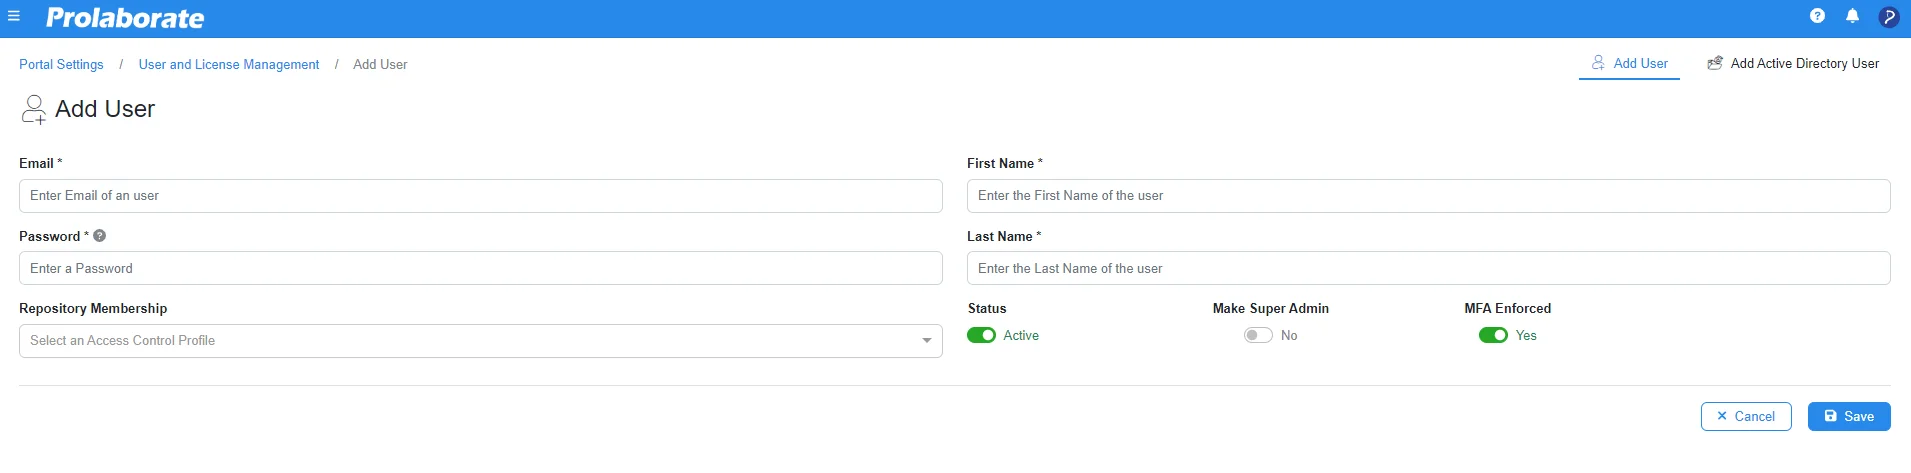
In the Add User section, define the following details.
| Enter the email address of the new user. | |
| Password | Enter the password. Once it is set up the user will be prompted to change the password on their first login. |
| First Name | Specify the first name of the user. |
| Last Name | Specify the last name of the user. |
| Repository Membership | Select the Access Control Profile to which this user should be added based on which the user will access the repositories and its data. Click here to know more about the access control profile. |
| Status | The status will be active default. Toggle the button if you want to make the user from active to inactive. |
| Make Super Admin | Enable this option if you want to make this user an Admin. |
| MFA Enforced | Enable this option to force users to enhance their level of security. Click here to know more. |
After entering all the details, click on the Save button to add the user.
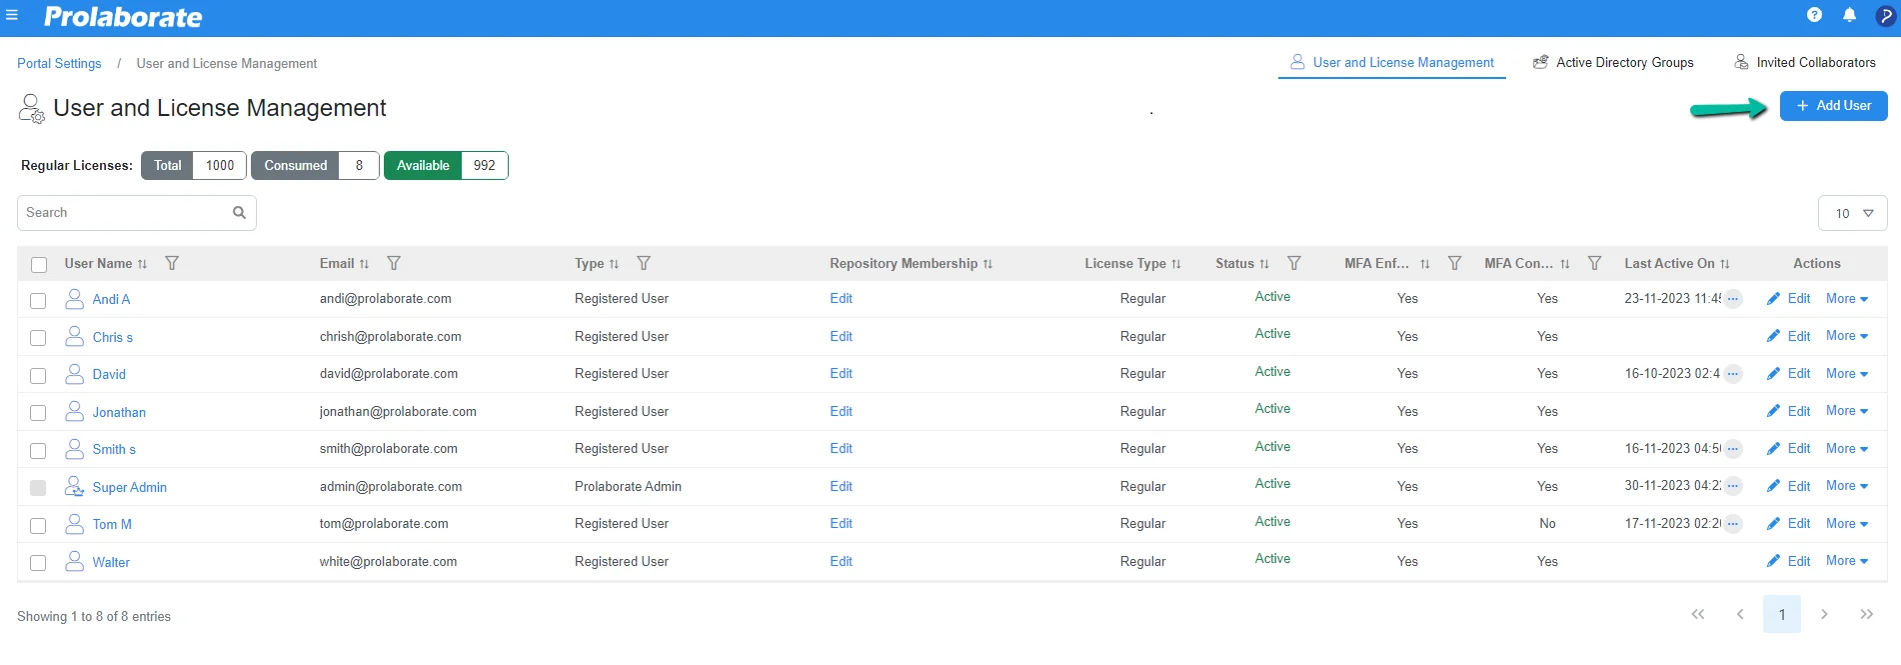
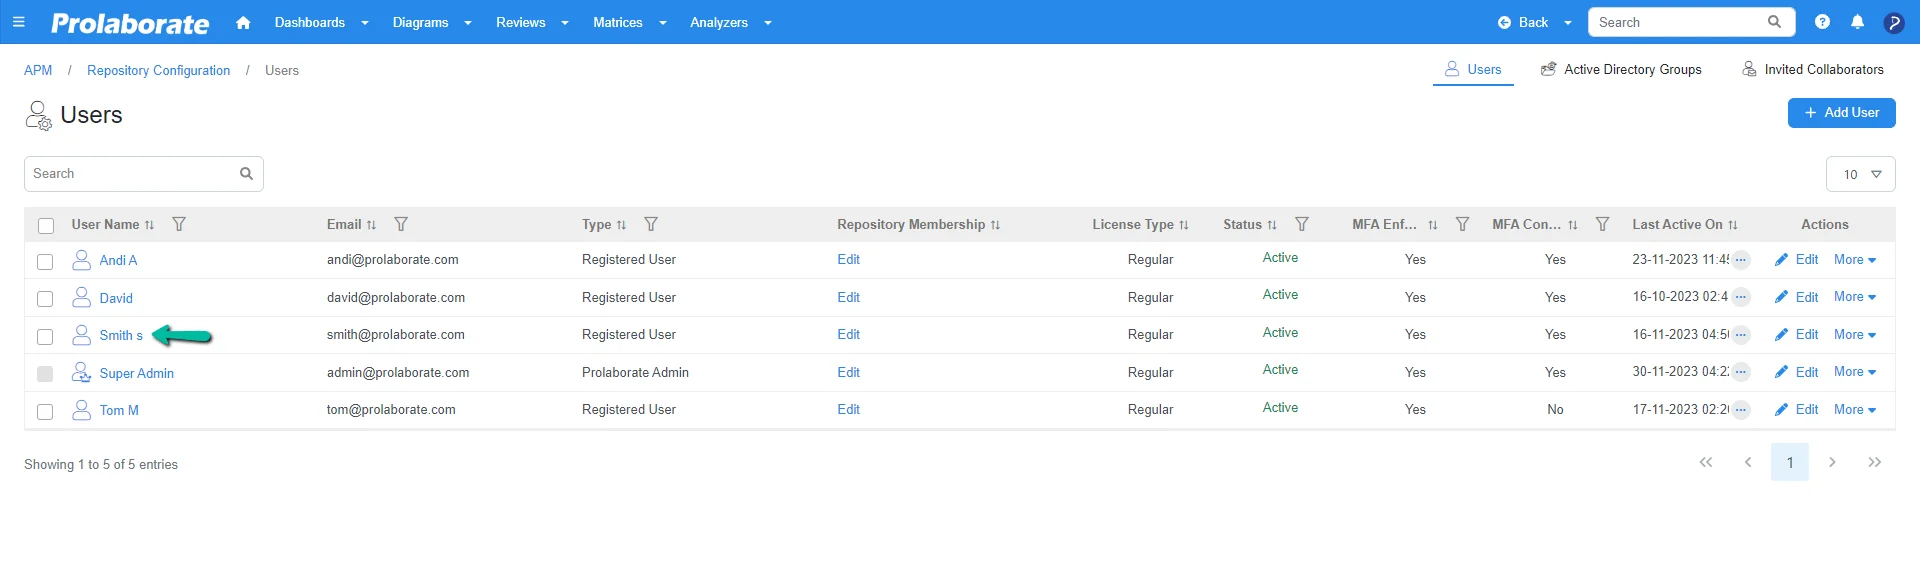
Once saved, you will then land on the page where it lists all the users who are added to the application along with additional information such as the type of user, repository membership, license type, etc. as shown in the image below.
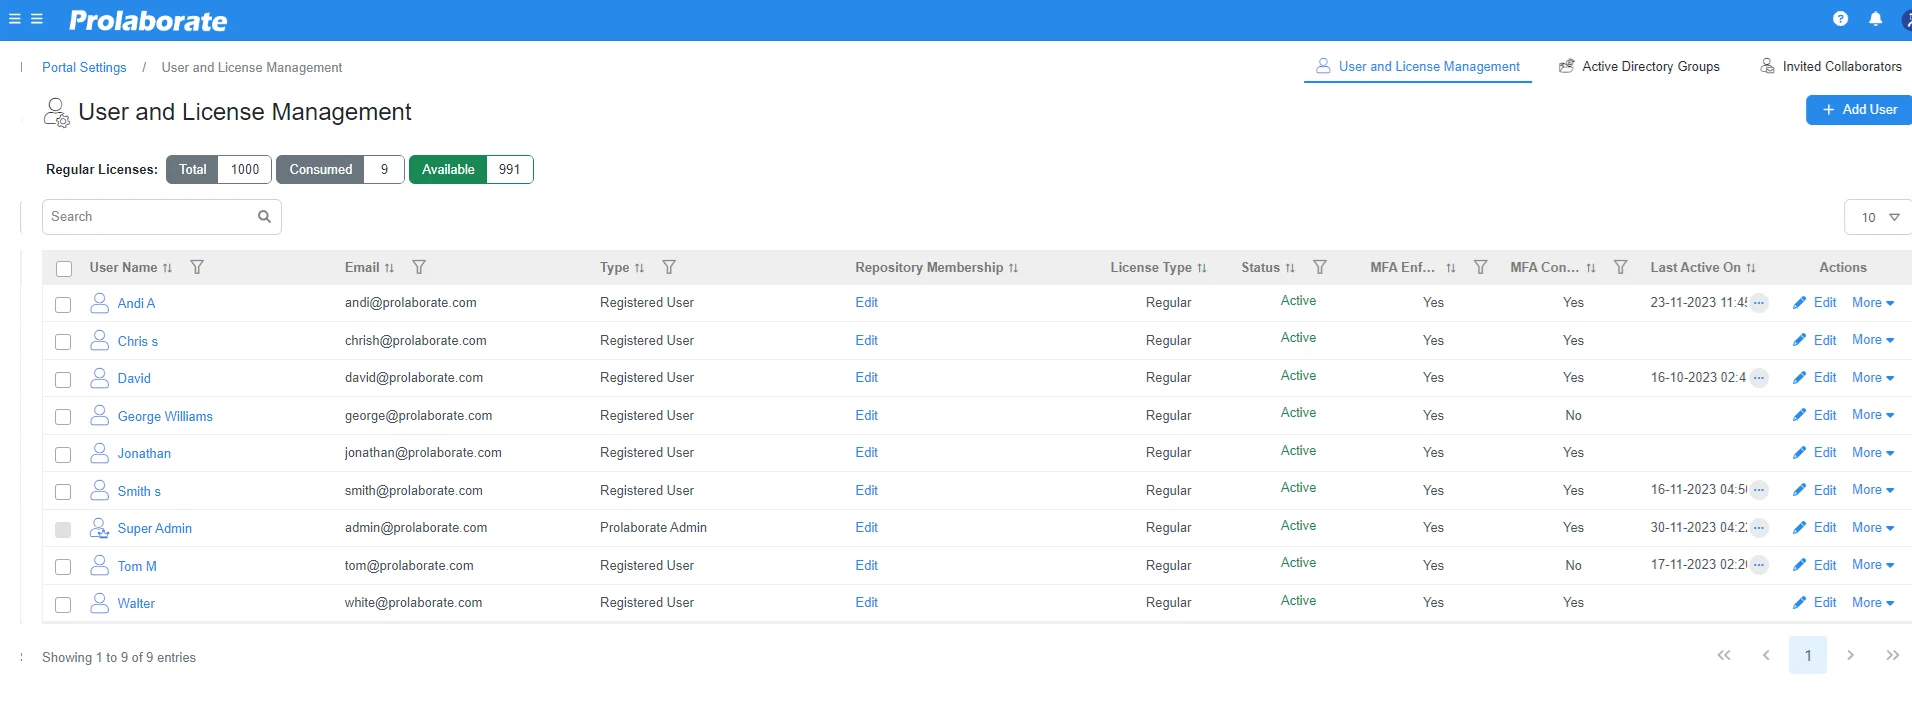
| Column Name | Description |
|---|---|
| Username | Username of the Prolaborate users is listed here |
Email ID of the respective Prolaborate users.
. |
|
| Type | Type of the user who is accessing Prolaborate applicationSuper AdminRegistered UserProlaborate AdminRead-only UserIdentity Provider UserActive Directory UserActive Directory Group User |
| Repository Membership | Repository Membership and User Groups assigned to the user are shown in the popup window. Admin can edit or change the Repository Membership and assign User Groups as required . |
| License Type | Users License type (Regular or Read-only) is showed here. |
| MFA Enforced | Identify if MFA is enforced for the users with a clear ‘Yes’ or ‘No’ indication. |
| MFA Configured | Displays the status of whether the user has configured the MFA |
| Status | Current status of the users is shown here.ActiveInactiveBlocked |
| Last Active On | Display the user’s most recent login time in Prolaborate, indicated by the timestamp of their last login. This information is refreshed only when the user logs out. |
| Edit | Admin can modify the user’s information using this Edit Option. |
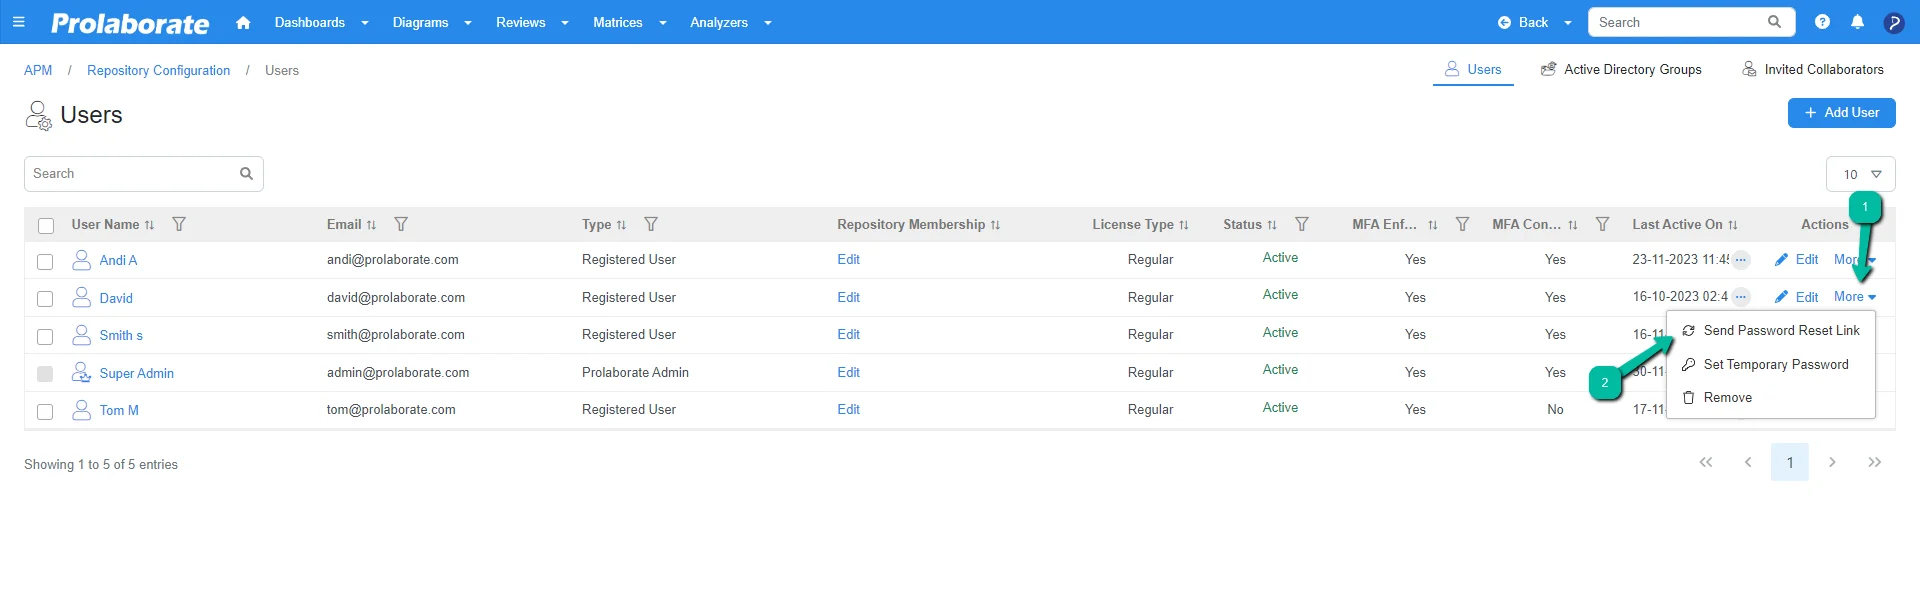
| More | By clicking this dropdown, admin can be able to do the followingSend Password Reset Link – An email link is sent to change the password. Note that Mailer should be enabled and configured to view this optionSet Temporary Password – Admin can set a temporary password for a user. After the user logs in using the temporary password, a change password screen will be displayed where the user should change the password.Delete – Admin can delete a user from Prolaborate using delete option in User and License Management page. Users can also be deleted in Users page where the deleted user will only be removed from the respective repository but not from the application.
|
Following are the user type and license type in Prolaborate.
| Type | Types of Users in Prolaborate. |
|---|---|
| Prolaborate Admin | The administrator who has complete access to the application. |
| Registered User | Users who have been added by Prolaborate Admin and Collaborators who enroll themselves as users in Prolaborate. |
| Identity Provider User | Users who enroll themselves with SAML settings. |
| Active Directory User | User or User group added through Active Directory. |
| Regular User | User who can access Repository with full access and able to write and Make a Discussion for the EA Items. |
| Read-Only User | Users who can only see the data in a Read-only mode. |
License Details: It shows the Prolaborate license count that is included in the license edition (Growing Teams, Large Teams or Enterprise). If you have opted for Growing Teams or Large Teams license edition, then the total license count, consumed license and available license details will be shown on this page. If you have opted for an Enterprise license edition which is an unlimited license then the counts subject to total license, consumed/available license will not be shown.

The consumption of licenses applies to all user types, including Active Directory and invited collaborators.

Steps to Add User at Repository Level
To add a user at the repository level, choose the repository from the repositories page and then click on Menu > Users under Repository Configuration.

On the landing page click on Add Users to add a new user.
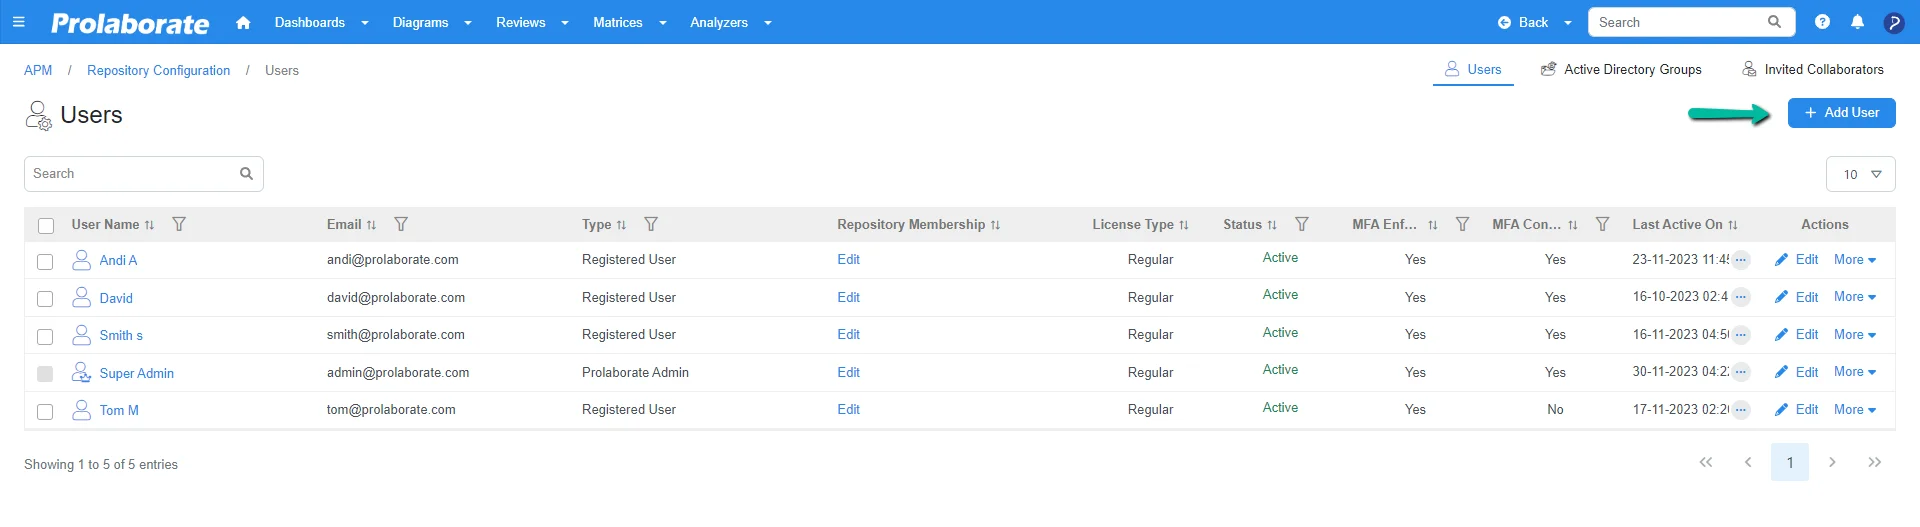
In the Add User section, define the following details.
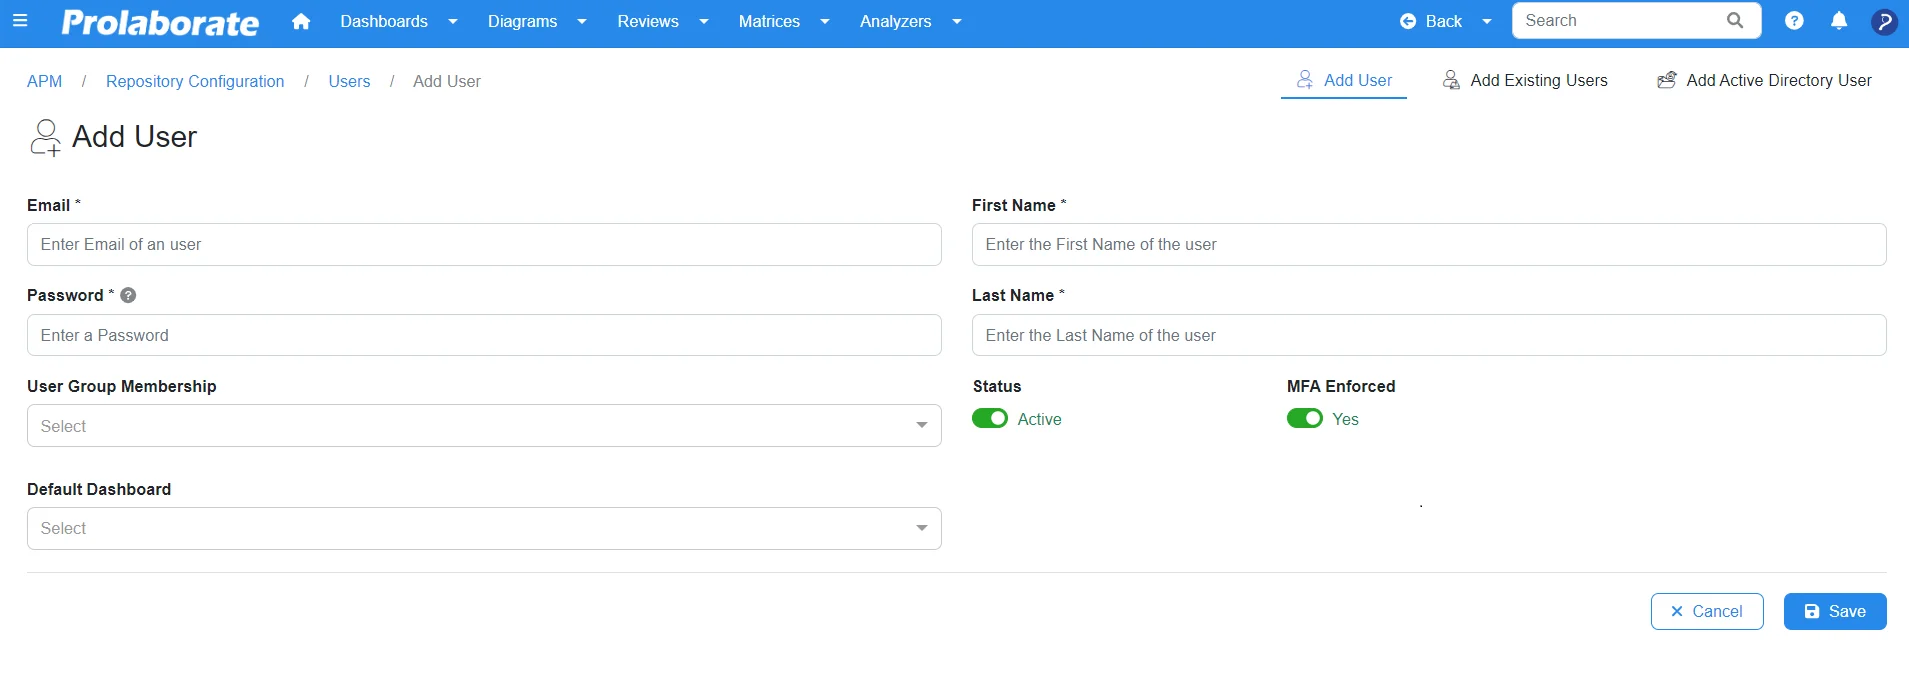
In the Add User section, define the following details.
| Enter the email address of the new user. | |
| Password | Enter the password. Once it is set up. the user will be prompted to change the password on their first login. |
| First Name | Specify the first name of the user. |
| Last Name | Specify the last name of the user. |
| User Group Membership | Select a User Group to which this user should be added based on which access to the repository will be provided. |
| Default Dashboard | Select a “Default Dashboard” to which this user should view as default. i.e upon login, the user will land directly on the dashboard which is set as the default dashboard. |
| Status | The status button by default will be active, toggle if you want to make the user from active to inactive. |
| MFA Enforced | Enable this option to force users to enhance their level of security. Click here to know more. |
After entering all the details click on the Save button and the user will be added. You will be then land on the page where all the list of users are listed.
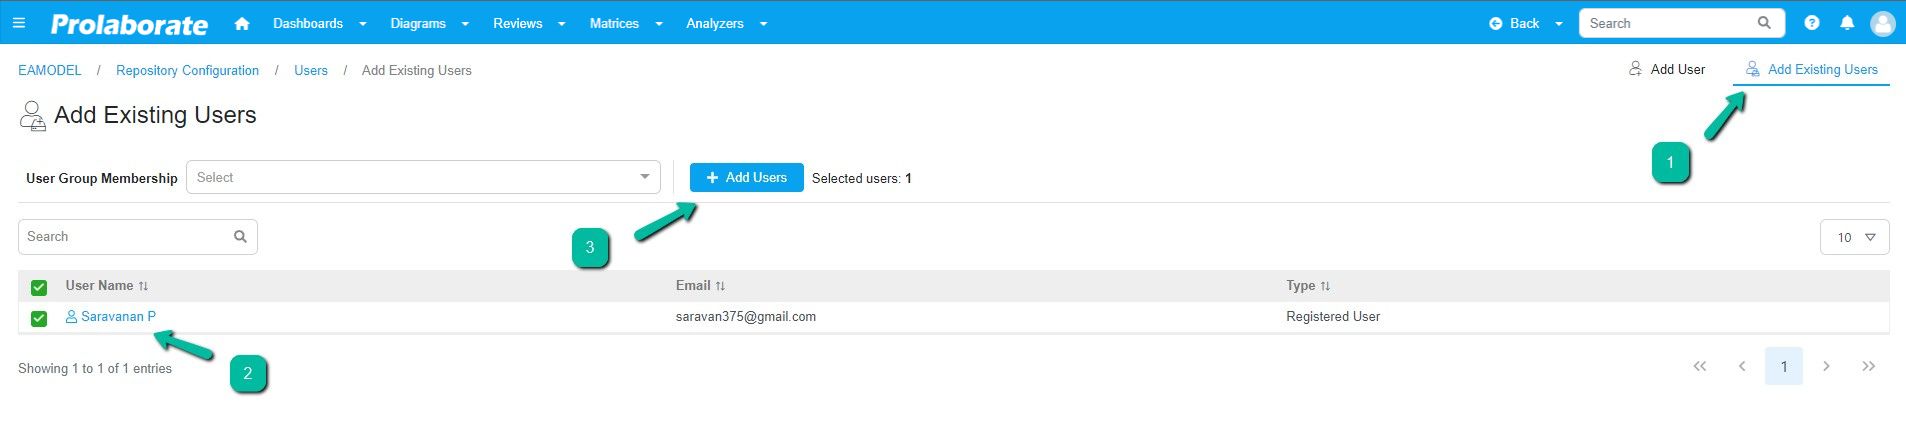
Steps to Add Existing User at Repository level
This option enables you to add existing users of Prolaborate to a new repository.
Note:
- Prolaborate now merges the user information works as a SAML user with the same access and consumes as a single licence if the user account has a matching email id for SAML users.
To add an existing user, click on Add User > Add Existing Users. You will then find the list of users who are existing at the application level. Choose the user whom you want to add to the repository level and then click Add Users.
Step 1:
Step 2:
The following features can be performed at the application level and repository level subject to adding users.
Manage Access to Repositories and Groups
To add or remove a user from a user group click on Edit under the Repository Membership column.
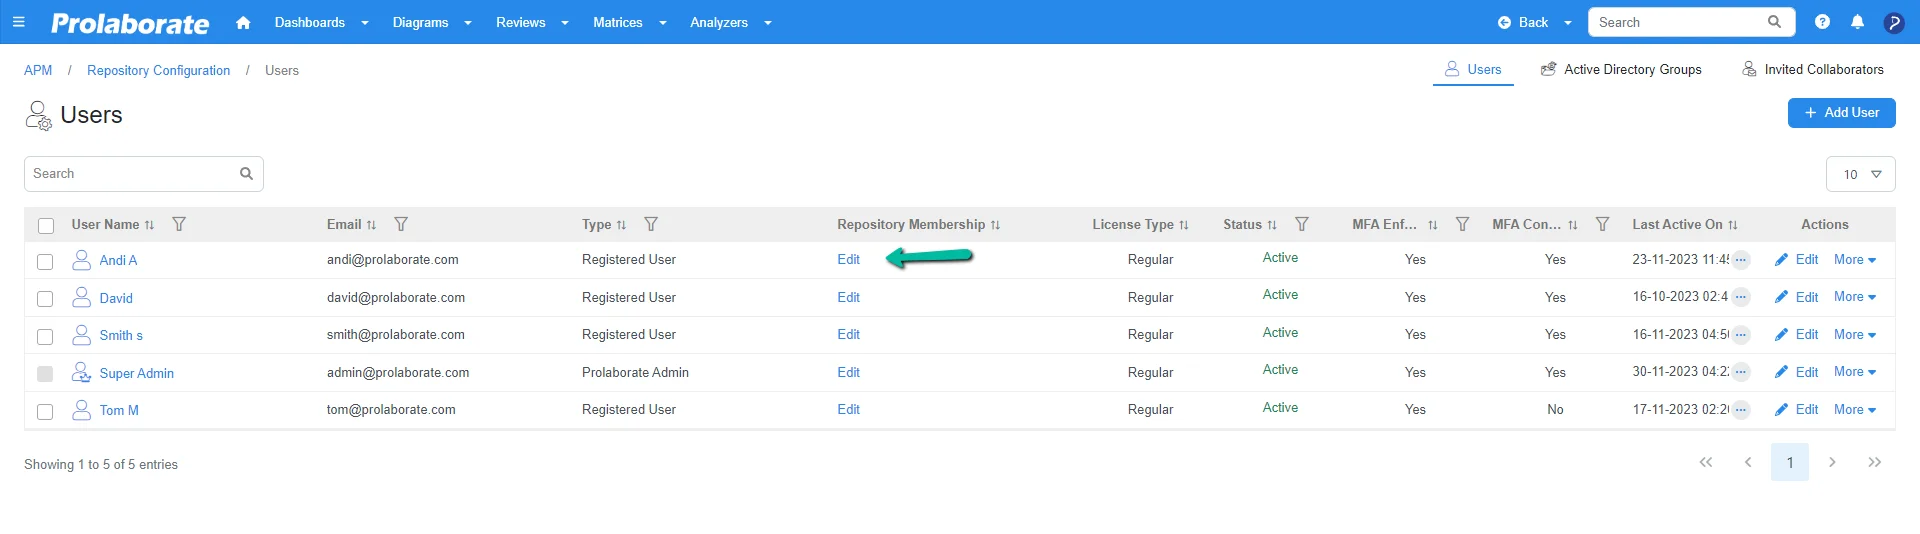
You can click on the Edit icon of a user and select Edit under the Repository Membership to add or remove a user from a user group.
Step 1:
Step 2:
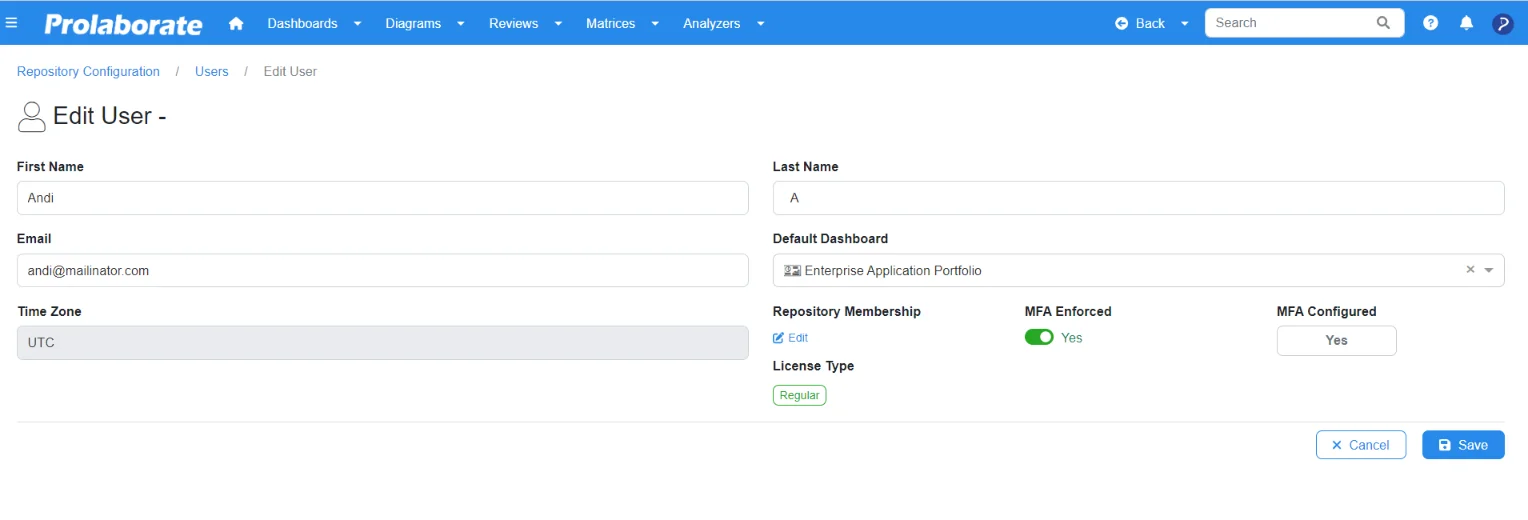
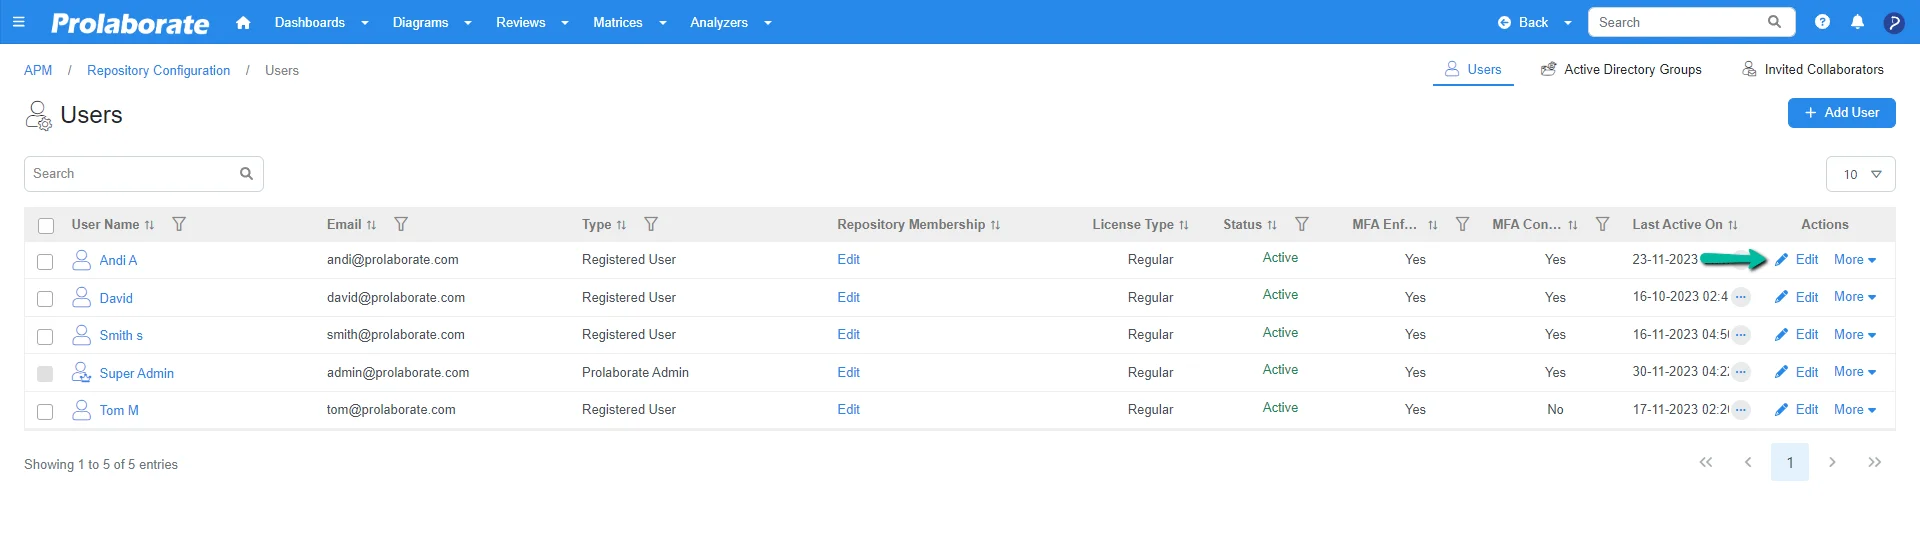
Steps to Edit User Details
Click on Edit to edit all the details of a user.
Note:
- Active Directory Users and Identity Provider Users information cannot be edited.
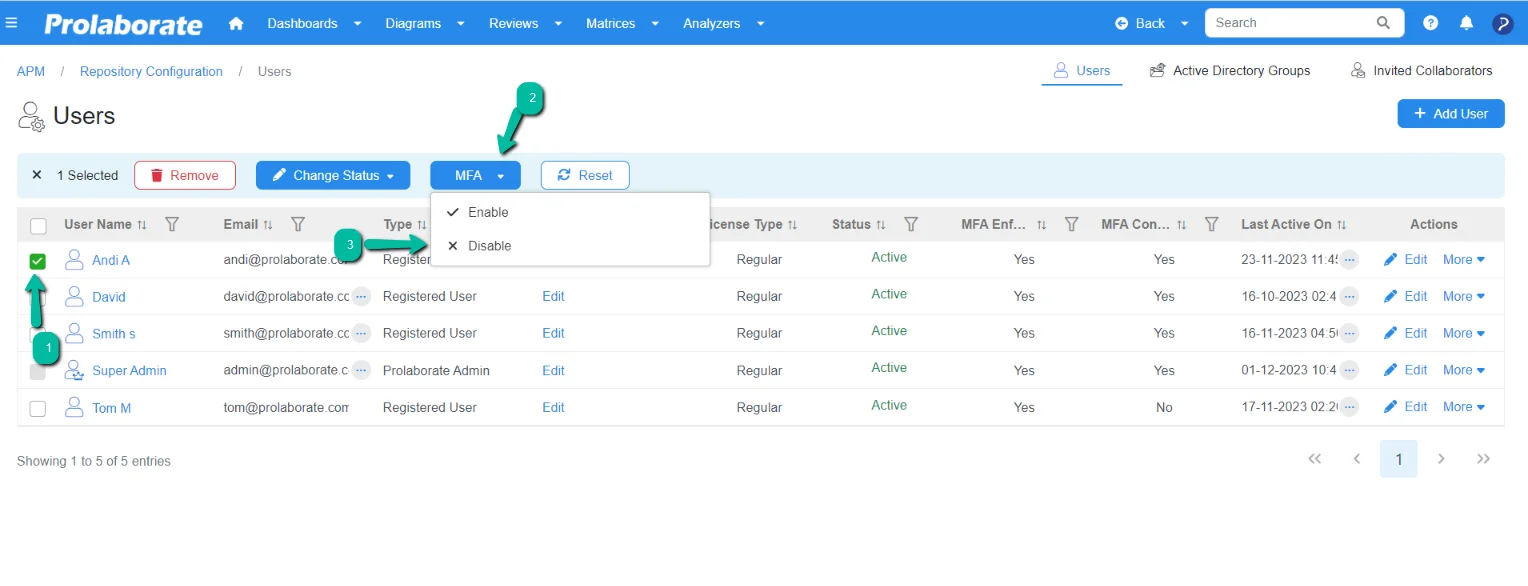
Steps to Enable and Disable MFA for Users
To enable or disable MFA for a specific user, select a user for whom you wish to change the MFA settings. To know more about MFA, refer here.
Enable MFA
You may modify MFA for a user using this functionality both at the repository and portal levels. After choosing the user, click the MFA drop-down menu to enable MFA for that user.
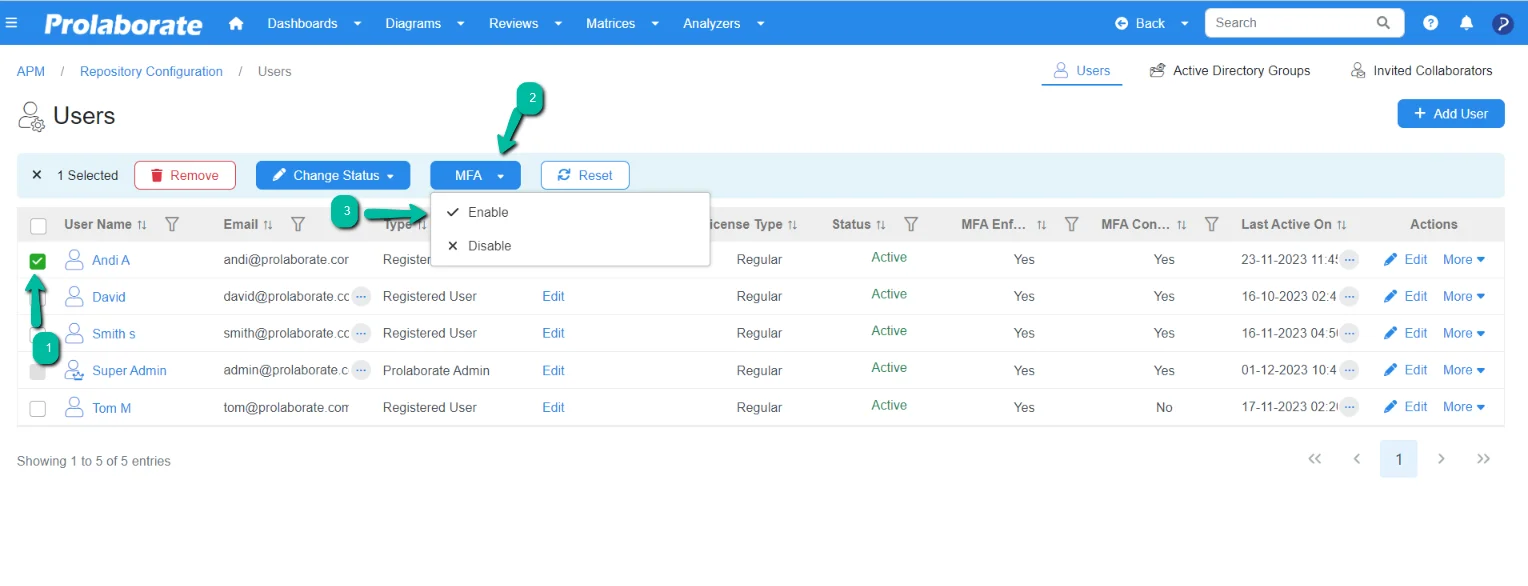
Disable MFA
You may modify MFA for a user using this functionality both at the repository and portal levels. After choosing the user, click the MFA drop-down menu to disable MFA for that user.
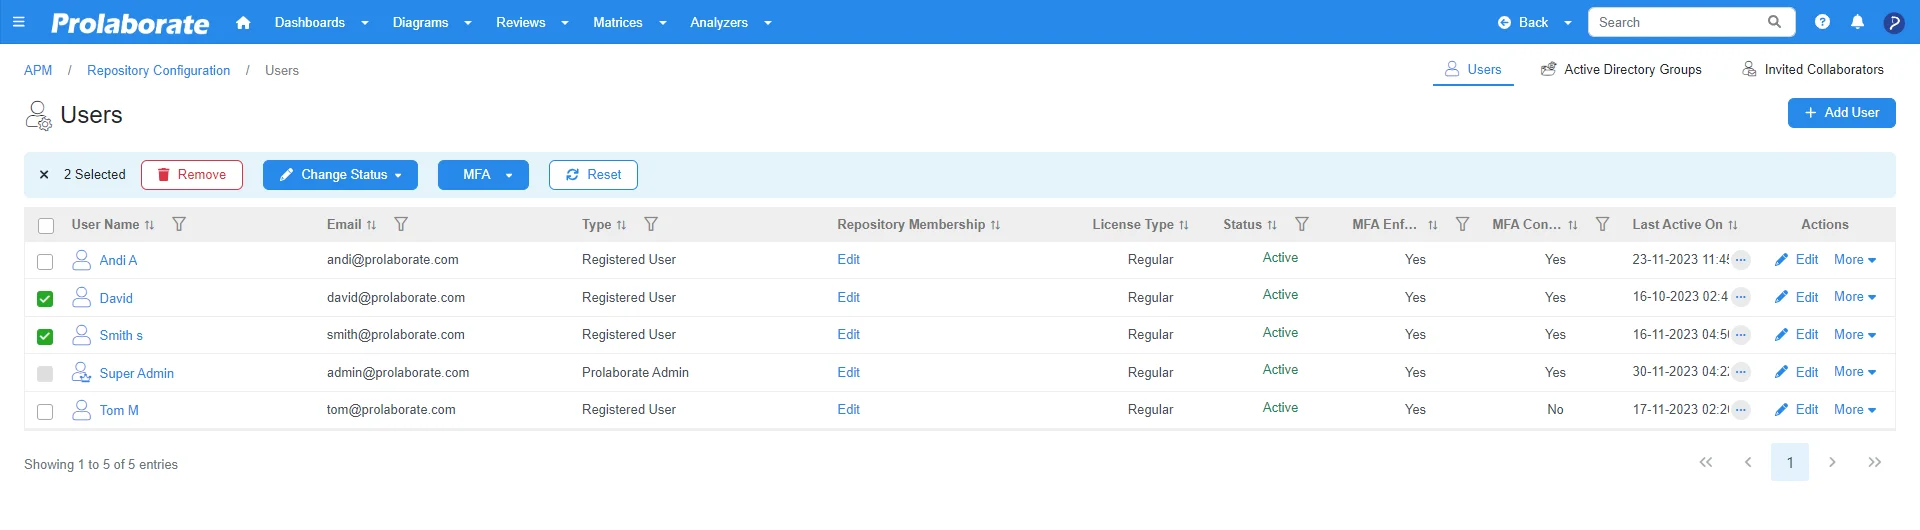
Steps to Remove and Delete Users
Remove:
This feature is available at the repository level where you can remove the user from the respective repository only, however, he will remain as a user at the application level.
For instance, if a user is added to multiple repositories and later when you want to deny the user in accessing to that particular repository then you can use the Remove feature to restrict the user from accessing that repository.
To remove a user from the repository, click on More > Remove
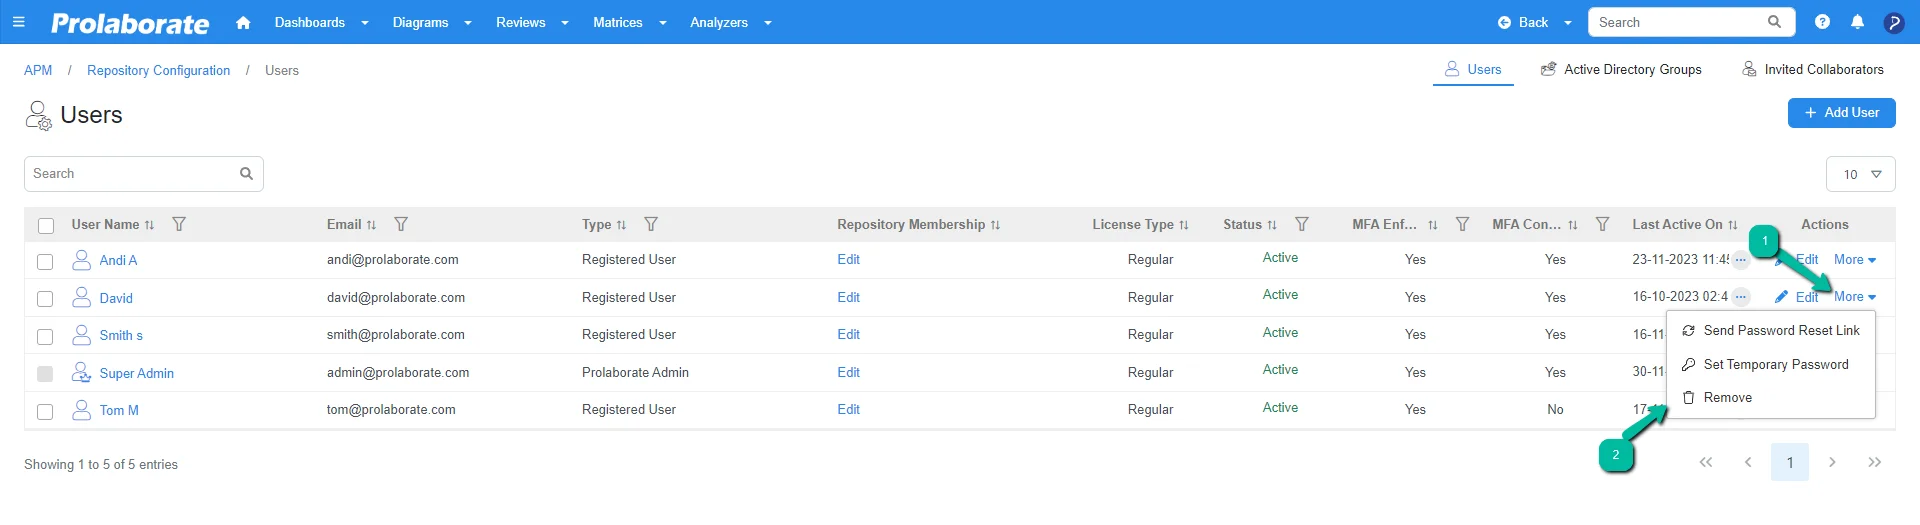
To remove multiple users, select the user from the user list and then click on the Remove button.
Delete:
This feature is available at the application level where you can delete a user at the application level. When you delete the user at the application level it cannot be revoked. Moreover, when a user is deleted, the license consumed will be released.
To delete a user, select the user and then click on the Delete button.

To delete multiple users, select the user from the user list and then click on the Delete button.
Note:
Before deleting a user, it’s important to be aware of certain implications:
- Open Discussions: If a user is deleted from Prolaborate, any discussions they initiated that are still in an open state will remain unchanged. However, please note that the administrator and other active members will no longer have the ability to close or edit these discussions.
- Review Moderator: If the user being deleted is the sole moderator for a review, this action may hinder another user from deleting the associated reviews.
- For SSO users, if a user who has previously logged in through Single Sign-On (SSO) has been deleted from Prolaborate, and then logs back into the application, they will be treated as a new user. This means that any additional permissions or groups that were assigned to them, other than the default profile access/group for SSO, will be revoked. The default profile will be assigned to them.
It is advisable to review these factors before proceeding with the deletion of a user to ensure a smooth transition and prevent any unintended consequences.
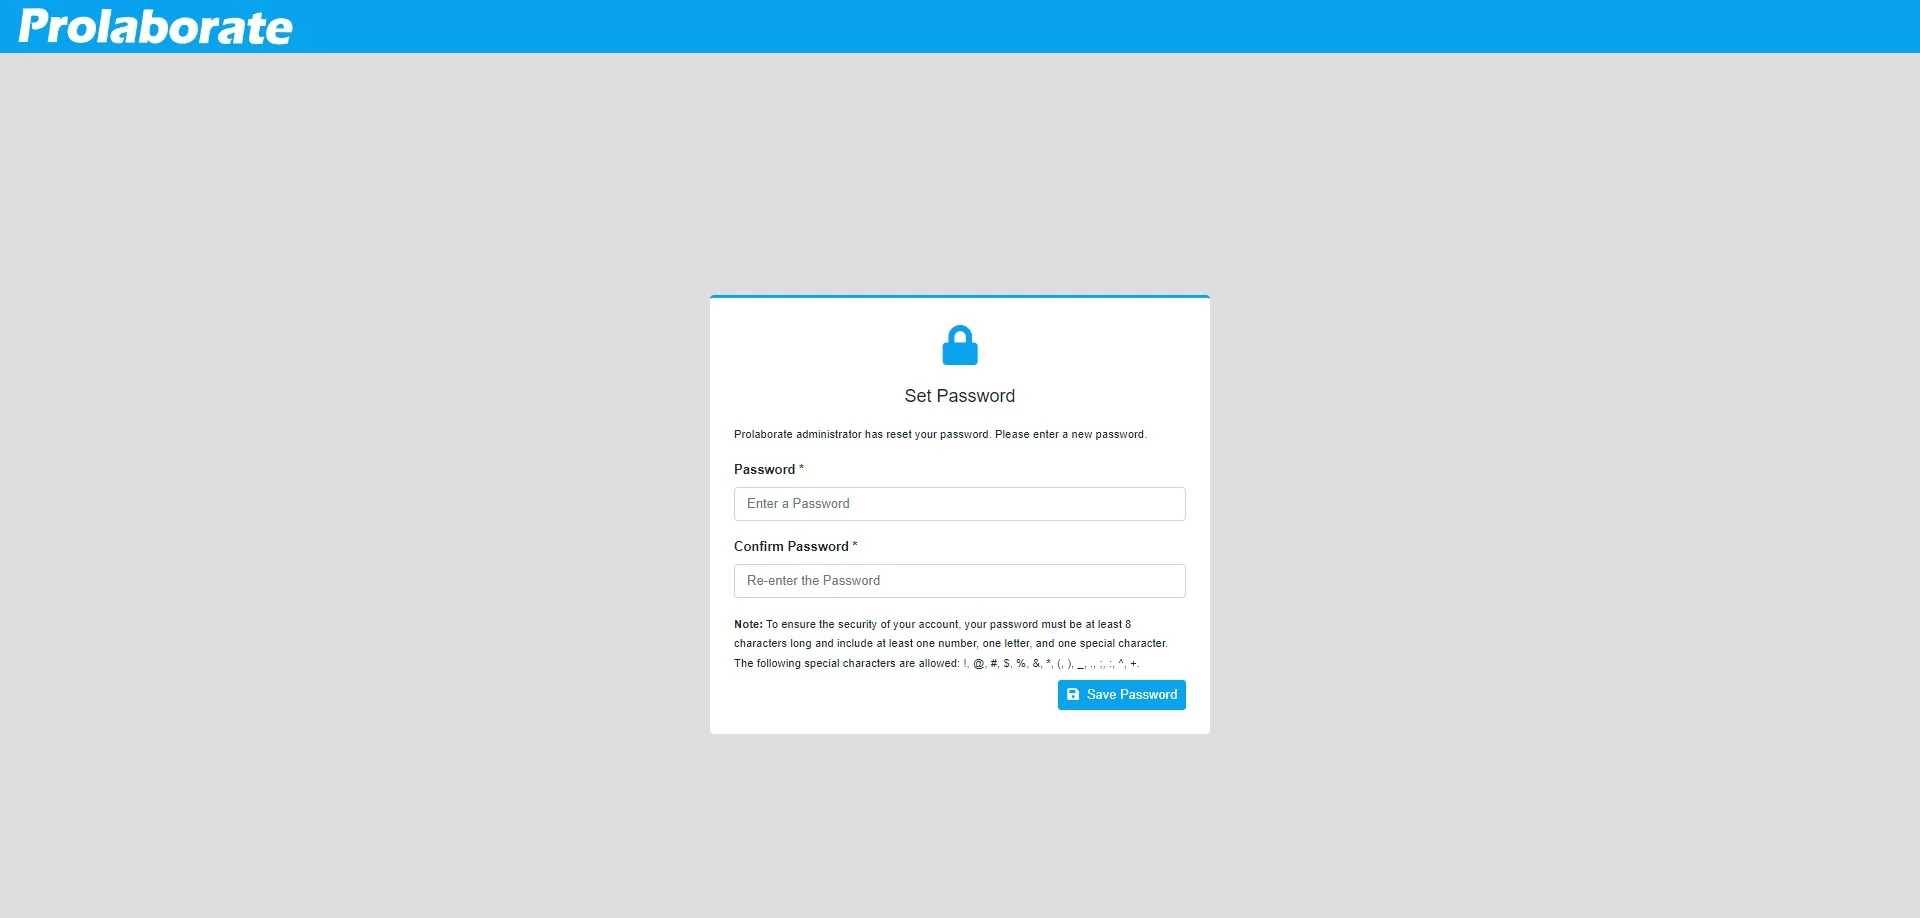
How to Set Temporary Password for a User?
When a user has not configured the mailer then they will not be able to reset the password by themselves in such instances users can request the admin to reset the password. Upon receiving such a request, the admin can set the temporary password and inform the user. When the user logs in using the temporary password, they will be prompted to reset the password.
To set the temporary password for a user, click on More > Set Temporary Password

On selecting the Set Temporary Password, you can set the temporary password for a user.
The below image shows the prompt to set the temporary password for a user upon selecting Set Temporary Password.

How to Send Password Reset Link?
This feature will enable the admin to reset the password for the users by sending them a password reset link. The prerequisite for using the password reset link is to configure mailer. Once the mailer is configured the admin can send the password reset link using this feature.
To send the password reset link click on More > Send Password Reset Link.
By clicking the password reset link in the email, the user will land on the page below where the user can reset their password.
How to Invite Collaborators to access Prolaborate?
This feature will enable you to invite a user for collaboration and once you invite, the user will receive a link and upon signing up for the form they will be added as a user in Prolaborate and they can start collaborating. If the user has not signed up, they will remain as Invited Collaborators and not as Prolaborate users.
Collaborators who have been invited through reviews, dashboard, discussion, etc. will be listed here Below is the screenshot which shows the list of collaborators who have been invited into Prolaborate.
The below image shows the list of collaborators who have been invited into Prolaborate.

On inviting the collaborators, they will be notified with an invitation mail. Clicking the link on the email, collaborators will be prompted to register themselves as shown in the image below.
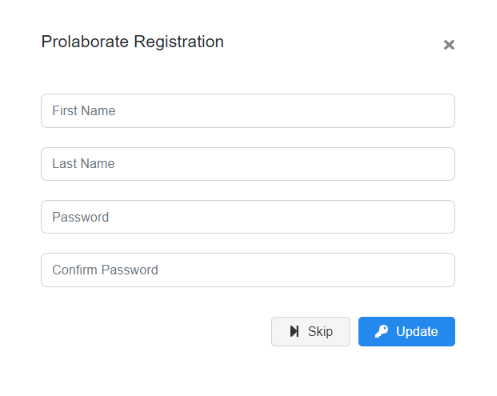
On enrolling in the registration form collaborators will be listed as a user in the user list and if they skip enrolling themselves, they will remain under the Invited Collaborators list as shown in the image below.
To delete a collaborator, click on Trash Icon. To delete multiple collaborators, select multiple collaborators and click on Delete.

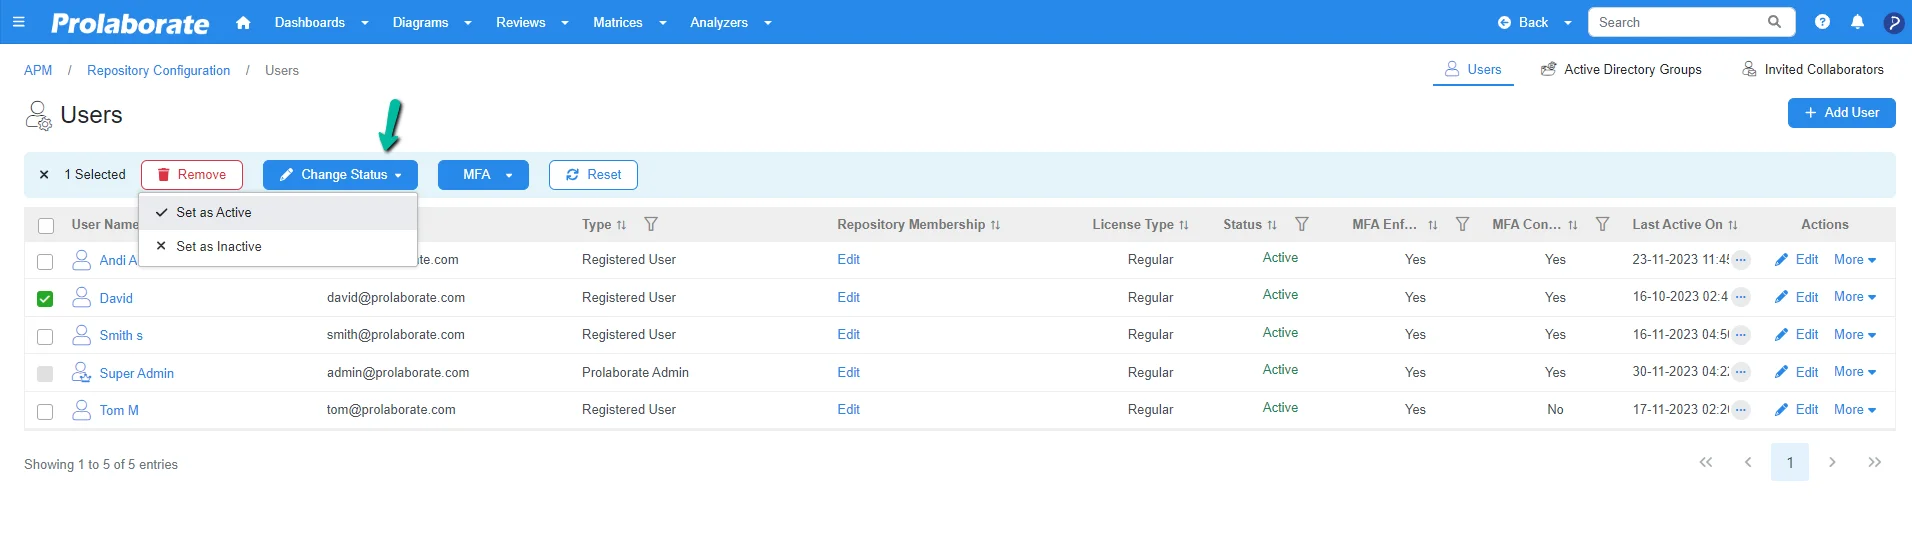
Steps to Inactivate Unused User Account
This feature will enable you to set the user status as inactive. By doing so the user will remain in Prolaborate but exist as an inactive user. Once the user is set as inactive the user will not be able to login further using their credentials.
Changing the user status to inactive will continue to consume a Prolaborate license. However, Prolaborate retains discussions, reviews, and documents added by inactive users.
To update or change the user status from active to inactive or from inactive to active, select the user from the list and click on the Change Status option to change the user status
The below image shows when an Inactive User tries to login using the Prolaborate credentials, and upon logging in the user is notified to contact the administrator since the user status is set as Inactive.

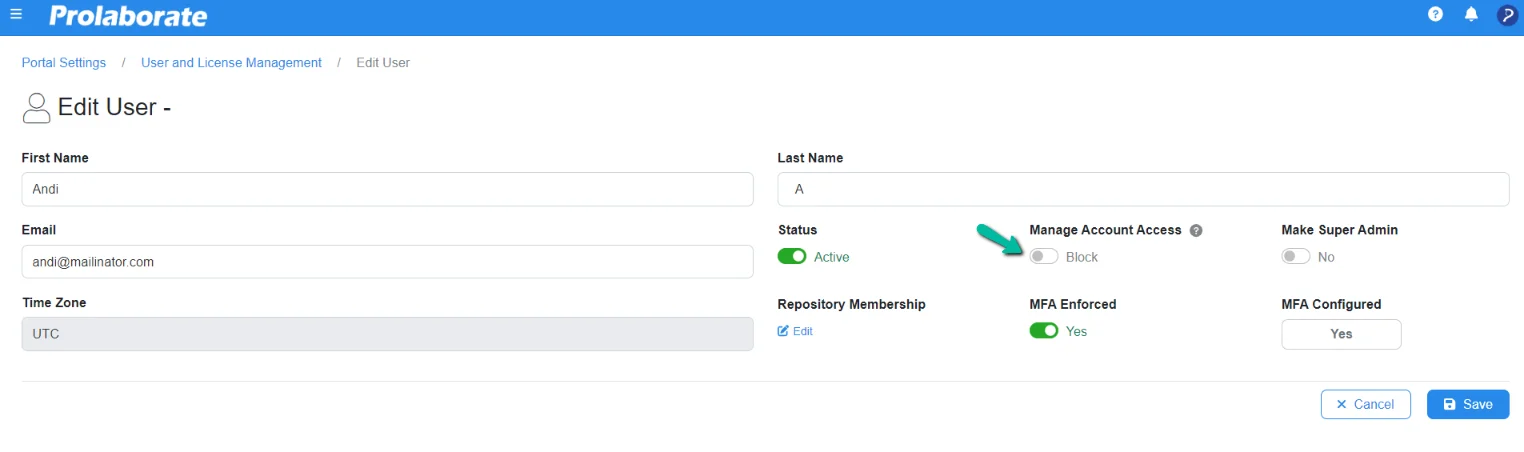
How to Unblock User Account?
If a user enters an invalid password thrice, the respected user ID gets blocked, and the status changes to Blocked. The blocked account gets automatically activated after 30 mins or users can request their Admin to unblock it.
Admin can re-activate the blocked user ID by either toggling the “Manage Account Access” button or by sending a temporary password reset link to the respective email address.
Steps to Convert Registered Users as SAML User
The Prolaborate V4.4.1 version, has improved user management for a team that wishes to switch to IDP user management from the registered user management. This new feature converts the user accounts who use same log in ID in both places, from registered to IDP when SAML Single Sign On is enabled and ‘Others’ is chosen as Identity Provider under Identity Provider Configuration as shown in the image below.
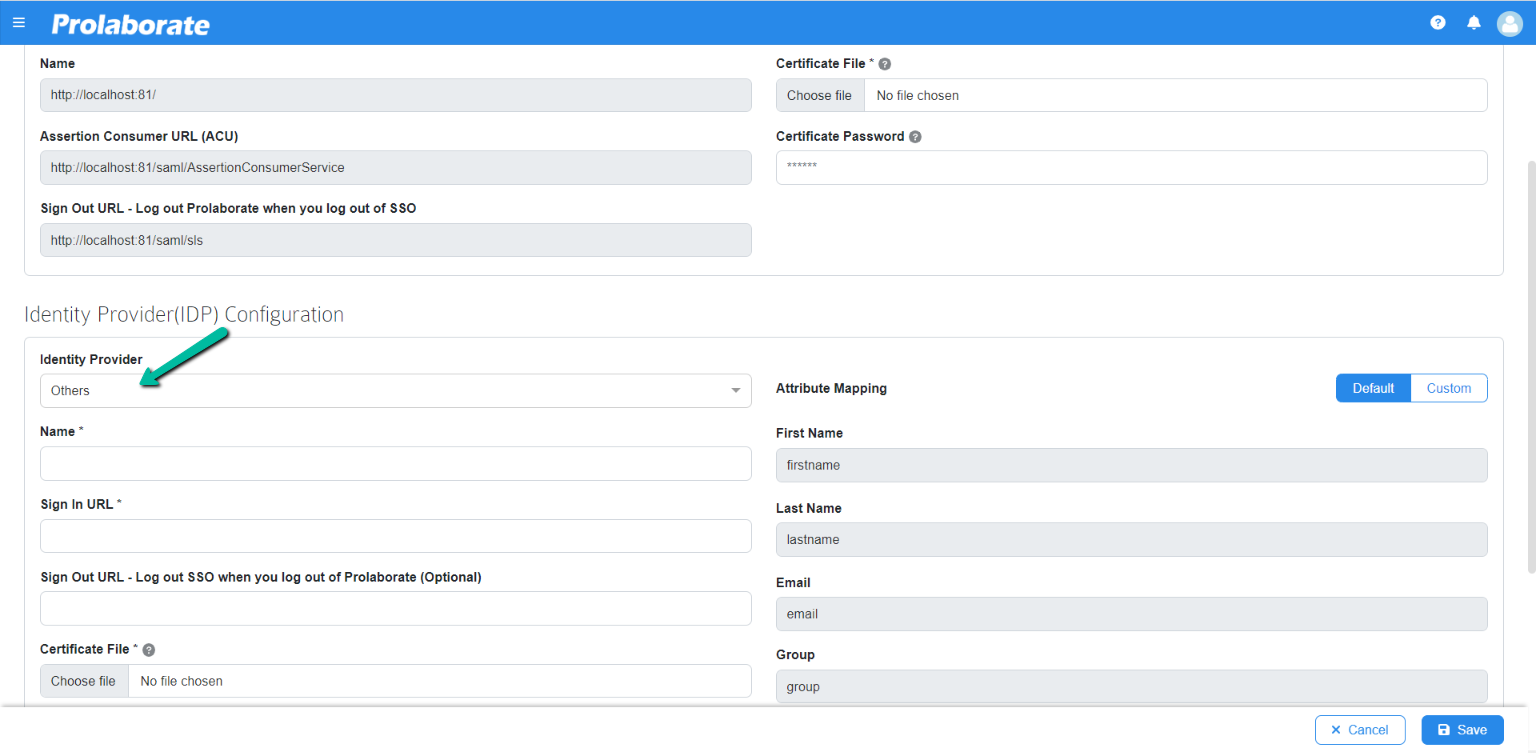
In such scenarios, Prolaborate automatically maintains a single user record thus consuming a single license. The previous configurations and permissions are retained after conversion, and new configurations and permissions are also applied based on the selected Access Control Profile in SAML Single Sign On.
Things to Know Before You Start:
- Once SSO is enabled, user must login using ‘Log In With SSO’ option for the conversion to occur
- Post conversion, user will be unable to login to the application using their existing credentials
Steps to Convert Active Directory Users as SAML User
From Prolaborate V4.4.2 version, Active Directory User can be switched to IDP users. This new feature converts the user accounts who use same log in ID in both places, from AD to IDP when SAML Single Sign On is enabled and ‘Active Directory Federation Service’ is chosen as Identity Provider under Identity Provider Configuration as shown in the image below.
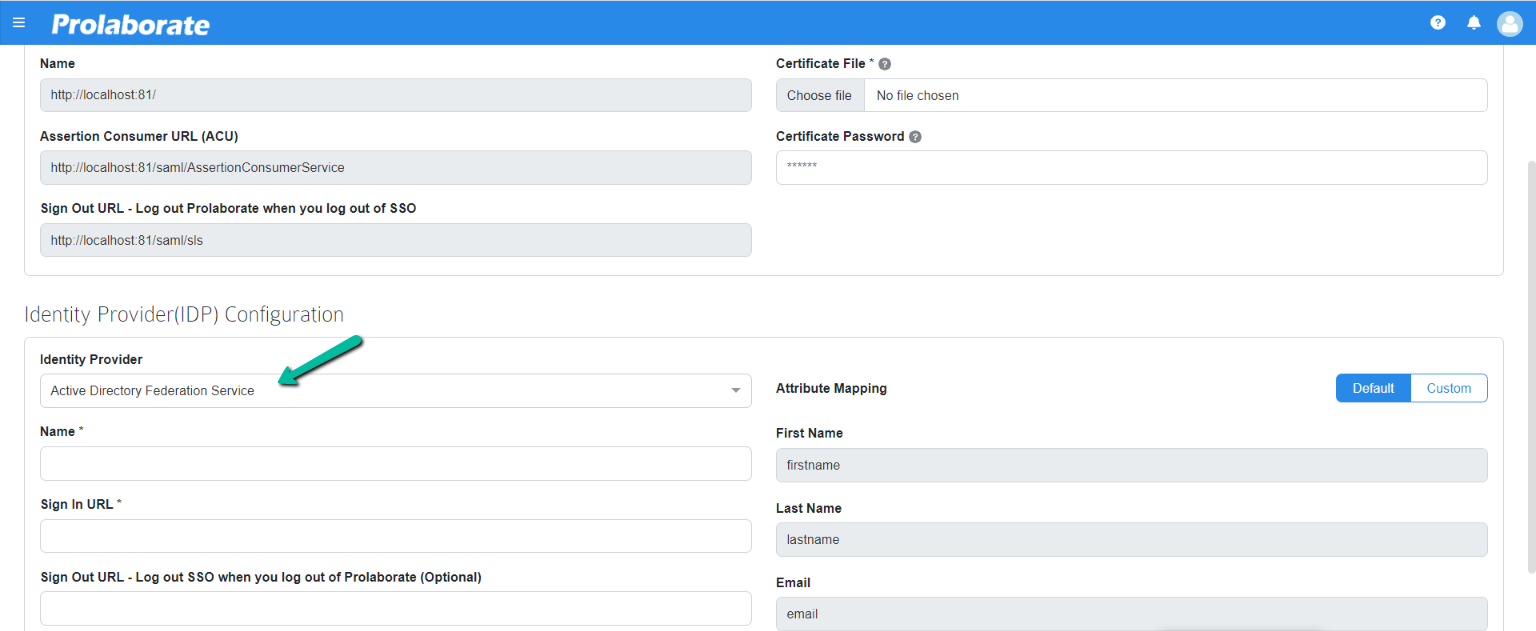
In such scenarios, Prolaborate automatically maintains a single user record thus consuming a single license. The previous configurations and permissions are retained after conversion, and new configurations and permissions are also applied based on the selected Access Control Profile in SAML Single Sign On.
Things to Know Before You Start:
- Once SSO is enabled, user must login using ‘Log In With SSO’ option for the conversion to occur
- Post conversion, user will be unable to login to the application using their existing credentials
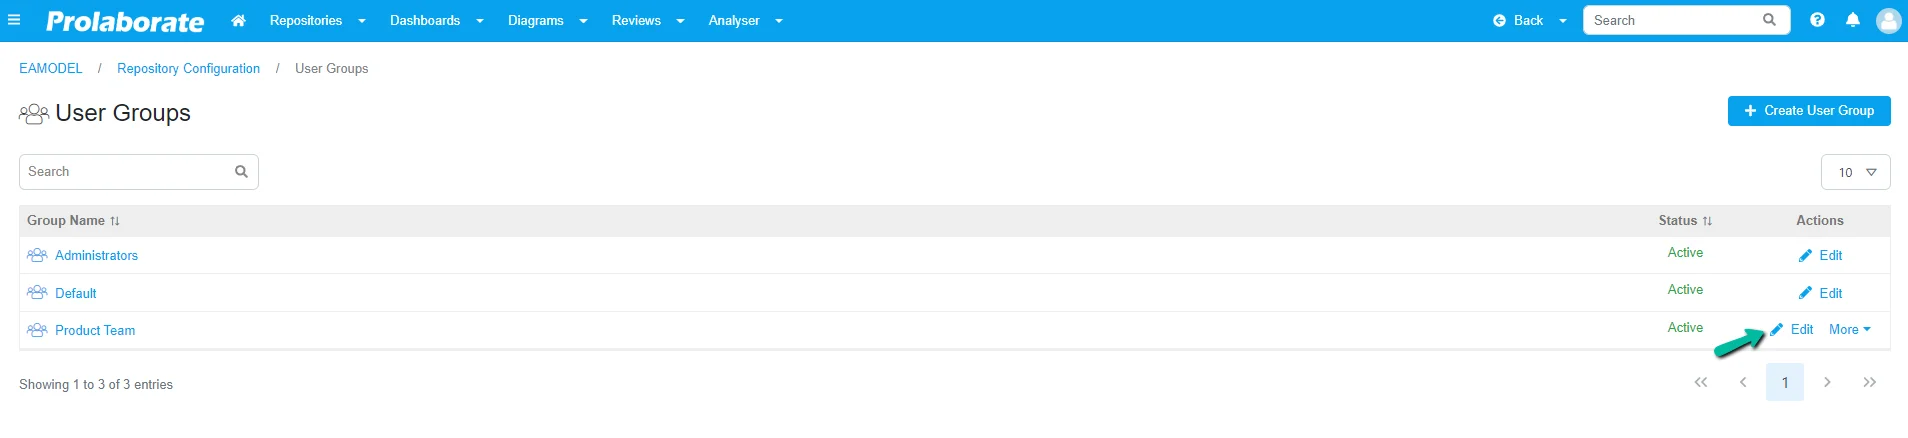
Manage User Groups
User groups help you treat a set of members as a single entity. This will be extremely helpful in cases like assigning access permissions to packages or dashboards.
You can assign access at once rather than assigning access one by one to individual users.
Things to Know Before You Start:
- You should have created at least one Repository before adding user groups to a repository. Click here to refer to the guide “how to add Repository”.
- You should have added a few users before creating a user group.
Steps to Add User Groups
After you logged in, if the default dashboard is set up then you will land on the default dashboard page. Click on Menu > Repositories from the menu bar to land on the repositories page
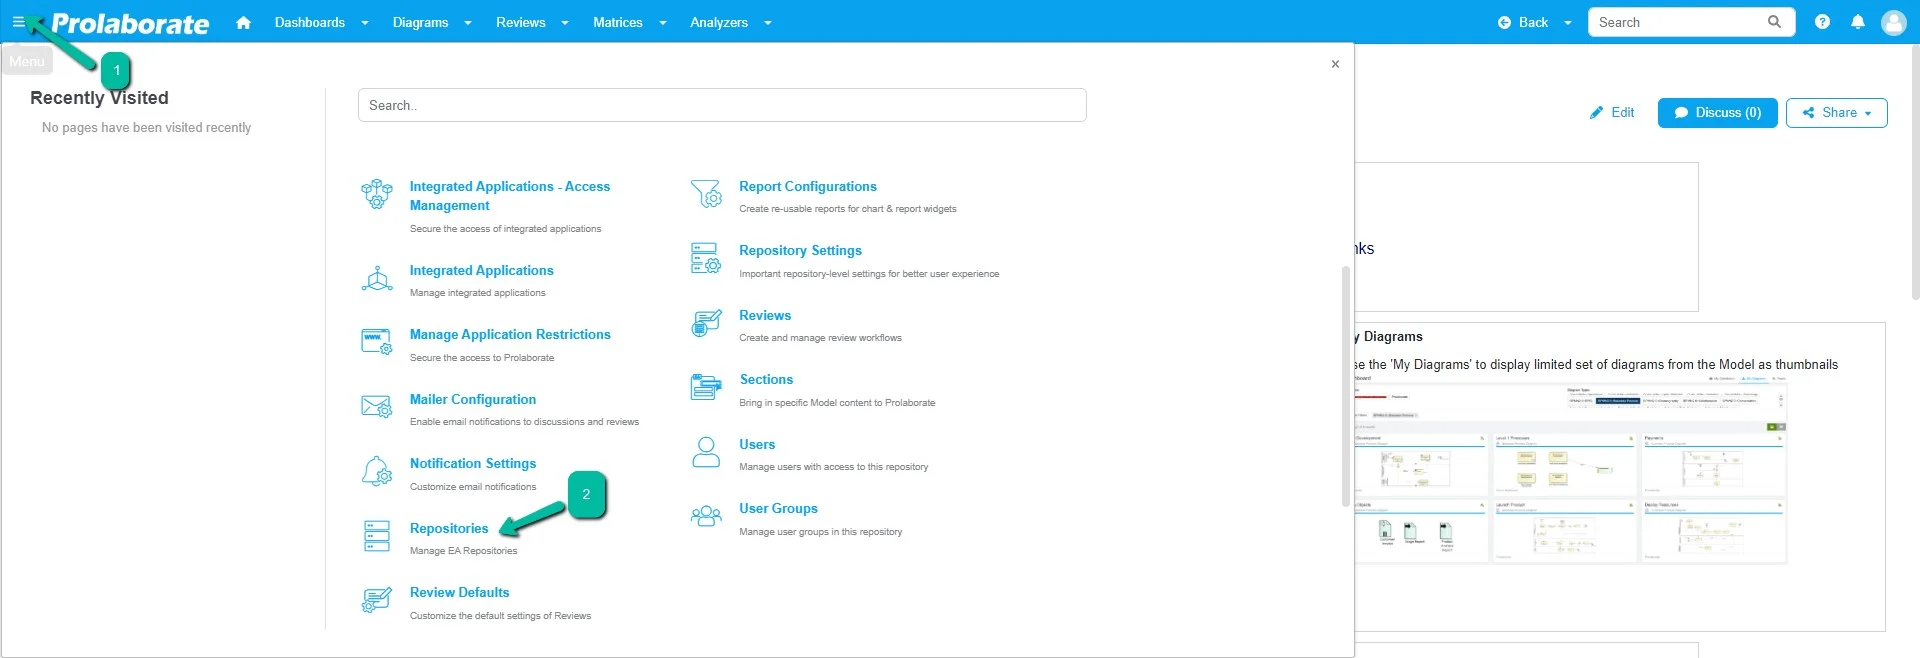
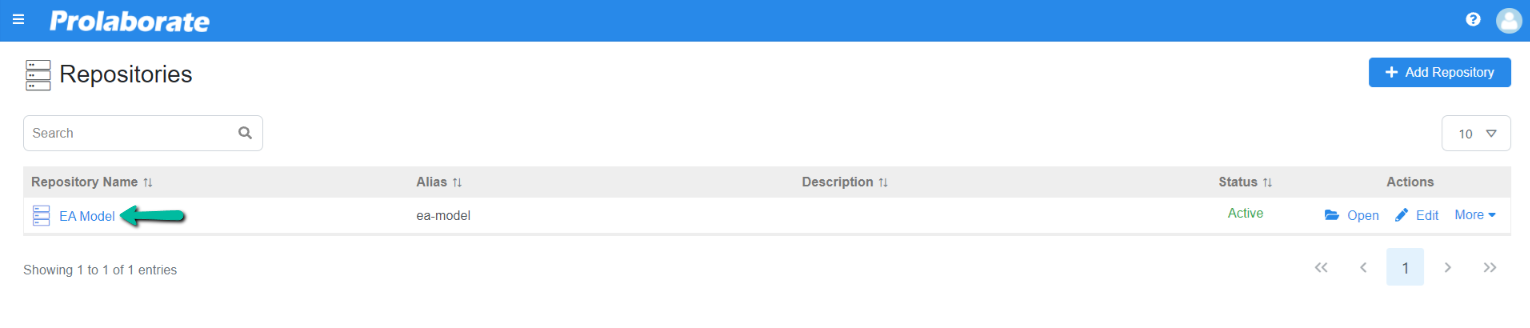
Now choose the repository for which the user groups need to be created from the list of repositories added.
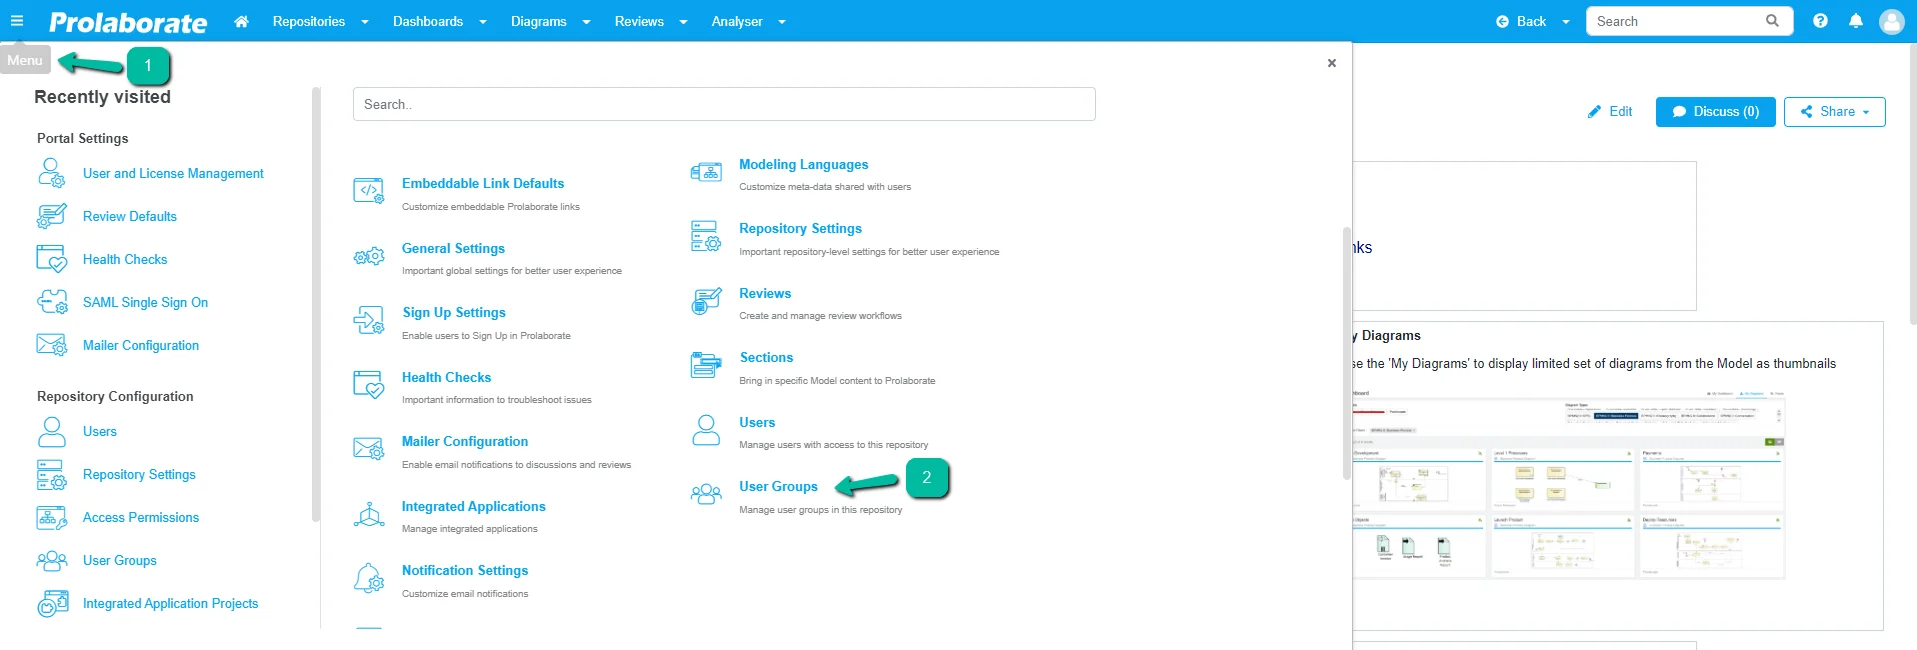
Now click on Menu > User Groups to go to the user groups page.
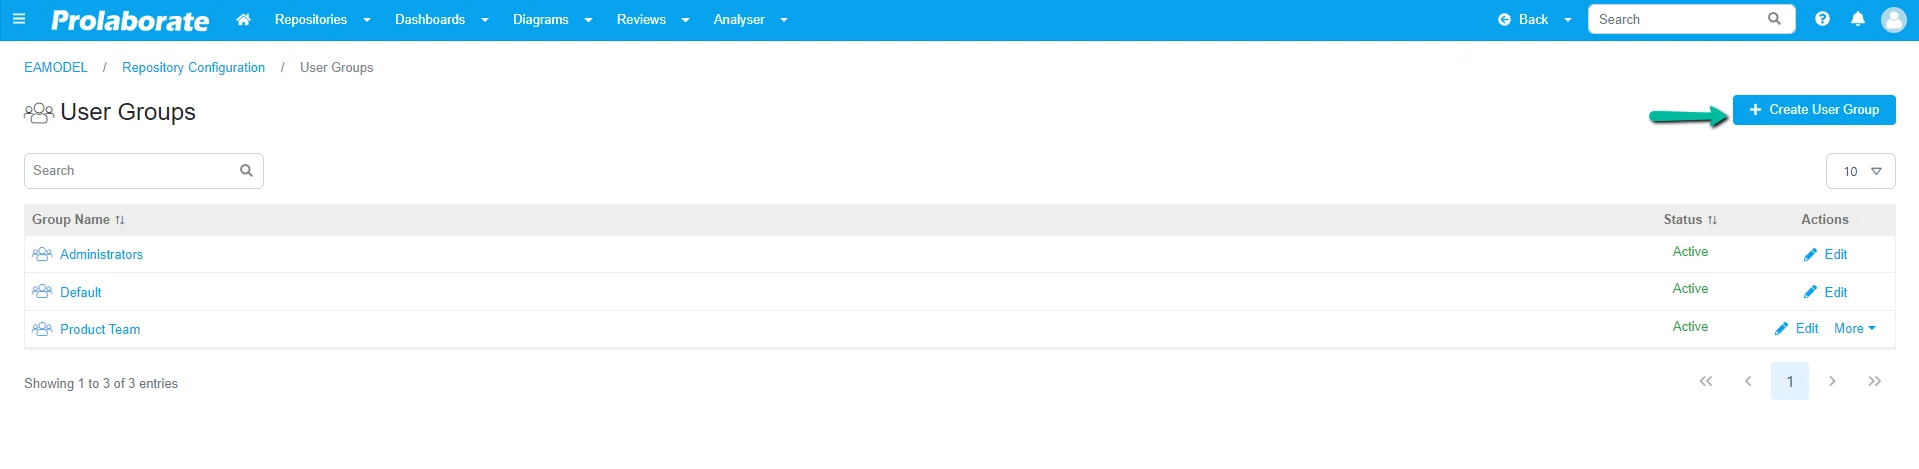
Click on the Create User Groups
The Create User Group page will be opened.

In the Create User Group, define the following details.
| Name | Specify the name of the user group. |
| Users | Select the user from the list of users. |
| Default Dashboard | Select a default dashboard to which the user group members should view as default. |
| Administrative Access | You can assign administrative access for features to the users in the user group. |
| Status | Active or Inactive. Please note making the group inactive does not make its members inactive. If a group is inactive, the permissions given to that group will be revoked and that group will not be available anywhere in the system. |
After entering all the details, click on the Save button and the user group will be added. You will then land on the page where all the list of user groups are listed.
How to Edit User Group?
To update user group details, click on Edit and you can update or edit all the details of a user group.
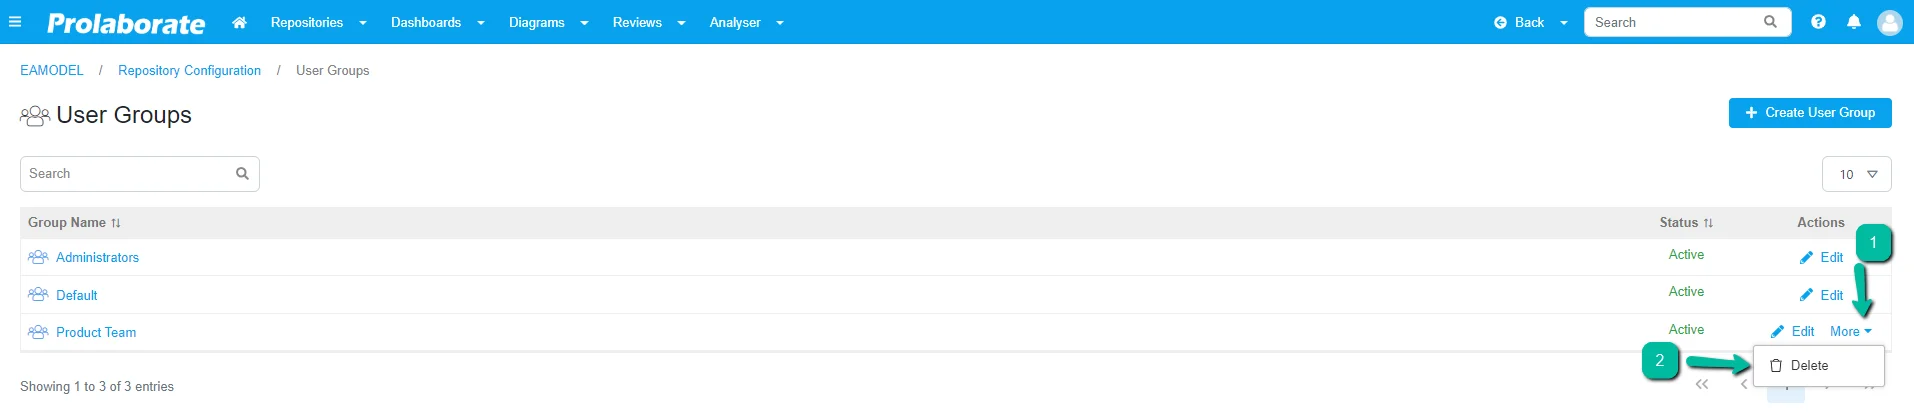
How to Delete User Group?
To delete a user group, click on More and then Delete