
Multi-Factor Authentication
Multi-Factor Authentication
Introduction to MFA
As the digital landscape evolves, so does the need for robust security measures within web applications. Multi-Factor Authentication (MFA) emerges as a frontline defence, surpassing conventional password protection. By integrating additional layers of verification, such as authentication codes, MFA serves as an additional barrier, significantly enhancing the resilience of web applications against evolving cyber threats.
The MFA feature is available from Prolaborate V5.2.0 onward for all Prolaborate IAM users. It is not applicable for SSO and AD users in Prolaborate.
There are multiple ways to enforce/apply MFA for users in an organization who uses Prolaborate. Let us look at them in detail.
Enforcing MFA for All Users
To enforce MFA for all IAM users in Prolaborate, navigate to General Settings under Portal Settings using the menu and enable the toggle Mandate MFA for all users.
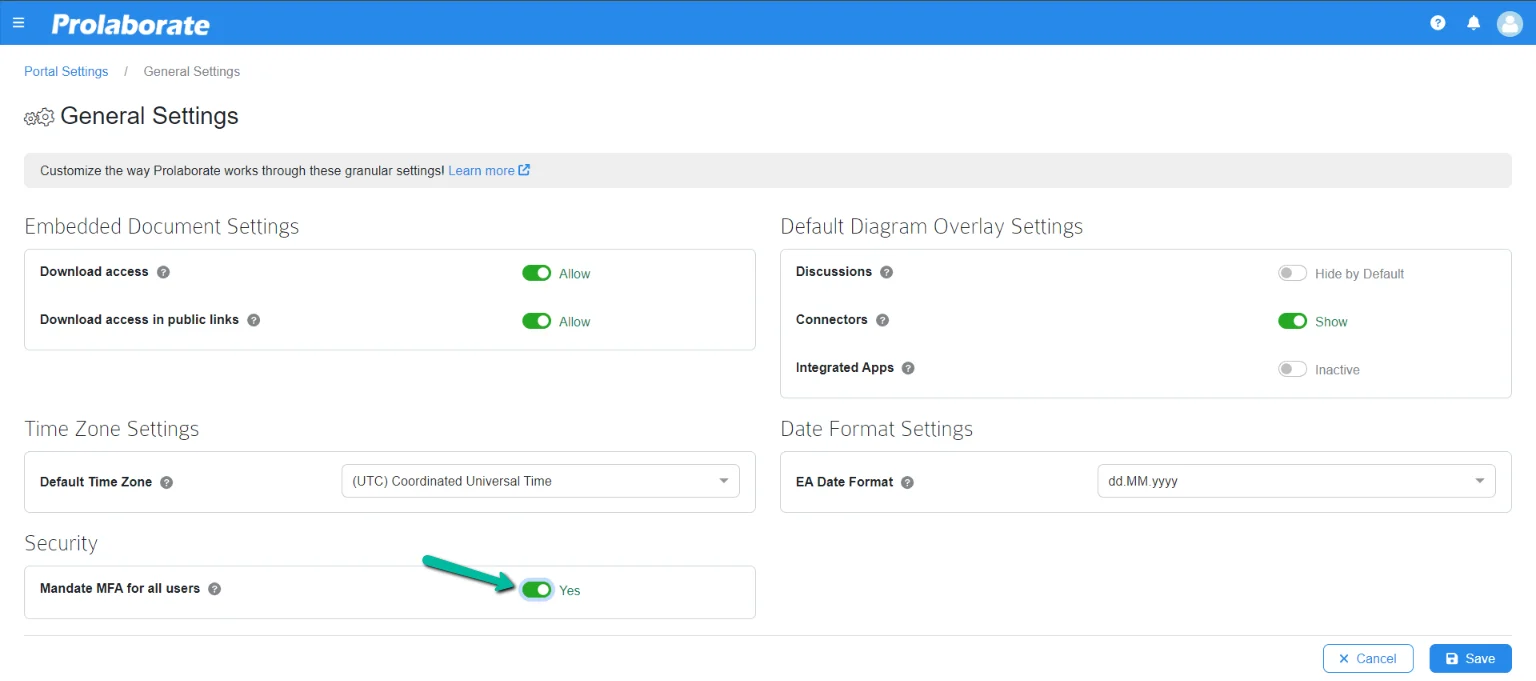


After enabling it, click Save to save the configuration.
Note:
- Admin access is required to enforce MFA for all users
Once it is completed, MFA will be enabled for all system users. One needs to configure MFA upon login after entering the email and password. Click here to learn how to configure MFA.
Enforcing MFA for Selected Users
The next approach is to enforce MFA only for designated users in Prolaborate by an administrator, striking a balance between enhanced security and user convenience.
Note:
- MFA should be disabled in General Settings
- To enforce MFA for selected accounts, the user should be an admin or part of a user group that has administrative access to users and user groups.
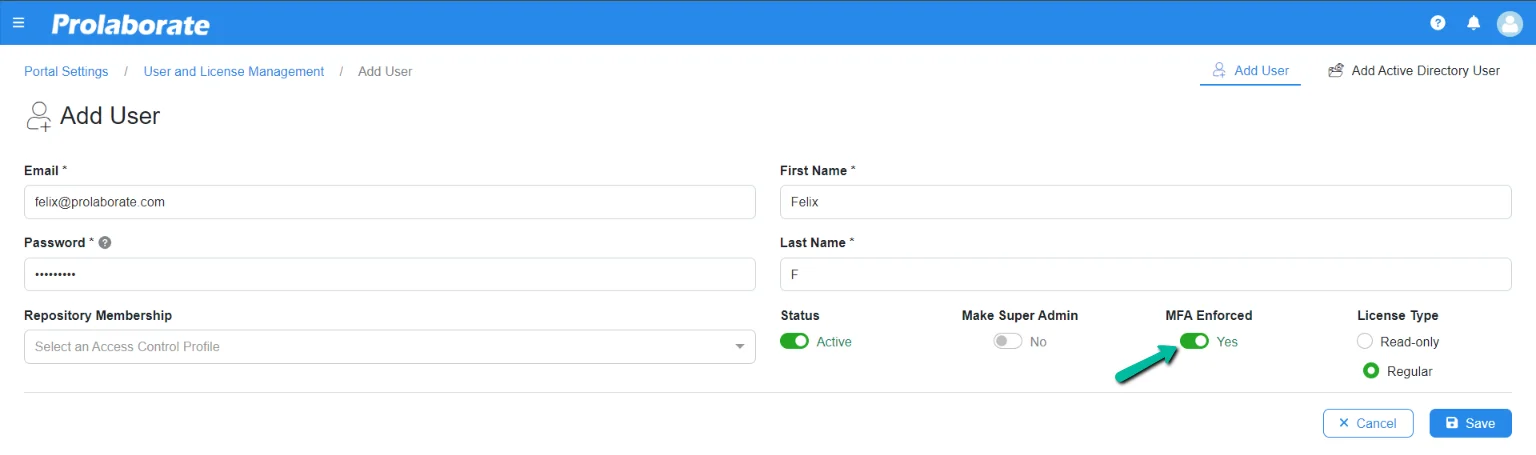
Navigate to User and License Management page under Portal Settings or Users page under Repository Configuration.
For a new user
When adding a new user, toggle the option MFA Enforce to Yes and save.
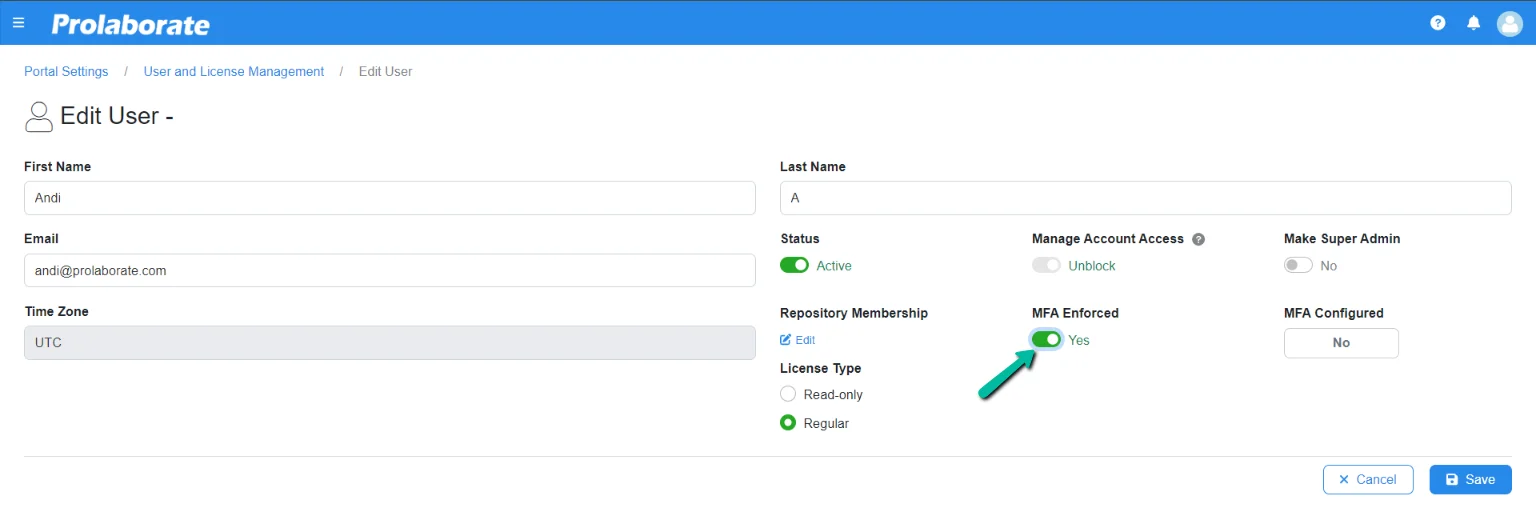
For an existing user
When editing an existing user, toggle the option MFA Enforce to Yes and save.
Update MFA settings for multiple users
One can select multiple users and enforce MFA with a few simple clicks.

Once it is completed, MFA will be enabled for the designated system users. One needs to configure MFA upon login after entering the email and password. Click here to learn how to configure MFA.
Note:
- Admin can also disable the MFA for the designated system users by changing the MFA Enforce toggle to No by editing the user’s information individually or by simply selecting multiple users and choosing the Disable option in the user’s listing page.
Enabling Personal MFA
In very specific cases if the organization does not enable MFA and some user may prefer to enable for their login account.
After the upgrade to the latest version, Users can configure MFA from the My Profile page or during login and enable MFA on their own.
Click here to learn how to configure MFA.
Note:
- Users can remove the MFA configuration on their own in My Profile page only if MFA is not enforced in General Settings or by an admin.
Configuring MFA Settings
Configuring MFA when enforced by an admin
Once the email and password details are entered on the login screen, click on Login to navigate to the setup MFA page, if MFA is enforced by an admin.
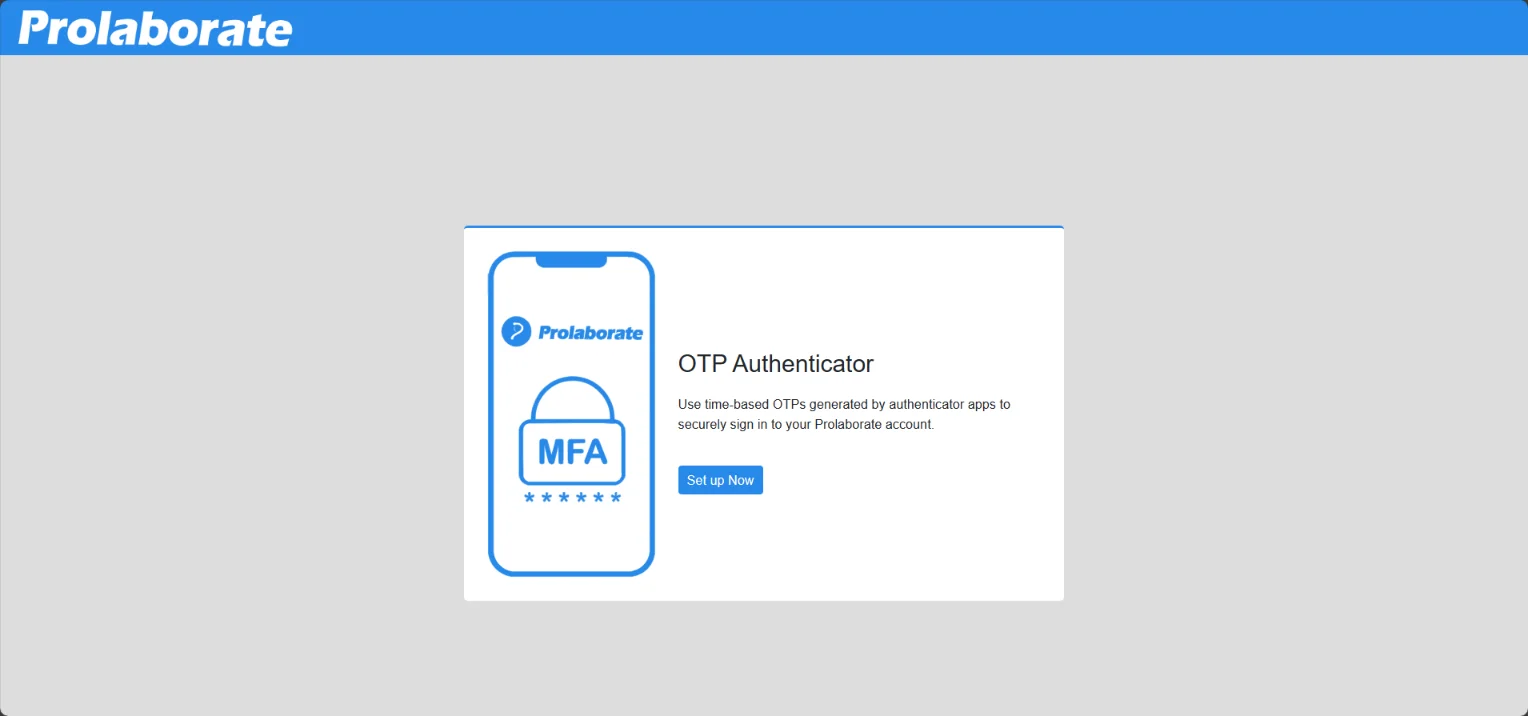
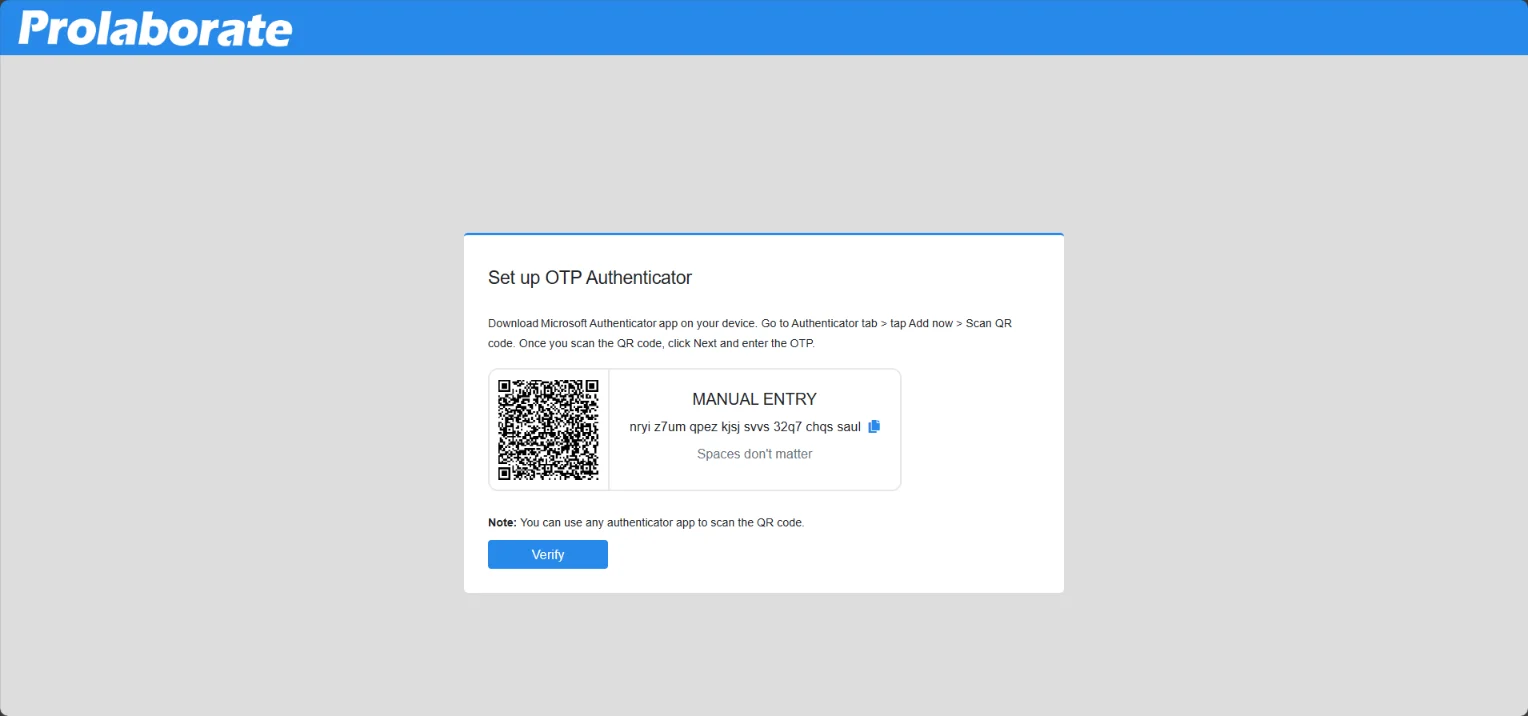
The next step is to scan the QR code using the authenticator app (Google or Microsoft). Once the account is added to the Authenticator app, click on Verify. Enter the code manually to proceed with the verification if you are unable to scan the QR code.
Enter the six-digit one-time password code and click on Verify .
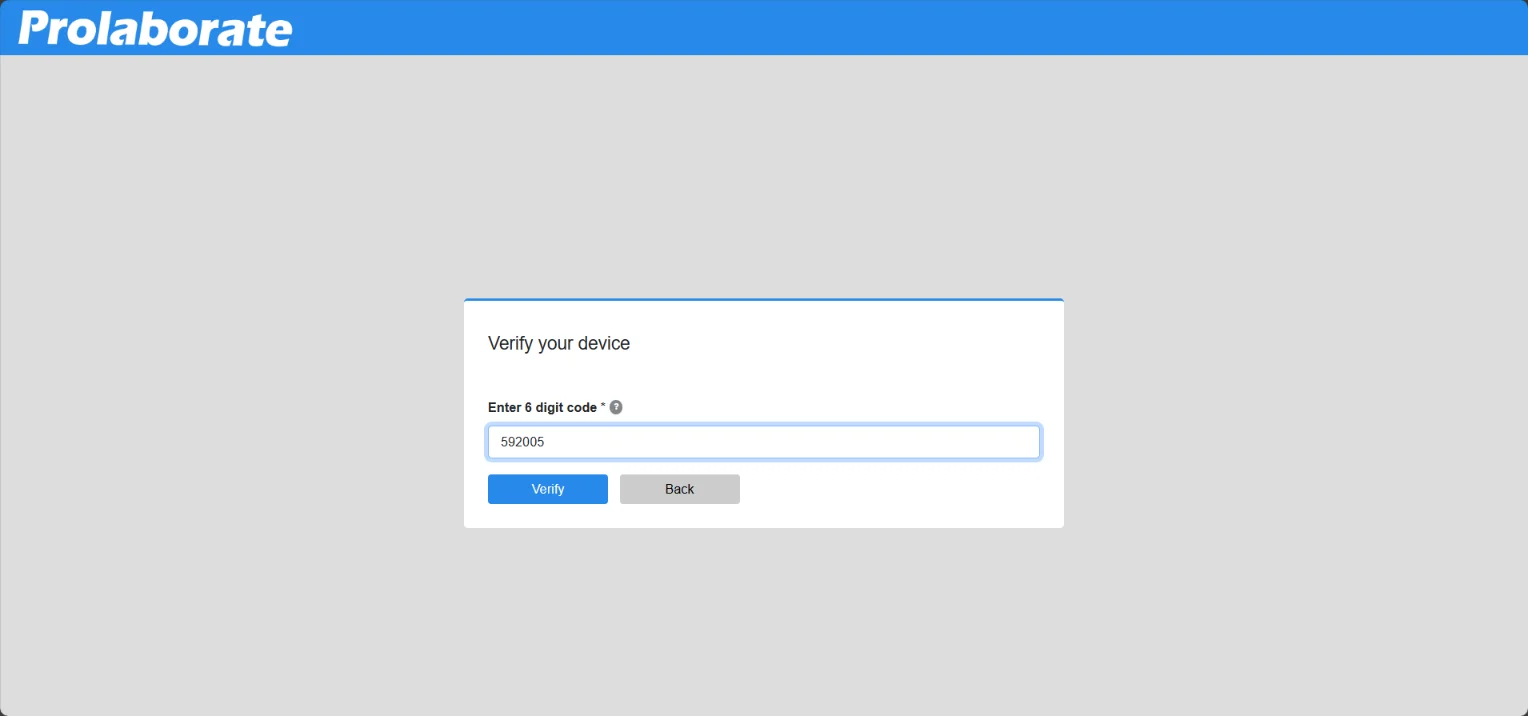
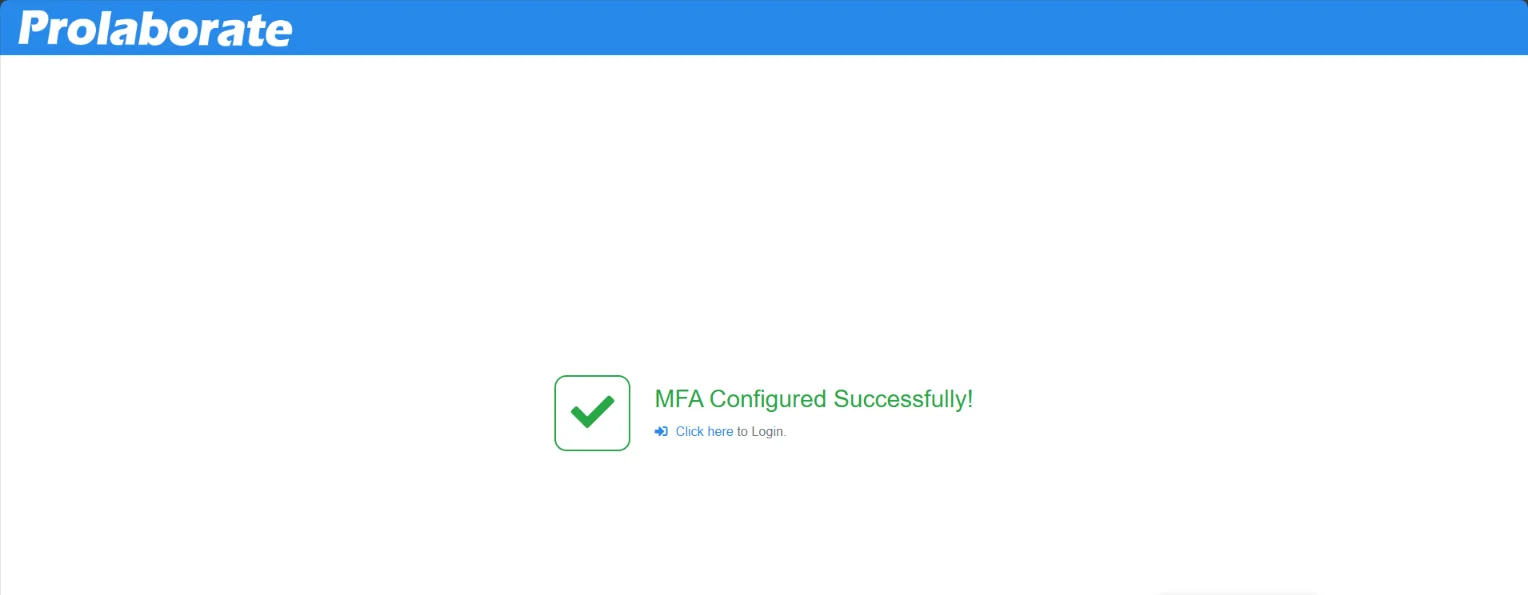
If the code entered is correct, MFA configuration will be successful, and the user can log in to Prolaborate.
Configuring MFA on own
Upon Login Post Upgrade
Users have the option to enable MFA on their own, if MFA is not enforced by an admin.
Upon login to the application post upgrade to V5.2.0, after entering the email and password, users are given an option to configure MFA or skip for now.
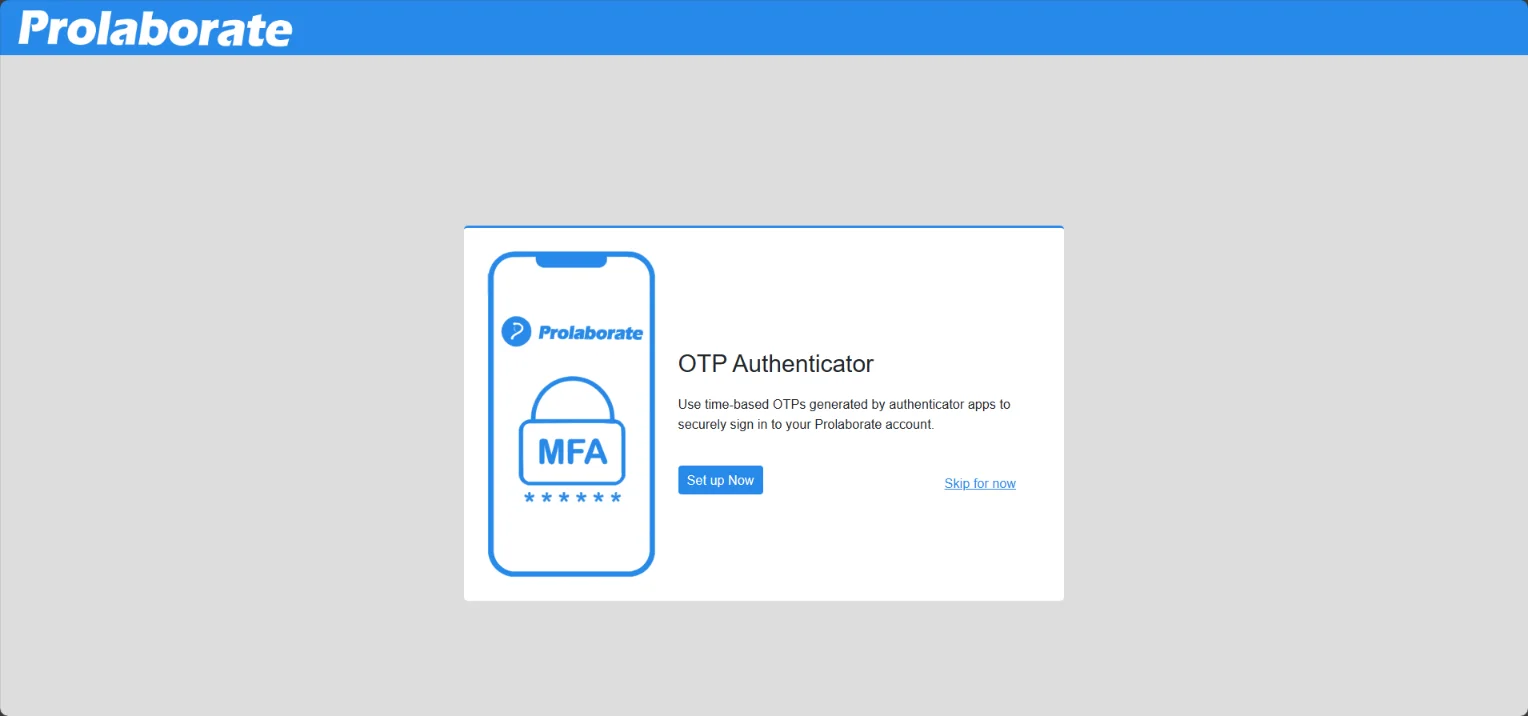
Clicking the Set up Now allows the user to configure MFA and if the configuration is successful, MFA will be enabled. Refer to the previous section on how to configure MFA.
User can also have the option to configure and enable MFA when logging in to the application next time by clicking the Skip for now option.
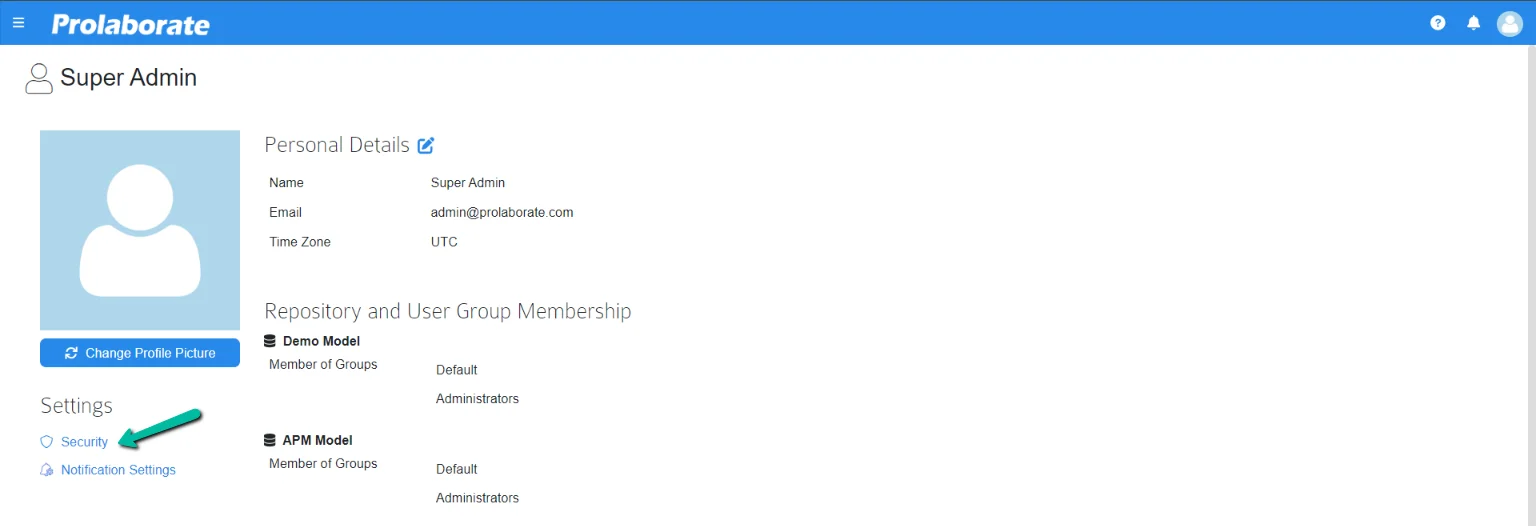
My Profile Page
After login, MFA can be configured in the My Profile page if users wish to enable MFA on their own.
Click the icon on the top right corner and choose the My Profile option.

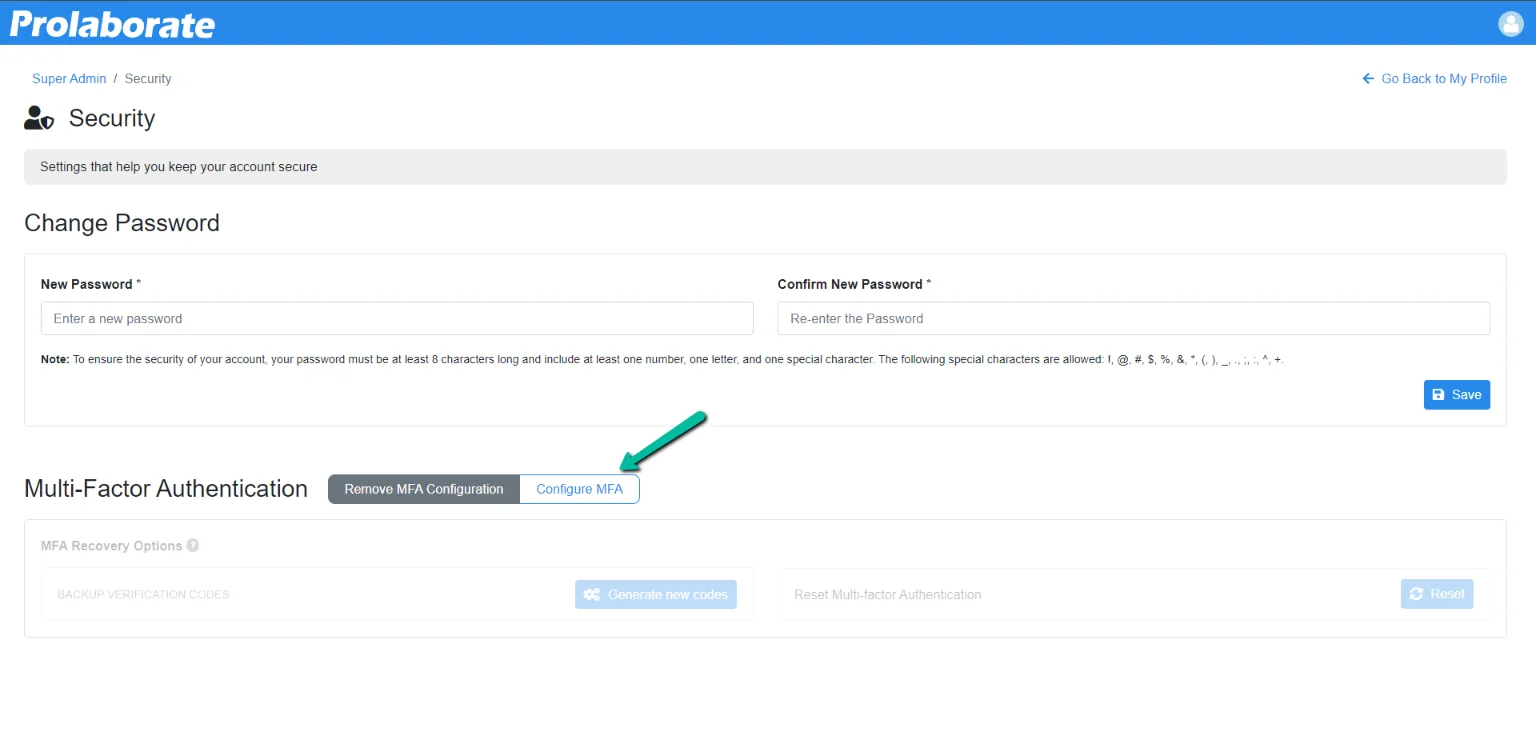
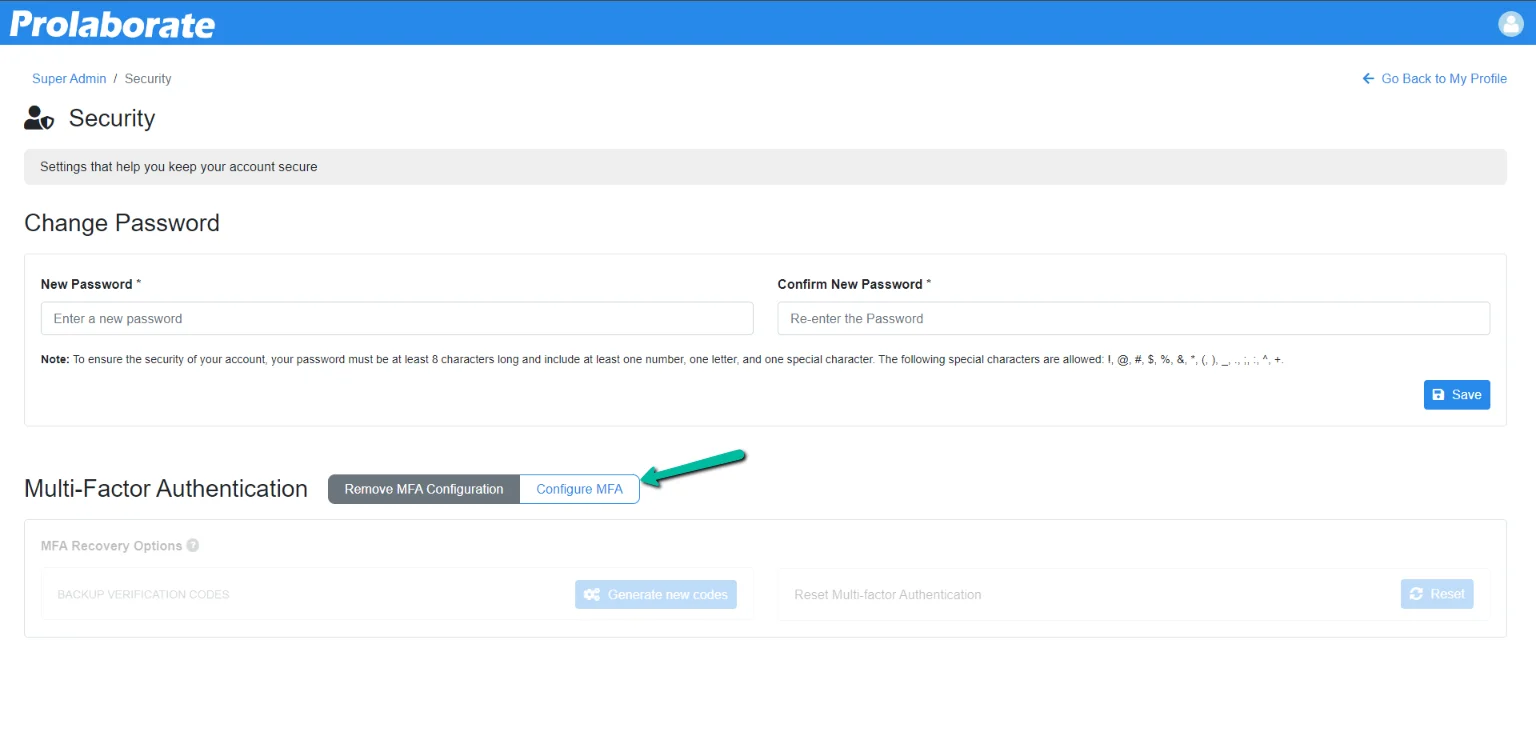
On the My Profile page, click on Security under Settings.
User will be prompted to enter the password to verify the user. After entering the password, click on Verify. Once the correct password is entered, it navigates to the Security page.
Click on Configure MFA to initiate the configuration process. If the configuration is successful, MFA will be enabled. Refer to the previous section on how to configure MFA.
View MFA is configured for a user
Admin can quickly check in the users listing page if MFA is enabled for a user and whether the user has configured MFA or not.
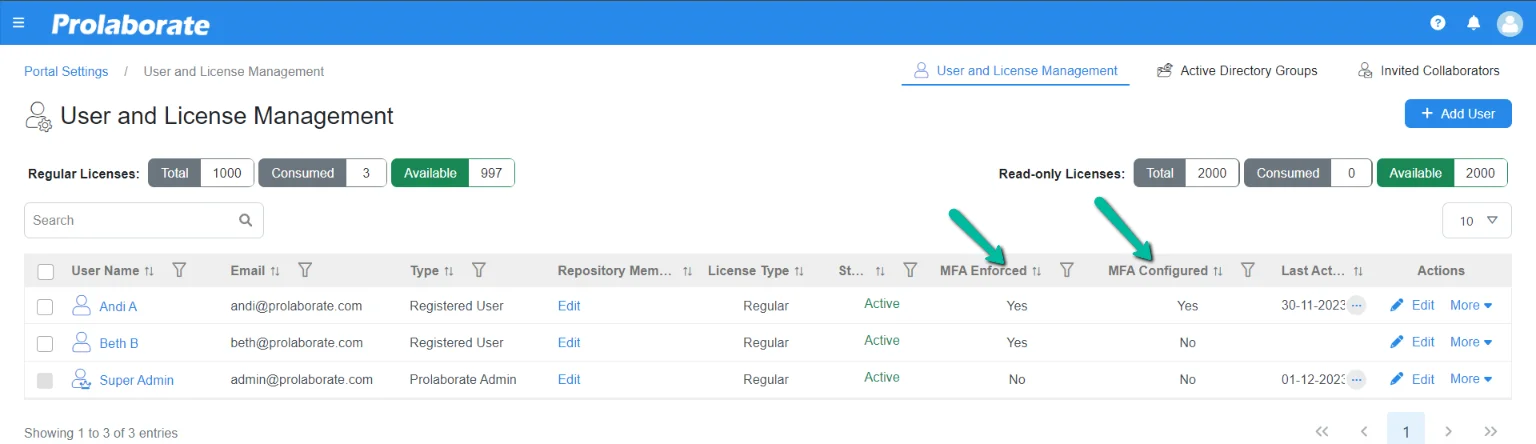
| MFA Enforced | MFA Configured | Status |
|---|---|---|
| No | No | MFA is not enforced and hence not configured |
| Yes | No | MFA is enforced but the user is not logged in to the application and configured MFA post upgrade to V5.2.0 |
| Yes | Yes | MFA is enforced and the user is logged in to the application and configured MFA successfully post upgrade to V5.2.0 |
Resetting MFA Configuration
Reset MFA configuration by Admin
Admin can reset the MFA configuration for users if Authenticator app used in a device is changed or lost.
Navigate to users listing page. Click More under Actions and click MFA Reset. This option is displayed only if MFA is configured for a user.
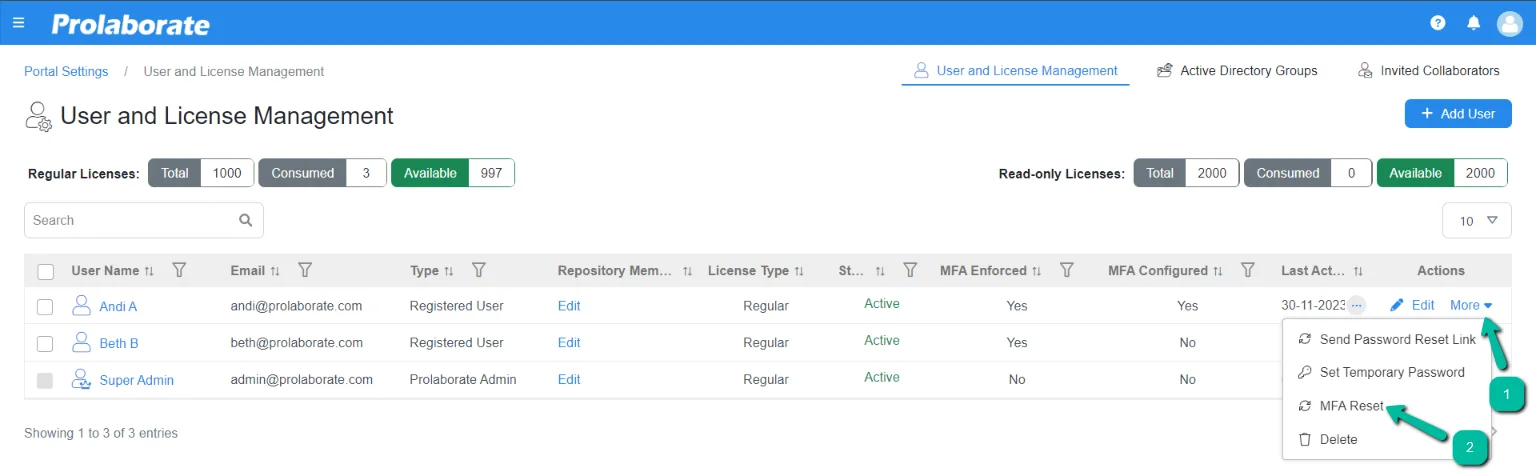
Admin can also multiple users and reset the MFA configuration with just few simple clicks.
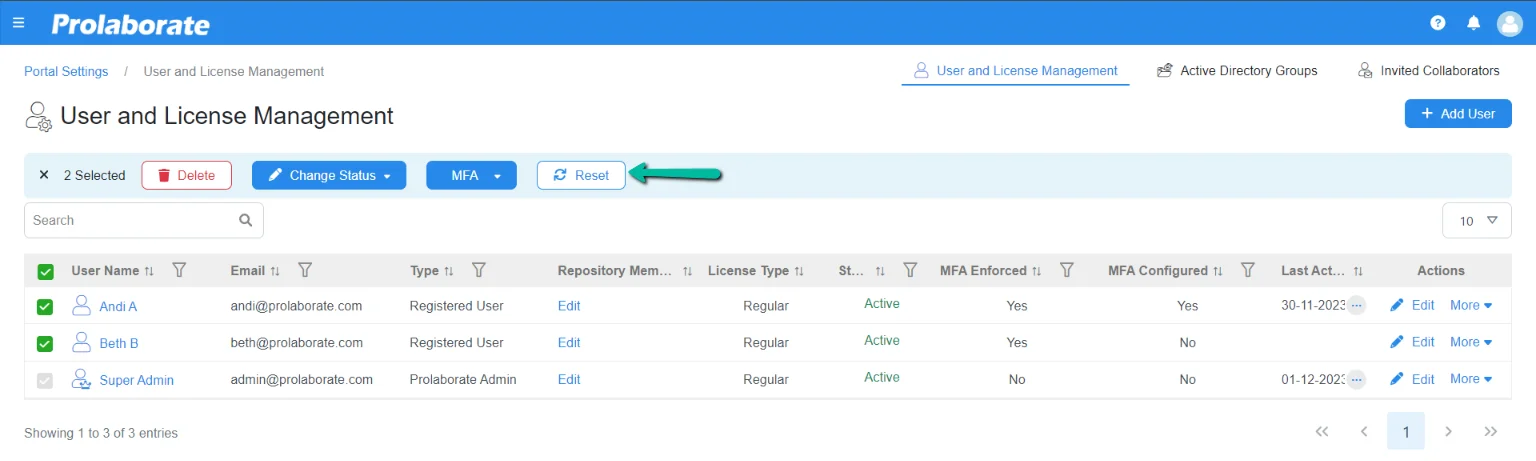
If the configuration is reset, users must configure MFA each time while logging into the application once MFA is enforced.
Note:
- Admin can reset the MFA configuration for all IAM users even if the users have enabled and configured MFA on their own.
Self-Reset
Users can also reset the MFA configuration on their own directly on the My Profile page under Security section. Click on Reset under Multi-Factor Authentication section.
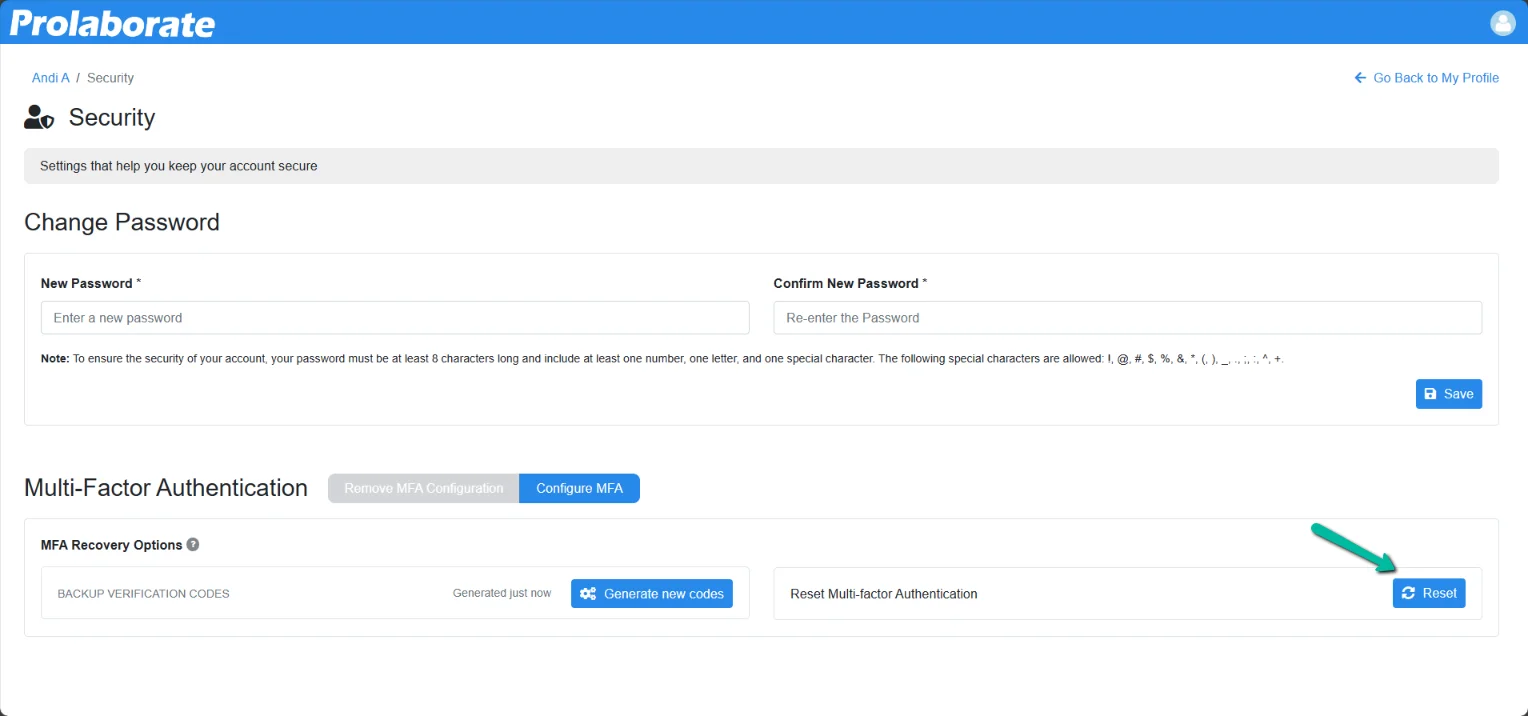
Upon reset, users are prompted to configure the MFA again in order to use the application.
Note:
This is applicable for Prolaborate IAM users not for SSO and AD users in Prolaborate.
Using Recovery Codes for Authentication
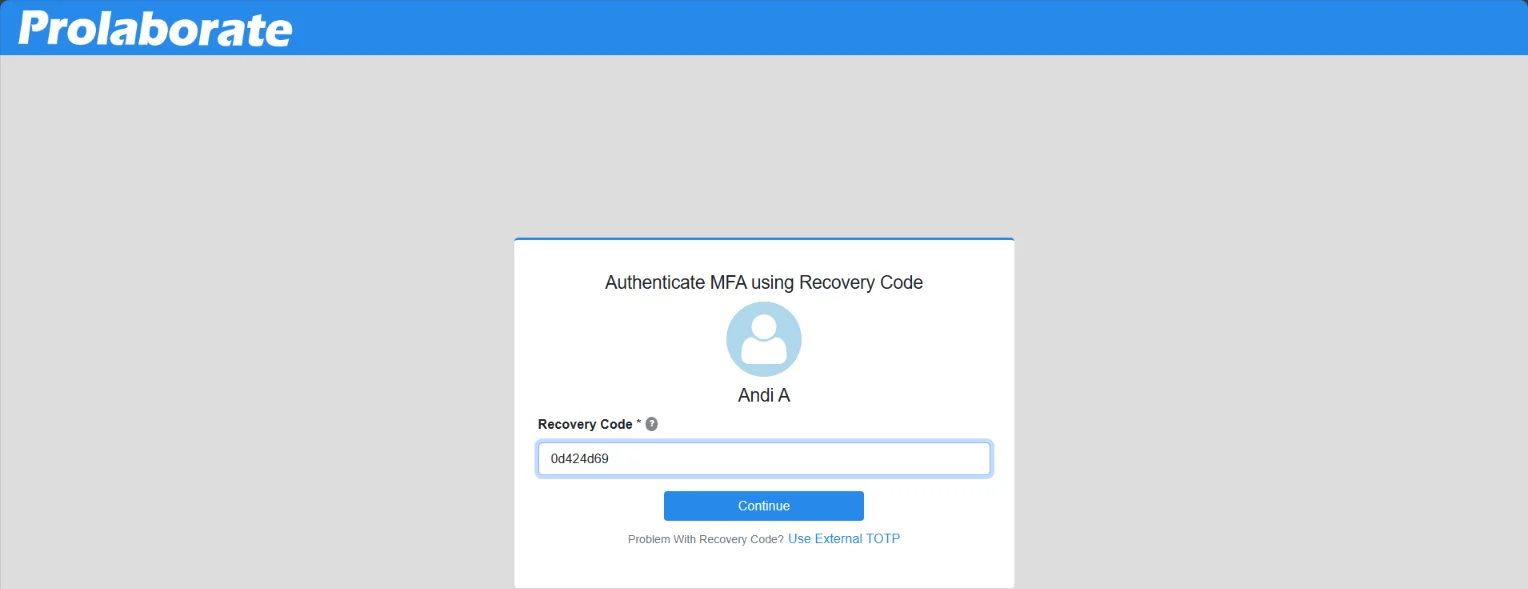
The device used to authenticate the MFA is either damaged or lost, users can use Recovery Codes for authentication if MFA is configured.
After entering email and password, click on Use Recovery Code at the bottom.
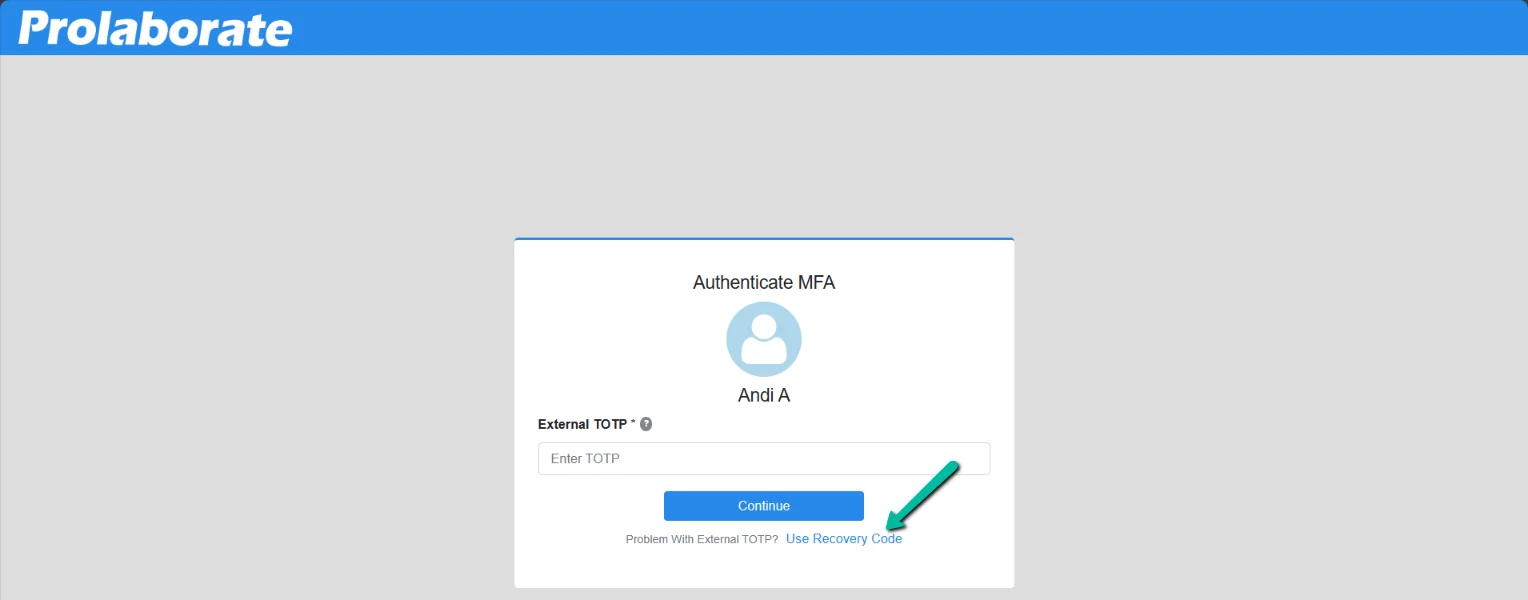
Enter a valid recovery code and click on Continue to log in to Prolaborate.
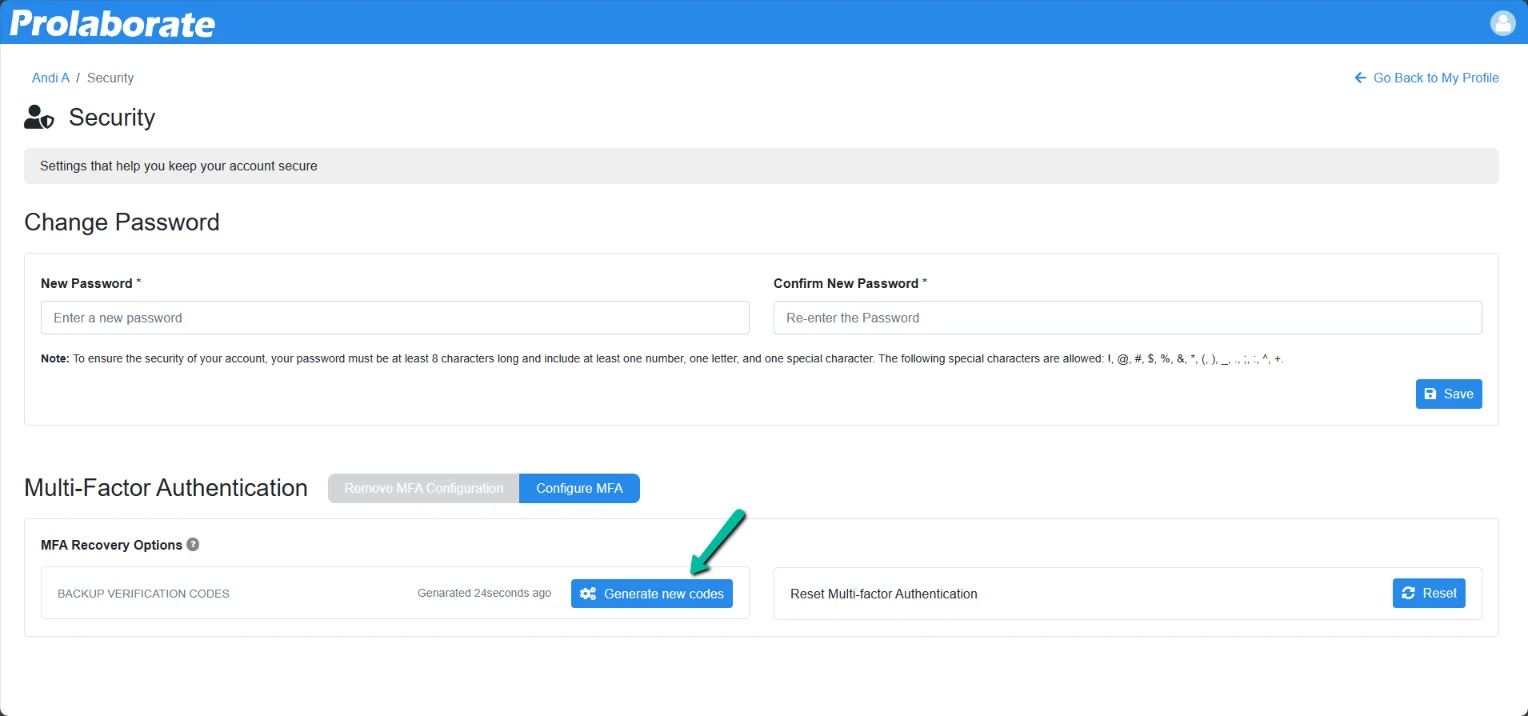
Generate Recovery Code
During the time of MFA configuration, an information will be shown to users to download recovery code. In case if the users fail to download then they can avail Recovery Codes from My Profile page of a user under Security section. Click on Generate New Codes under Multi-Factor Authentication section.
Users can either Download or Copy the Backup Verification Codes and close the window.
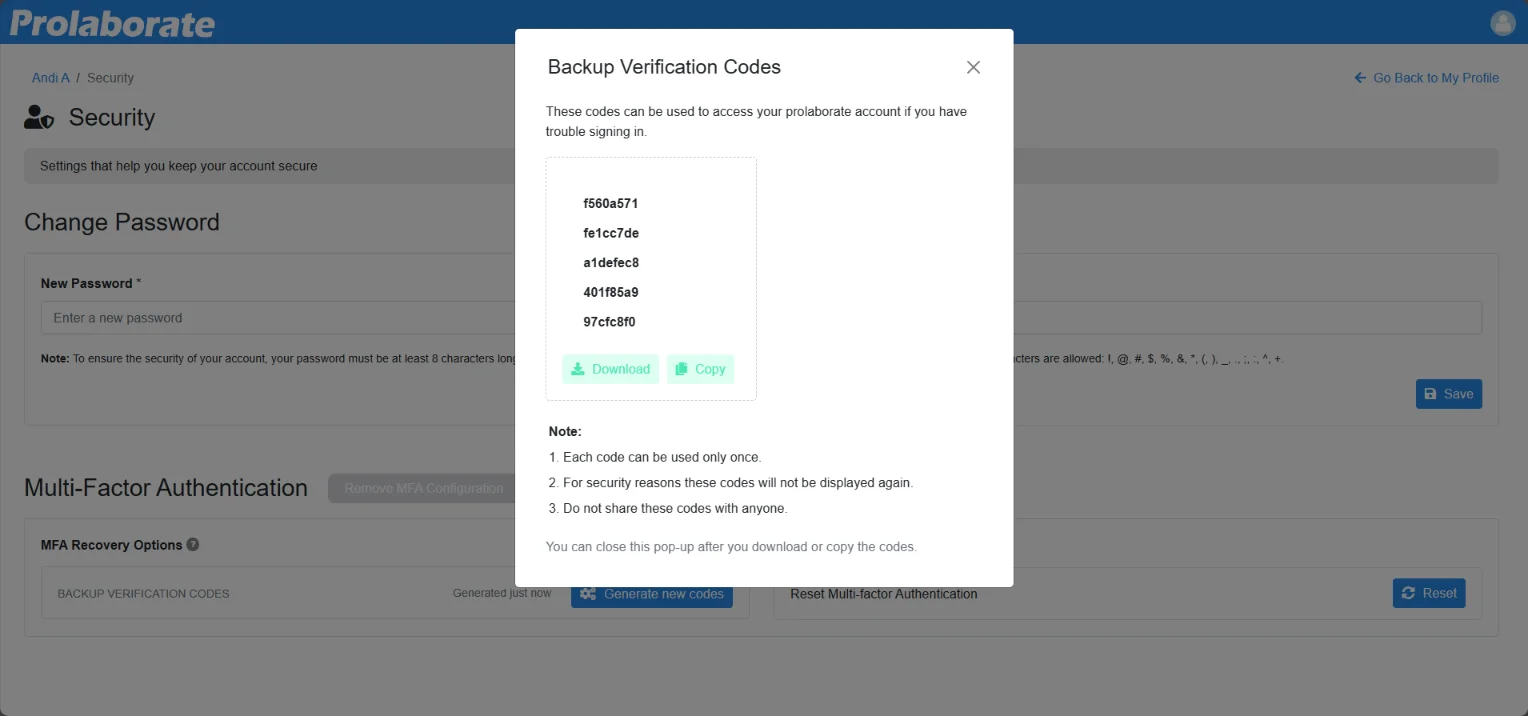
Note:
- Each code can be used only once.
- Do not share these codes with anyone.
- If you have used up all your codes or lost them, you can always generate a new set of codes.
- Whenever you generate a new set of codes, the old unused codes will become invalid.