
Widgets library – A simplified approach to manage widgets
Prerequisites
- To access the Widgets library, Administrator access in Dashboard is required.
- Import and Export of widgets are available only for Prolaborate Super Admin.
Introduction
Prolaborate’s Widgets library offers a wide range of customizable widgets that enable users to design and modify their dashboards to suit their specific requirements. With this feature, modelers can easily create and reuse widgets, making it easier to build a dashboard that meets their needs and preferences. These widgets can be tailored to display data in different formats, such as charts, graphs, or tables, and customized with various styles options.
Users can use the Widgets library for the following use cases, which are described below.
Add a new widget to library
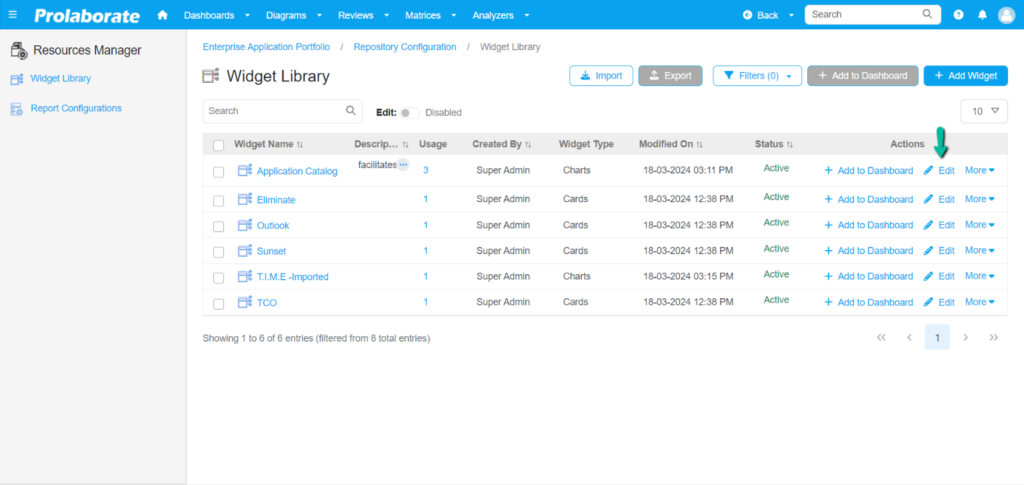
Design a widget that meets your specific needs. To begin with, navigate to the ‘Resources Manager’ tab in the ‘Repository Configuration’ menu.
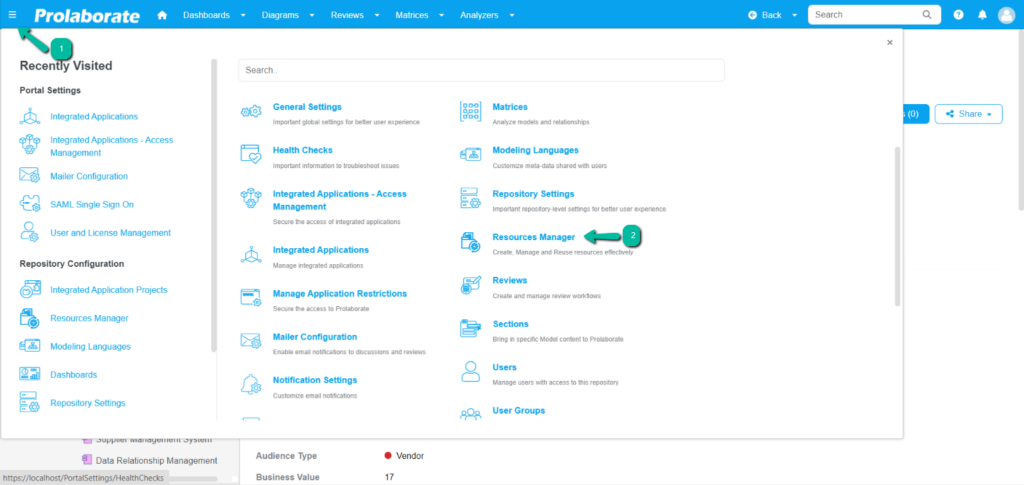


This will take you to the landing page of the Resources Manager where the Widgets library will be your default landing page for resources manager.
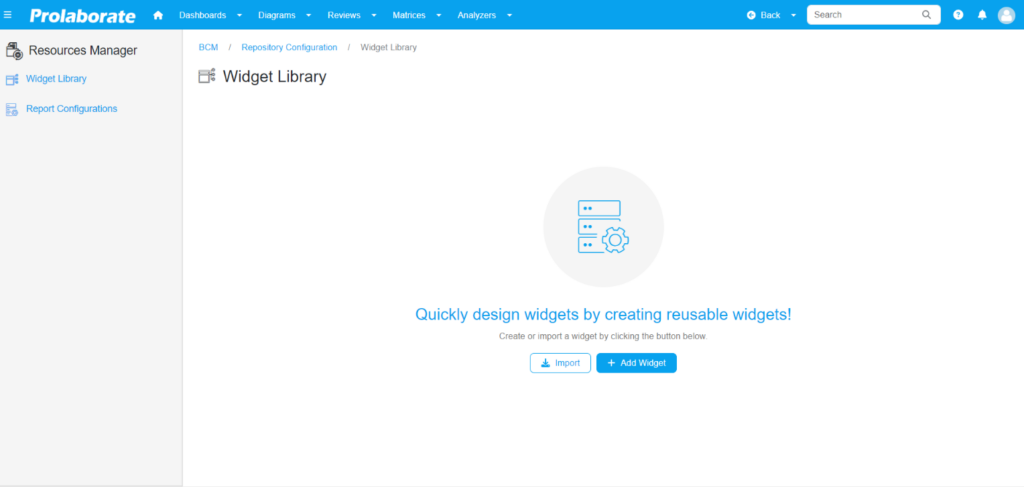
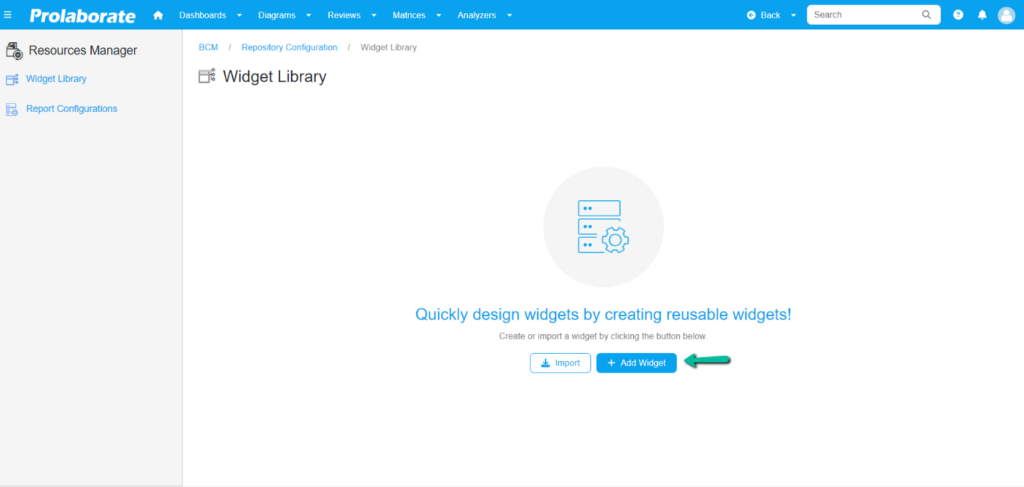
To add a widget to the widgets list, you need to click on the ‘Add Widget’ button:
- Provide a suitable title and select the type of widget that you desire. To learn more about the various types of widgets available in Prolaborate, click here.
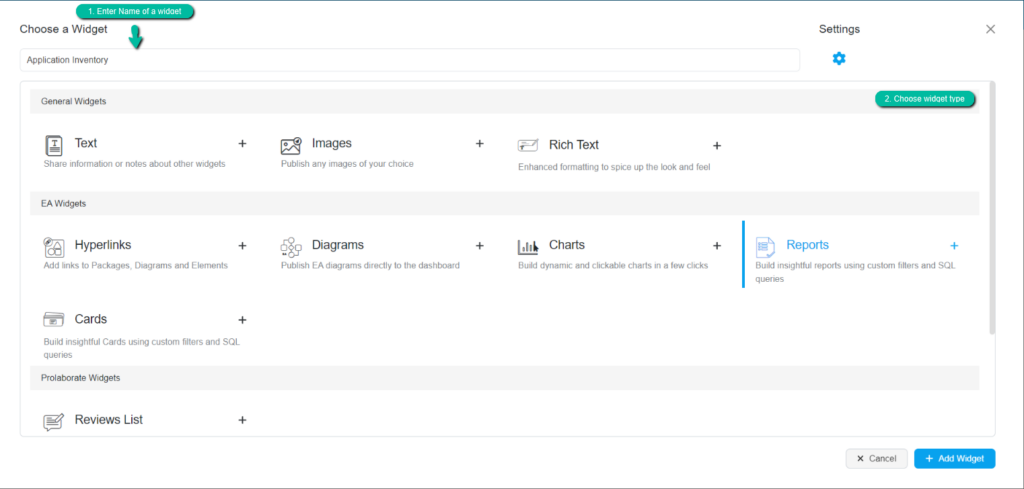
2. To make your widget visually appealing click on the settings icon. This allows your widget to be visually appealing and click on the ‘Add widget’ button. Click here to learn more on Widgets settings
3. The way your widget is configured will depend on the type of widget you have selected. To delve deeper into how to create a widget click here.
Publish widgets to Dashboard
When it comes to publishing widgets to dashboard, there are two ways. You can either publish widgets to the dashboard by clicking the ‘Add to dashboard’ button from the Widgets library or you can publish widgets from the widget library directly from the dashboard edit page by clicking on the ‘Add from Widgets library’ button.
Option 1: Publish widgets to dashboard from library
This flow will allow the user to add Widgets library widgets to the dashboard from Widgets library module.
Users can add widgets to the dashboard individually or in bulk.
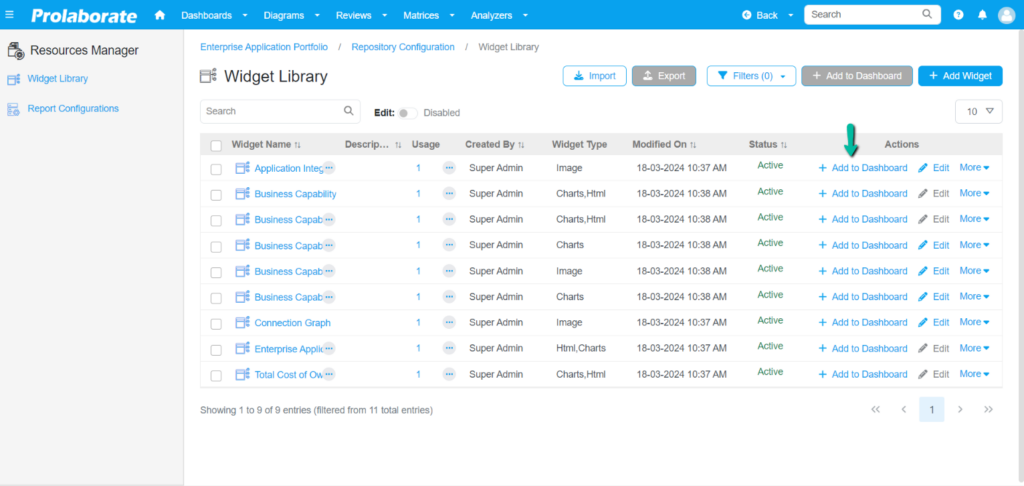
Publish single widget
To add widgets to dashboard individually, click on the ‘Add to Dashboard’.
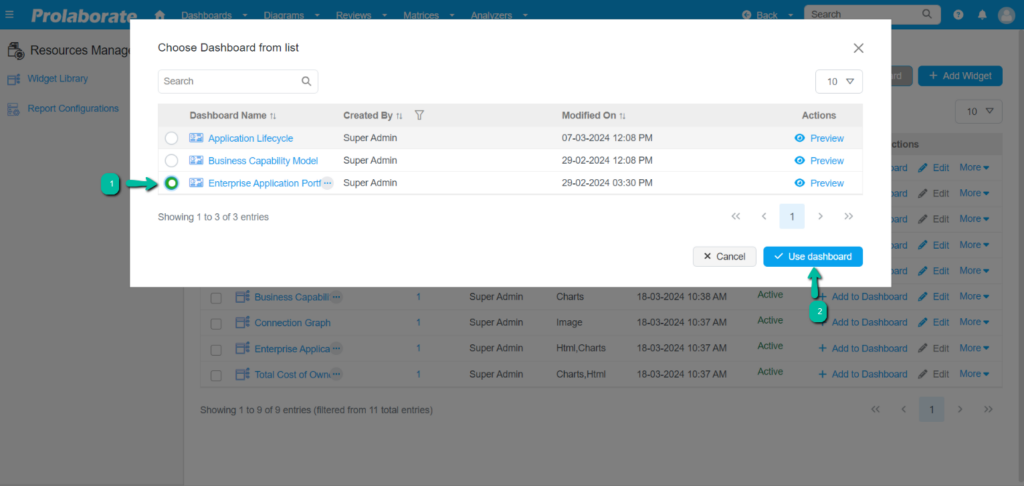
A pop-up window will appear which allows you to choose which dashboard you want to add the widget to. One dashboard at a time can be selected to use the selected widget in the dashboard.
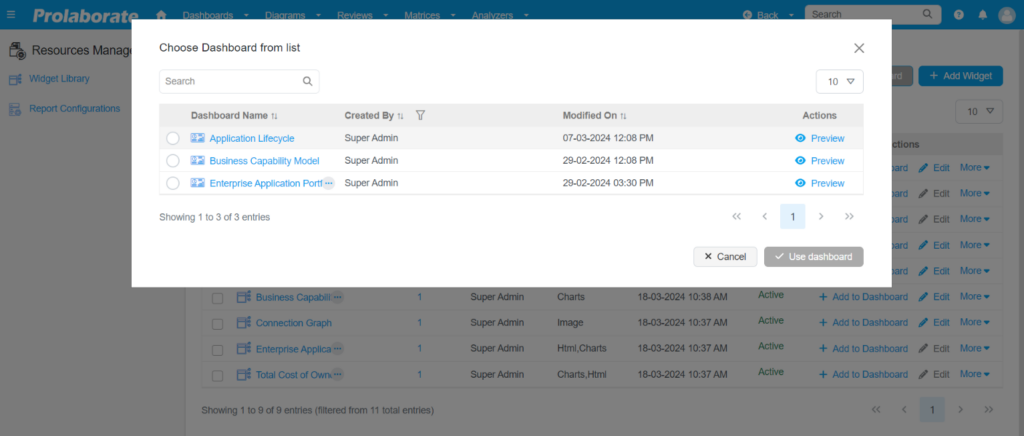
Click the ‘Use dashboard’ button to go to the selected dashboard. It will redirect to the dashboard edit page, where you can resize it according to your needs.
Once you have clicked on the ‘Use Dashboard’ button, you will be taken to the edit page of the dashboard you have selected. On this page, the chosen widget will be automatically placed in a position that fits the available space in the dashboard.
You can then adjust the size of the widget to suit your preferences. This ensures that you can quickly and easily customize your dashboard to suit your needs and view everything in a clear and organized manner.

Click ‘save’, to save the changes.
Publish multiple widgets
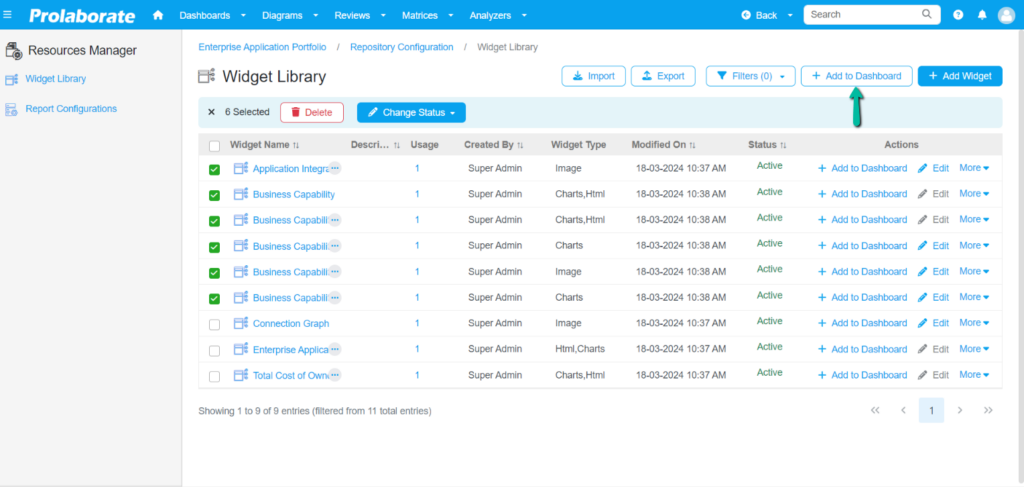
To add multiple widgets to the dashboard, select the widgets from the Widgets library list. Note the ‘Add to dashboard’ button enabled. Now click on the ‘Add to Dashboard’ button which is enabled.
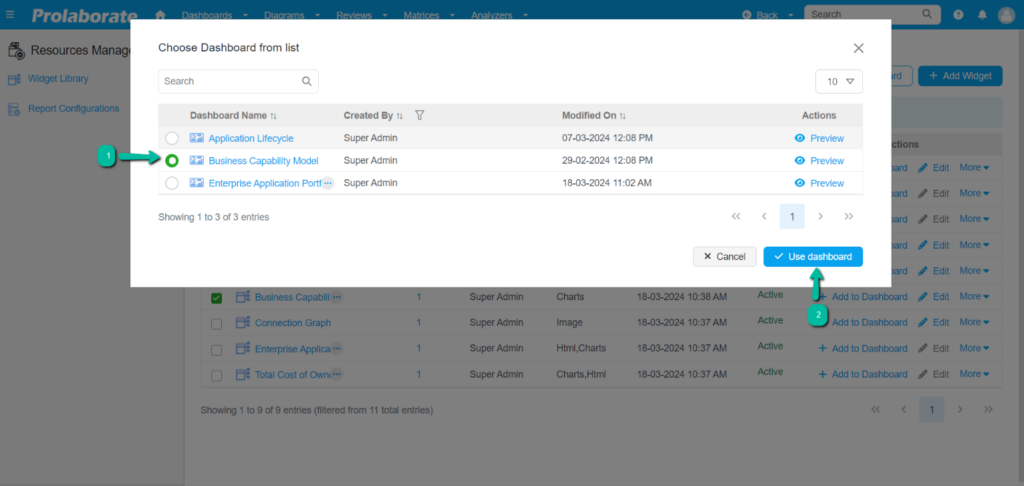
A pop-up window will appear which allows you to choose the dashboard you want to add the widgets to. Only one dashboard can be selected at a time to use the selected widget in the dashboard.
Click the ‘Use dashboard’ button to go to the selected dashboard. It will redirect to the dashboard edit page, where you can resize it according to your needs.
Once you have clicked on the ‘Use Dashboard’ button, you will be taken to the edit page of the dashboard you have selected. On this page, the chosen widget will be automatically placed in a position that fits the available space in the dashboard.
You can then adjust the size of the widget to suit your preferences. This ensures that you can quickly and easily customize your dashboard to suit your needs and view everything in a clear and organized manner.
Click ‘save’, to save the changes.

Option 2: Add library widgets to dashboard
This flow will allow the user to add widgets directly to dashboard edit page from the library.
Users can add widgets to the dashboard individually or in bulk.
Publish single widget
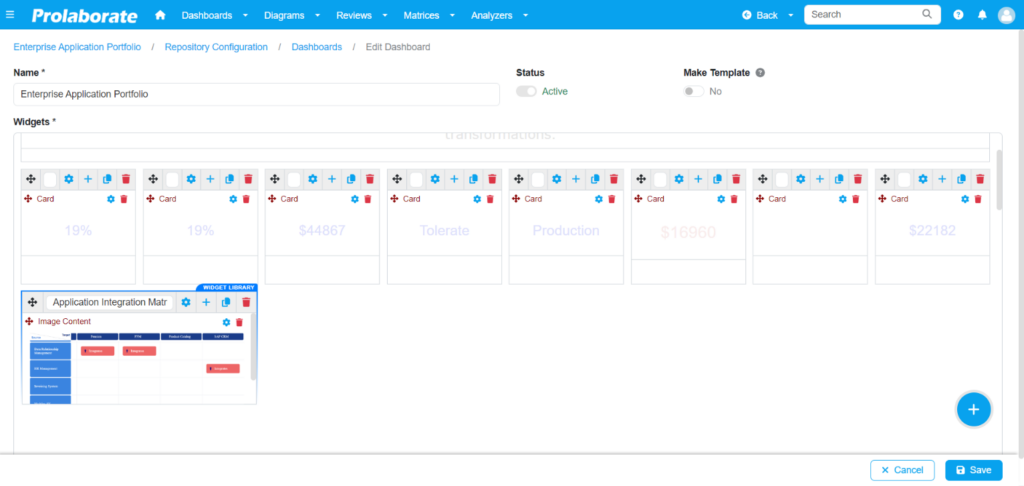
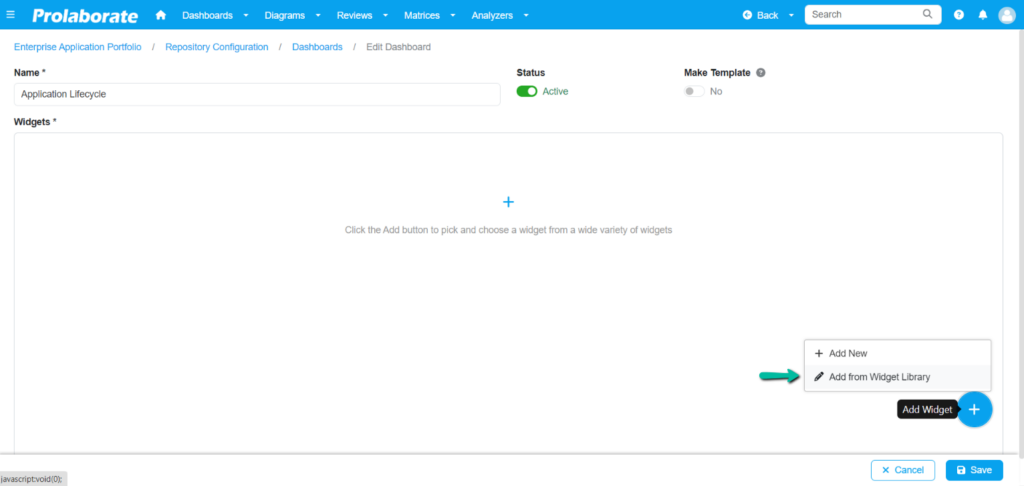
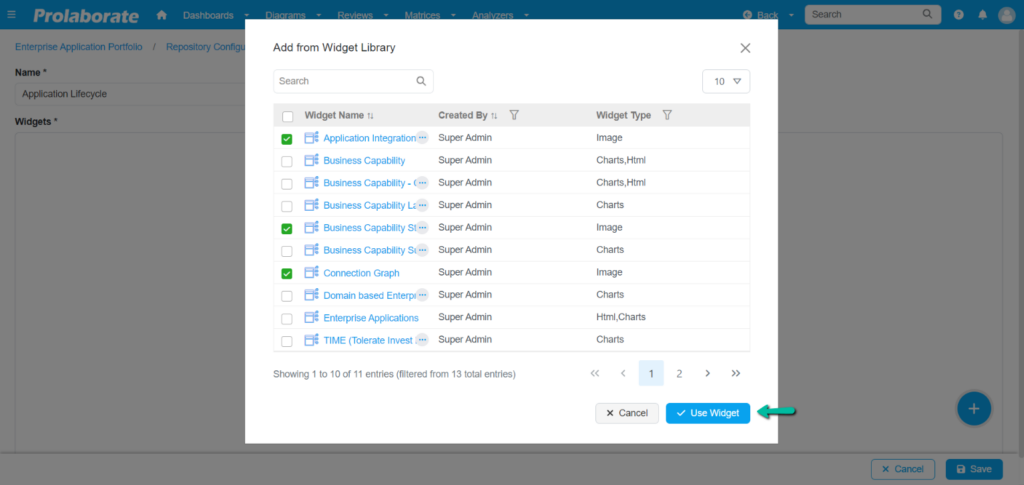
In the dashboard editing page, users can easily add widgets from the library by clicking the ‘Add from Widgets library’ button.
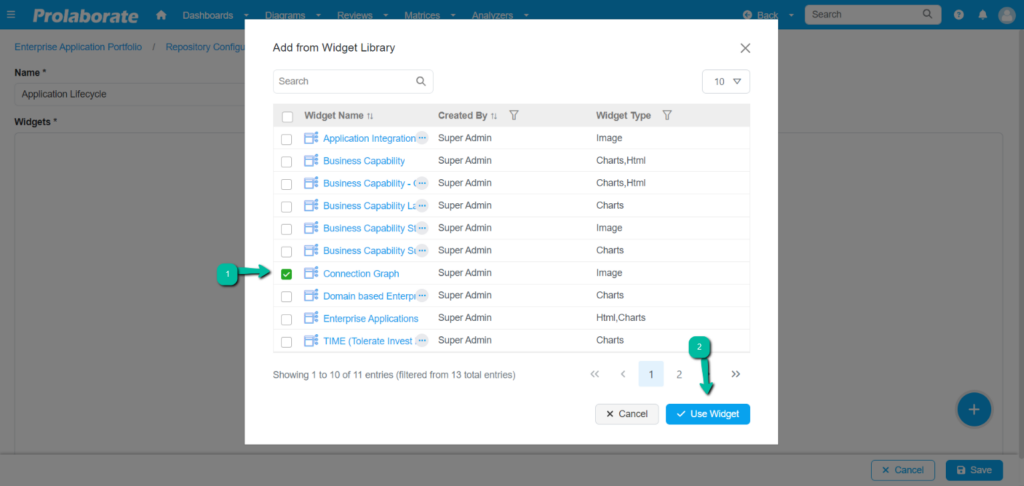
Clicking on it will prompt you to select the widgets from the list. Click the ‘Use Widget’ button and the selected widget will be added to the dashboard. You can resize it according to your needs.
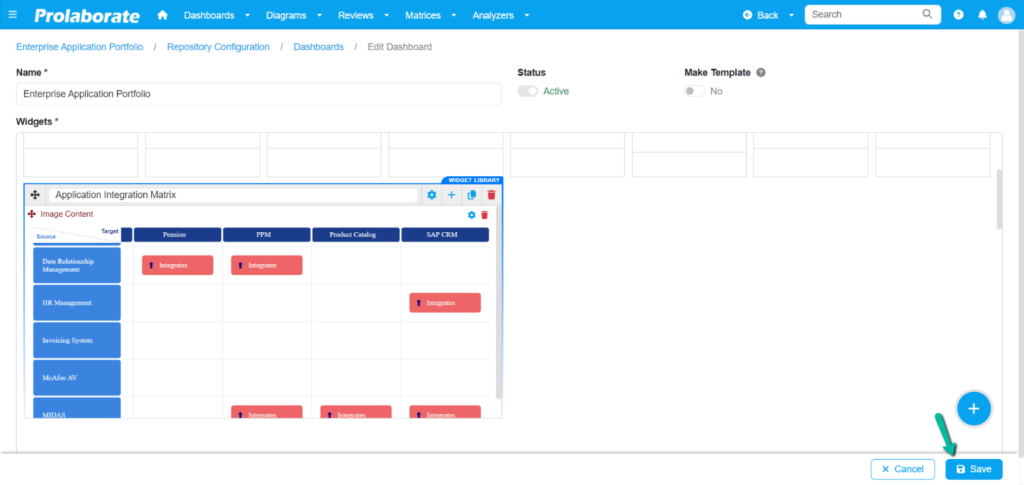
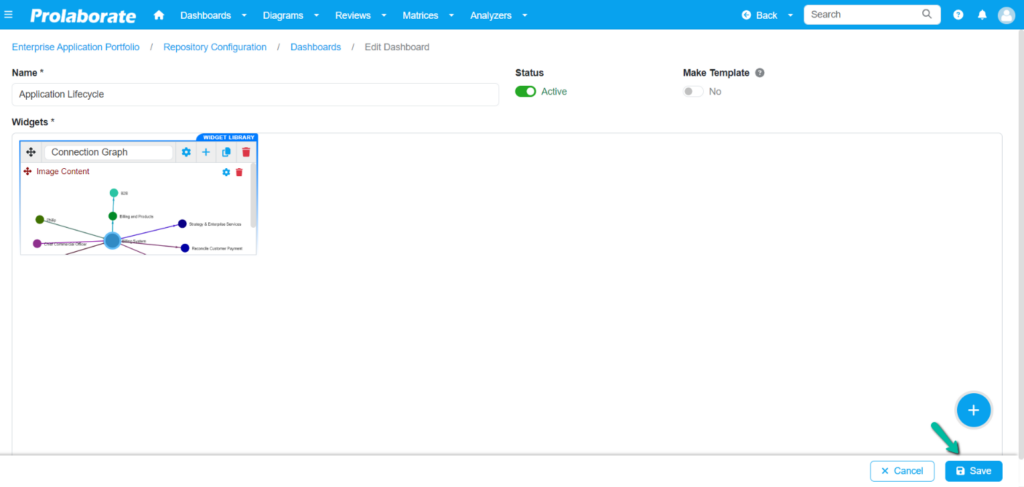
Once you have clicked on the ‘Use Widget’ button, the chosen widget will be automatically placed in a position that fits the available space in the dashboard.
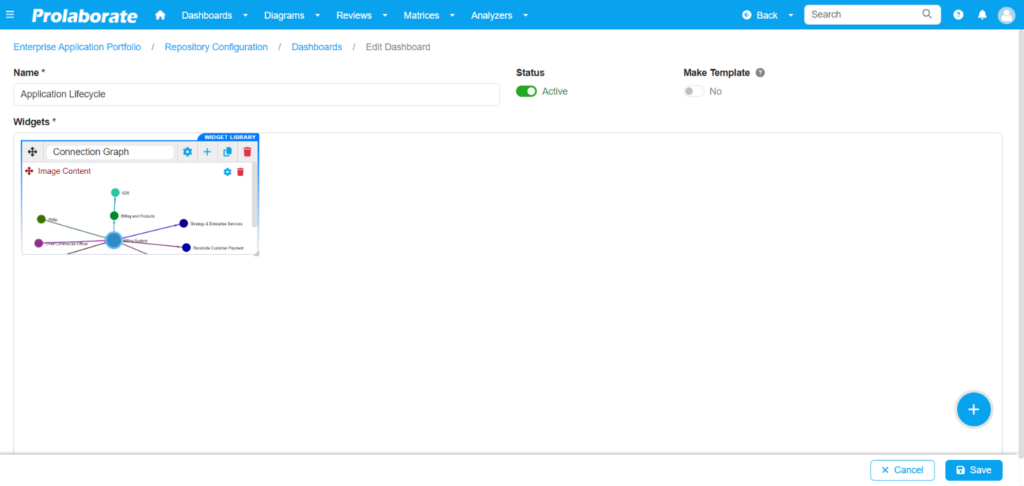
You can then adjust the size of the widget to suit your preferences. This ensures that you can quickly and easily customize your dashboard to suit your needs and view everything in a clear and organized manner.
Click ‘save’, to save the changes.
Publish multiple widgets
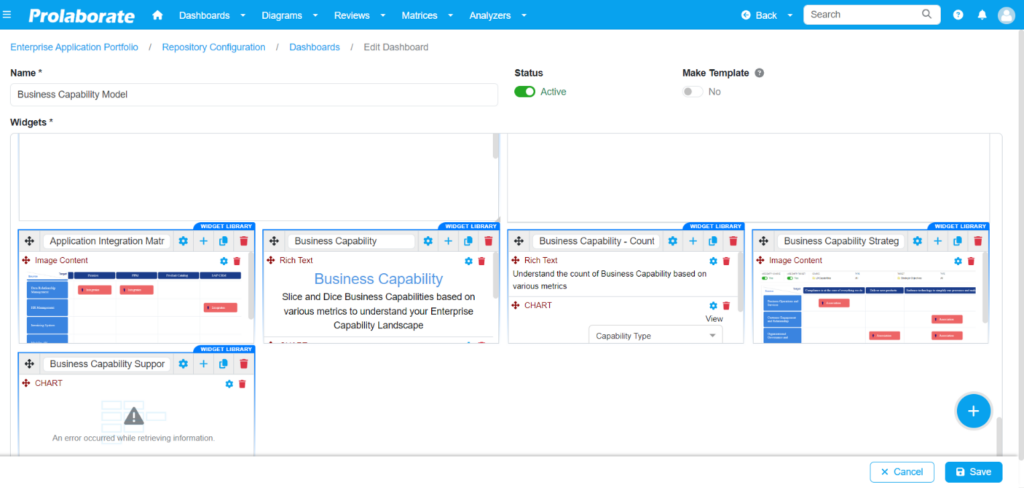
To add multiple widgets to the dashboard, click on the ‘Add widget’ button and select ‘Add’ from ‘Widgets Library’.
Clicking on it will prompt you to select the widgets from the list. Click the ‘Use Widget’ button and the selected widget will be added to the dashboard. You can resize it according to your needs.
You can then adjust the size of the widget to suit your preferences. This ensures that you can quickly and easily customize your dashboard to suit your needs and view everything in a clear and organized manner.
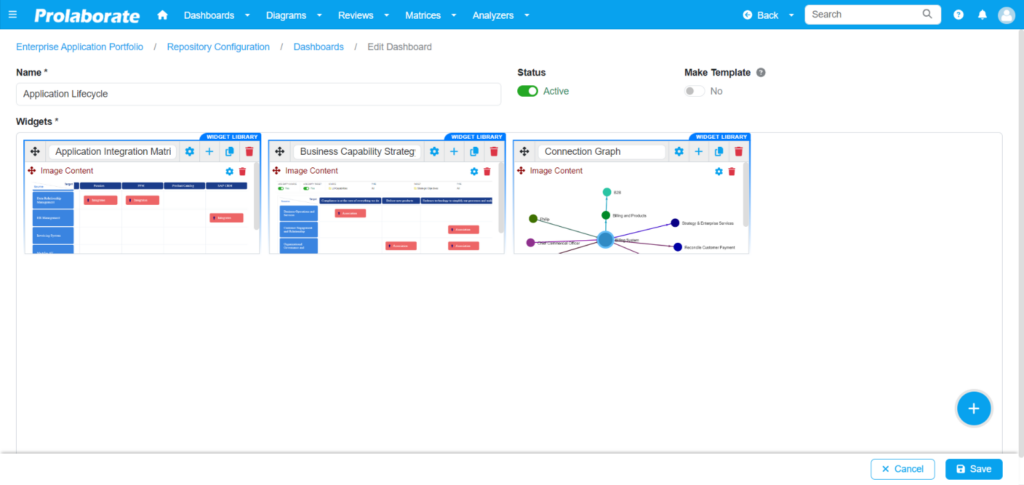
Click ‘save’, to save the changes.

Note:
- Only the active widgets will be listed in the pop-up window.
Add existing widgets from dashboard to library
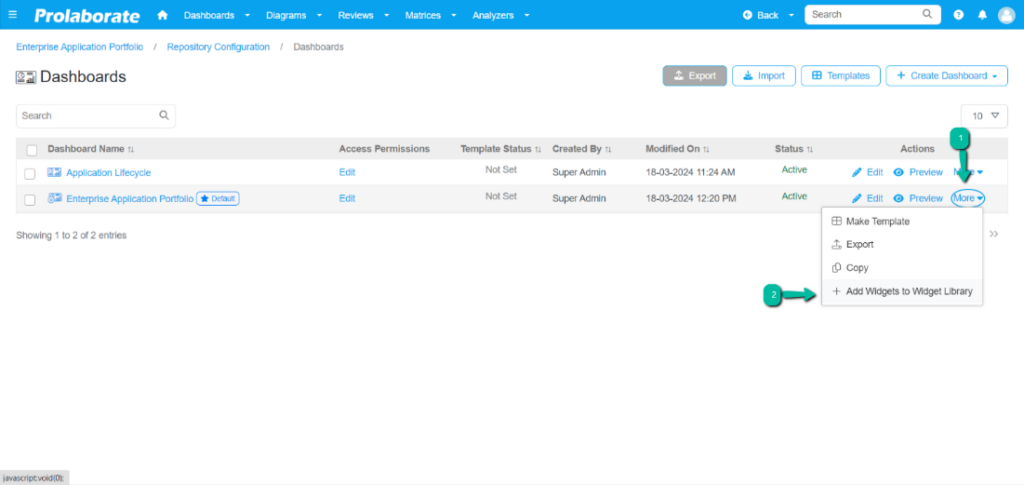
If users wish to make the widgets reusable, by using the widgets which are already available in dashboard, it can simply be done by clicking on ‘Add widgets to Widgets library’ option.
Goto dashboard list page, under the Actions column click more > Add widgets to widgets library option.
This window displays a list of all available widgets from the dashboard. Use the filter feature to easily find the widget you need.
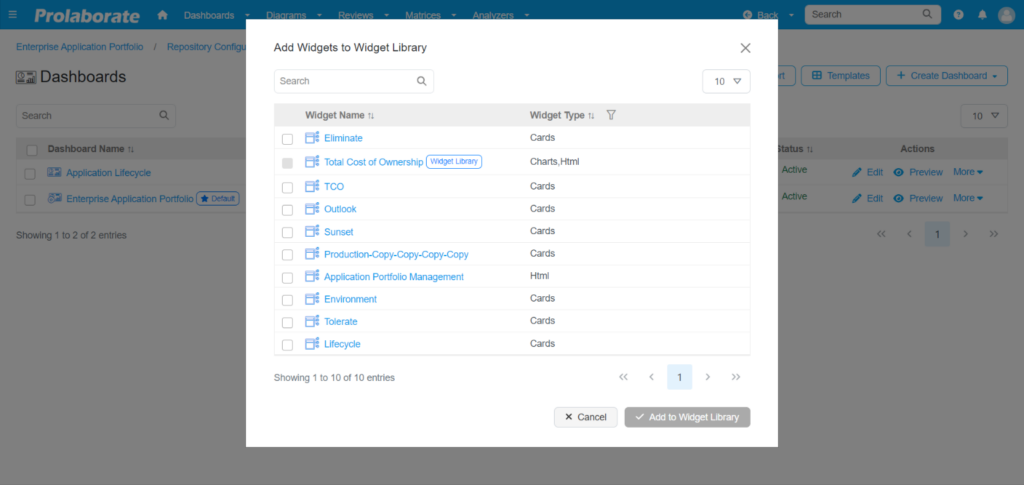
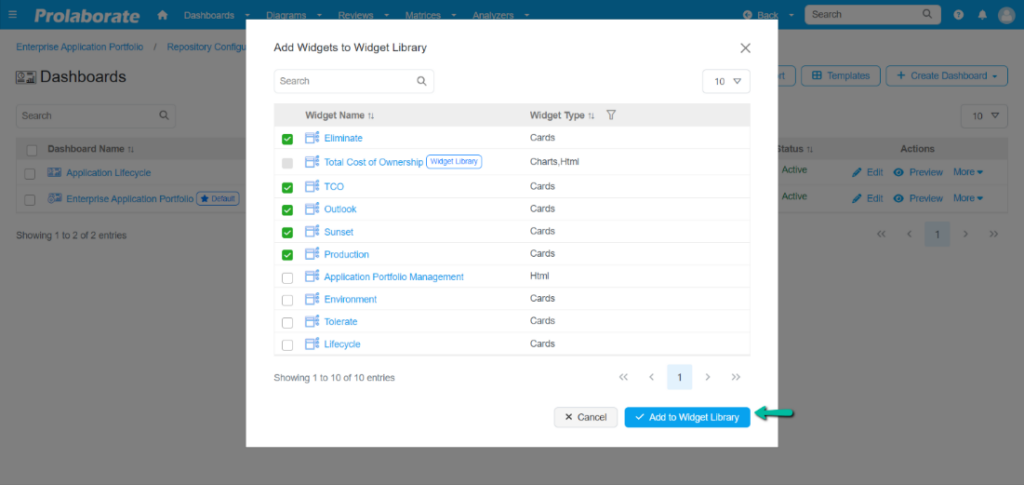
If you want to add the widgets to the library simply select the widgets from the list and click on ‘Add to Widgets library’, button.
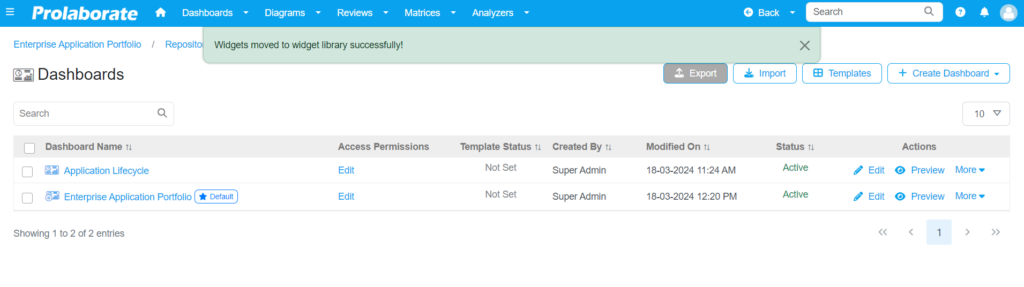
After adding widgets to the library, a success message will confirm their addition. You may then reuse them in any other dashboard.
Note:
- Widgets cannot be added to the library if they are already present in the library. Ensure that the widget you’re attempting to add is not a duplicate.
- Widgets without a name cannot be added to the Widgets library.
- Widgets with the same name cannot be added to the library. Ensure each widget has a unique name to avoid conflicts during the addition process.
- Widgets with multiple blocks can be added to the library but configuring them is restricted in the Widgets library.
Remove widgets from dashboard
Removing widgets from the dashboard within the Widgets library is a straightforward process designed to streamline dashboard management. Users can effectively manage the content of their dashboards within the Widgets library, ensuring that they remain relevant and tailored to your needs. This feature assists in decluttering the dashboard content, by allowing the user to efficiently remove widgets that are no longer needed.
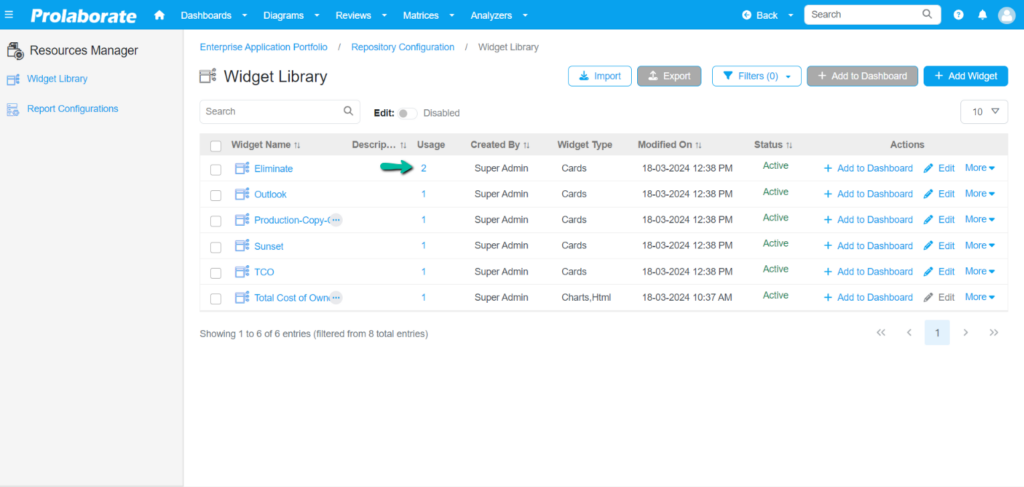
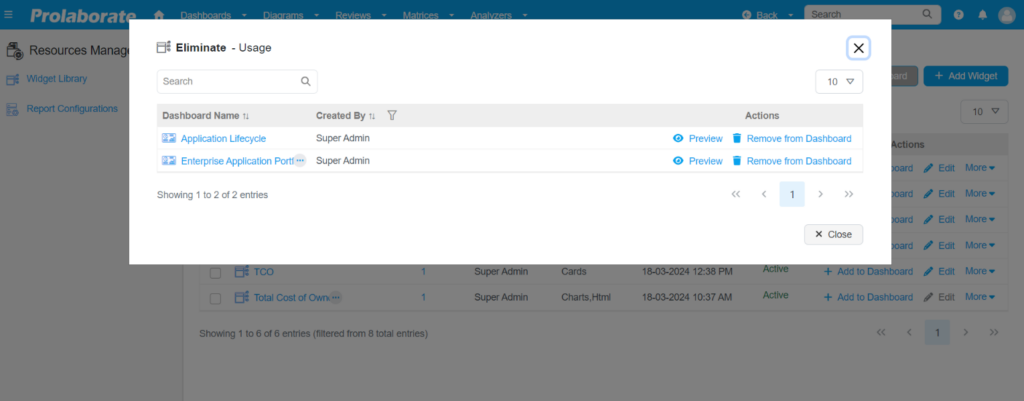
Navigate to the Widgets library, this is where you can manage and view all the widgets available to use. Locate the widget that you wish to remove from the dashboard. Click on the usage count associated with each widget.
This action will trigger a popup window displaying a list of dashboards that currently utilize the selected widget.
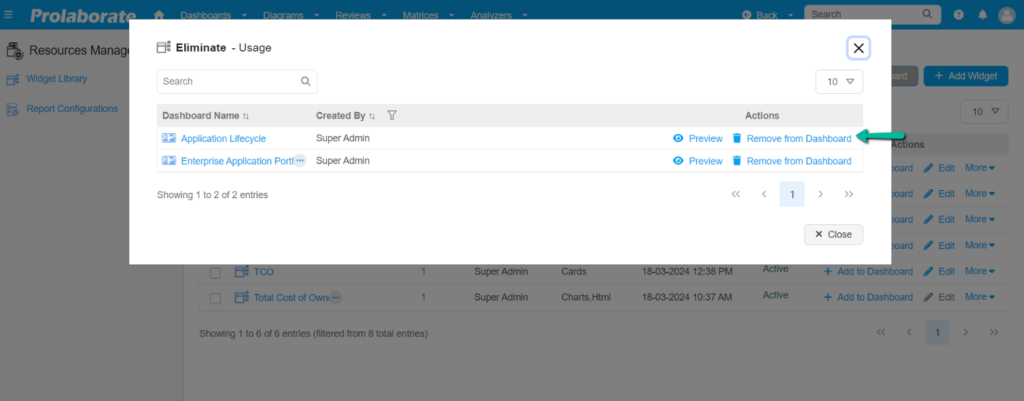
Find the dashboard that you wish to remove the widget. Click on the ‘Remove from dashboard’ option.
A confirmation pop-up will appear. Please click on the ‘delete’ button to proceed with the deletion.
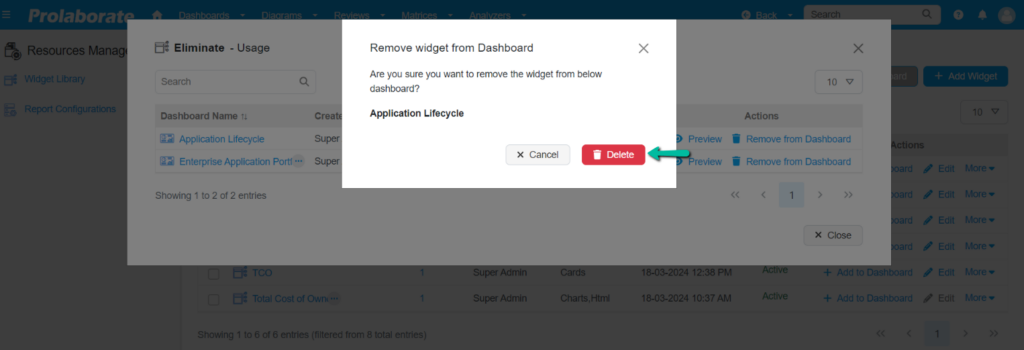
This action will be completed by removing the widget from dashboard.
Note:
Deleting a widget from the dashboard will impact the dashboard layout. To maintain an organized dashboard, it is crucial to rearrange the remaining widgets to fill any empty spaces created by the deletion.
Export Widget
The export functionality in Prolaborate’s Widgets library allows users to save widgets for sharing, backup, or migration purposes. Depending on the requirements, users can choose to export individual widgets or multiple widgets along with their associated resources.
Prerequisite
- To export the widgets, the user must be a super-admin.
Export Widgets only
Users can export only the dashboard by disabling all the reference resources if required, thus exporting only the widget contents.
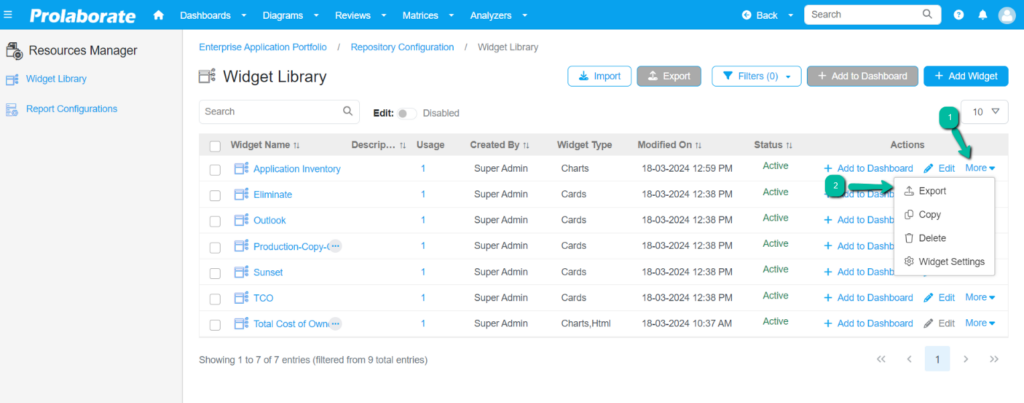
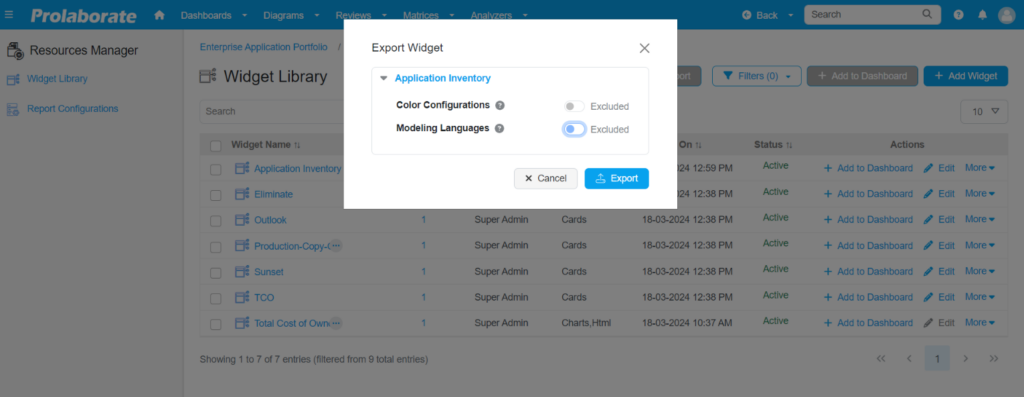
To export an Individual widget, navigate to the Widgets library’s listing page. Click More under Actions and select Export.
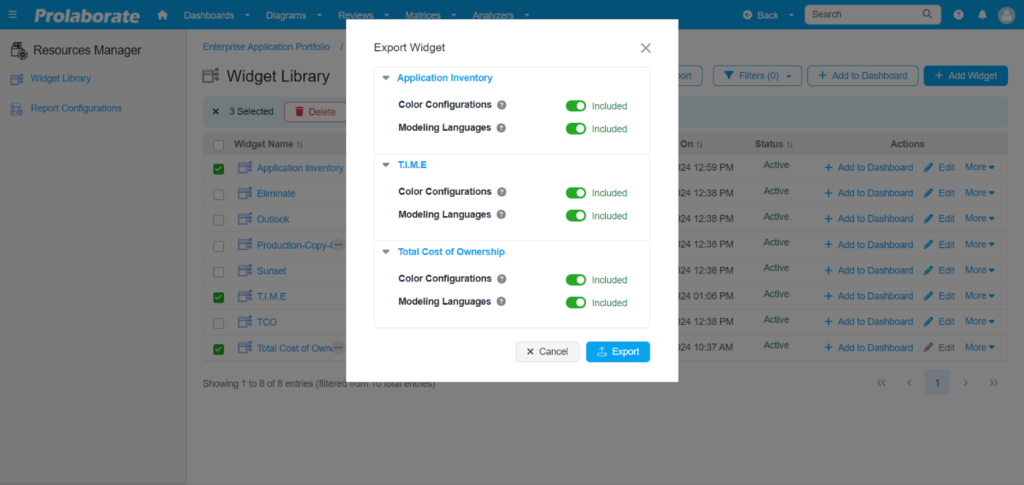
A popup window appears showing the list of resources that are referenced in the widget. Toggle off the resources that are listed in the popup to export the widgets without any associated resources.
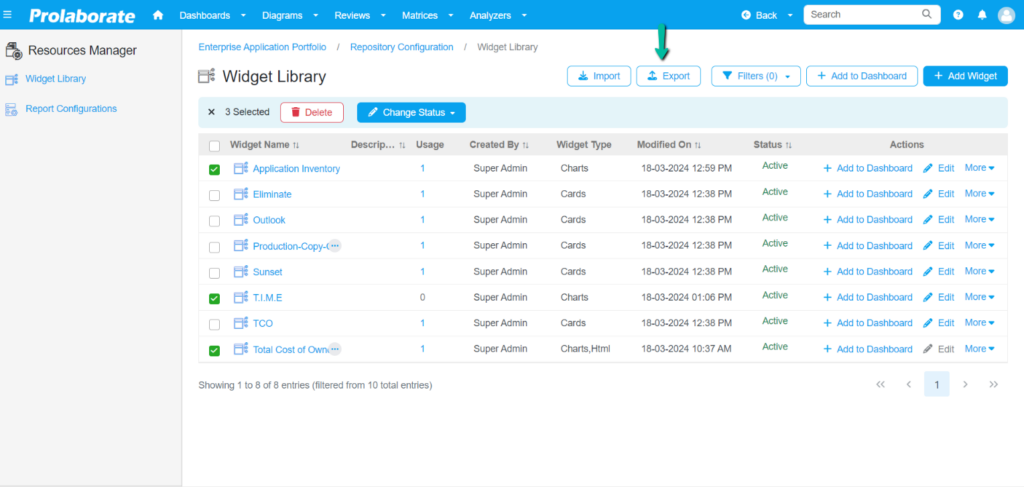
To export multiple widgets, navigate to the Widgets library’s listing page. Select the widgets and click on the Export button.
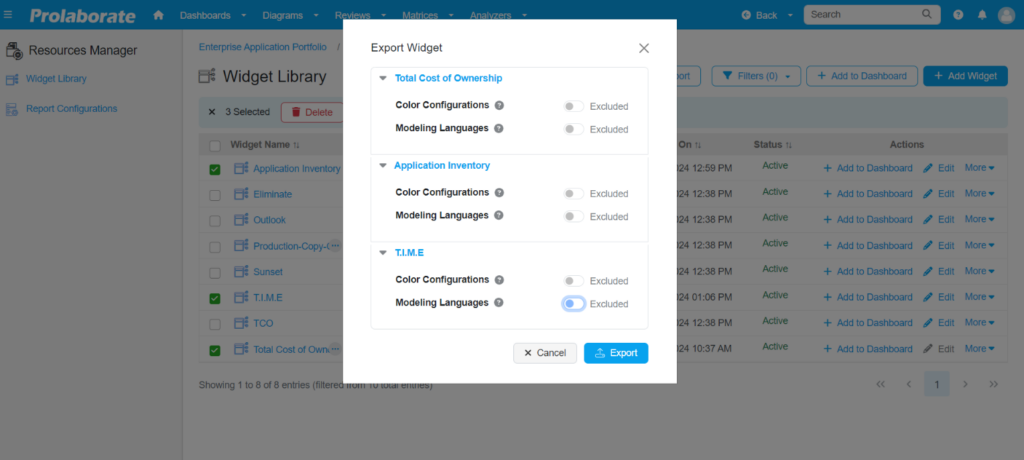
A popup window appears showing the list of resources that are referenced in the selected widgets. Toggle off the resources that are listed in the popup to export the widgets without any associated resources.
Export Widget with resources
With this option, users can export widgets along with all associated resources such as images, text, modeling languages or configuration files.
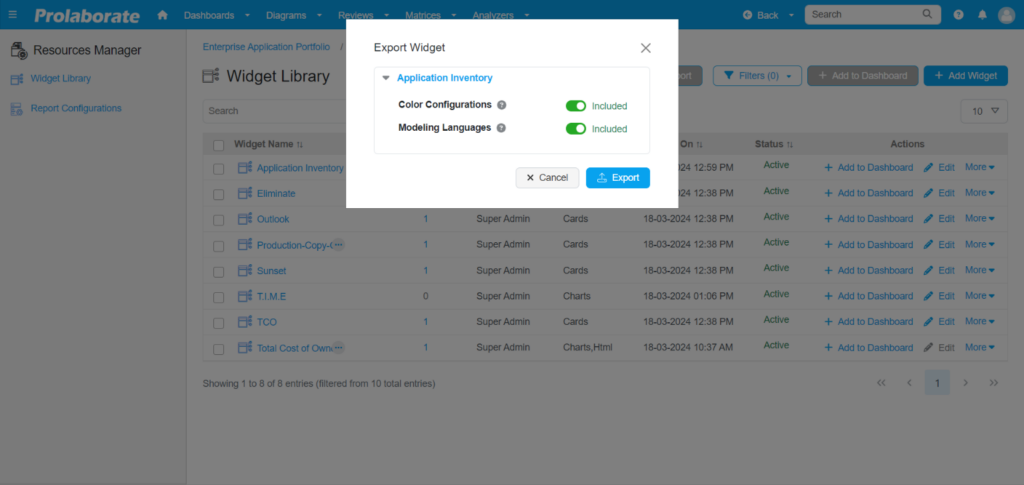
To export an Individual widget, navigate to the Widgets library’s listing page. Click More under Actions and select Export.
A popup window appears showing the list of resources that are referenced in the widget. Toggle the resources listed in the popup to export the widgets with associated resources.
To export multiple widgets, navigate to the widget’s library listing page. Select the widgets and click on the Export button.

A popup window appears showing the list of resources that are referenced in the selected widgets. Toggle the resources that are listed in the popup to export the widgets with resources.
Import Widgets
The import functionality in Prolaborate’s Widgets library enables users to import widgets into their environment.
Prerequisite
- To import the widgets, the user must be an admin.
Steps to Import Widgets
Widgets can be imported easily just by selecting the exported zip file. If the exported content contains resources, it will be imported; otherwise, only the widgets get loaded.
Navigate to Widgets library listing page, click Import.
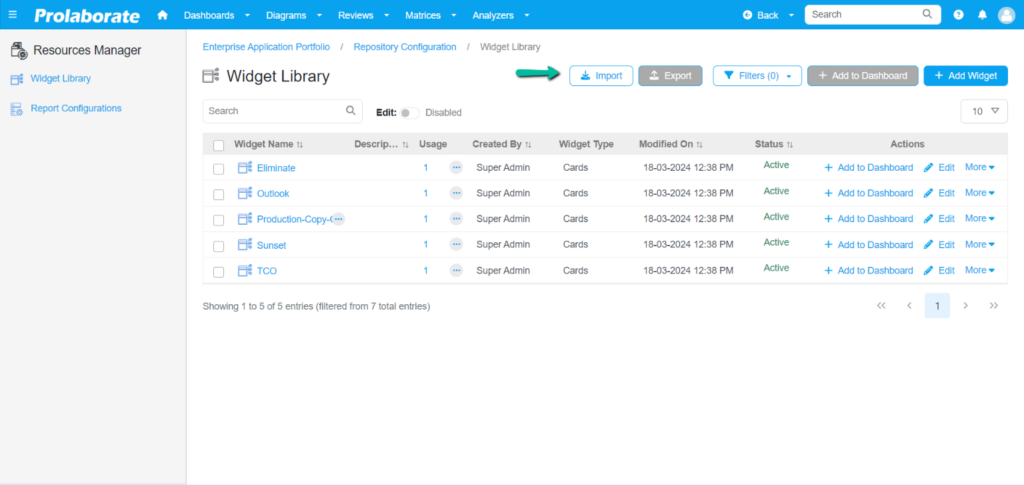
Choose the exported widget .zip file from the respective file location and click Import.

The widget and its resources will be successfully imported. A suffix ‘imported’ will be added to the imported contents.

View Widgets Usage
The usage capability in Widgets library allows users to gain valuable insights into the usage of widgets across various dashboards. By accessing this functionality, users can effortlessly track where specific widgets are being utilized, enabling better management and optimization of dashboard content.
The ‘Usage’ column shows the count of dashboards a widget is added to.
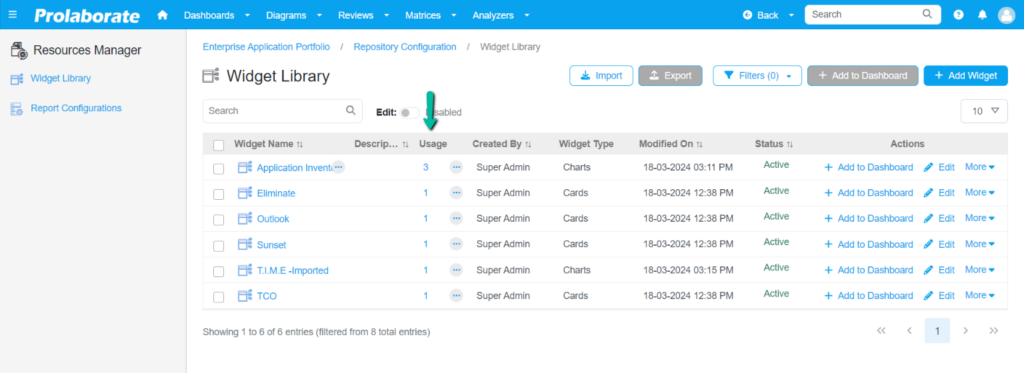
By clicking the count, a popup will appear showing the list of dashboards that consume the chosen widget.
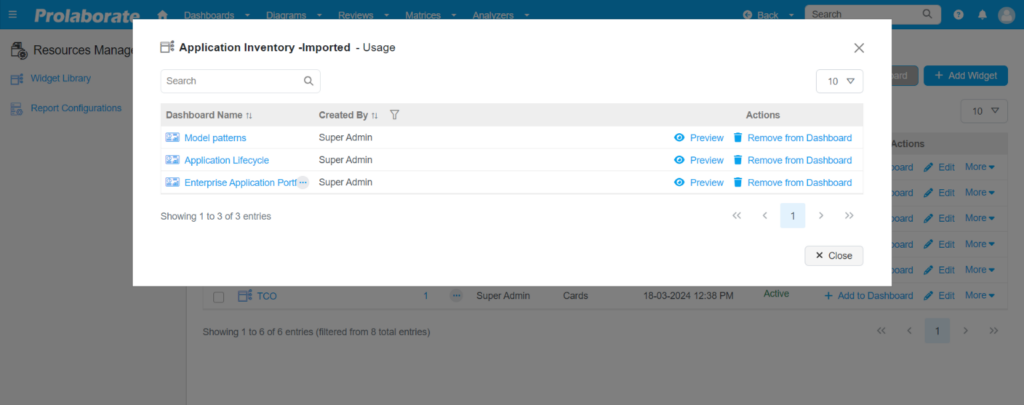
Dashboard Name: Name of the Dashboard
Created By: Dashboard author.
Actions: I) Preview– Click to Preview the Dashboard
II) Remove from Dashboard– Click to remove the widget from the dashboard.
Edit or Modify Widgets
In Prolaborate’s Widgets library, users can modify widget details. This includes editing the widgets Name, Description, Status and configuring the widgets and their color settings.
Users have the flexibility to tailor widgets in a manner that meets their unique needs. The customization process can encompass a wide range of approaches.
Below are the approaches to edit the widgets in the Widgets library:
Modify Basic Details
Changes to the Name, Description and Status of the widgets can be done by enabling ‘Edit’ toggle.

By default, the edit will be disabled. Toggle the ‘Edit’ button to enable or disable the editor provided they have sufficient access permission (Write).
Activate the inline editor by toggling the ‘Edit’ button. This will enable you to edit the Widget’s Name, Description, and Status. However, the rest of the details will remain un-editable.

Click on a cell to modify the widget name. The changes will be saved automatically if the user clicks outside the cell.

Users can write about the widgets in the description field by using various inbuilt tools. The changes will be saved automatically if the user clicks outside the cell.
Modify the status of the widgets to either Active or Inactive. The changes will be saved automatically if the user clicks outside the cell.

Re-configure Widgets
For modification of a widget, click on the ‘Edit’ button to access the configuration settings. These settings are done to modify the widget chart, report etc., The modification that takes on a widget will impact the dashboards which are linked to it.
Click on ‘Edit’ button the way your widget is edited will depend on the type of widget you have selected. To delve deeper into how to create a widget click here.
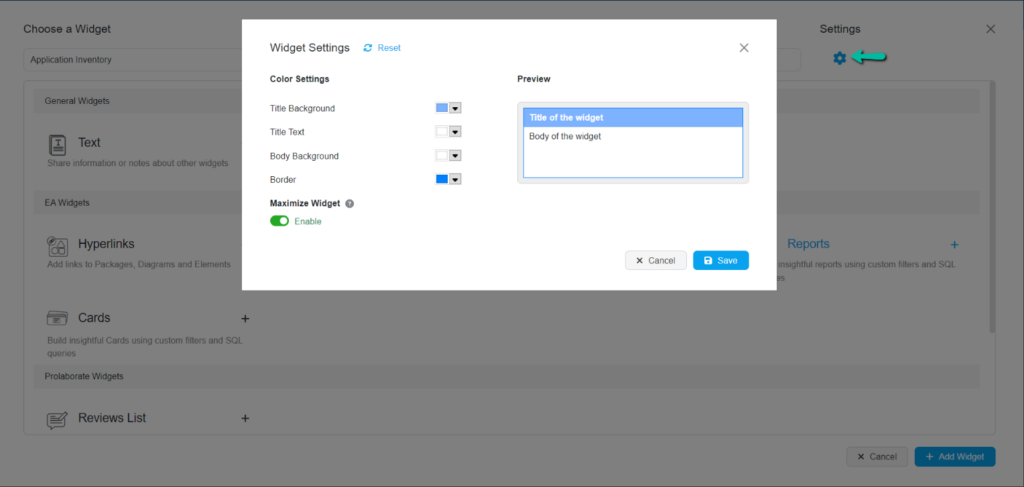
Widgets Settings
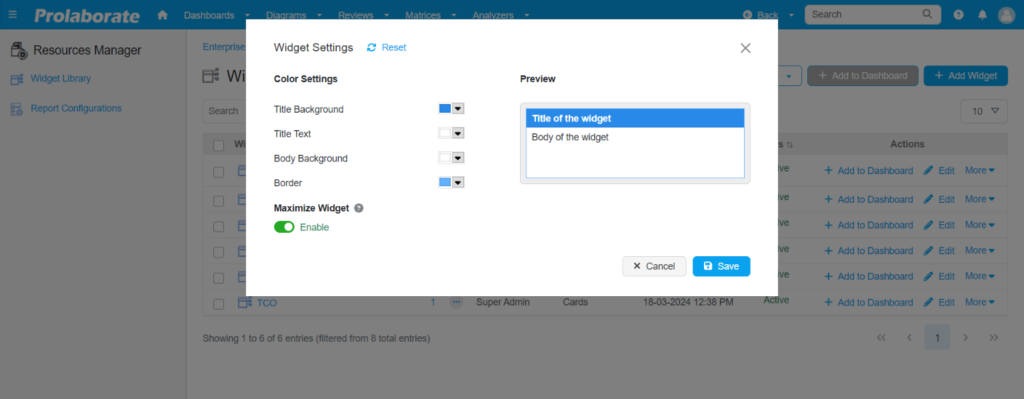
Set custom color to the title and body of widget.
To customize the widget color, Navigate to Actions> More> Widget Settings.
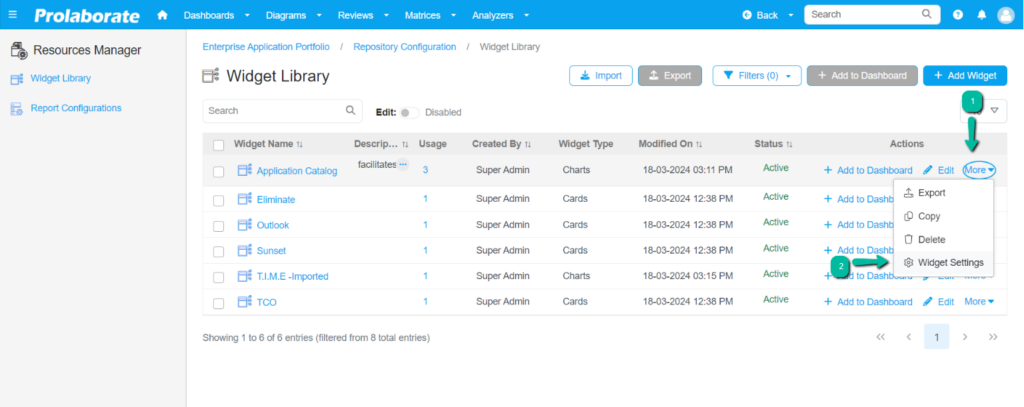
You will now be able to see the widget settings option, see the below screenshot for reference. Customize your widget with the widget settings i.e., adding color to your title, adding color to the widget, etc. Click on ‘Save’ for changes to take place.
The modification that takes on a widget will impact the dashboards which are linked to it.
Click here to learn more about Widget settings.
Create a copy of Widget
To copy a widget, navigate to Actions> More> Copy.
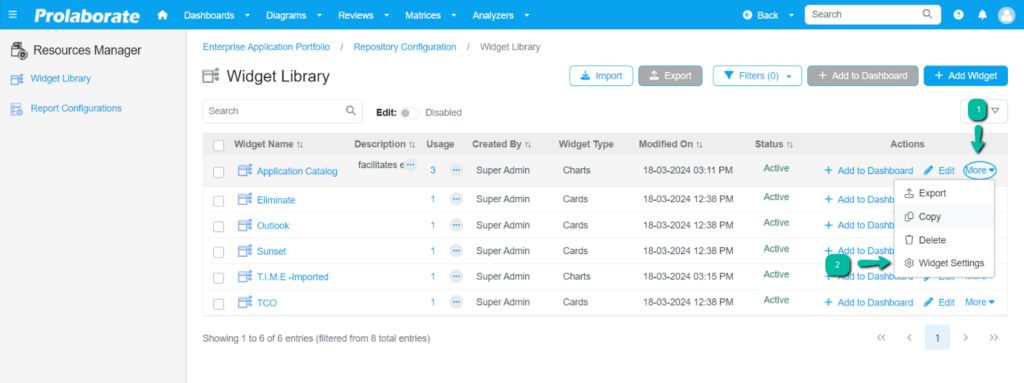
Click on the Copy option. Upon clicking, the widget will be recreated immediately within the Widgets library and the suffix ‘Copy’ will be added to the widget name.

Delete Widgets from library
Deleting the widgets from the Widgets library will remove them from the Widgets library list and in the dashboard.
Widgets can be deleted either in my individual or in bulk.
To delete the widget individually navigate to Actions> More> Delete.
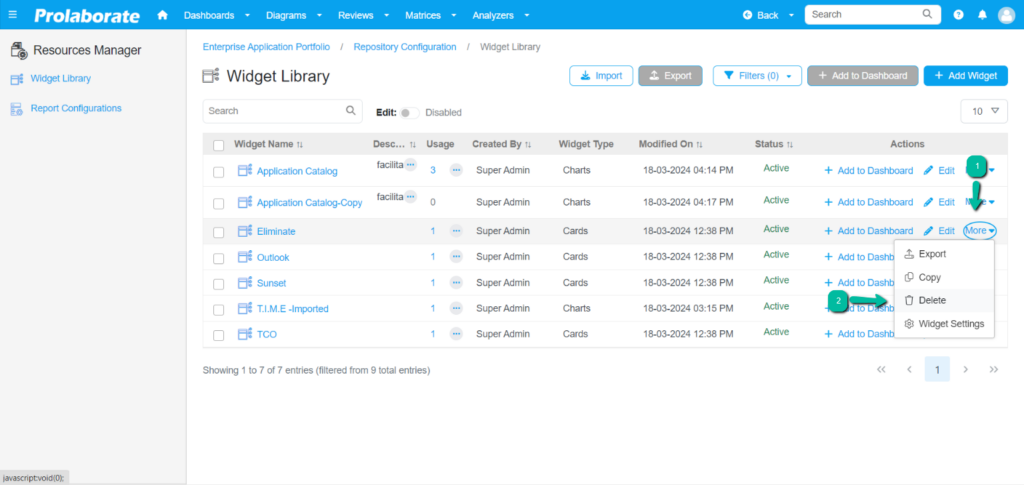
A pop-up will appear listing the widget name along with associated dashboard names.
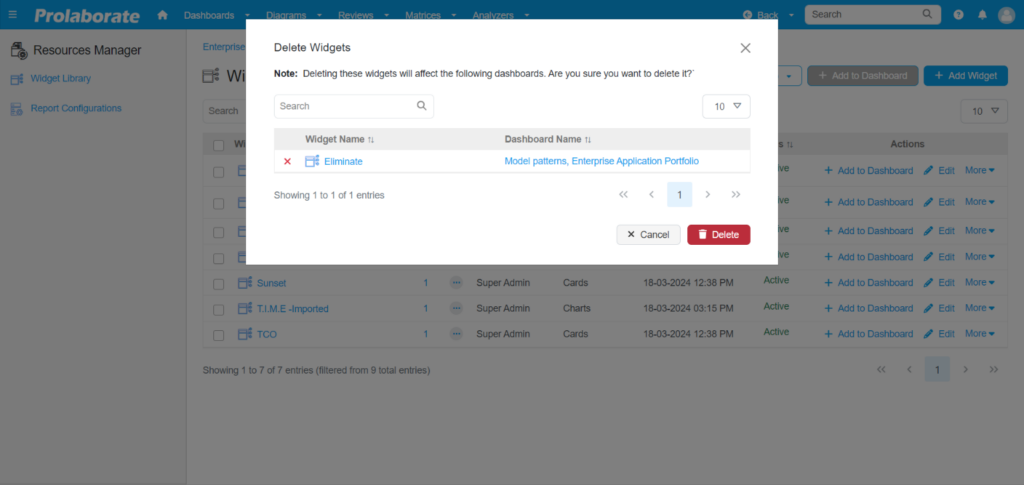
Click on the ‘Delete’ icon to proceed with the deletion process.
This action will remove the widget from the list and from associated dashboards.
Note:
Deleting a widget from the dashboard will impact the dashboard layout. To maintain an organized dashboard, it is crucial to rearrange the remaining widgets to fill any empty spaces created by the deletion.
To delete multiple widgets, select the widgets from the widgets library list and then click on the Delete button.
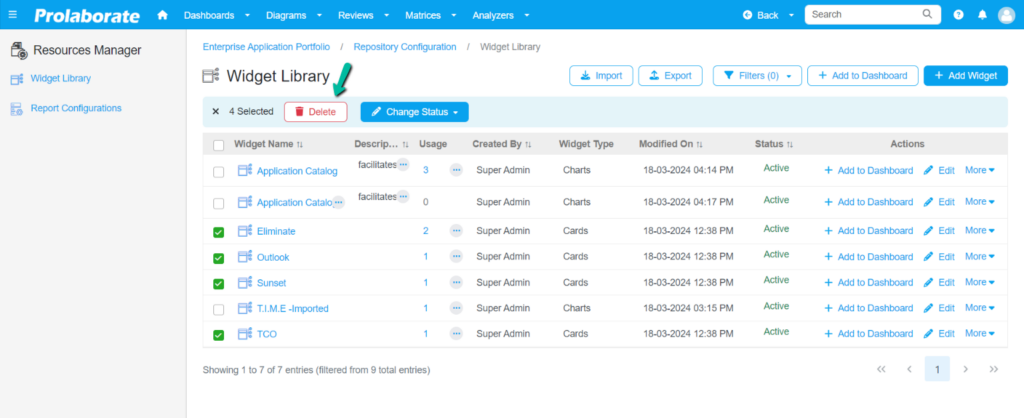
A pop-up will appear, listing the widget name along with associated dashboard names.
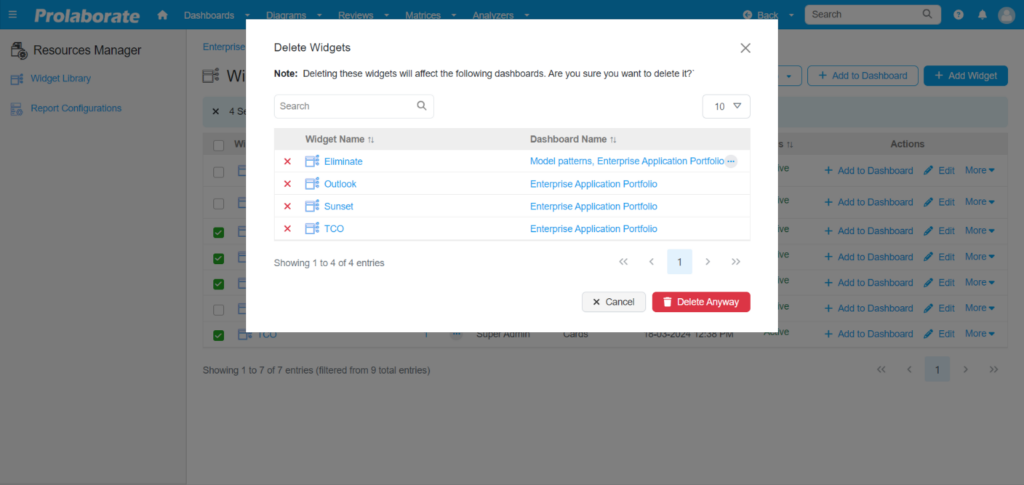
From here user can remove the selected widget from the pop-up screen by clicking on ‘X’ icon Removing the widget from the pop-up by clicking on ‘X’ icon will not remove the widgets from the dashboards.

Click on the ‘Delete’ icon to proceed with the deletion process.
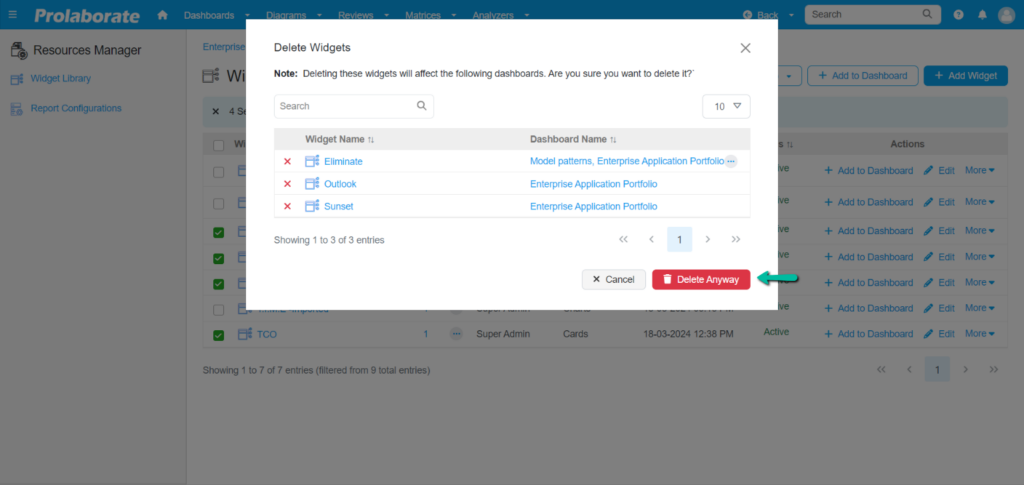
This action will remove the widget from the list and from associated dashboards.
Note:
Deleting a widget from the dashboard will impact the dashboard layout. To maintain an organized dashboard, it is crucial to rearrange the remaining widgets to fill any empty spaces created by the deletion.
Change Status
This feature allows you to set the widget’s status to Active or Inactive. When marked inactive, the widgets will remain in the Widgets Library list but cannot be added to a dashboard.
If a widget is already used in a dashboard, making it inactive in the Widgets Library has no impact on the associated dashboard, and its usage remains unchanged, but it cannot be added to any dashboard again.
Changing the status of the widgets can be achieved by individual or in bulk.
To change the status of the individual widget, enable the edit toggle which is used for basic modification of the widgets.
Click on the Status column cell and choose either Active or Inactive. The changes will be saved automatically if the user clicks outside the cell.
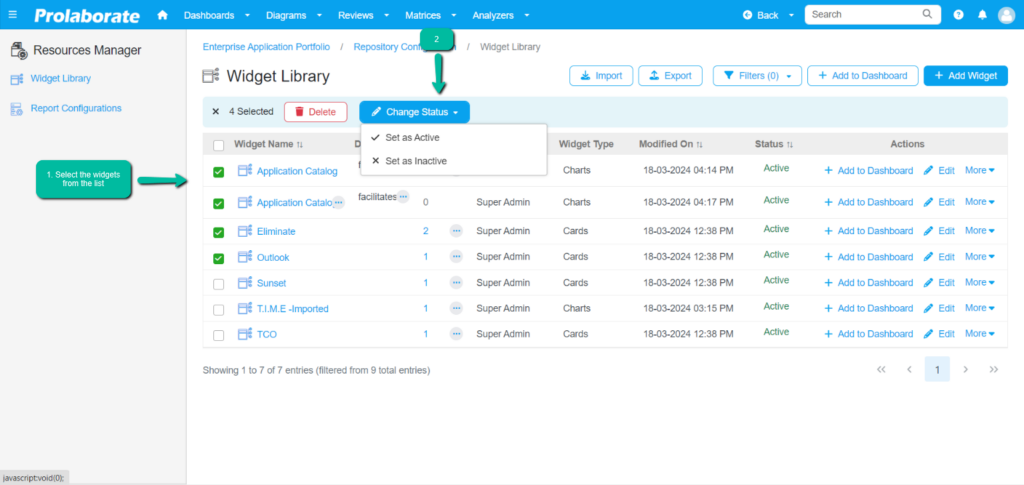
To change multiple widgets status, select the widgets from the list and then click on ‘Change status’ button.
Note:
Before proceeding with any actions involving widget management, it’s important to be aware of certain implications. To know about the limitations and impact click here.
Filter Widgets
The Widgets library in Prolaborate offers powerful filtering options to help users efficiently navigate and manage their widgets. These filters allow users to customize their view of the Widgets library based on various criteria.
Here are the available filtering options:
| Field | Description |
|---|---|
| Created By |
|
| Widgets Type |
|
| Show Active widgets |
|
| Show Inactive Widgets |
|
| In Use |
Yes: Displays widgets that are currently being used in one or more dashboards. |
Note for Customer Upgrading from Prolaborate 5.2 or Below:
For customers migrating from Prolaborate 5.2 or lower versions to Prolaborate 5.3, it’s important to note that in previous versions, widgets could be created without entering names, resulting in widgets being saved with the same name, like “Untitled.” Since there was no enforced validation for widget names, this could potentially result in widgets being saved with duplicate names. However, we have modified the behaviour in 5.3, meaning all the widgets must have a unique name.
We have handled the situation internally in the migrator. Read the steps below to learn more.
- During the migration process to Prolaborate 5.3, any widgets saved without a name and any widgets saved as a template in the previous versions will be automatically moved to the Widgets library.
- These widgets will be assigned a default name of ‘Untitled 1’ to differentiate them from other widgets.
- All migrated widgets will be preserved and accessible in the Widgets library after the upgrade.
Expected actions from customers:
- Users are encouraged to review and update the names of migrated untitled widgets according to their preferences and organizational standards.
- Renaming untitled widgets will enhance clarity and organization within the Widgets library, improving usability and user experience. To know how to edit widget name click here.
Known Limitations
While Prolaborate’s Widgets Library offers extensive functionality for managing and organizing widgets, it’s essential to acknowledge certain limitations to ensure users can effectively navigate and utilize the feature. it’s important to be aware of certain implications:
- Remove from dashboard: When removing a widget from the dashboard, it’s crucial to note that it will leave a blank space in the dashboard layout. This can impact the overall visual coherence of the dashboard.
- Editing widgets: Editing a widget directly from the widgets library will result in changes being reflected across all linked dashboards. This ensures consistency but requires caution to avoid unintended modifications. Upon editing a widget within a dashboard, remove the reference and reduce the widget’s usage count in the widgets library.
- Delete widgets: Deleting widgets from the widgets library will also remove them from any associated dashboards. This ensures synchronization but necessitates careful consideration before deletion. Conversely, deleting a widget from a dashboard will not affect its presence in the widgets library. This allows for localized management without impacting other dashboards.
- Change Status: When a widget’s status is changed to “inactive” in Prolaborate’s widget library, certain actions, such as export or publishing, are restricted for that widget. However, this change does not affect widgets already published on dashboards; they will remain visible and functional regardless of their status in the widget library. This distinction effectively restricts actions on inactive widgets while ensuring stability and continuity for published widgets on dashboards.
- Import – Overwrite limitations: In Widgets Library, while the Overwrite functionality is allowed during the import process, users should be aware of its consequences. Importing widgets that already exist in the library may trigger an overwrite action, resulting in the removal of the existing widget from the library and any associated dashboards if the widgets have the same ID.
- Data Cache: In the Widgets Library, the Data Cache works as expected: it keeps cached data for widget rendering until manually refreshed. However, during preview, it always shows live data, even if the Data Cache is on.