
Customize Visual elements in Prolaborate
Introduction
Customizing icons and colors for artifacts in Prolaborate empowers users to tailor their Enterprise Architecture visualization experience that aligns with organizational preferences and requirements. This feature enhances the visual representation of various elements, such as applications, processes, and more, making it easier for stakeholders to quickly identify and understand key components within the architecture. Whether it’s assigning distinct icons to signify specific artifact types or choosing colors that resonate with corporate branding, the customization options in Prolaborate contribute to a more personalized and meaningful representation of enterprise architecture data.
Prerequisites
- Prolaborate version should be 5.2.0 or above.
- To customize icons and colors, the user must be an admin or part of a user group that has administrative access to Modeling Languages.
Apply Custom Icon for artifacts
Note:
- Custom icons can be applied only for elements, packages, diagrams and connectors
- Image file of type .png is supported
- The icon displayed will be of the following order,
- If custom icon is uploaded for a stereotype, then it will be displayed all over the application.
- If not, the icon defined in the MDG will be displayed.
- If MDG is not available, then a base type icon will be displayed.
How to configure custom icons?
To configure custom icon for an artifact, navigate to Modeling Languages under Repository Configurations by using the menu.
Click on More under Actions of a Modeling Language and choose Apply Custom Icons and Colors.


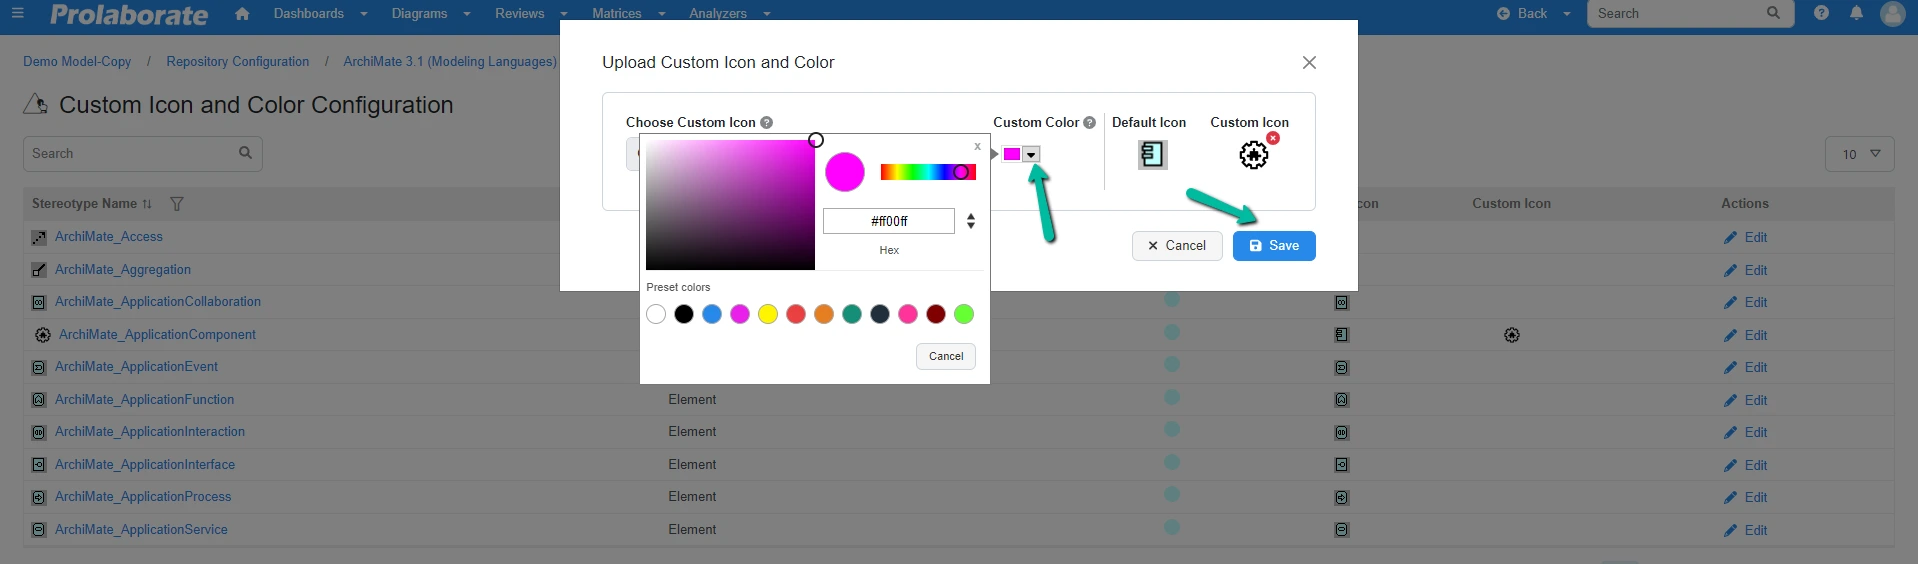
Prolaborate lists the stereotypes available in the selected Modeling Language with its default icon from the uploaded MDG. Click on Edit under Actions for the stereotype for which you apply a custom icon.
Click Choose file and select the required image file to upload.
A preview of the custom icon is shown in Custom Icon. Click Save to save the changes.
Once saved, the custom icon is displayed all over the application for the stereotyped artifact.
To remove the custom icon, click the Cross icon in the above popup window and save the changes.
How to visualize?
The changes are applied all over the application. For example, when the artifact overview or the repository browser is opened, the applied custom icon will be displayed.
Limitations
Though the uploaded custom icon is visible all over the application, they are few places it shows the base type icon.
- If Technology and Stereotype is not defined properly in the Modeling Language.
- For custom property of type ‘Query’
- The list view in the Connector Property window
- For Sub-report in the list view widget
- Selected source of designer configuration in Charts, Report, Connector Property and Report Configuration
- Usage section in the Artifact overview page and property window
- To refer the pre-requites click here.
Apply Custom Colors in Analyzer views
Note:
- Custom colors can be applied only for elements, packages, diagrams and connectors
- The colors displayed will be of the following order,
- If custom color is uploaded for a stereotype, then it will be displayed in the Analyzer view
- If not, the colors defined in the MDG will be displayed.
- If MDG is not available, then a random color will be applied for the stereotype in the Analyzer view
How to configure custom colors?
To apply a custom color for a stereotype, click on Edit under Actions for the stereotype for which you apply a custom color. Pick a color using the color picker and save the changes.
Click on More under Actions of a Modeling Language and choose Apply Custom Icons and Colors.
How to visualize?
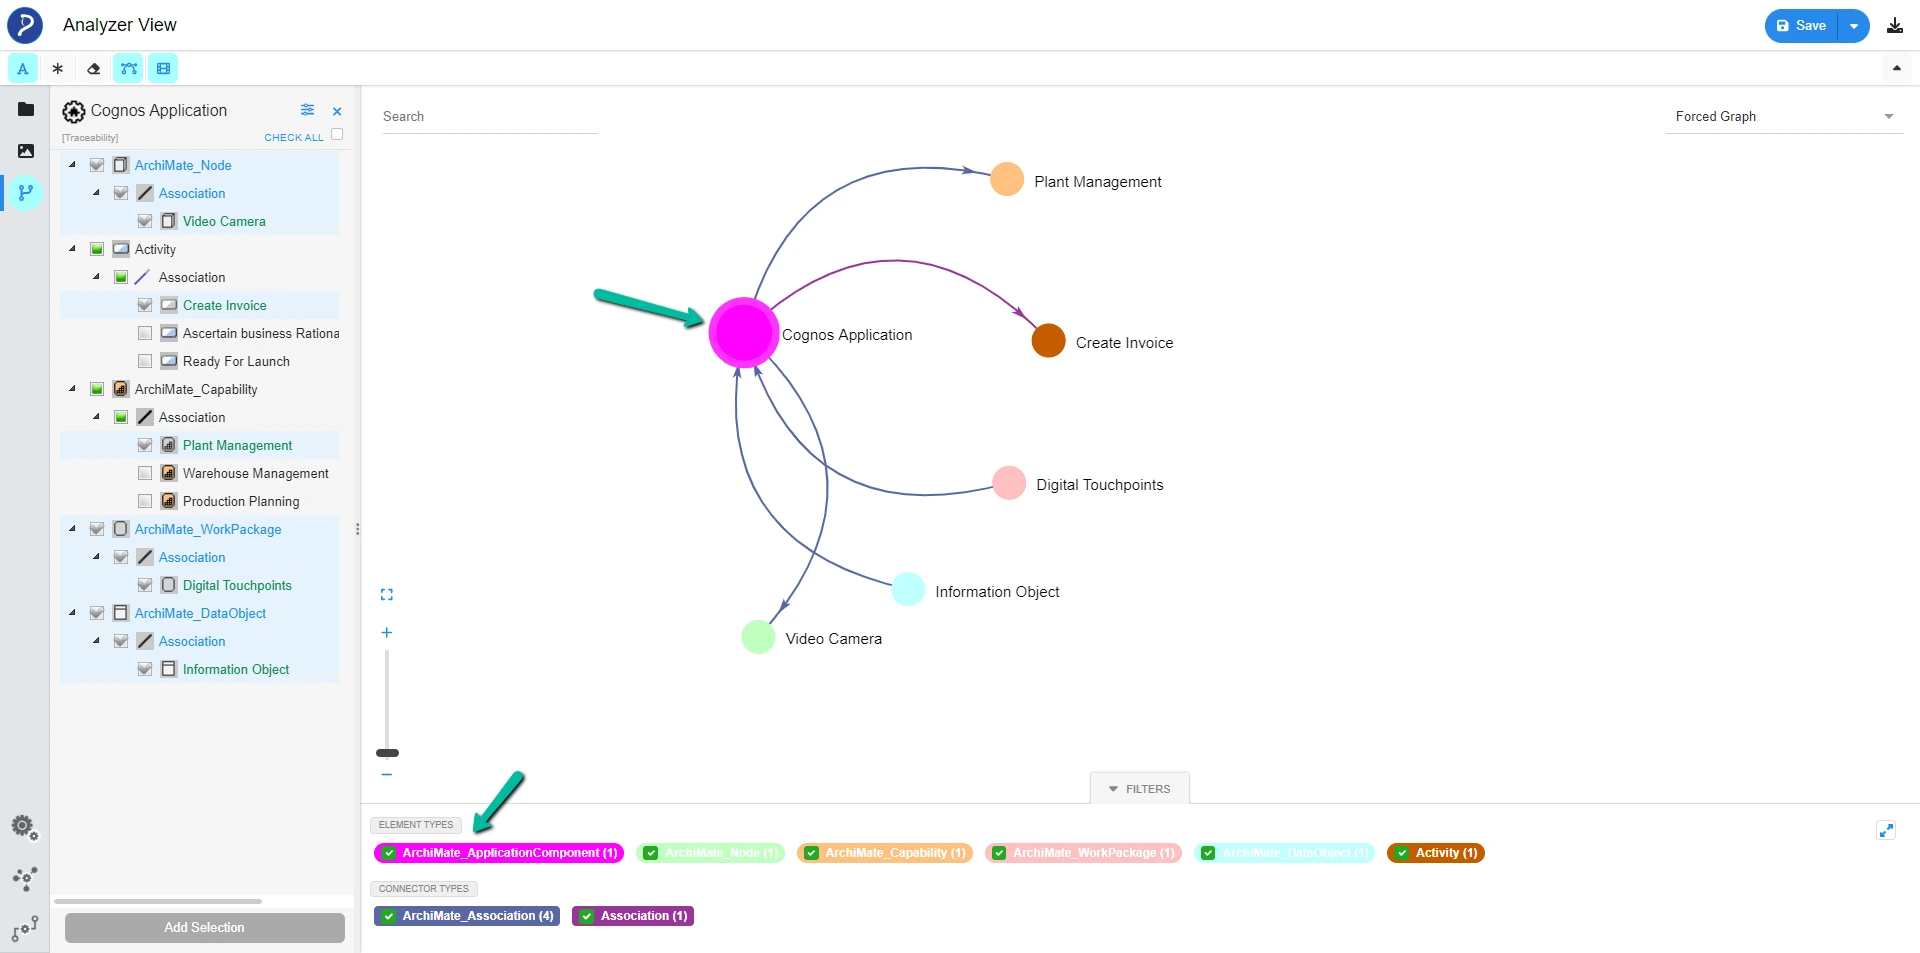
The color applied to the stereotype is applied to all the nodes of that stereotype in the Analyzer view.
Limitations
The color applied for a diagram stereotype will not be reflected in the Analyzer view.