Configure Modeling Languages
Configure Modeling Languages
Prolaborate redefines the way of working on Modeling Languages in Enterprise Architect. Prolaborate is not limited to bringing MDG technology from EA to Prolaborate but it also simplifies the creation of custom forms, facilitates defining the precise blend of properties, maximizes the relevance of attention by avoiding overwhelming information for users, etc.
By importing MDG in Prolaborate you can accomplish the following at ease
- Manage Modeling Language.
- Show & Hide General Properties in Properties Window.
- Formulate Properties Window for a specific User Group.
- View the Result of Configuration.
Note:
- Due vigilance is required since the configuration of the Modeling language is repository-specific, hence any changes will impact all the users/ user groups in the repository
How to Add Modeling Language?
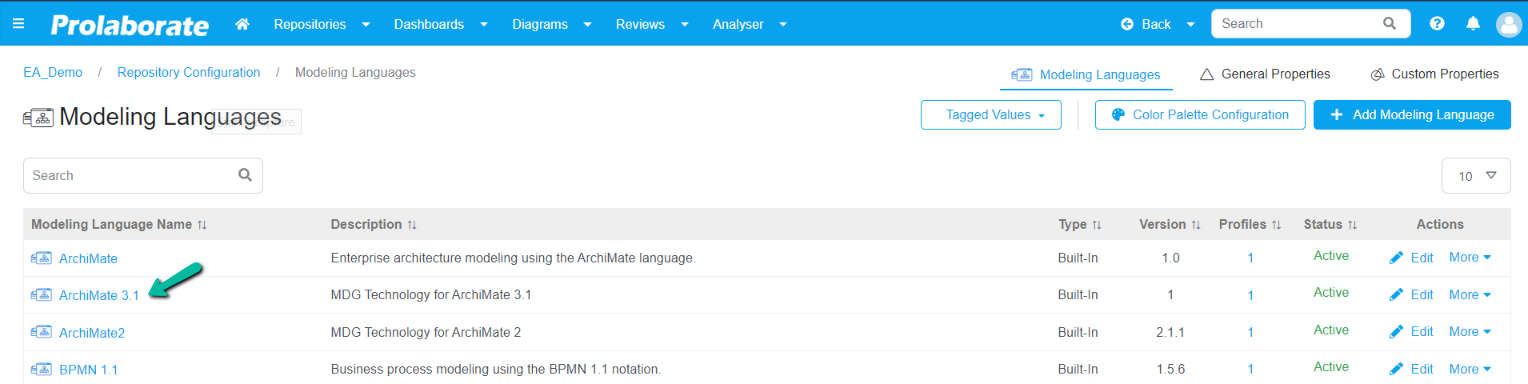
Modeling Languages or MDGs form the core of modeling in Enterprise Architect & Prolaborate. To Import a modeling language, Select a Repository > Menu > Modeling Languages (Under Repository Configuration Section) > click on Add New Modeling Language
Note:
- Modeling Languages of ArchiMate, BPMN, UML, Whiteboard are available in Prolaborate by default. Those can be added by using choose from existing MDG option when adding a new modeling language in Prolaborate
- From Prolaborate V5.2.0 onwards, SysML 1.4 MDG is available as one of the default MDG which is equivalent to SysML 1.5 in EA. (Due to certain limitations in PCS, though the artifacts are from SysML 1.5, it is stored SysML as 1.4)


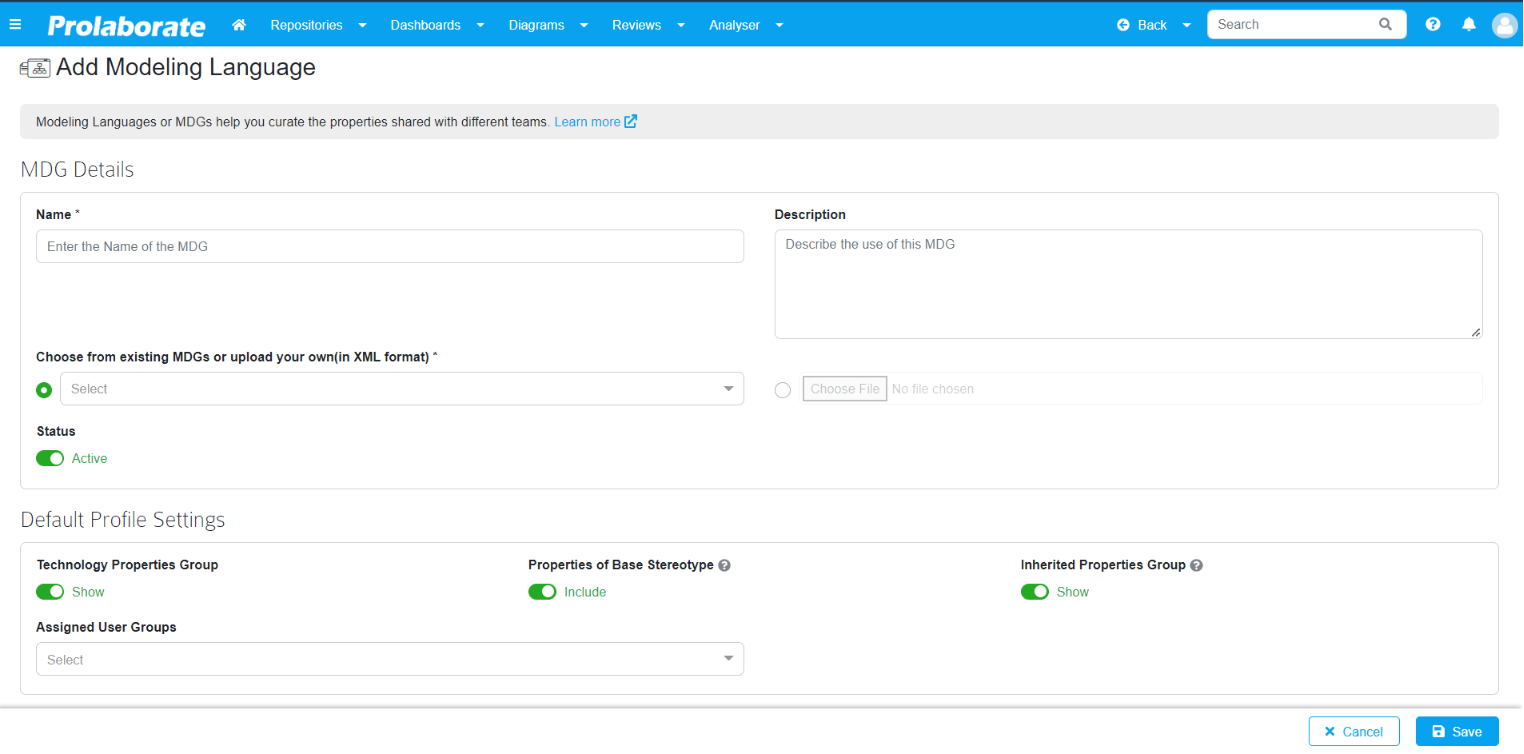
Please fill out the form as per the instructions below:
| Field | Description |
|---|---|
| Name | Enter the name of the MDG Technology |
| Description | Give a description explaining its purpose |
| Choose from existing MDGs or upload your own (in XML format) | Choose from the existing list of MDGs or upload a valid MDG Technology file. Please use the Edit option if you want to upload an updated MDG file as you cannot add the same MDG technology file again. |
| Status | Status will be active by default. Do not change it unless you don’t want this to be used anywhere in Prolaborate. |
| Properties of Base Stereotypes | If this setting is enabled, MDG Technologies of Base Stereotypes needs to be present already to add the current MDG. For example, if you have an MDG file-based out of BPMN 2.0, BPMN 2.0 needs to be pre-set already in Prolaborate and only then you can upload your MDG file. Disable this setting if you don’t want to bring in inherited Properties to the form. Please note this setting cannot be undone once it is saved. |
| Technology Properties Group | If this setting is set to Show, Technology Properties will be visible in the Properties Window of all the Stereotypes in this MDG. Disable this flag if your users need not see the Technology Properties. Please note this setting cannot be undone once it is saved. |
| Inherited Properties Group | If this setting is set to Show, Inherited Properties will be visible in the Properties Window of all the Stereotypes in this MDG. Disable this setting if your users need not see the Inherited Properties. This setting will be applicable only if the “Properties of Base Stereotypes” setting is enabled amd cannot be undone once it is saved |
| Assigned User Groups | List all the user groups available in the repository, and the default profile can be assigned to specific user groups if they are selected |
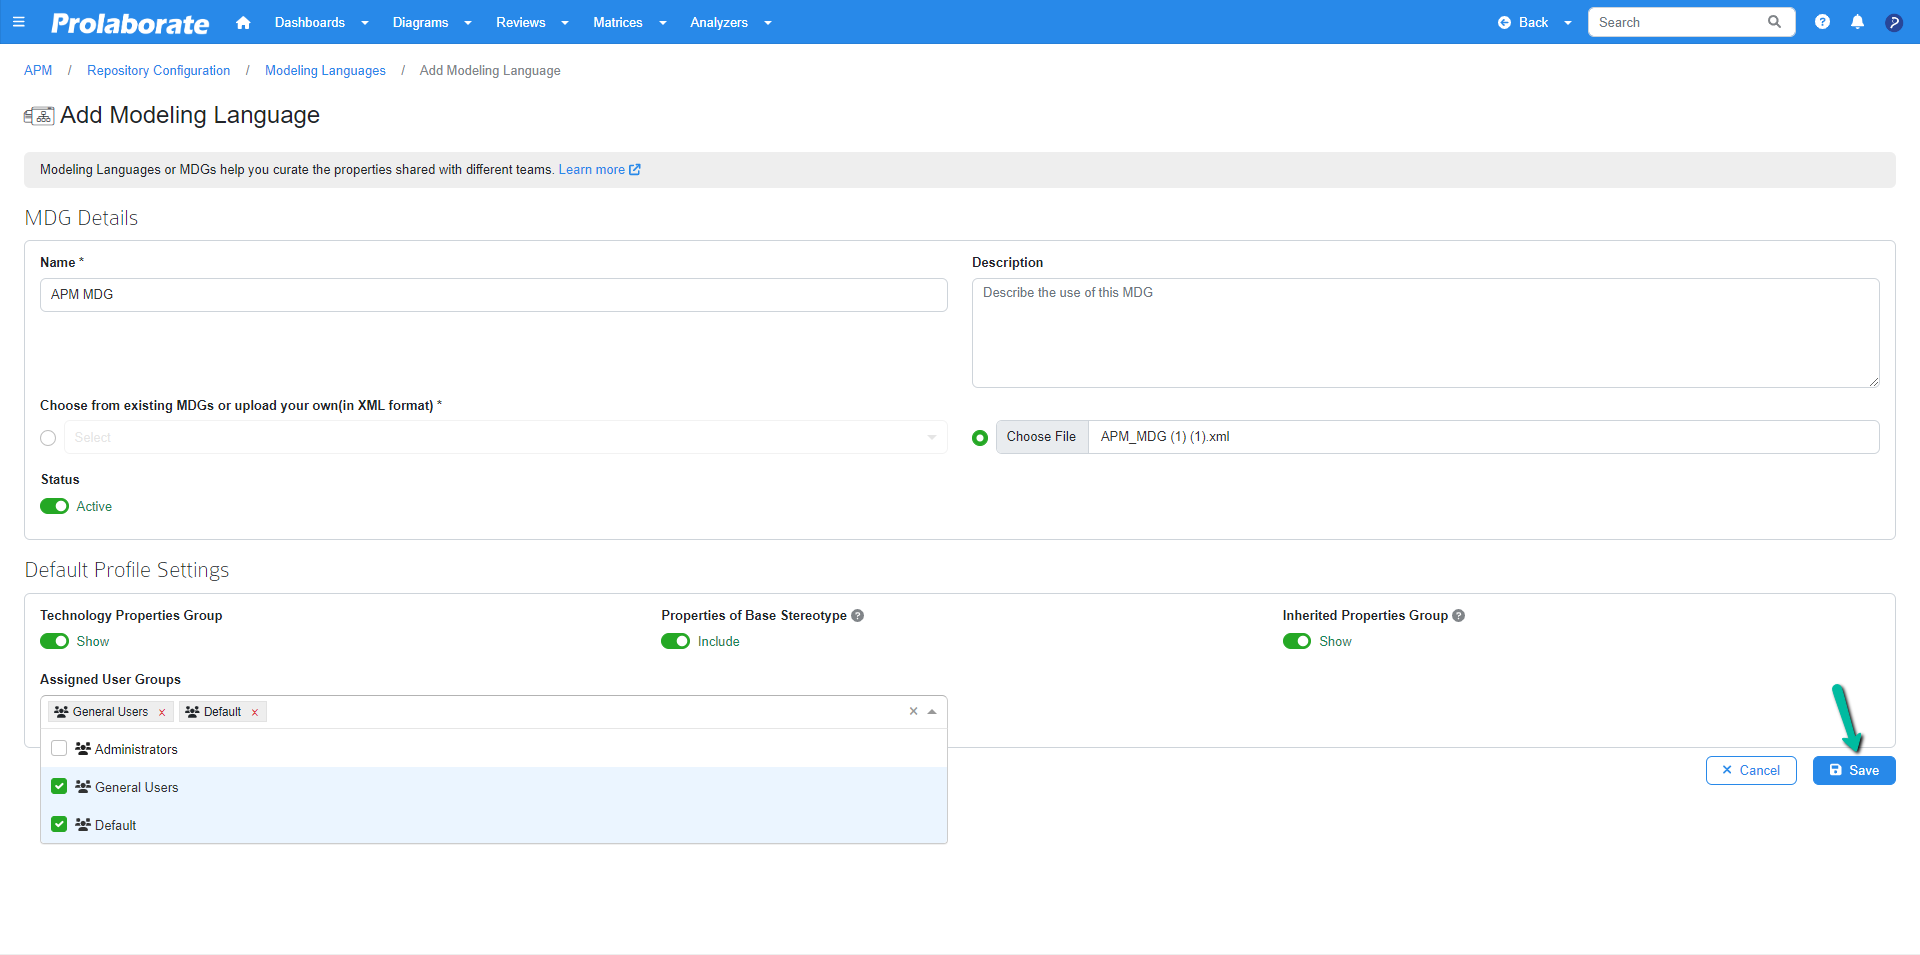
Once you have filled up all the details, click on Save.
Note:
- From Prolaborate V4.4.2 onwards, Modeling Language files whose stereotypes are defined using Swedish, French, German, Dutch, Polish, Japanese and Russian languages are supported
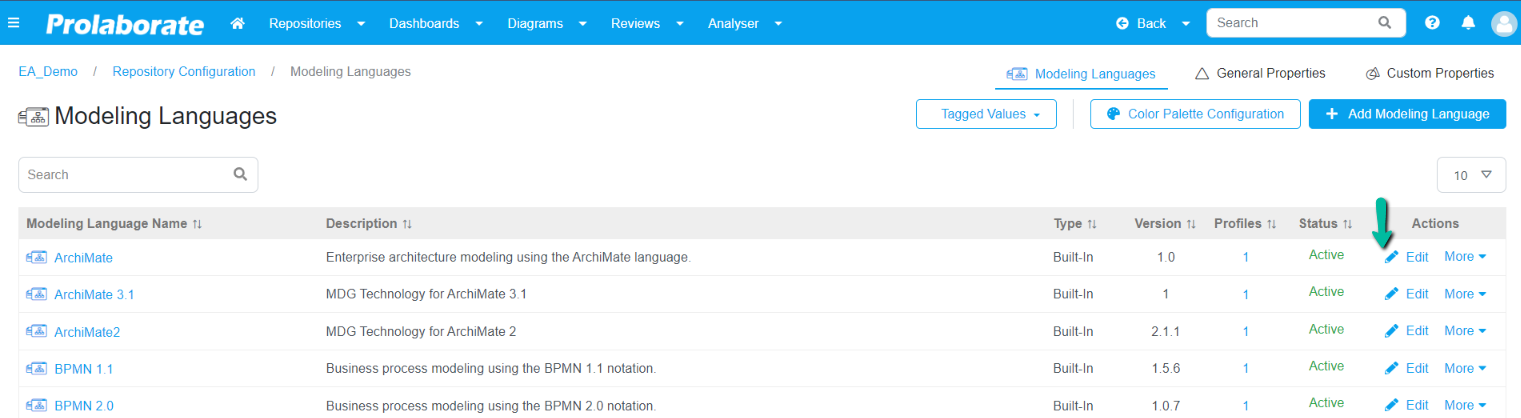
Steps to Edit Modeling Language
The list of all ‘Add MDGs’ will be available in the Modeling Language page. If you have made some changes in the MDG file after you have uploaded it in Prolaborate, you can just use the Edit option and upload the updated MDG file.
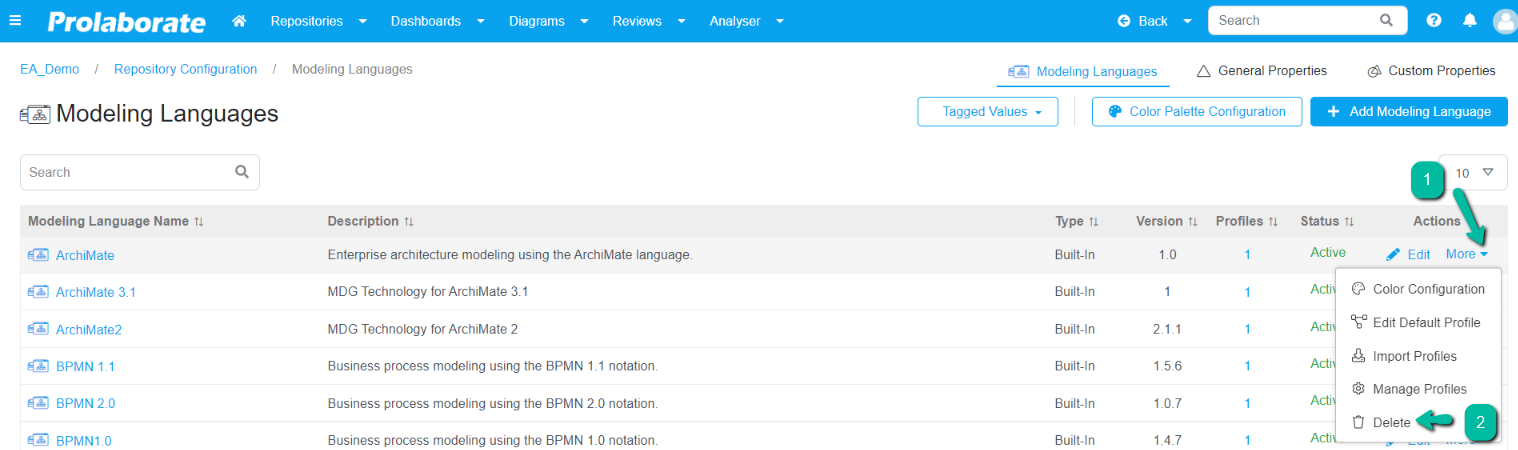
How to Delete Modeling Language?
To delete a Modeling Language, click on More > Delete.
In the upcoming section, we will see how these settings impact the Form Configuration of Stereotypes in the MDG.
Note:
- This upload will not impact the Prolaborate settings which you have done in that MDG.
How to Show & Hide General Properties in Properties Window?
Manage General Properties
To manage general properties such as name and notes in artifacts, click on Menu > Modeling Languages.
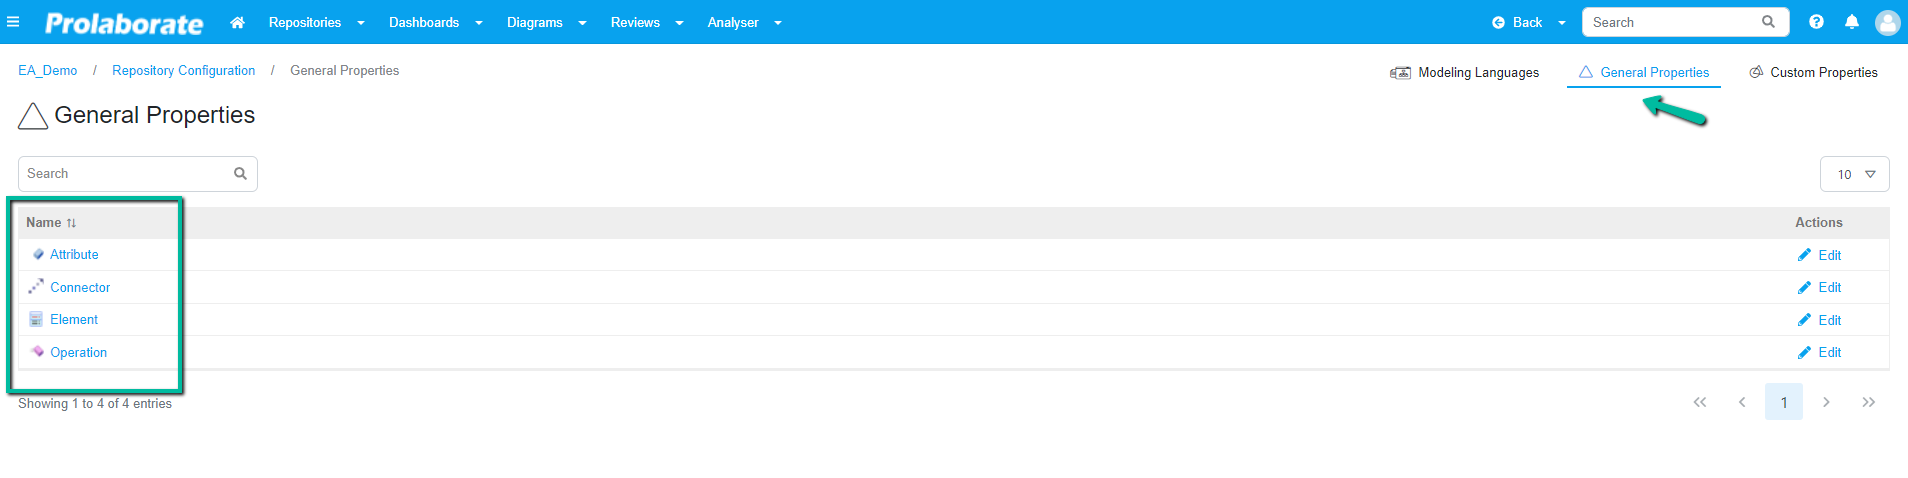
On the landing page choose General Properties. The General Properties page will list all the artifacts and on selecting the artifacts you can view properties, set default properties, etc.
Choose General Properties to display
Prolaborate authorizes admin to set the General Properties which user needs to see by default. The default general properties can be set for the following
- Attribute
- Connector
- Element
- Operation
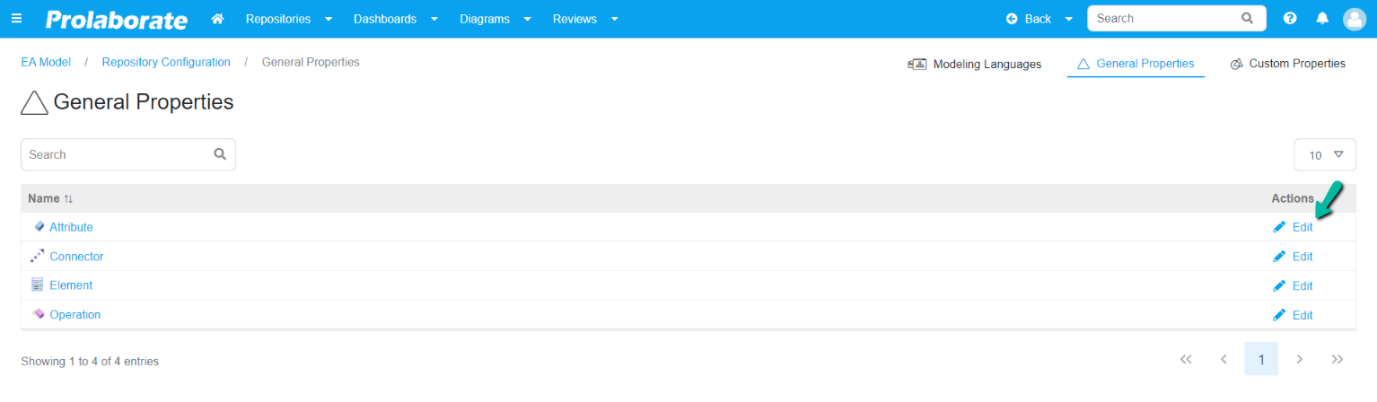
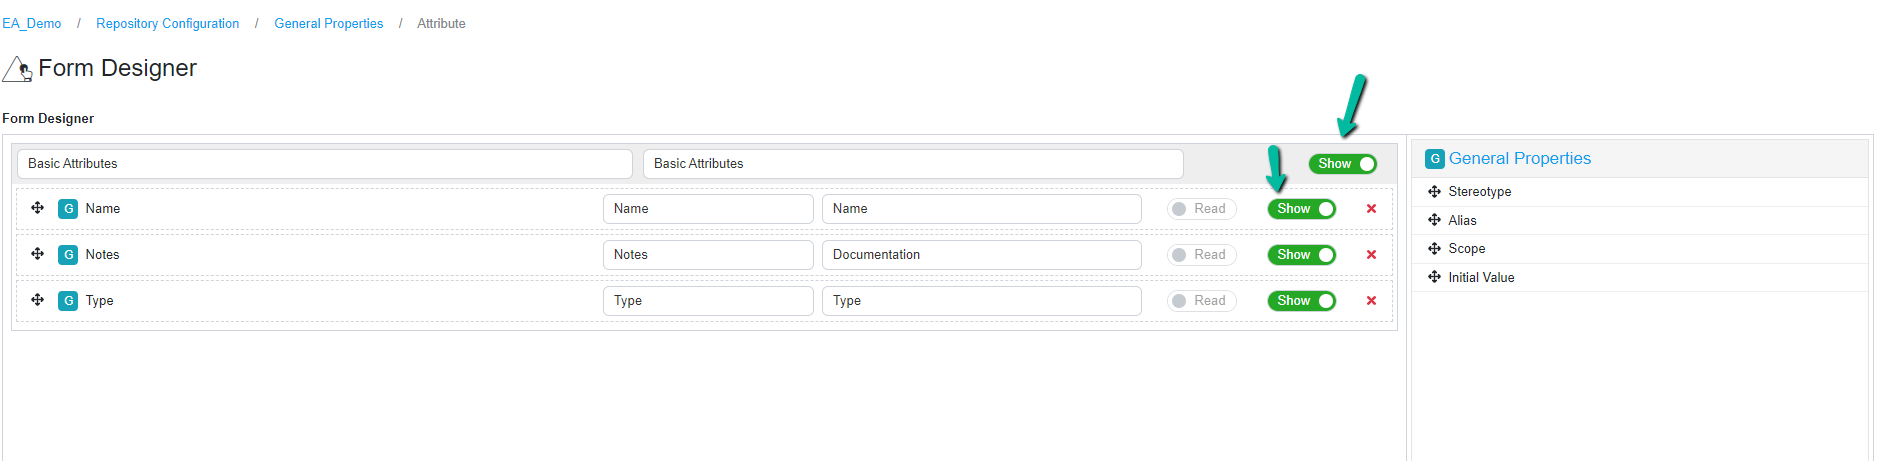
To set general properties for any of the artifacts click on Edit or click on the name of the artifact by hovering the mouse on the artifact name.
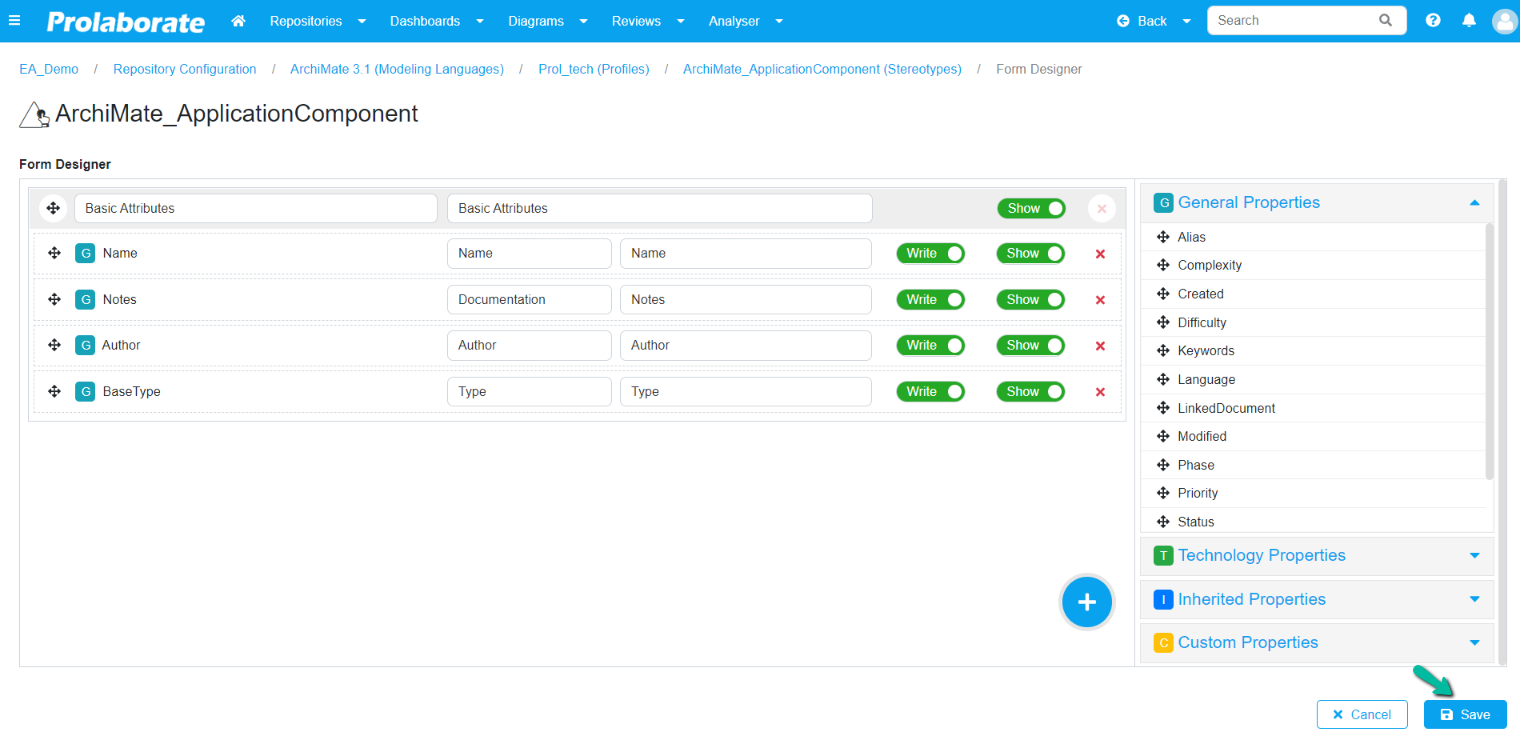
On the Form Designer page, you can see Name, Notes, Author, and Base Type are configured to be displayed by default.
Toggle the button on the Basic Attributes form to Show/Hide the entire Basic Attributes itself or to Show/Hide the Properties toggle the button across the properties
Note:
- This setting will not apply in a retrospective manner. They will apply only to new profiles and newly uploaded MDGs.
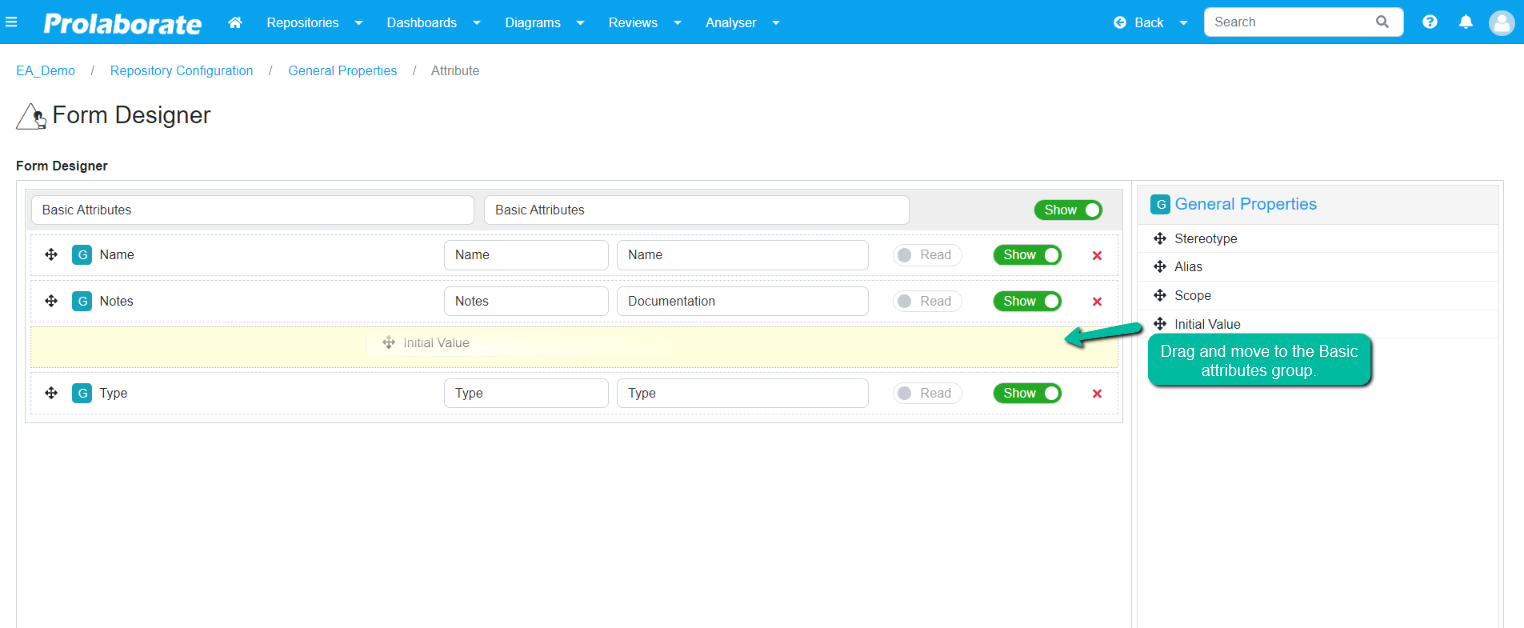
How to Add Properties in Form Designer?
To add Properties, select and drag the Properties from the General Properties Tab and move on to the Form Designer. Click Save to save the changes.
How to Remove Properties from the Form Designer?
To remove the Properties, click on the Cross Icon across the Properties and click on Save.

Steps to View General Properties of different artifact types
To see all the General Properties of any artifacts, click on Edit or click on the name of the artifact by hovering the mouse on the artifact name.

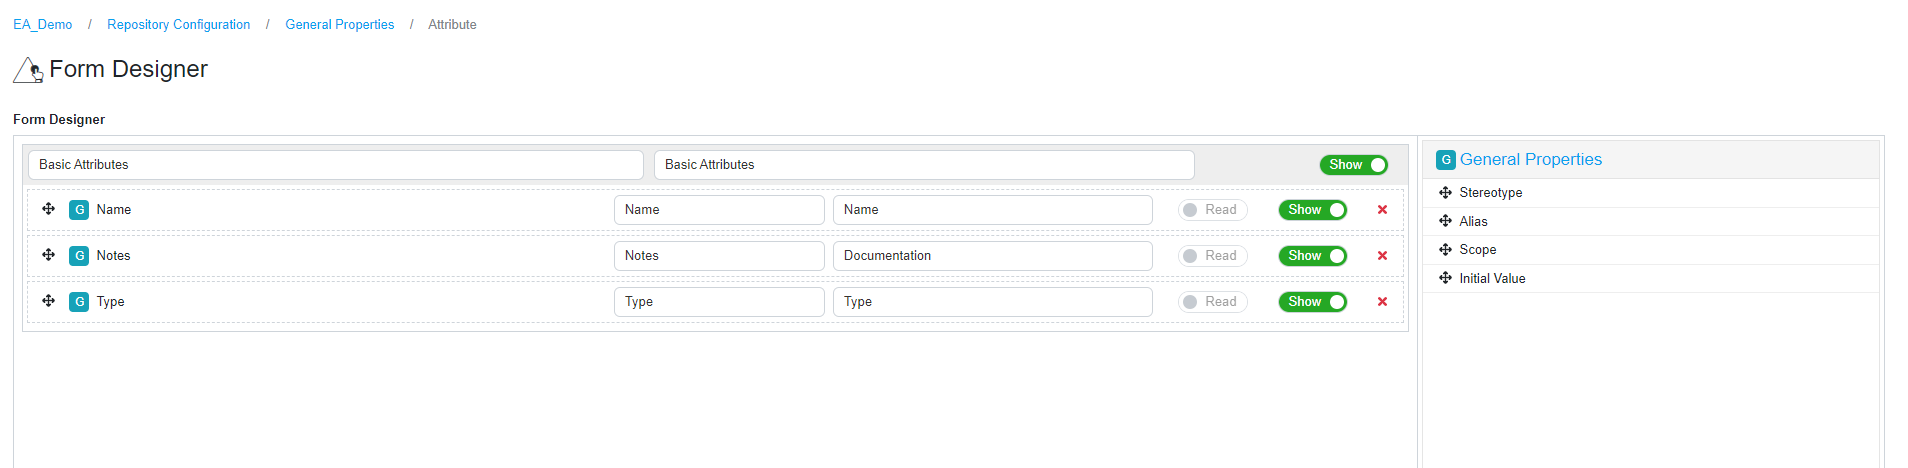
On the Form Designer page, you can see Name, Notes, Author and other general properties. The below image shows the General Properties for Attributes which are configured to be displayed.

The below image shows the General Properties for Attributes which are configured to be displayed.
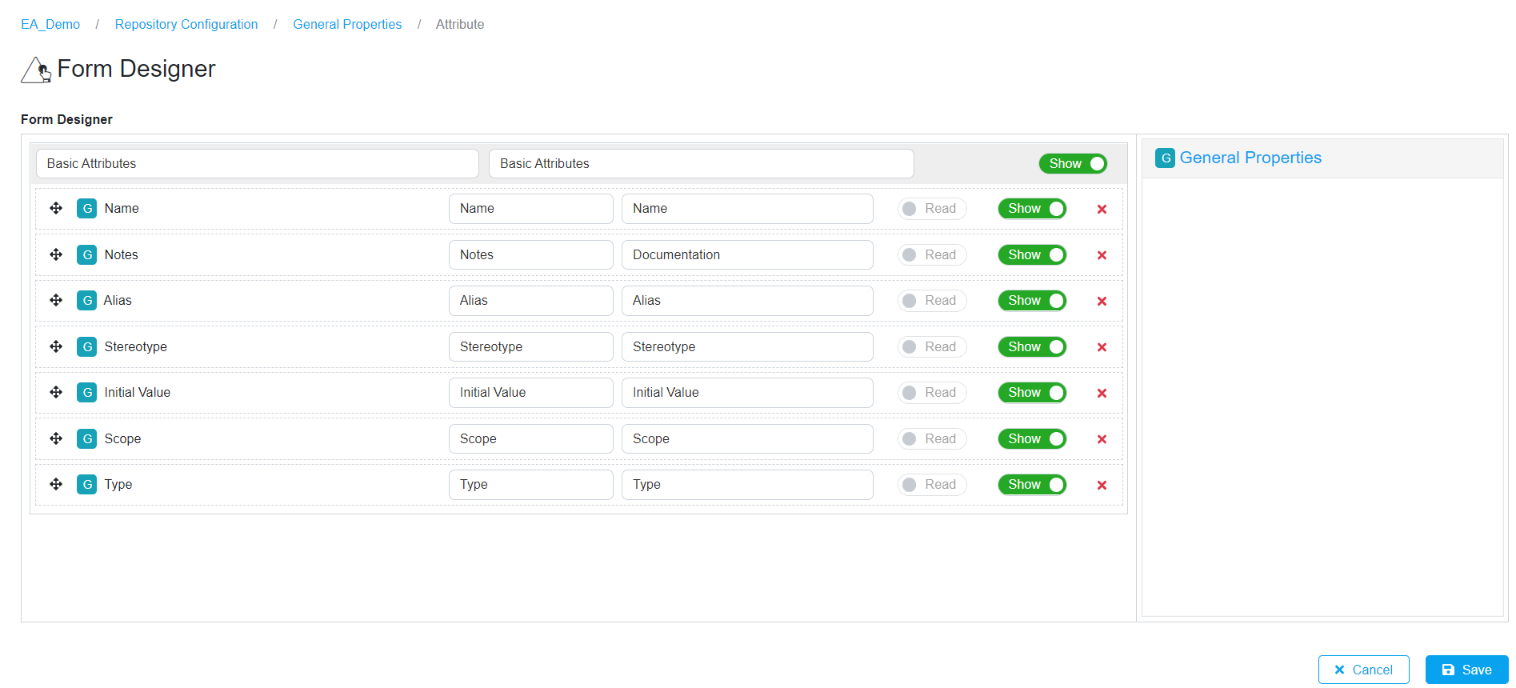
Add and remove properties as described before for Attributes, Operation and Connector. Click Save to save the changes.
Note:
The properties window of each stereotype displays attributes from the Form Designer configuration specific to that stereotype in the General Properties section. However, in some cases, elements, connectors, operations, and attributes pick properties from the General Properties when:
- A specific stereotype artifact doesn’t belong to any MDG uploaded in Prolaborate.
- Stereotypes belonging to a newly uploaded MDG pick properties from General Property Settings.
- A newly created MDG profile is assigned as the default for a user group or users.
- Unless there is a modification in properties at the stereotype belonging to an MDG profile, the basic properties will be sourced from General Properties.
Formulate Properties Window for a specific User Group
Profiles are created with a specific set of form configurations for a modeling language. By using profiles, any number of forms with a different set of form configurations can be created for a modeling language. By having profiles, you can set customized views for users. Also, multiple profiles allows one to simply switch over to have different views when required or set different profiles for different groups to have customized views.
Steps to Create Profile for a specific Modeling Language
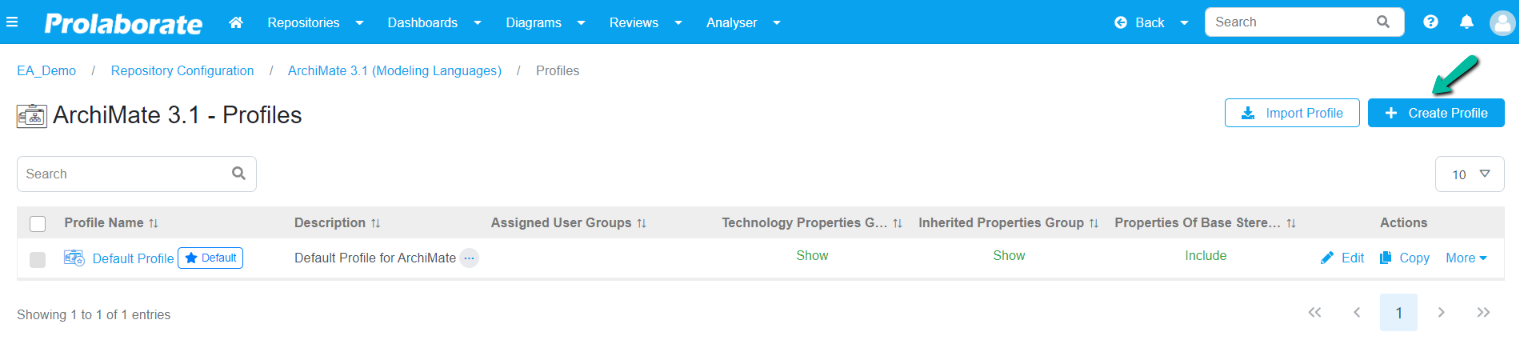
In the Modeling languages page, click on the name of the Modeling Language for which the Profile needs to be created. Once you land on the page, click on Create Profile.
Step 1: Click on the modeling language for which you want to create a Profile
Step 2: Click on Create Profile on the landing page
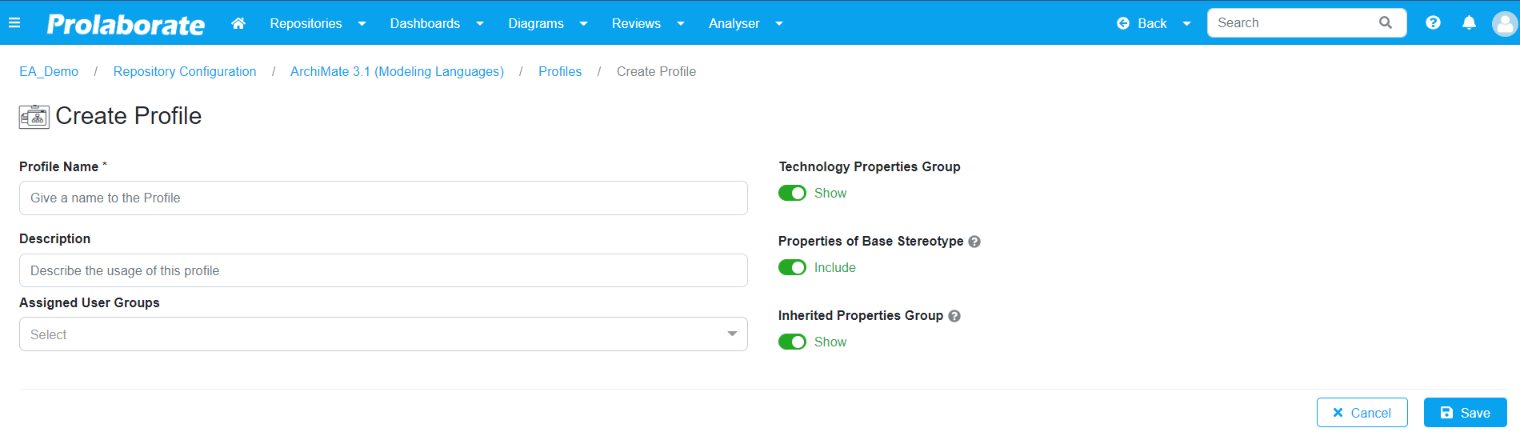
In the Create Profile page, enter a suitable name and description for the Profile. Choose a user group for which the Profile is applicable. Toggle the Properties which user must see in his properties tab and overview page and then click on Save.
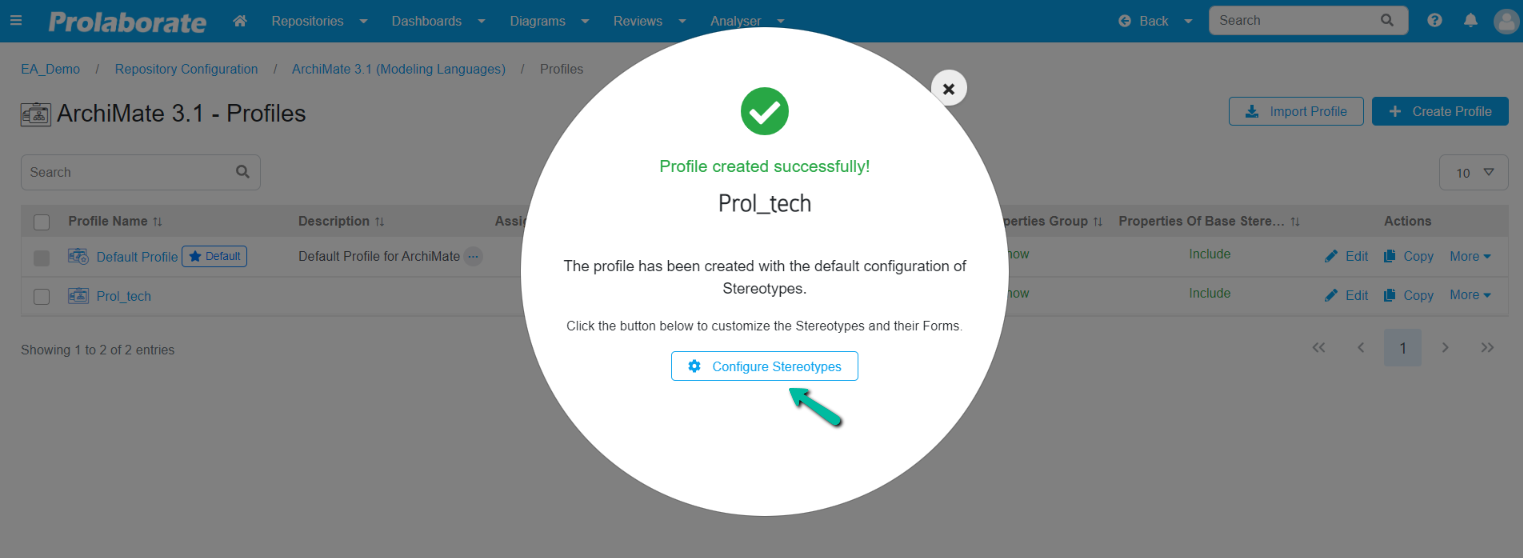
On saving the Profile Prolaborate prompts you to configure the Stereotype. Click on Configure Stereotypes to configure or you can skip to configure it later.
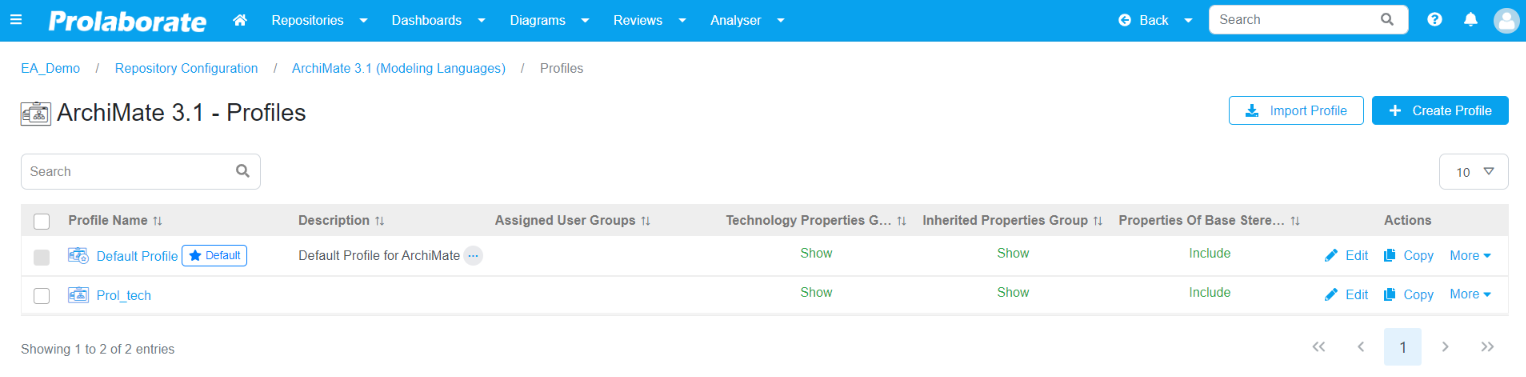
Manage Profiles
To view the Profile created under a Modeling Language click on the Modeling Language. The landing page lists all the Profile including the default profile created for the particular Modeling Language.
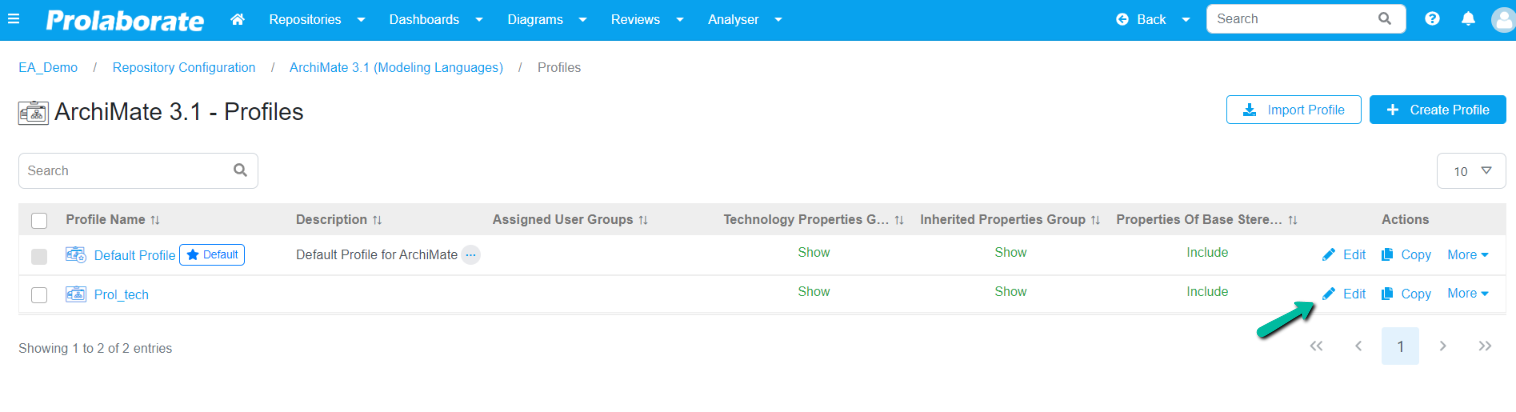
Edit Profile
To edit a Profile, click on the Edit Icon.
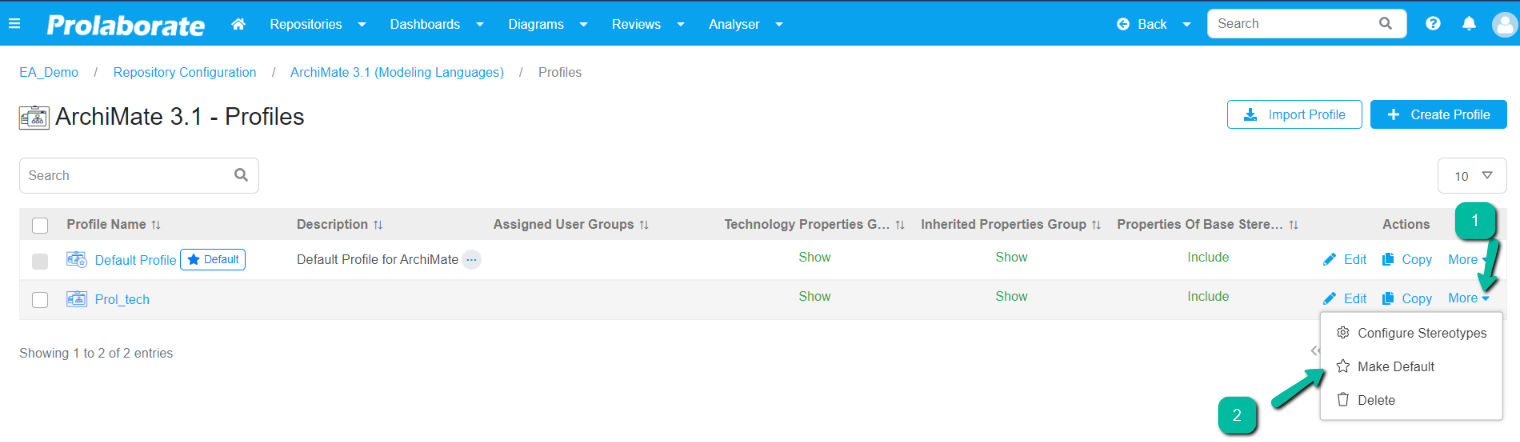
Make Default Profiles
When you have different Profiles and want to make one of them as default, go to More > Make Default.
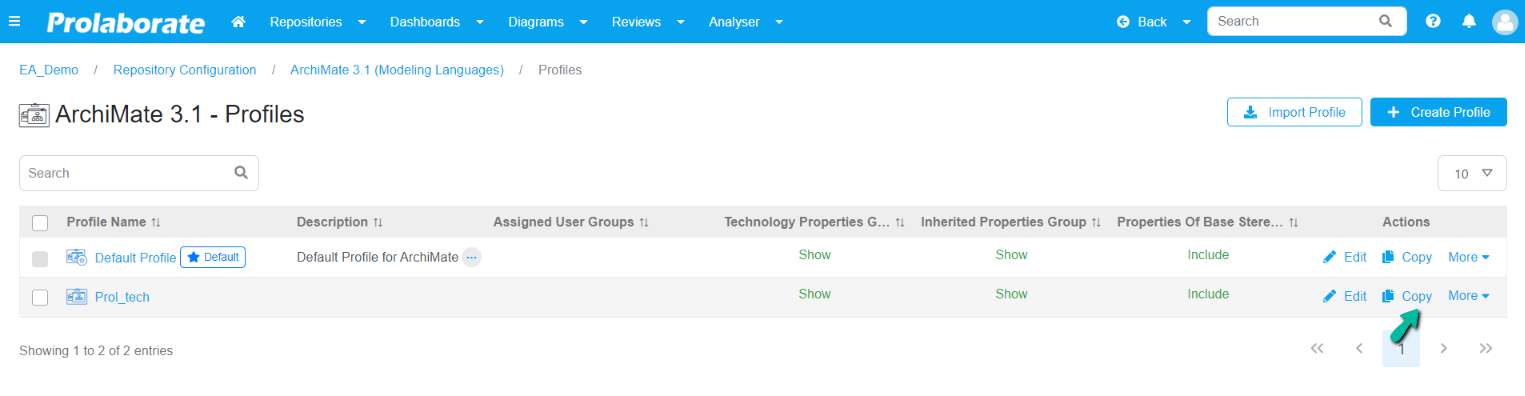
Copy Profile
To copy a Profile, click on the Copy Icon.
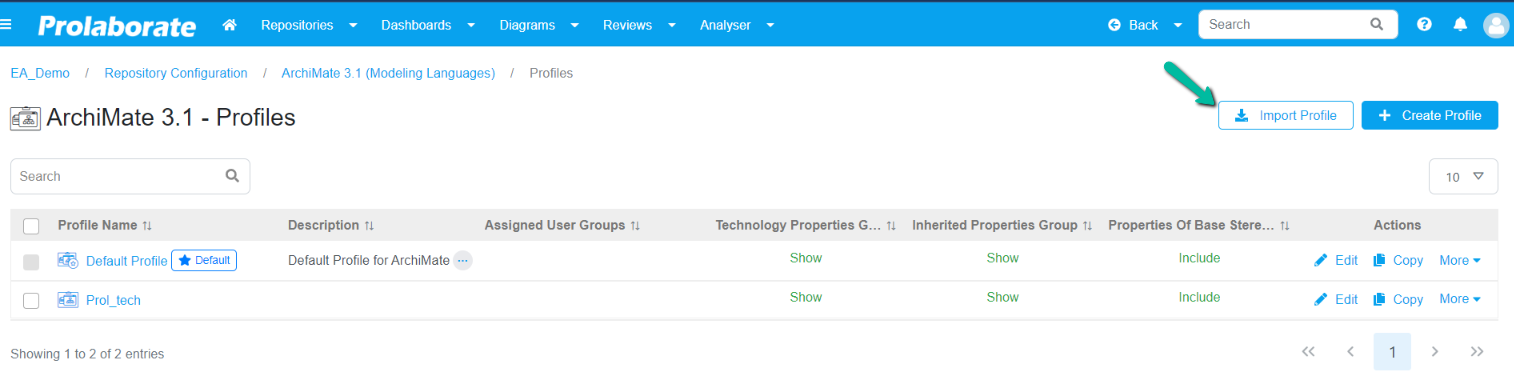
Import Profile
To import Profiles, click on Import Profiles.
Delete Profile
To delete the Profile, click on More > Delete.
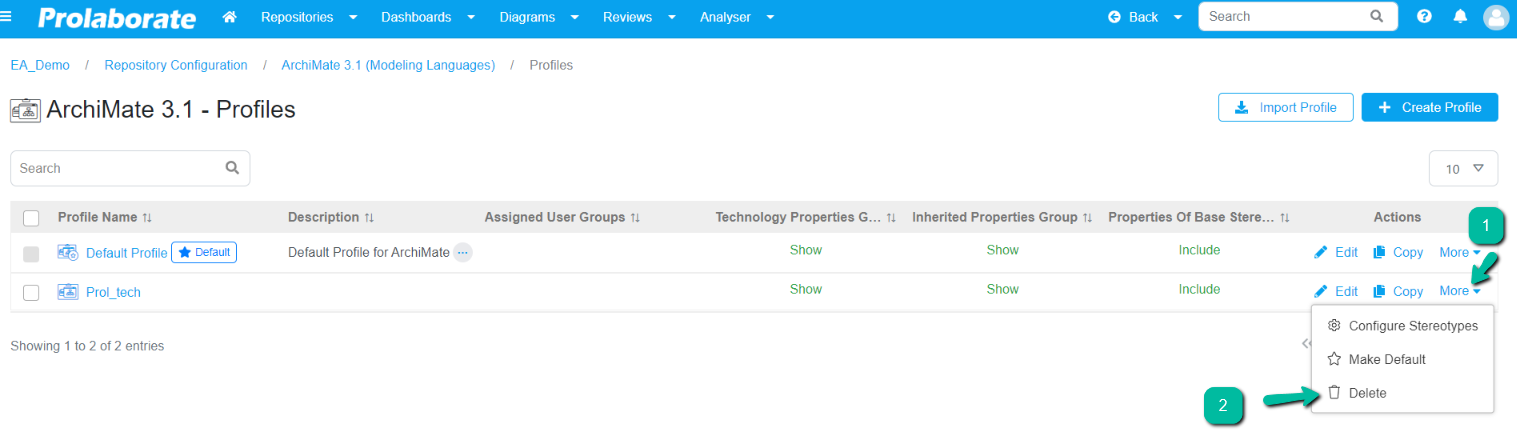
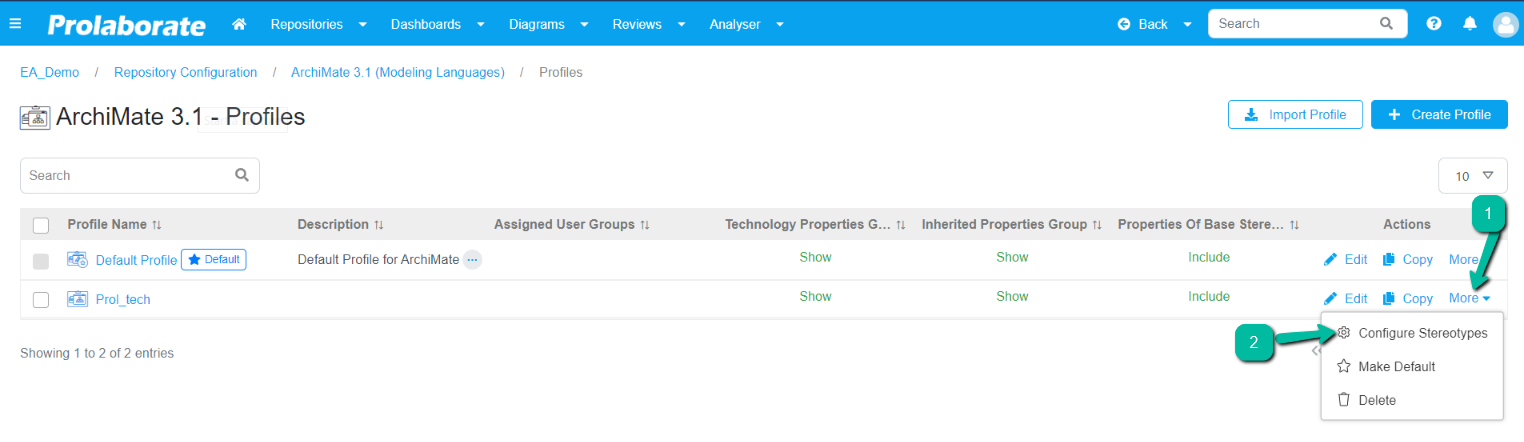
Configure Stereotypes
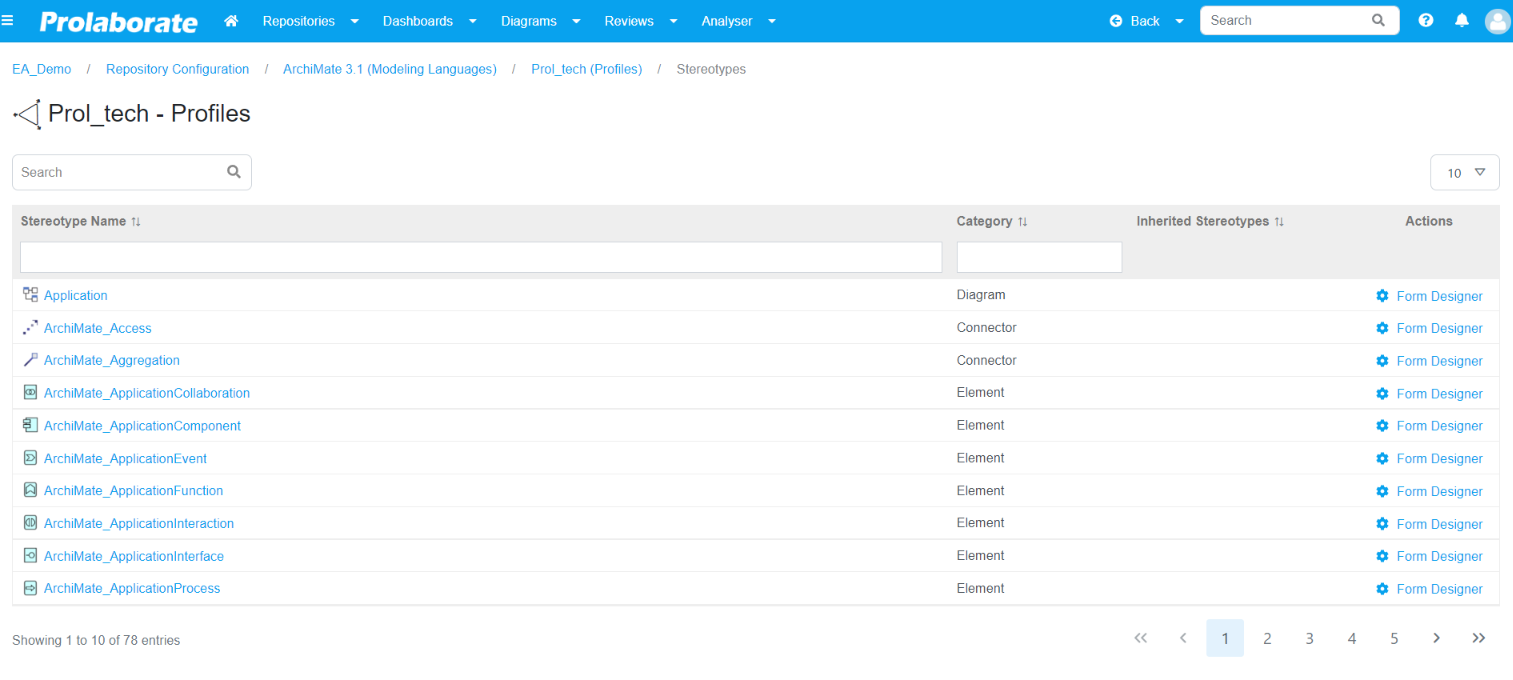
To Configure Stereotypes for the Profile click on More > Configure Stereotypes.
Click the Stereotype Name for which you want to configure Properties or click on the Form Designer across the Stereotype.
Add Properties group via form designer
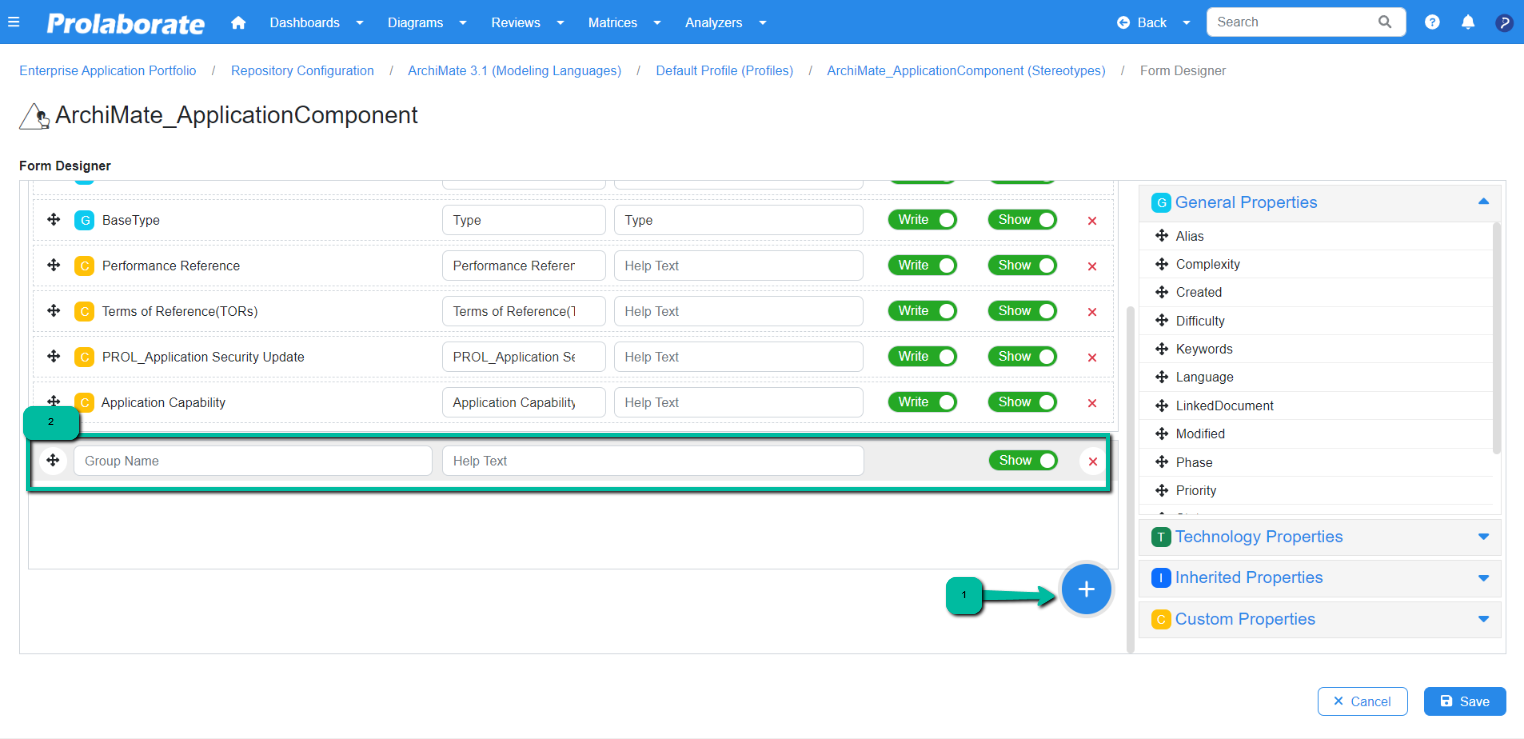
Defining a group in the form designer, allows you to efficiently organize and structure properties (tagged values/custom properties) within the forms. User can group properties by categorizing tagged values to enhance the clarity and usability of the forms. Follow these steps to add a group in Form Designer:
Click on the Add Group `+` icon to create a group. A text area will appear, prompting user to enter a Group Name and Help Text (Optional).
Note:
There are four groups in each stereotype. Users can pick tagged values from these groups.
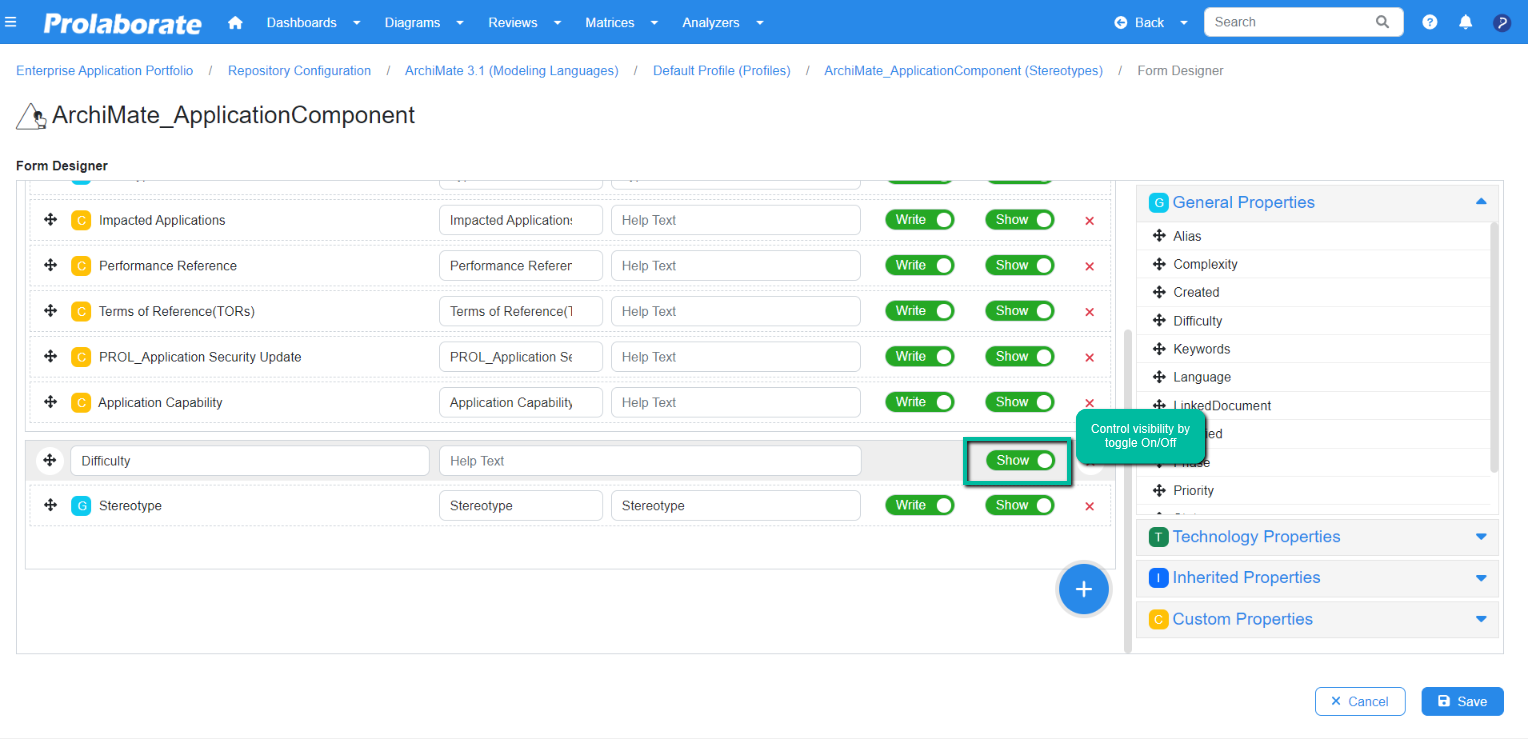
To include tagged values in the group, simple drag and drop them into the group area that was just created.

You can toggle the visibility of the group using the on/off switch, allowing you to control whether the group is accessible or hidden in the form.
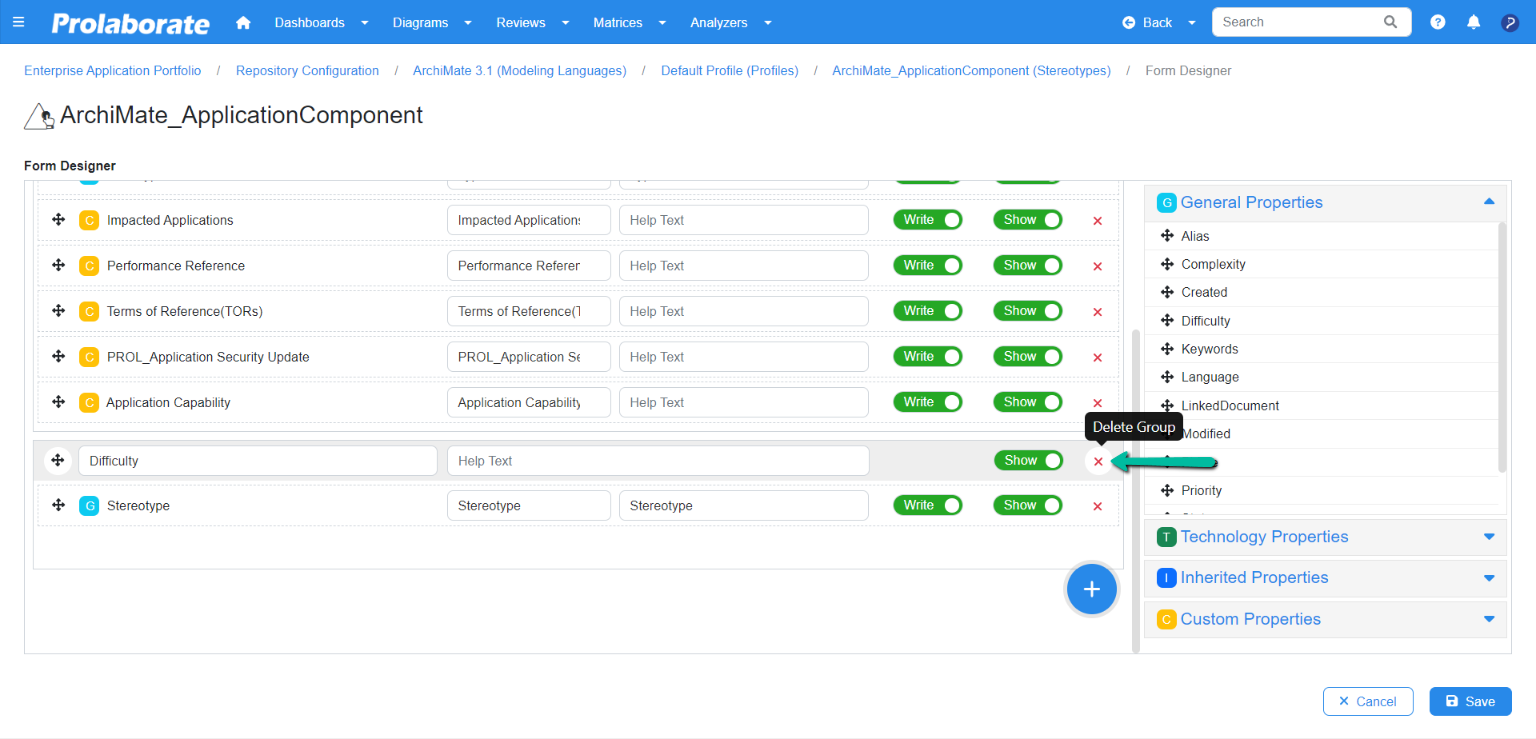
If you need to remove the group from the form designer, click on the Delete Group `X` icon associated with the group.
There are four groups in each stereotype
General Properties Group Setting
General Properties are common or basic attributes such as Name, Notes, Status, etc,..
On the Form Designer page, add General Properties by dragging and dropping to the Basic Attribute section. Toggle show or hide option to display them and write or read option to edit them respectively. Click Save once the Properties are configured and to save the changes made to the Profile.
Technology Attributes Group Setting
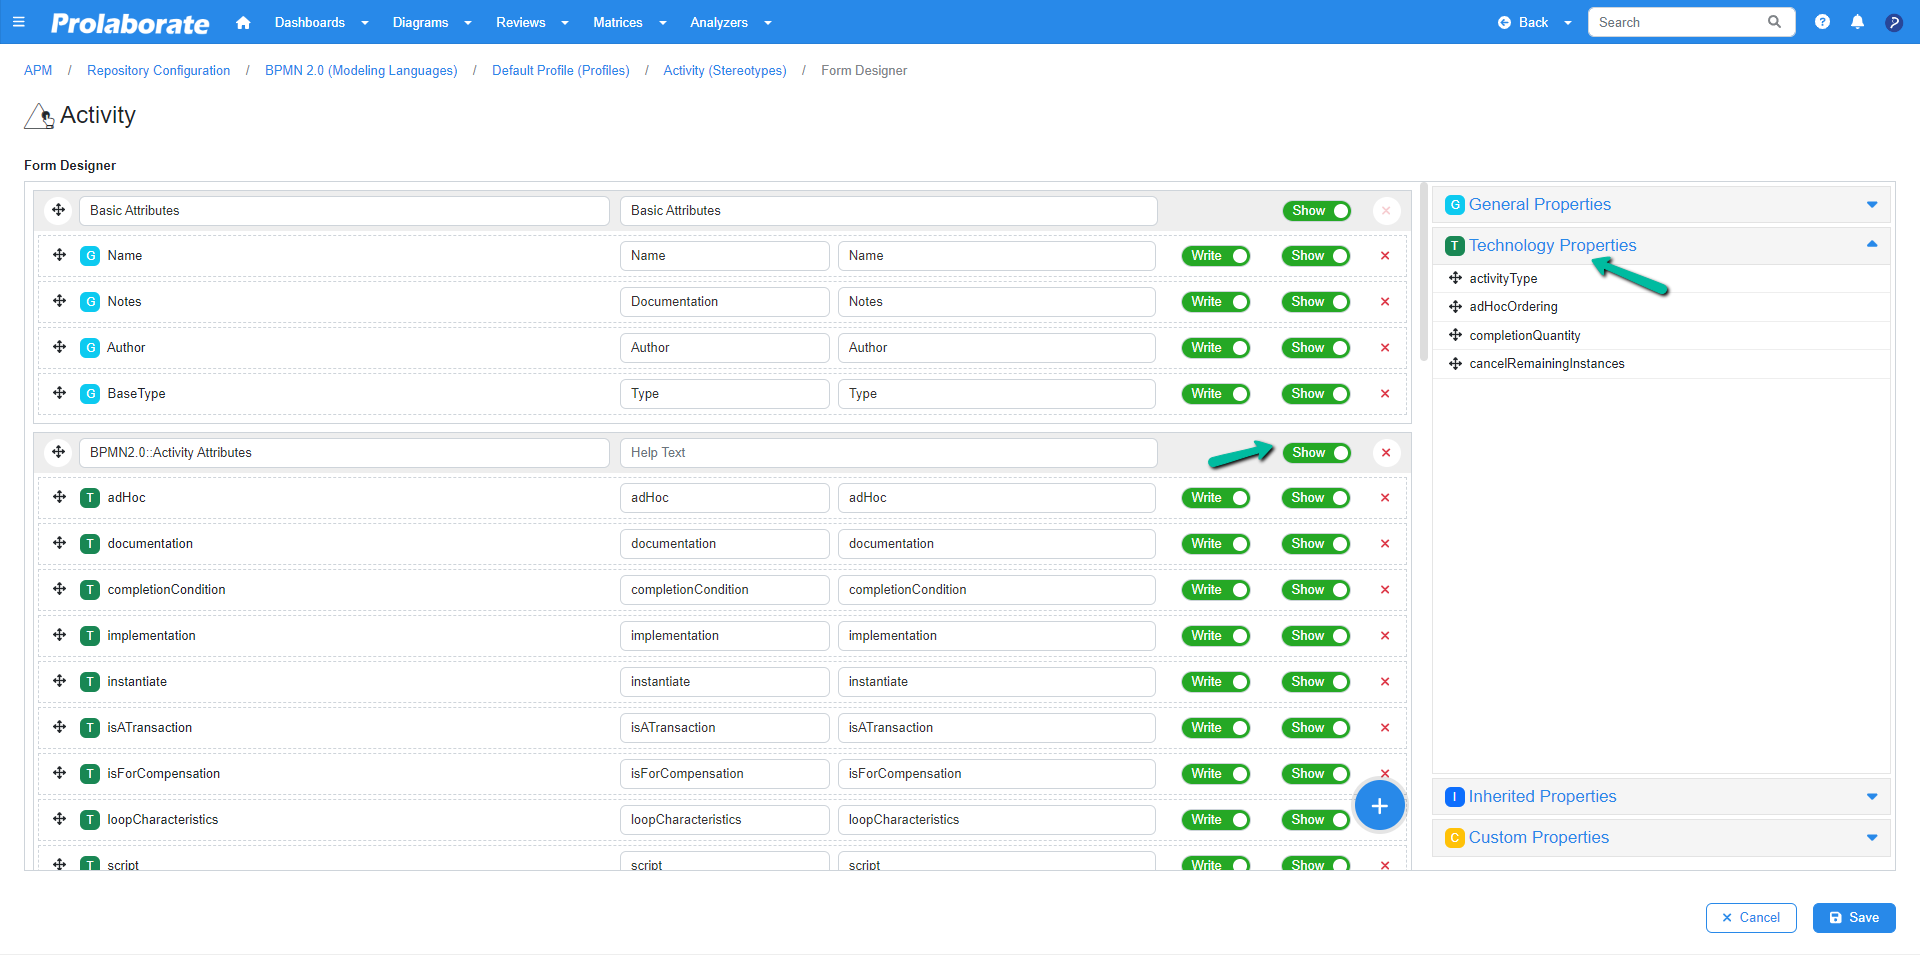
In BPMN modeling language or custom MDGs, certain stereotypes have predefined properties in them and those properties will be displayed under Technology Properties section for those stereotypes in Prolaborate.
Users can do the following:
- Change the Name of the Property Group.
- Add a Help Text to the Properties if your users need guidance.
- Toggle the button on the Technology Attributes form to Show/Hide the entire Attributes itself or Show/Hide the Properties toggle.
- Add Properties by dragging and dropping them on the section.
- Remove Properties.
- Toggle between write or read option to edit them respectively.
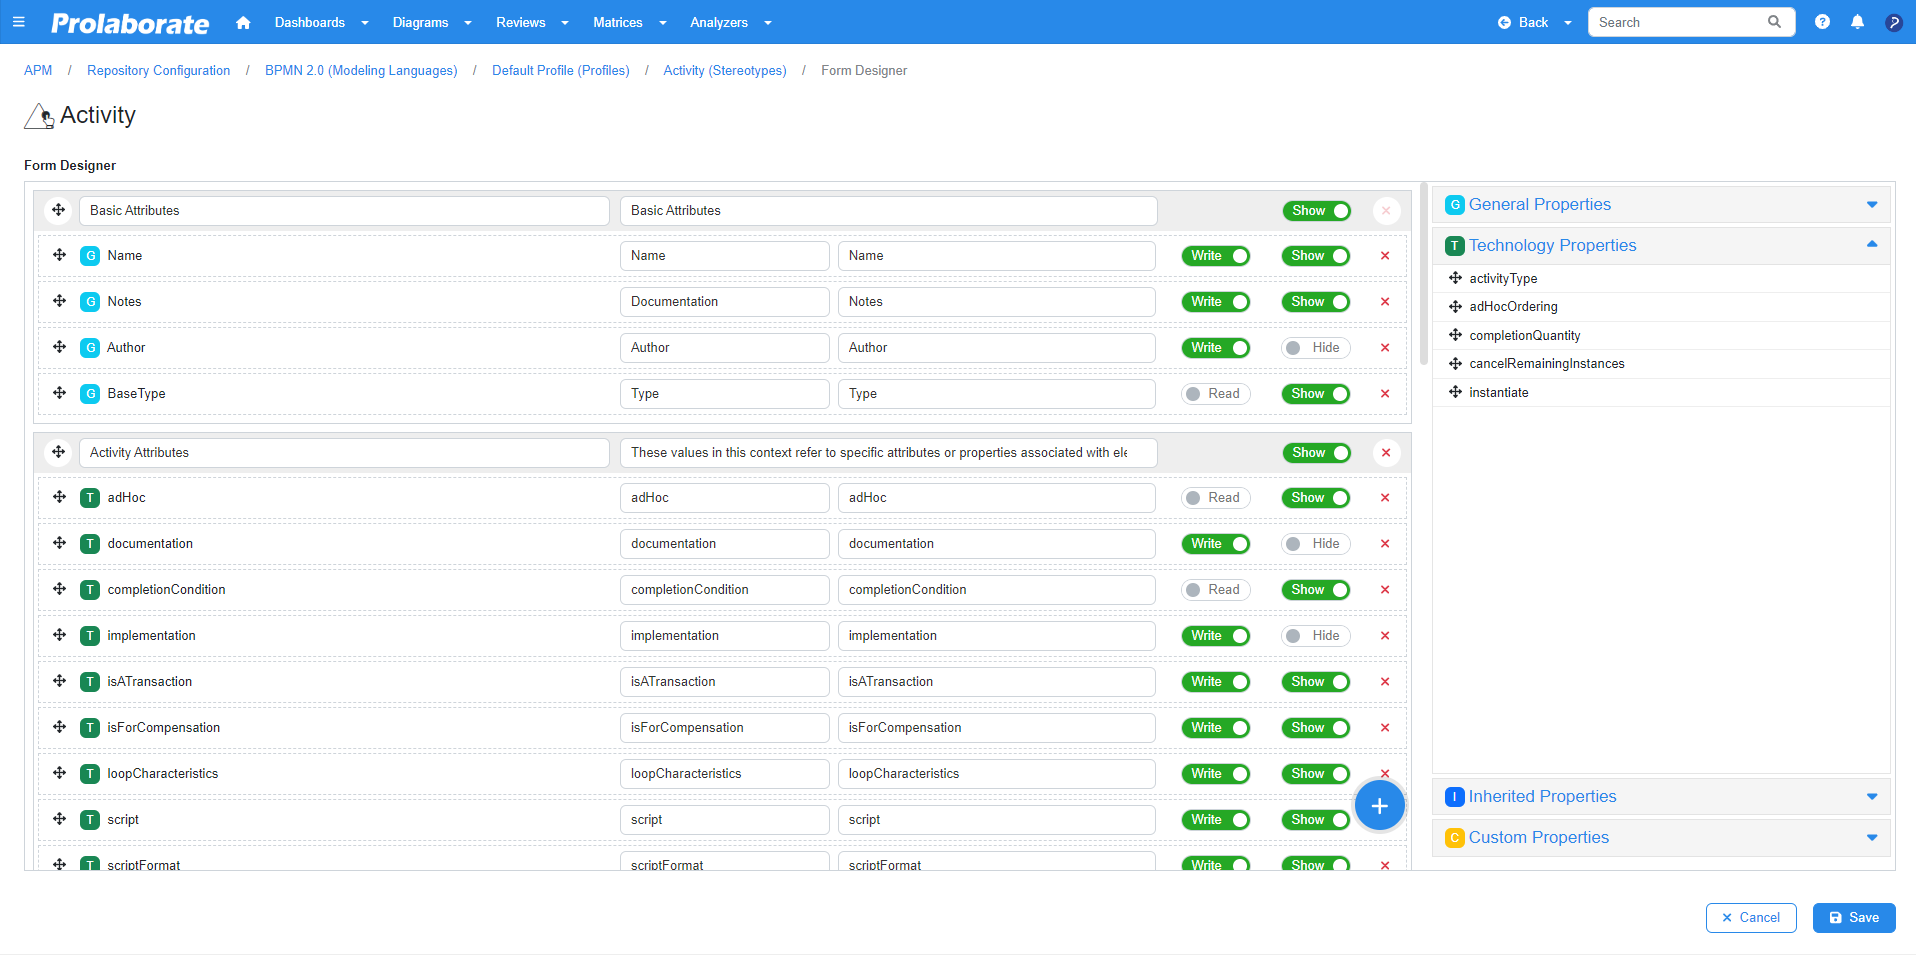
Once you are done, click on Save in the Form Designer to save the changes.
Inherited Properties Group Setting
In custom MDG, stereotypes can be created and extended with other Modeling Language stereotypes in order to inherit properties from others to their properties. Those properties comes under Inherited Properties where user can do the following,
- Change the Name of the Property Group.
- Add a Help Text to the Properties if your users need guidance.
- Toggle the button on the Inherited Attributes form to Show/Hide the entire Attributes itself or Show/Hide the Properties toggle.
- Add Properties by dragging and dropping them on the section.
- Remove Properties.
- Toggle between write or read option to edit them respectively.

Once you are done, click on Save in the Form Designer to save the changes.
Custom Properties Group Setting
The Custom Properties section on the Form Designer page shows you the list of Properties that are created by the user and your peers. You can drag and drop custom Properties to the form of the required stereotype.
How to Add Custom Property?
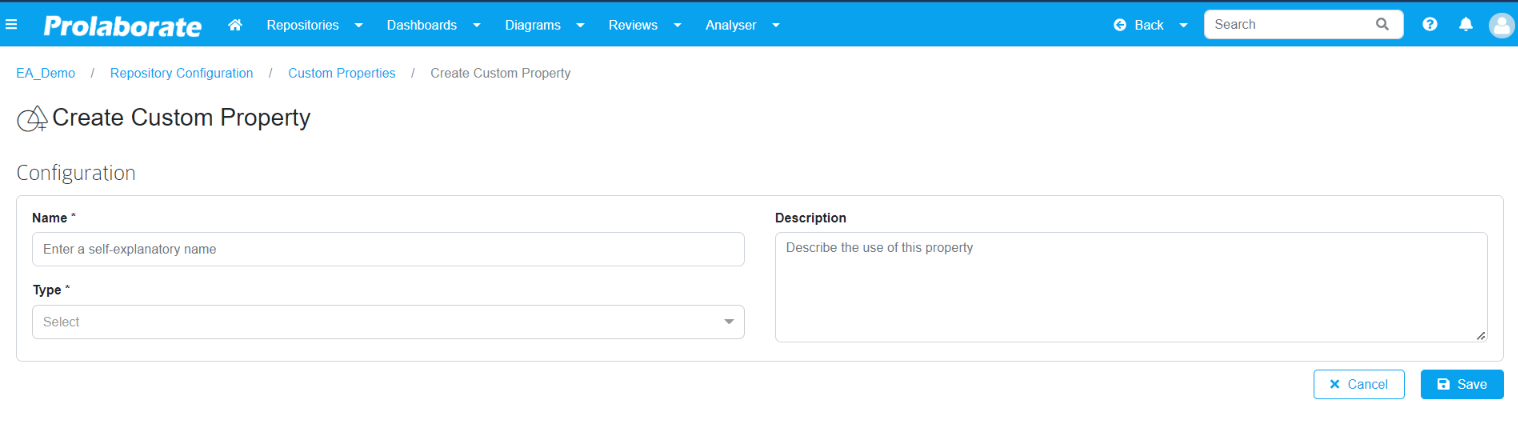
To create a new custom attribute, click on Custom Properties then click Add Custom Property button from the page.
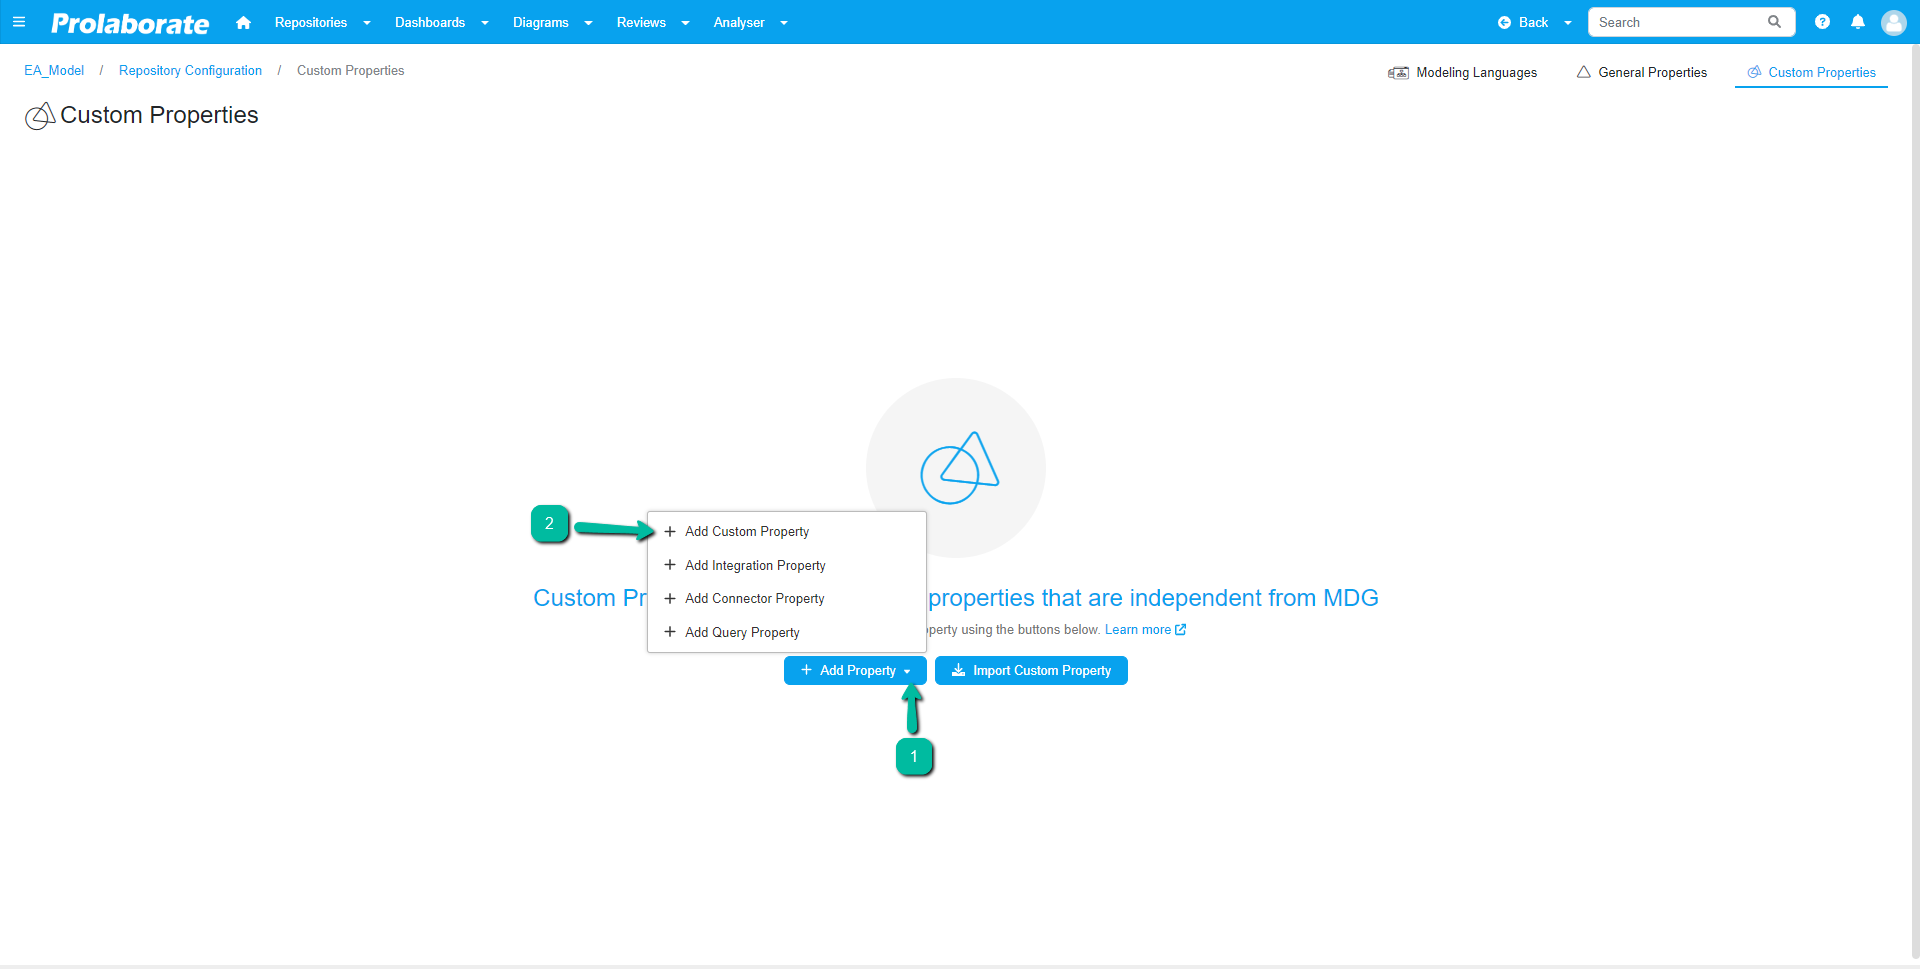
Click on Add Custom Property and the below form will open up. Fill in the details as required and click on Save. For help on EA Tagged values, please refer to the Documentation from the Sparx Systems website.
Note:
- For custom properties with a time type, Please ensure to update the time input format either “HH:MM PM” or “HH:MM AM”. Kindly note that Prolaborate supports only these formats to ensure standardized representation of time values.
How to Add Integration Property?
External items from Jira, Azure DevOps, etc can be added as a property to a stereotype in Prolaborate. To add an integration property click on Add Property > Add Integration Property.
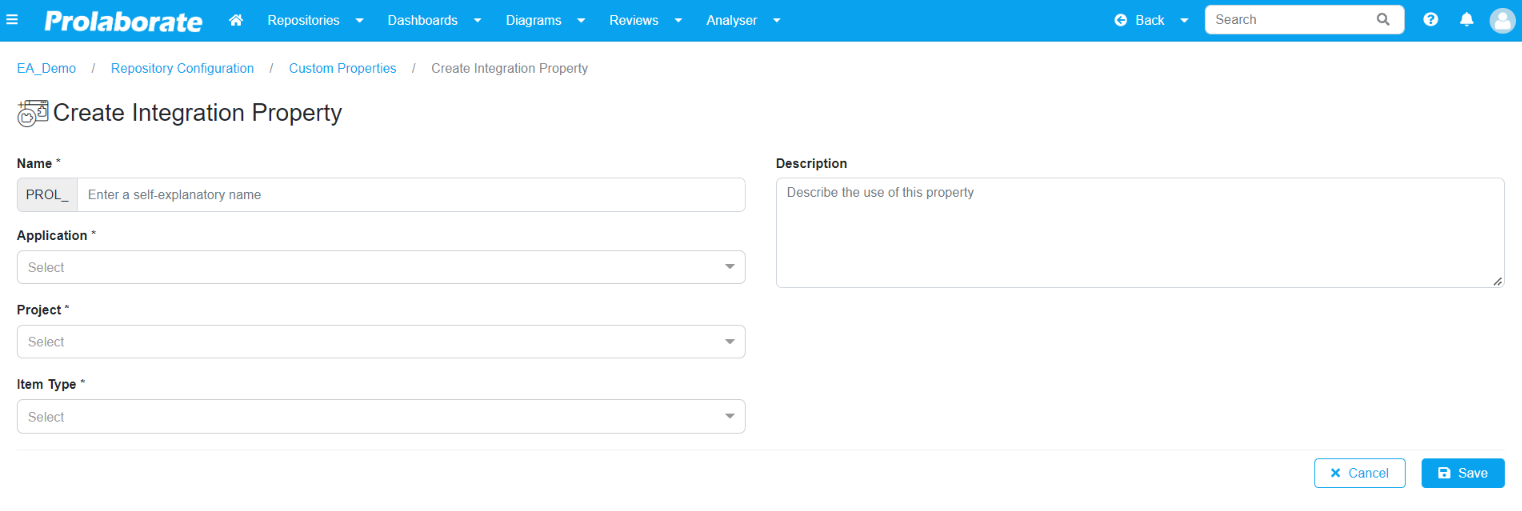
| Field | Description |
|---|---|
| Name | Give a suitable name |
| Application | Select the application which you want to integrate |
| Project | Select the project |
| Item Type | Select the Item |
| Description | Provide a brief description of your user’s note |
Click Save to add the new integration property.
How to Add Connector Property?
Create Connector between EA Artifacts in Prolaborate using connector property. To add a connector property, click on Add Property > Add Connector Property. To know more on how to create connector property, click here.
How to Add Query Property?
Query Property displays information as a list using SQL query which helps users to view the information in a simplified way. To know more on how to create query property, click here.
Manage Custom Properties
Click on Custom Properties from the Modeling Languages page to see the list of custom Properties.
Users can do the following from this page:
- Add Custom and Integration Properties.
- View the type and description of the properties.
- View the details of Properties.
- Export/Import custom properties from other repositories.
- Delete existing properties.
Application Modes for Tagged Values
Application Modes for Tagged Values help you control the visibility of Tagged Values in the Attribute panel. It can be set in the Modeling Languages page.

The options available are
- Show only for unrecognized stereotypes only –Use this mode to see Tagged values only for those Stereotypes which are defined in Prolaborate.
- Show for all stereotypes – Use this mode to see Tagged values for all stereotypes.
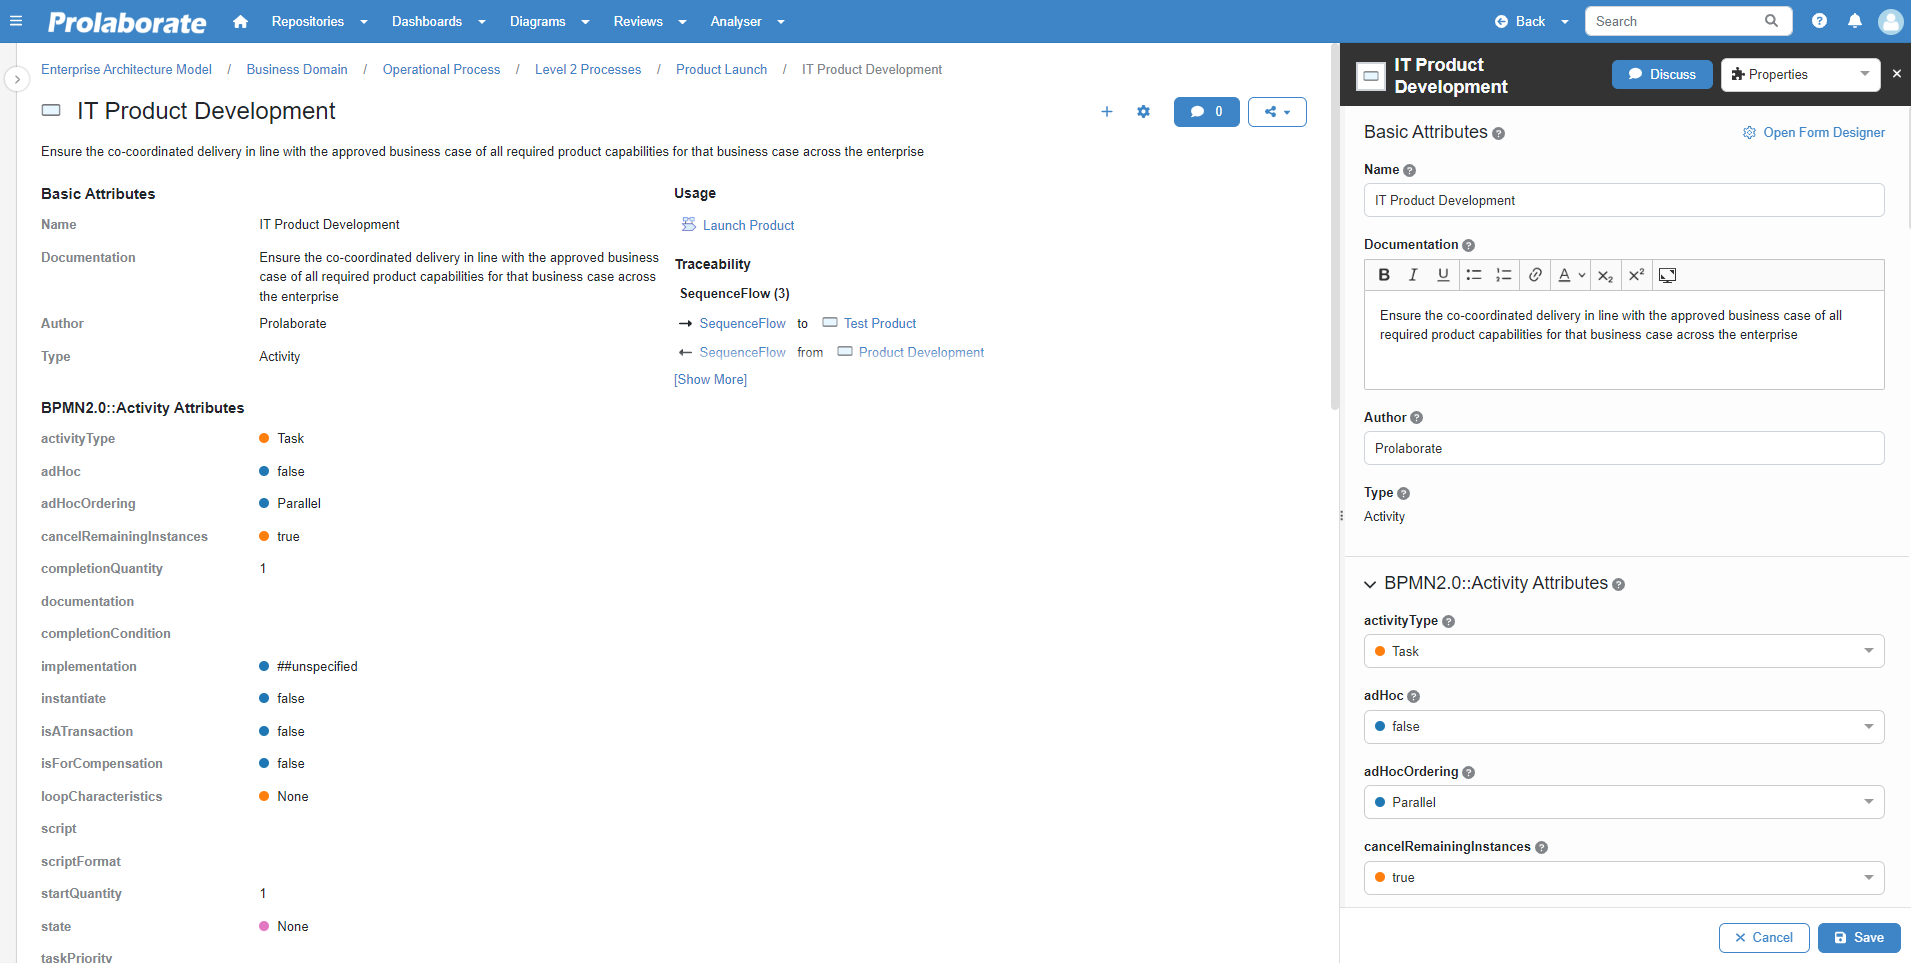
View the Configuration’s Result
Now that we are done with the configuration, let’s see how it has impacted the form of a Stereotype.