OpenID (Azure AD) Authentication in Sparx EA
OpenID (Azure AD) Authentication in Sparx EA
In this article, we will see how to enable Single Sign-On to Sparx Enterprise Architect models through OpenID (Azure AD) based authentication.
Configure OpenID in Azure AD
Register App
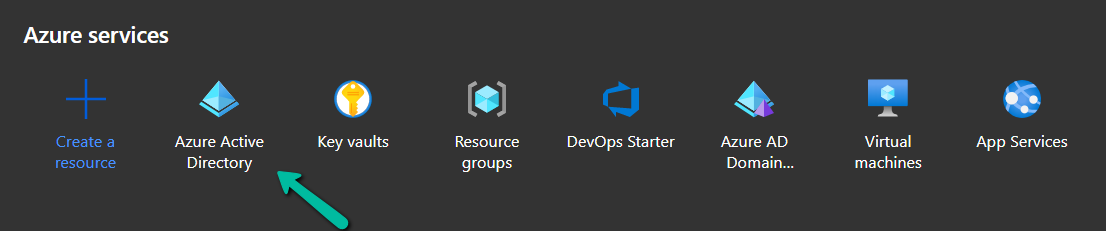
Log in to Azure.
Click on Azure Active Directory.


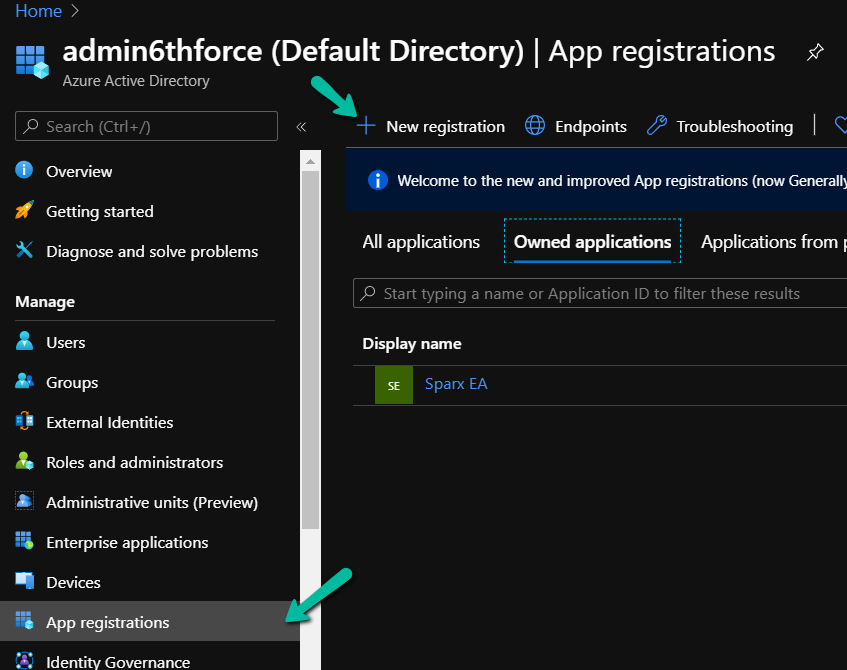
Click on App registrations. Click on the New registration button.
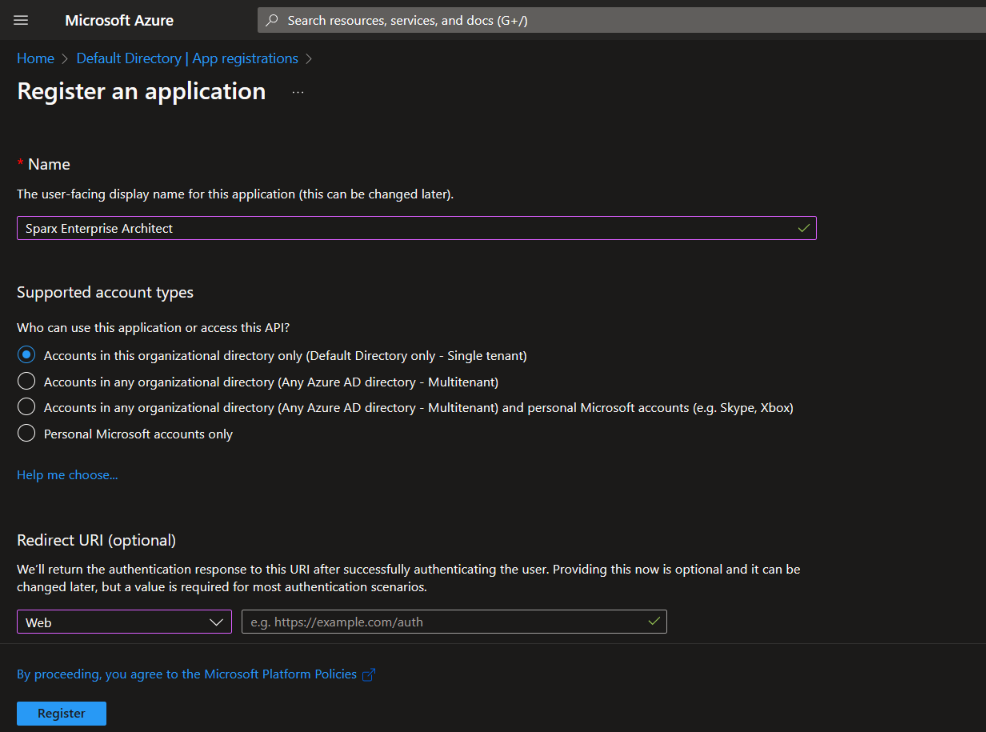
The form below will be opened. Give a name to the application and choose a suitable option under Supported account types. Fill in the Redirect URI as per the steps below and click on Register.
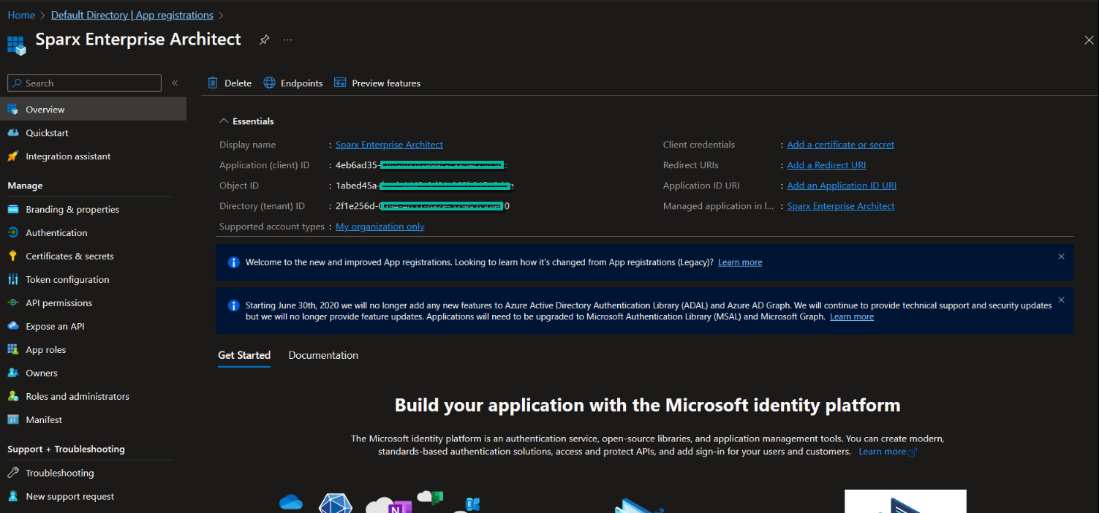
After the new app registration is created, the details of the application are shown in the image below.
Steps to get the Redirect URI:
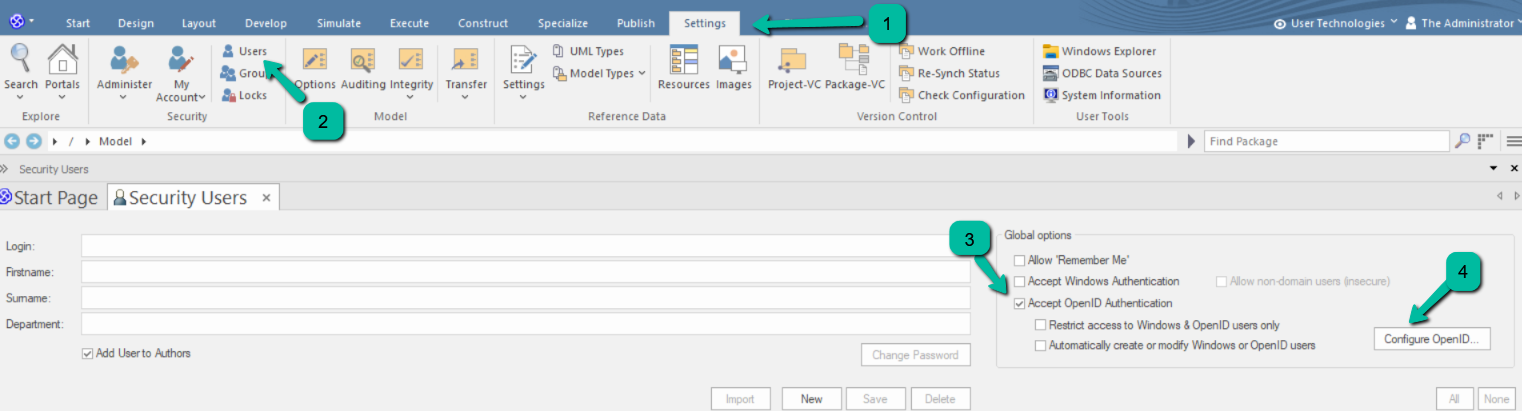
- Open EA as an admin
- Click on ‘Settings > Security > Users’
- In the ‘Global Options’ panel select the ‘Accept OpenID Authentication’ checkbox.
- Click on Configure OpenID button.
Note:
- Ensure that model security is enabled in Enterprise Architect to configure Open ID.
A popup will appear as shown in the image below
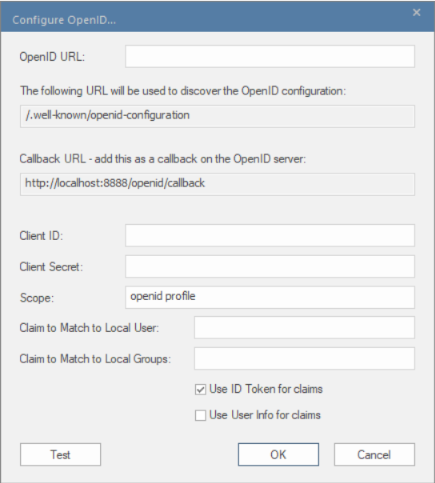
Copy the Callback URL and paste it in the Redirect URI when registering a new application in Azure.
Get OpenID URL
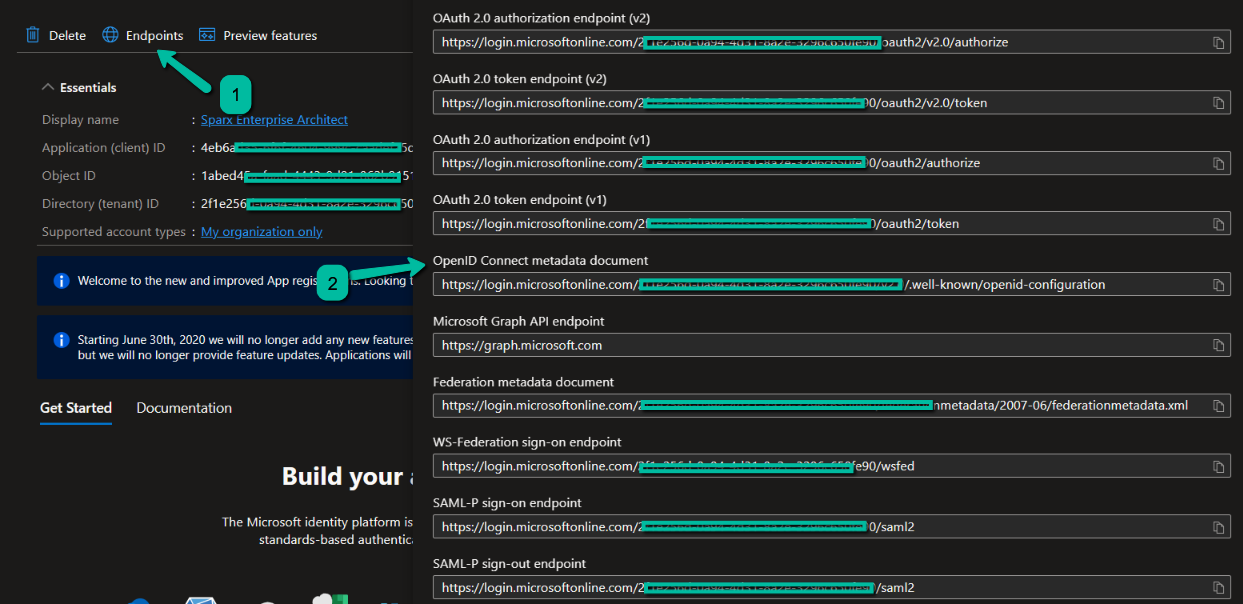
To get the OpenID URL, click on Endpoints and copy the OpenID Connect metadata document URL. This is the OpenID URL we need to use in EA.
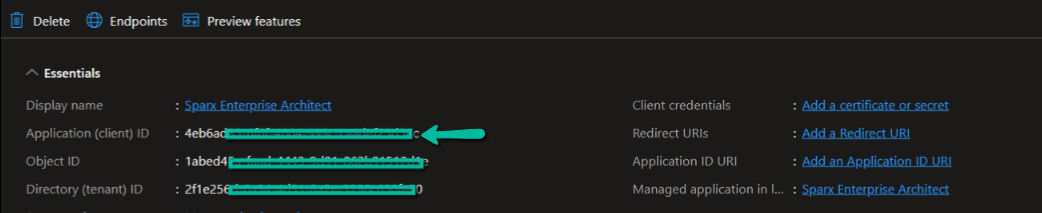
Get Application or Client ID
Open the newly registered app and note the Application ID. This is the Client ID we need to use in EA.
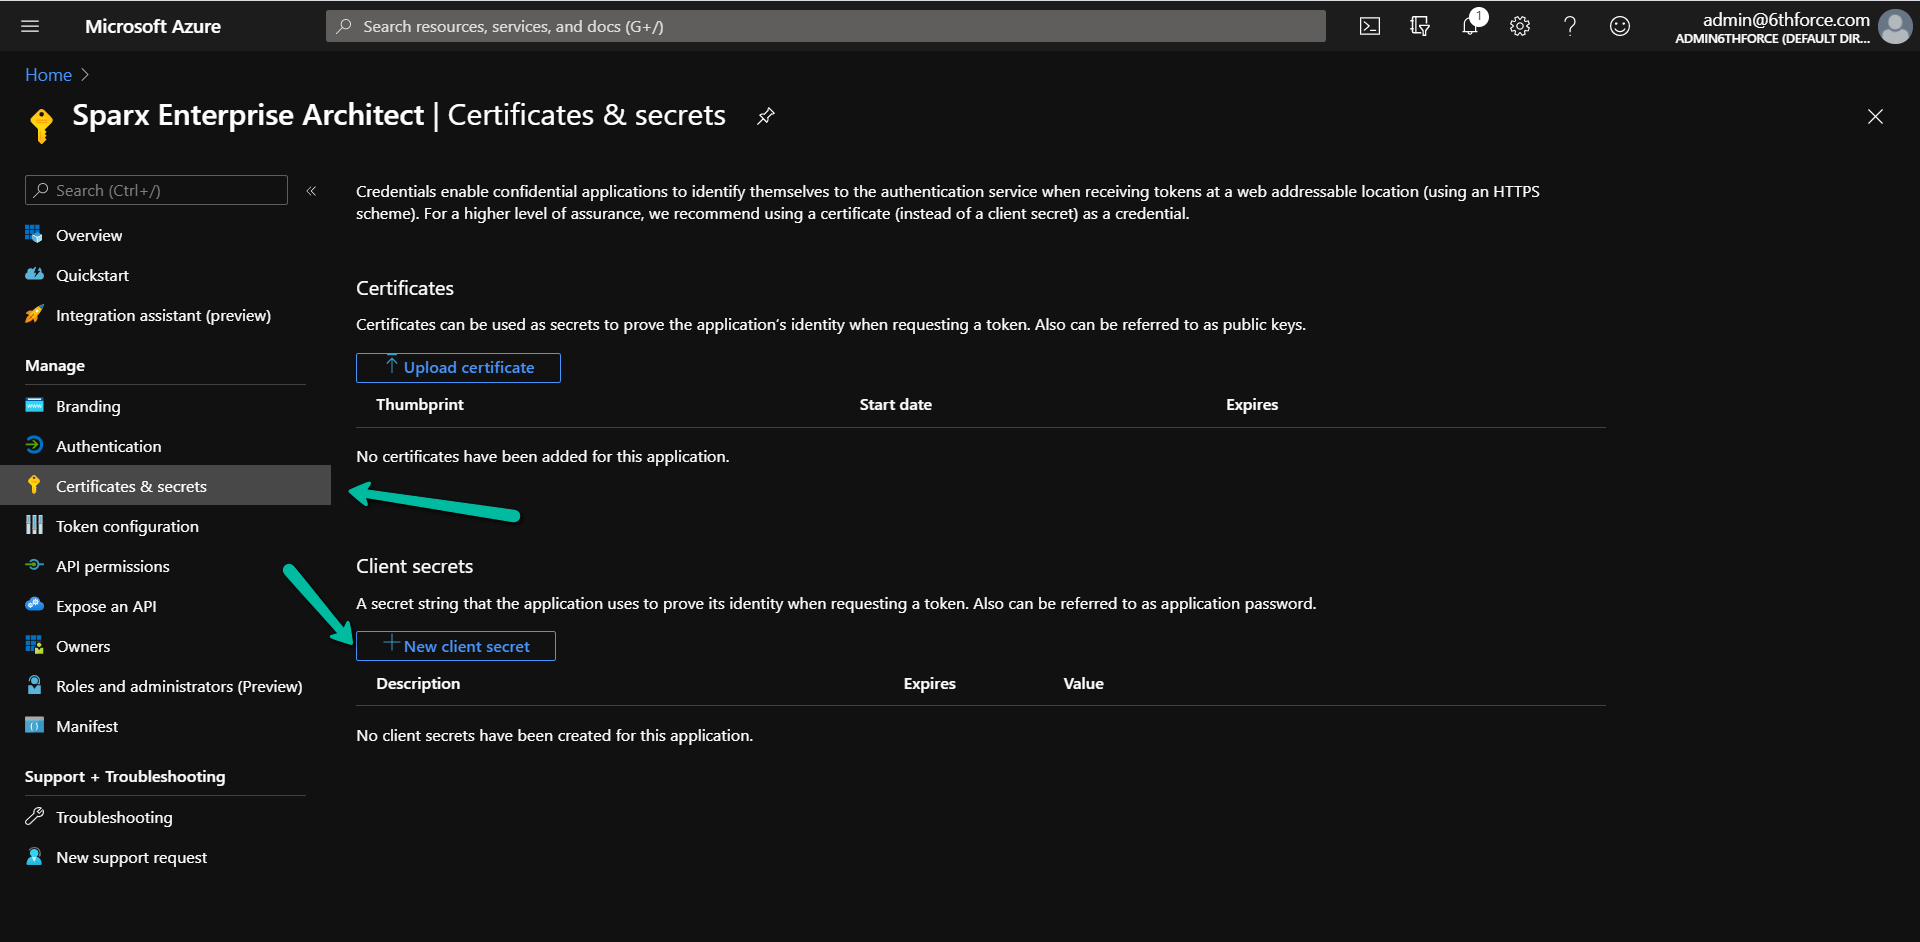
Create Client Secrets
To secure the transaction between EA and OpenID, you can create and use a client secret. Click on Certificates & secrets and then on the new client secret.
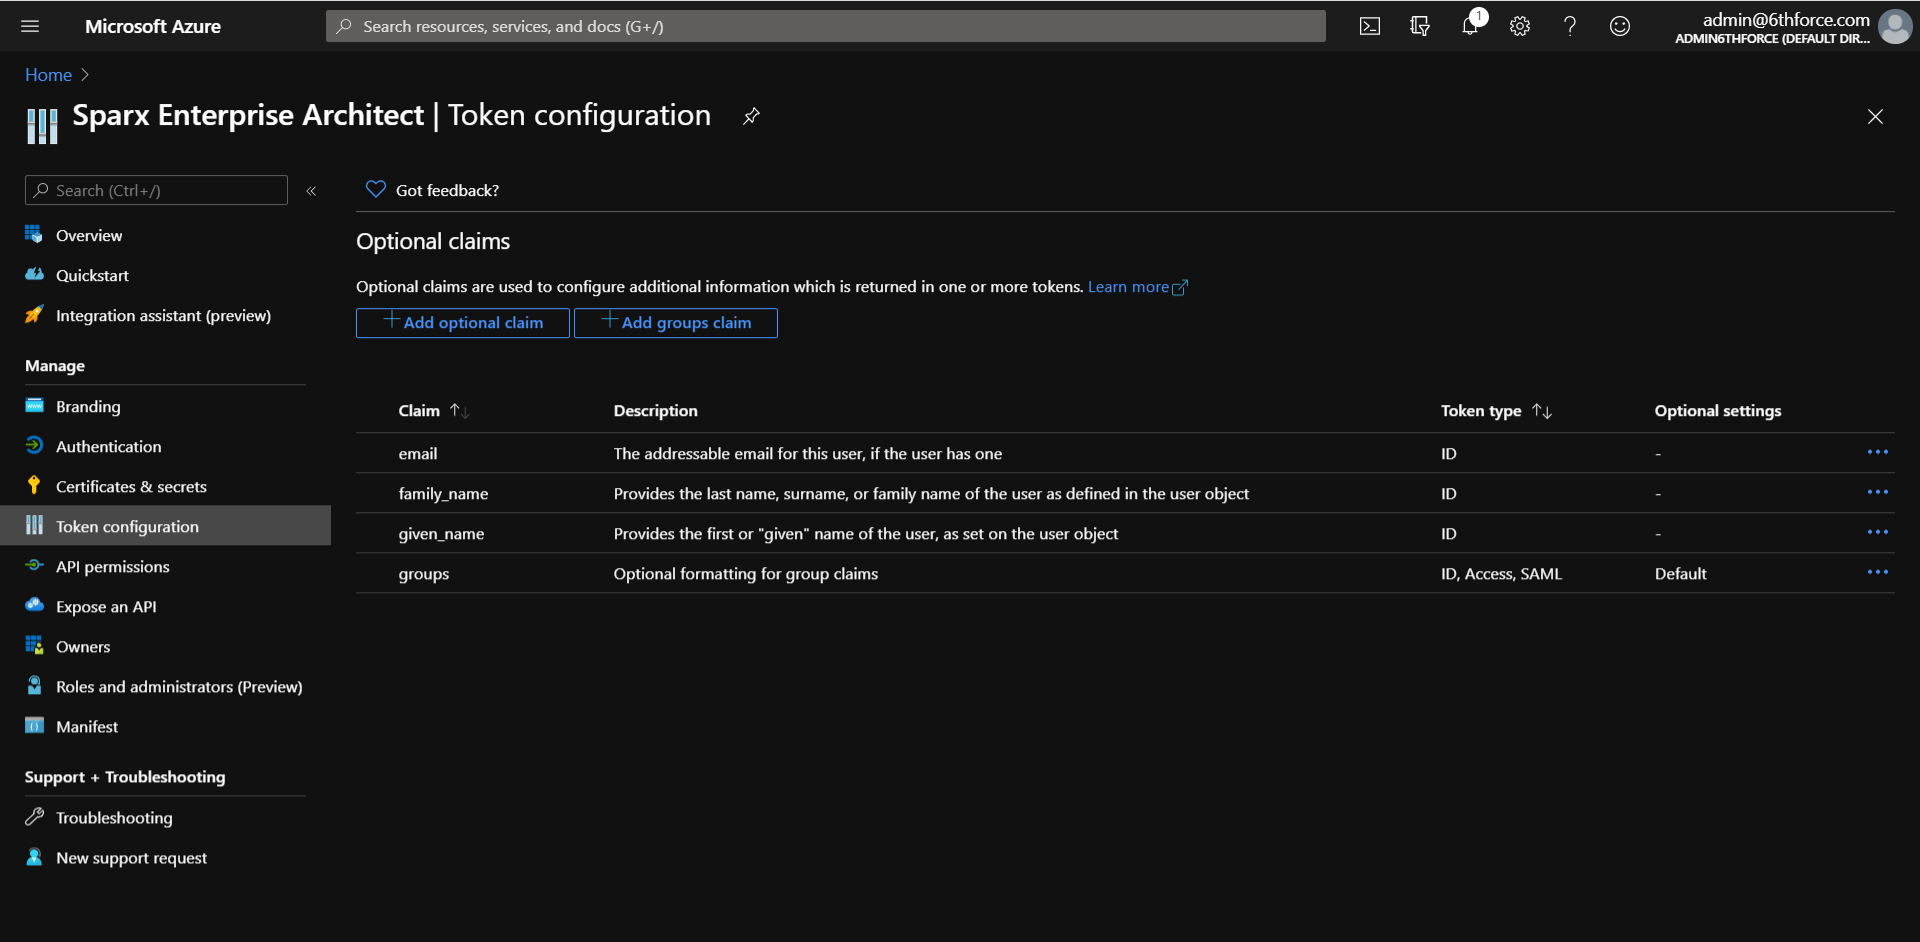
Manage Claims
You can create and manage claims in the Token configuration page. Learn more here.
Here is the mapping:
| OpenID | EA |
|---|---|
| Optional claim | Claim to Match to Local User |
| Groups claim | Claim to Match to Local Groups |
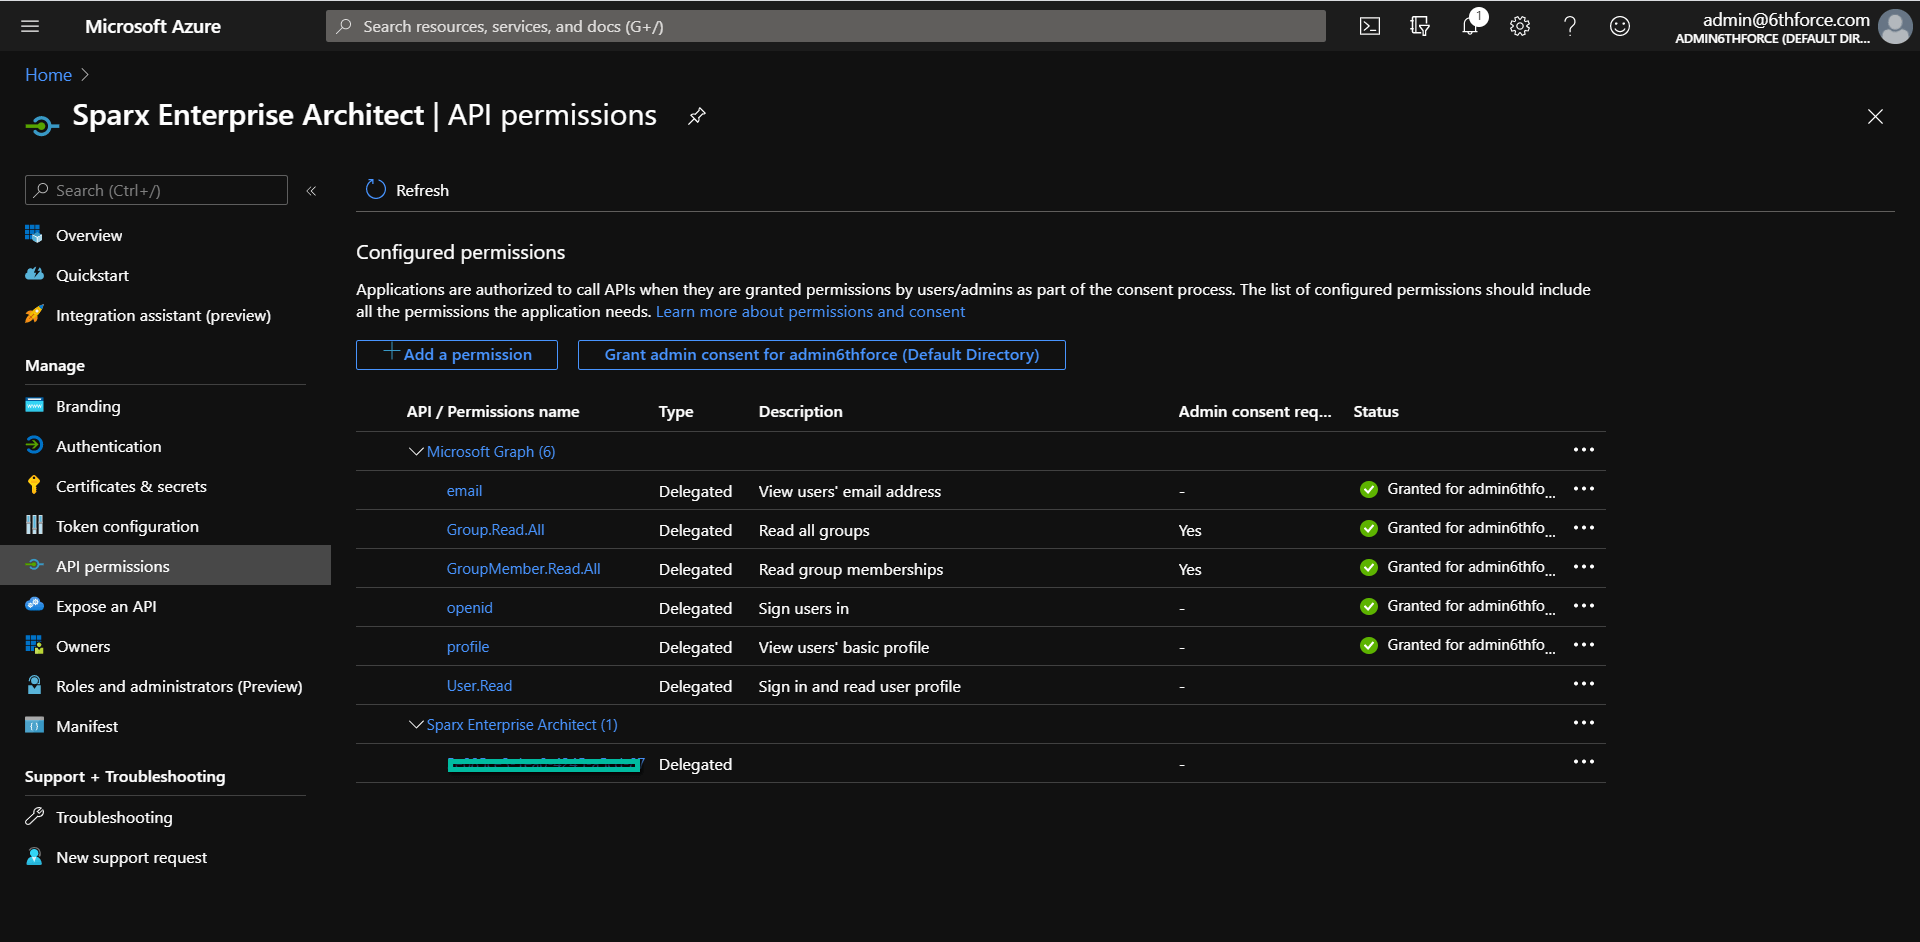
Manage API permissions or Scope
Here is a sample of API permissions or Scope defined in Azure AD. Learn more about permissions and consent here.
Configure OpenID SSO in Enterprise Architect
Connect EA to OpenID
- Log in to EA as Admin.
- Click on the ‘Settings > Security > Users’.
- In the ‘Global Options’ panel, select the ‘Accept OpenID Authentication’ checkbox and click on Configure OpenID. Click here to Learn more about the settings.
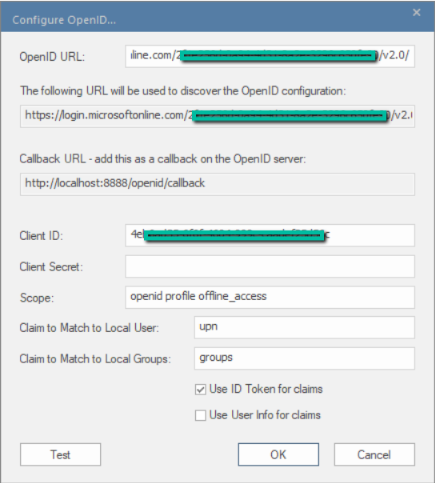
- Fill the required fields as below
| Field | Description |
|---|---|
| OpenID URL | Paste the URL we copied in Get OpenID URL section without this part – .well-known/openid-configuration |
| Client ID | Paste the ID we copied in Get Application or Client ID section |
| Client Secret | Paste the ID we copied in Create Client Secrets section |
| Scope | “Openid” should be mandatorily mentioned. Other scopes can be added as per your requirements after configuring them in Azure AD. Add ‘offline access’ to the ‘Scope’ field to allow users to refresh their authentication tokens automatically using ‘refresh tokens’. |
| Claim to Match to Local User | For this walkthrough we will match against ‘upn’; type ‘upn’ in the ‘Claim to Match to Local User’ field. |
| Claim to Match to Local Groups | “groups” is the common claim. You can add more claims as per your requirements after configuring them in Azure AD |
5. Select the ‘Use ID Token for claims’ checkbox. Deselect the ‘Use User Info for claims” checkbox.
Note:
- From EA V16 or later, it is now possible to get claims directly from the ID token rather than via the User Info endpoint. This has many advantages, including being more compliant with the standard (claims in the User Info endpoint are optional and are not customizable in Azure) as well as reducing the number of internet calls to the OpenID provider.
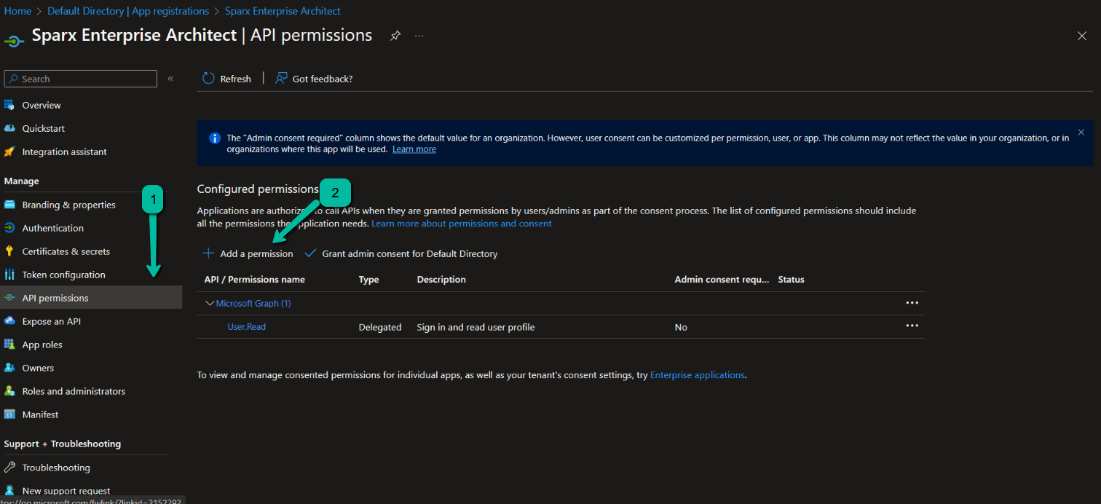
Add API Permissions
- Click on ‘API permissions’.
- Click on ‘Add a permission’.
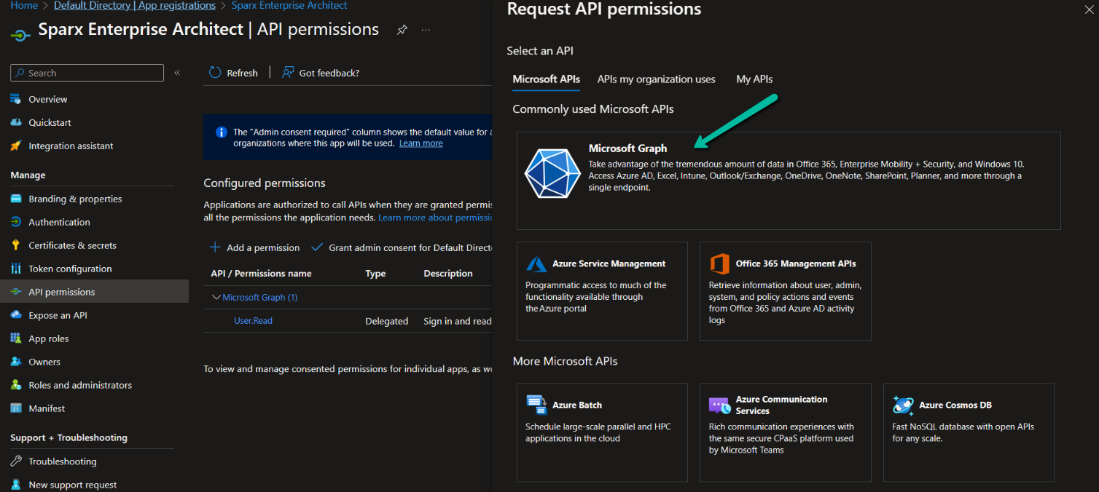
3. Click on ‘Microsoft Graph’.
4. Click on ‘Delegated permissions’.
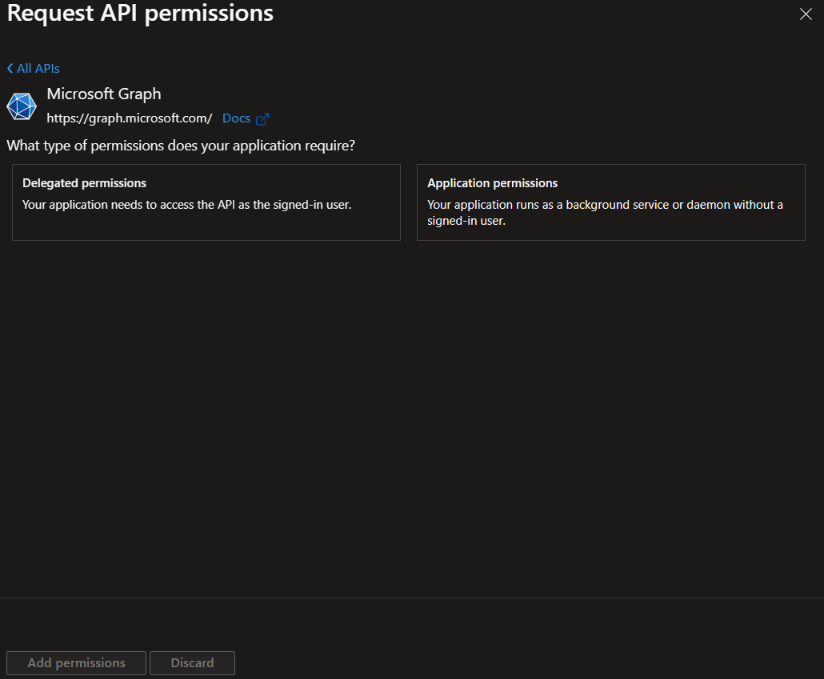
5. Select all permissions under ‘OpenId permissions’ and check ’email’, ‘offline_access’, ‘openid’ and ‘profile’.
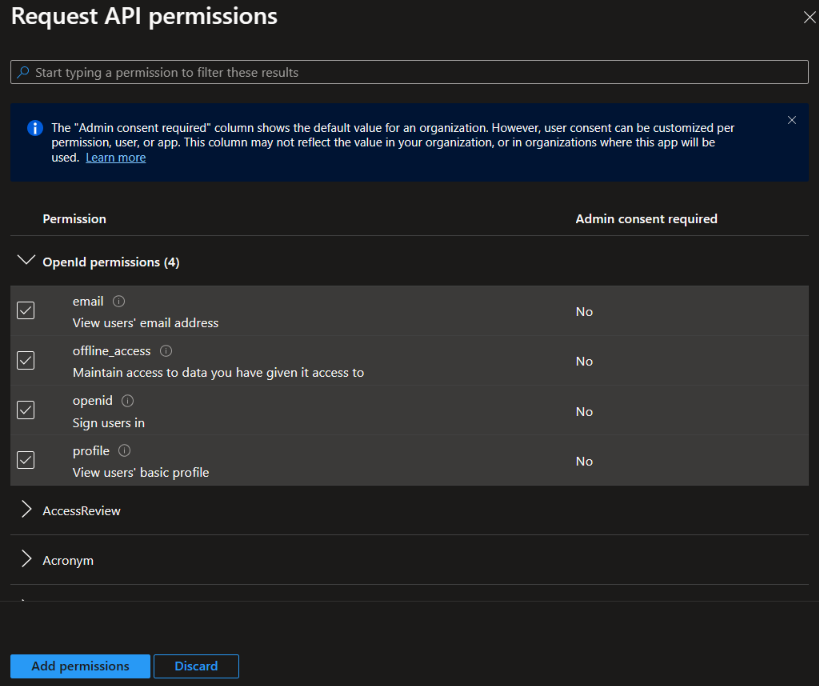
6. Click on Add Permission once done.
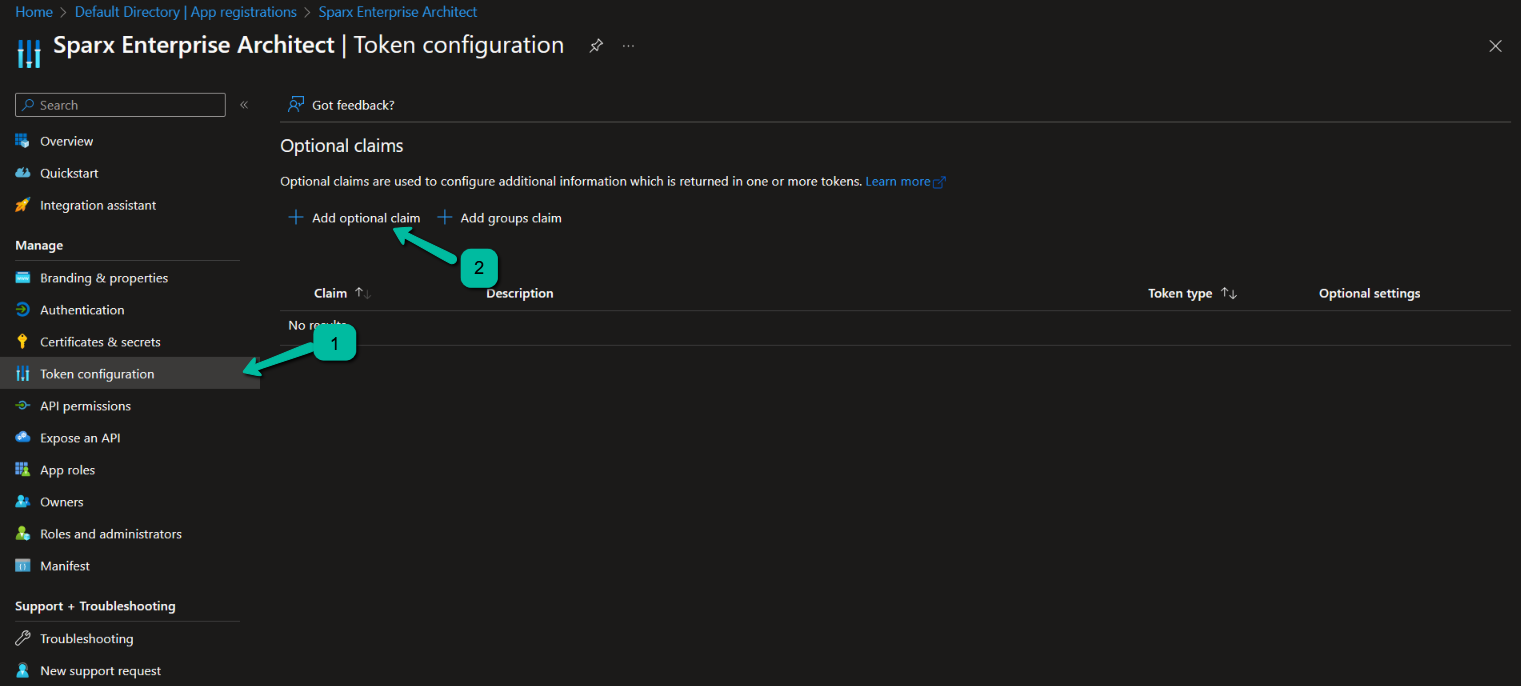
Claim to Match to Local User
- Click on ‘Token configuration’.
- Click on ‘Add optional claim’.
3. Select ‘ID’, ‘family_name, given_name’.
4. Optionally select another claim that will be used to match the user login in Enterprise Architect. Common choices are ‘upn’, ’email’, ‘verified_primary_email’.
For this walkthrough, select ‘upn’.
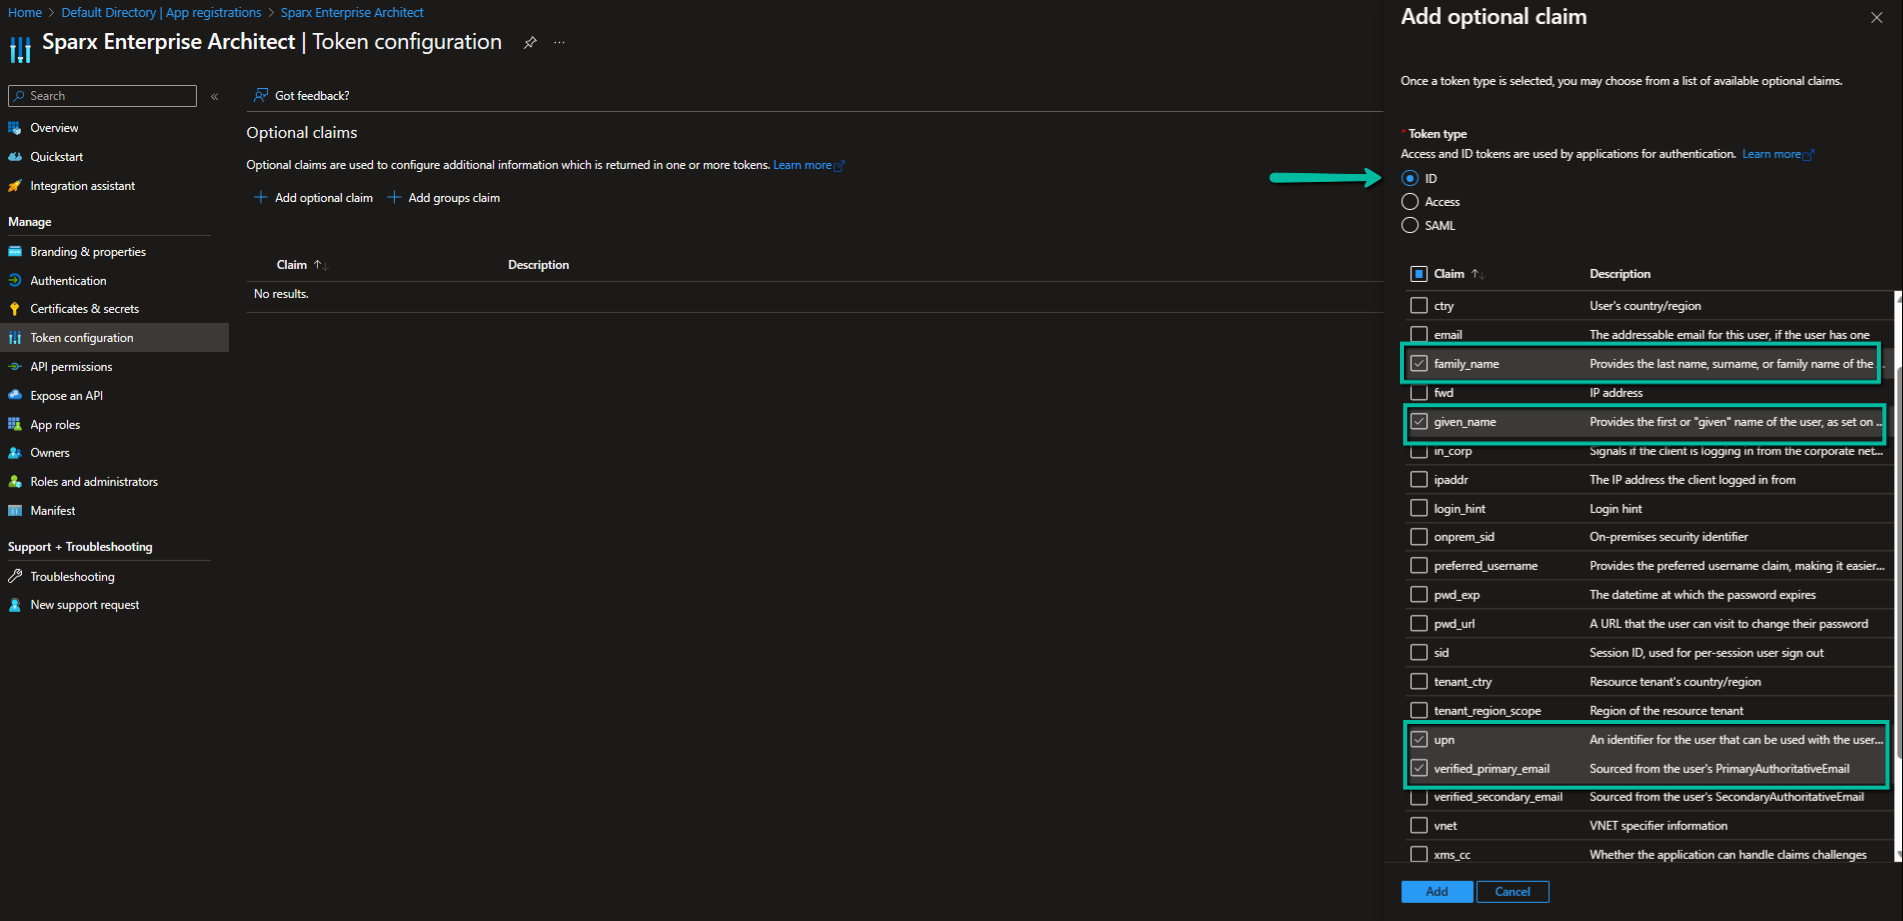
5. Click on Add.
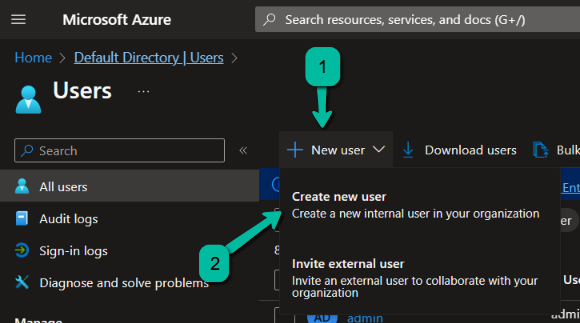
Add User to Azure
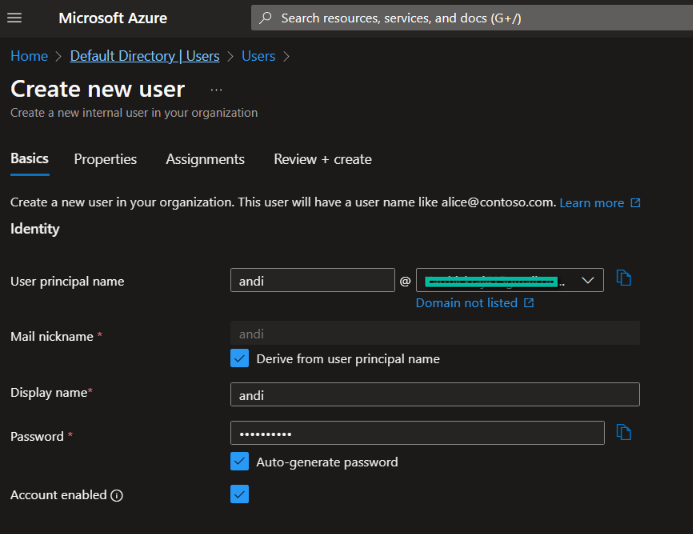
To add users, navigate back to the main ‘Active Directory’ section and click on ‘Users’. Click on ‘New user’ and select ‘Create new user’.
Fill in the details for the new user. Here we create a simple test user and do the following:
- Make a note of the password
- Click on ‘Create’
Test the Configuration in Enterprise Architect
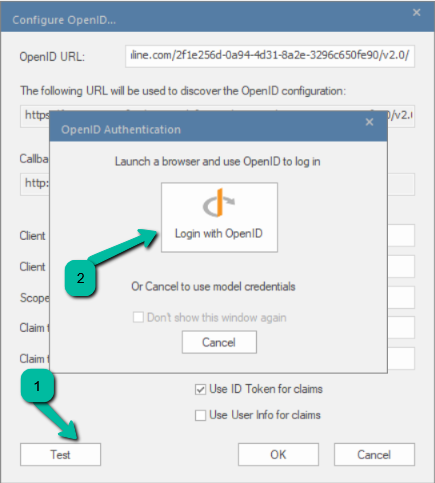
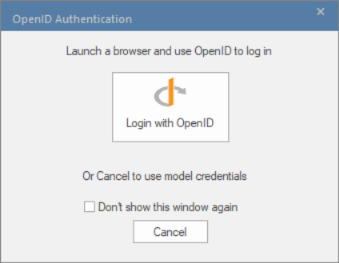
To test the Open ID Configuration, navigate back to Enterprise Architect. Click on the Test button in the Configure OpenID window.
Click on ‘Login with OpenID’.
This will pop up your internet browser and require you to log in to your Microsoft Account (for Azure).
- Log in as the newly created user.
(Note that your credentials might have been cached by the browser; log out of all Microsoft services and close your browser before performing this test.) - You might be prompted to create a new password. Please make note of the new password for later logins.
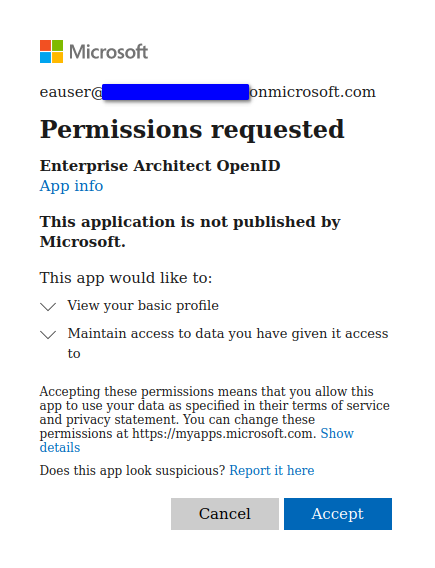
- You will be prompted to give consent to allow the new Azure App access to your profile.
(Note that it is possible for an administrator in Azure to give consent to the application on behalf of all users.)
4. The browser will now show a success message. You can close the browser and return to Enterprise Architect.
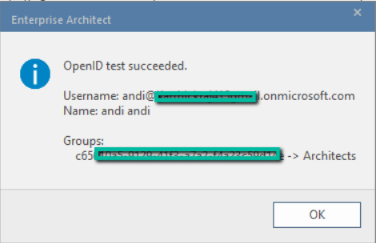
5. Enterprise Architect will show a success message with details that match the claims.
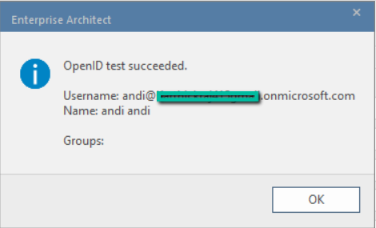
6. Click on the OK button on the success message.
7. Click on the OK button on the Configure OpenID window to save the settings.
Note:
- It is important to add first name and second name for users in Azure. Enterprise architect will only take any action if the user has a first name and second name in azure.
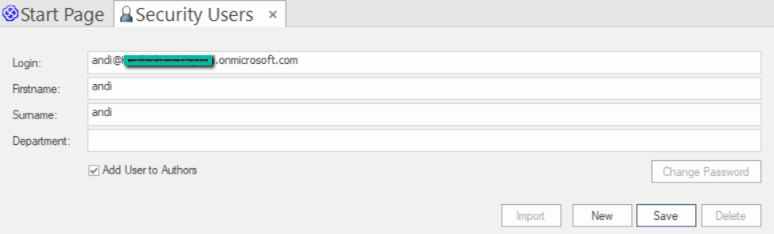
Add Matching User to Enterprise Architect
To add a new user to Enterprise Architect with a matching ‘Login’ field.
- Select the ‘Settings > Security > Users’ ribbon option.
- Copy the User Principal Name (UPN) of the Azure user and paste it into the ‘Login’ field.
- Type in a name (this does not need to match the Azure user’s name).
- Click on the Save button.
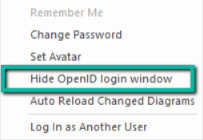
Testing Logging in to Model
Before logging in as an Open ID user, it is important to uncheck the ‘Hide OpenID login window’. Only then will one be able to see the OpenID prompt while logging in.
- Close and re-open Enterprise Architect.
- Open the model.
- The same OpenID Authentication screen displays; click on ‘Login with OpenID’.
The test is successful if both of the following happens.
- A success message shows up in browser.

2. A success message is shown in EA when a user logs in.

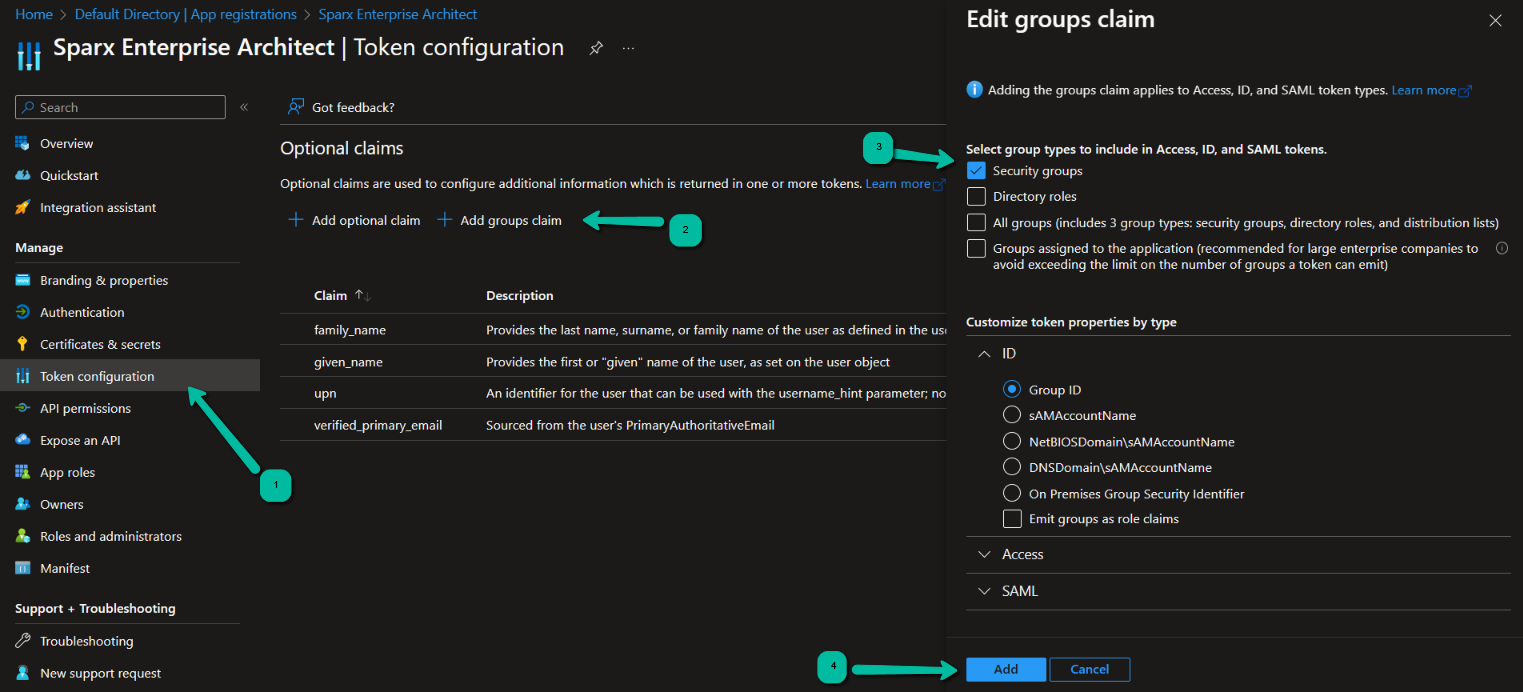
Add Group Claim to ID Token
To add group claim to ID token, follow the below steps:
- Select the ‘Azure > Azure Active Directory > App registrations’ ribbon option.
- Click on your new application.
- Select ‘Token configuration’ from the sidebar.
- Click on ‘Add groups claim’.
- Select ‘Security groups’.
- Expand the ID section.
- Click on the Add button.
Add New Azure Group
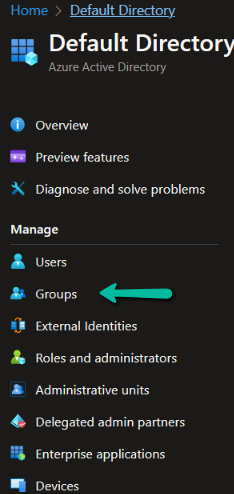
In the ‘Azure Active Directory’:
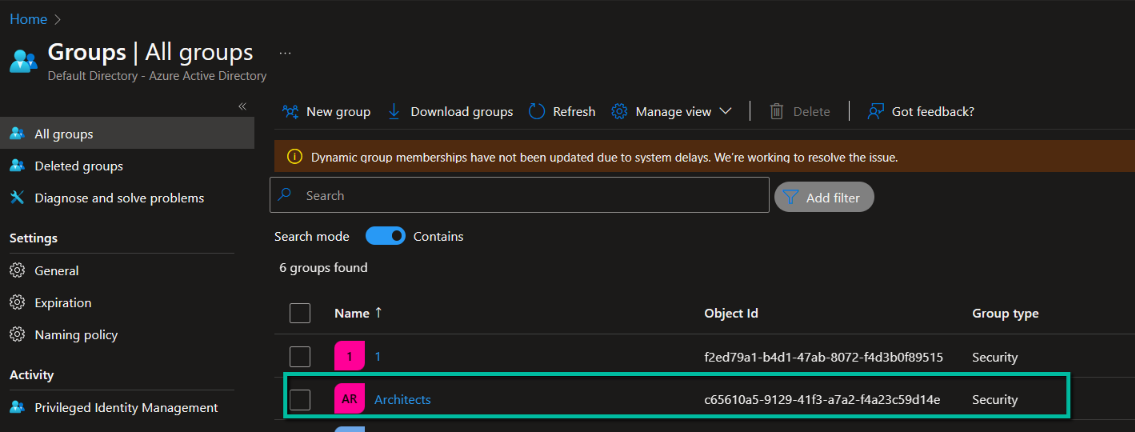
- Select ‘Groups’ from the sidebar menu.
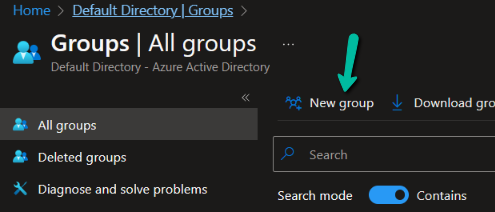
2. Click on ‘New Group’.
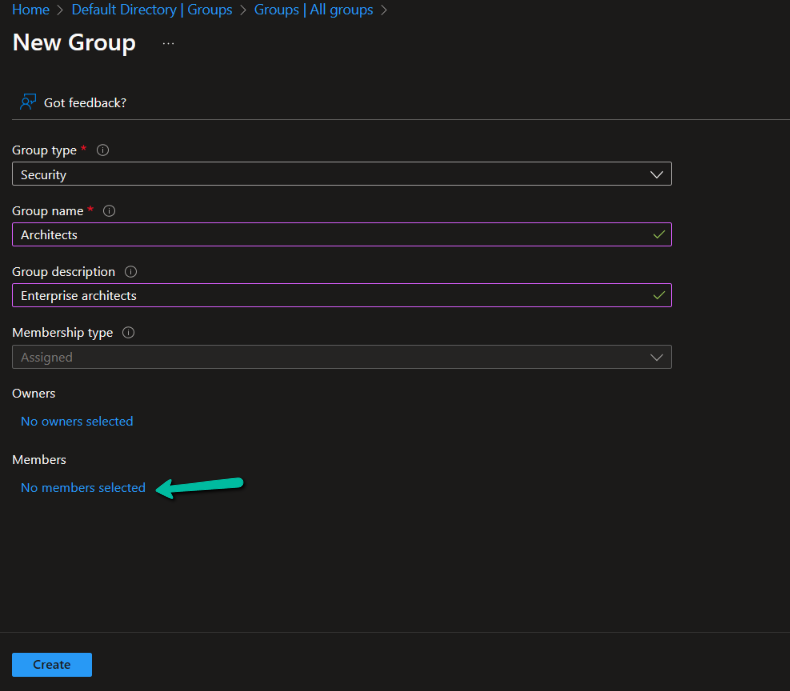
3. Leave the ‘Group type’ set to ‘Security’.
4. Type in a name for the group, such as ‘EA Users’, ‘EA Administrators’ or ‘EA Read-only’.
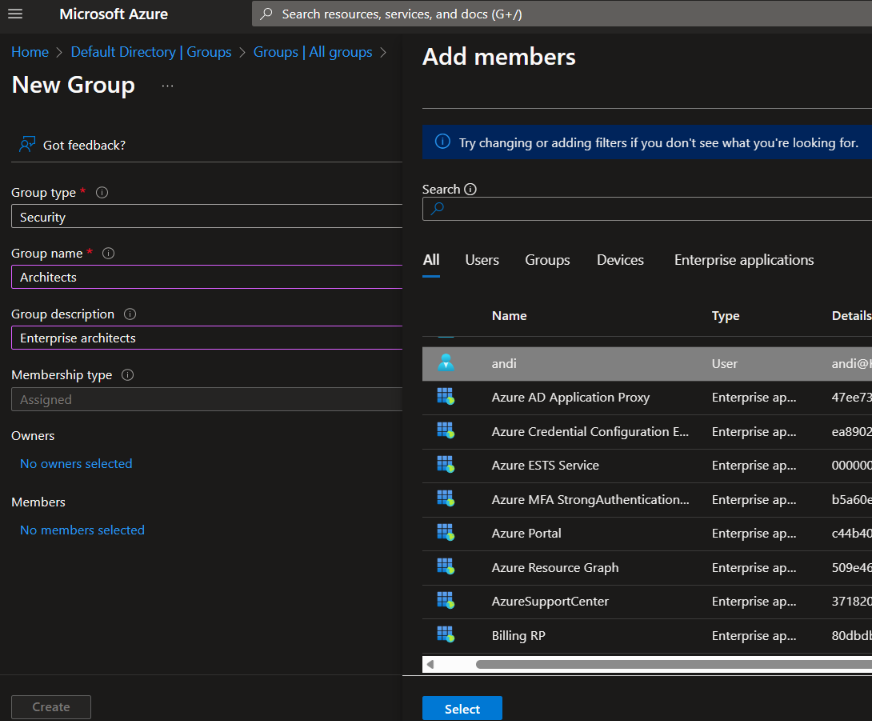
5. Click on ‘No members selected’ to add the test user to the group.
6. Select the created user and click on ‘Select’
7. Click ‘Create’ to finish creating the new group.
8. Refresh the list of groups (this can take up to 30 seconds).
9. Copy the group’s ‘Object Id’ for use in the next step.
Refer to the earlier Application URL and Client ID section.
Link Group in Enterprise Architect
To link the Azure group in EA, follow the below steps:
- Open Enterprise Architect.
- Open the model; cancel the OpenID login and login as an administrator.
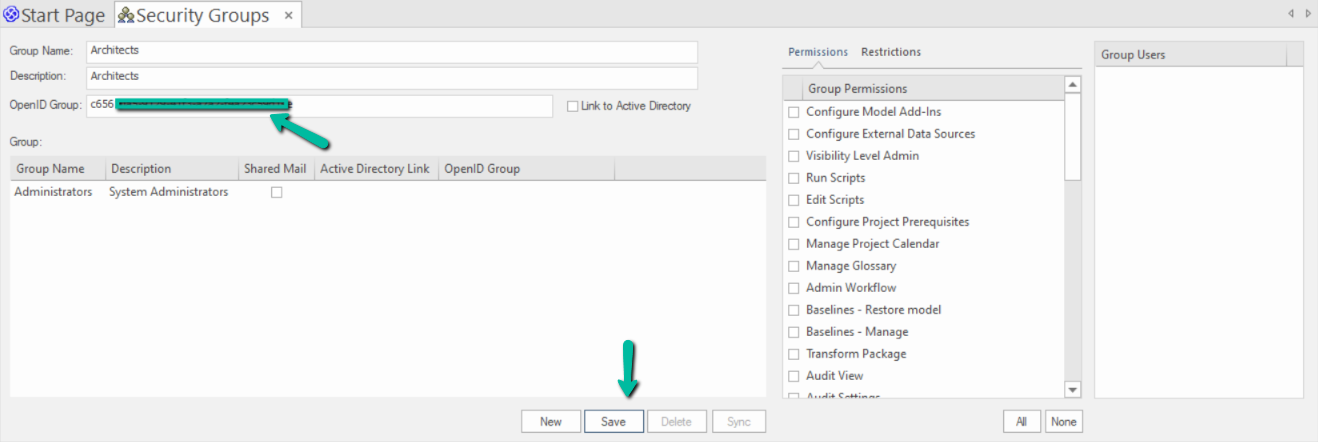
- Select the ‘Settings > Security > Groups’ ribbon option.
- Create a new group. Name and description do not need to match the name in Azure.
- Paste the Azure group’s ‘Object ID’ into the ‘OpenID Group’ field.
- Click on the Save button create the new group.
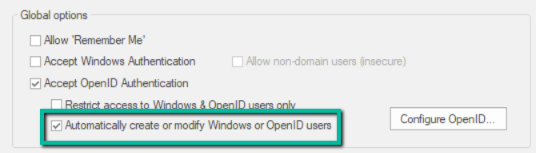
7. Enable the ‘Automatically create or modify Windows or OpenID Users’ option:
- Close the ‘Groups’ tab.
- Select the ‘Settings > Security > Groups’ ribbon option.
- Select the ‘Automatically create or modify Windows or OpenID Users’ option.
- Click on the ‘Configure OpenID’ option.
- If ‘groups’ is not already shown in the ‘Claim to Match to Local Groups’ field, type it in.
- Click on the Test button.
- Click on ‘Login with OpenID’.
- Log in to Azure, if required by the browser.
The result will be shown in Enterprise Architect, showing the user’s name as well as the Azure group and the local Enterprise Architect group that it is linked to.