
Analyzer
The Analyzer feature in Prolaborate allows you to visualize relationships between elements in an EA model and to analyze the impact of change in order to make better decisions. This feature allows users to discover the connections between elements, and automatically lay out a diagram allowing them to spend their time analysing the impact.
Prerequisites
- Analyzer should be purchased as an add-on to included in the Prolaborate License.
- User should have access to the repository.
Note:
- Analyzer add-on is free for Large Teams and Enterprise edition of Prolaborate.
- Analyzer add-on which is included in the Growing Teams edition of Prolaborate is free for the first year.
Analyze impact before taking a decision
By using Analyzer, users can either add nodes to analyze the relationships between them or open an existing diagram to analyze the artifacts and the relationships present in it. We have discussed both the options below.
Build a view for analysis from zero
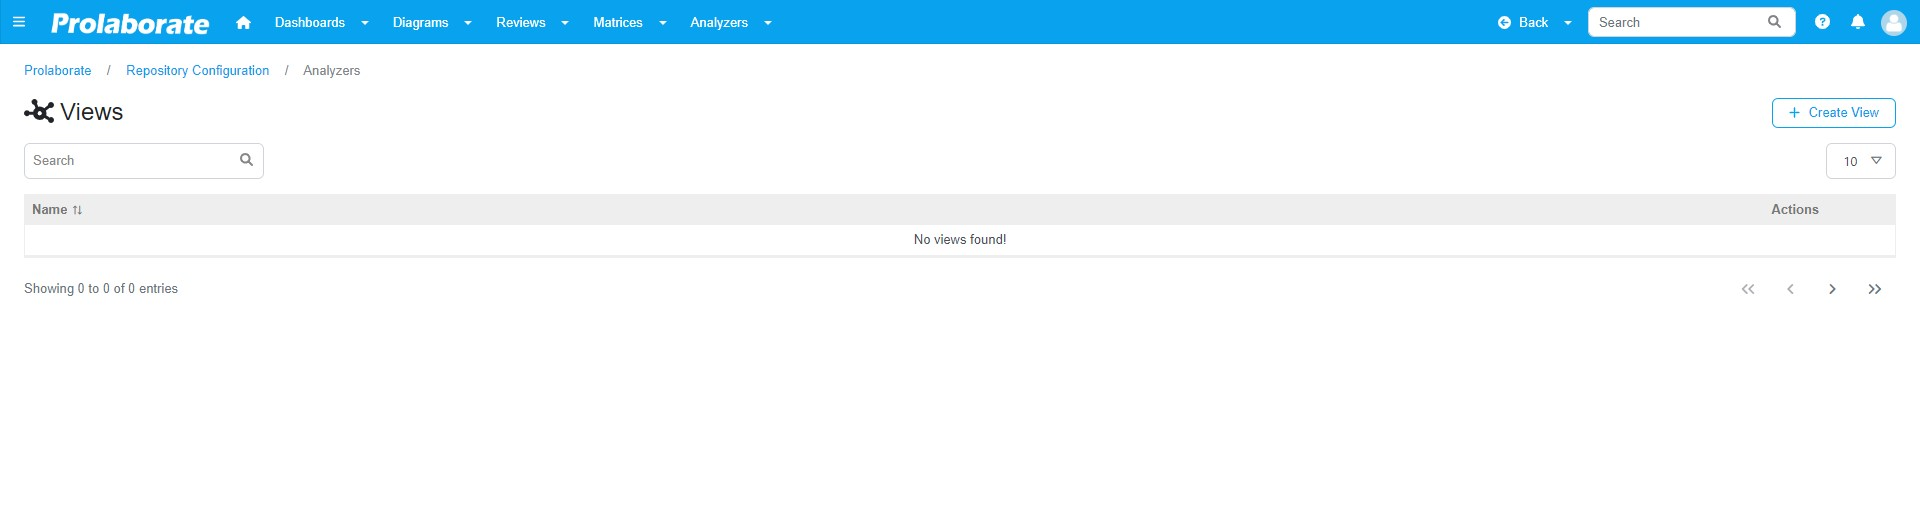
Step 1: Create a View
To create a new view, click on the Analyzer option in the header and choose Create View.


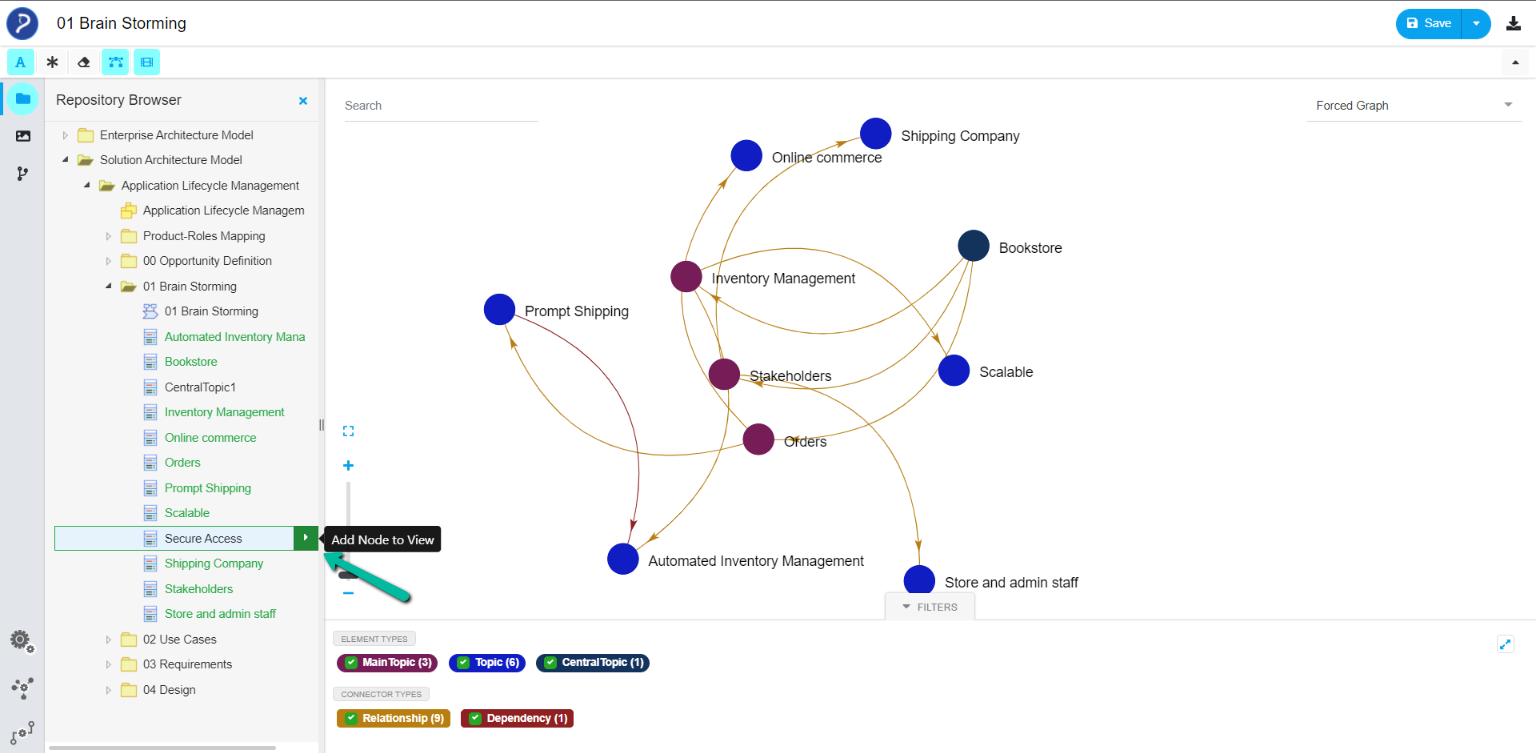
Step 2: Add Node(s) to View
Users can add the artifacts as nodes to ‘view’ by choosing the Add Node to View option displayed when hovering on them in the repository browser.
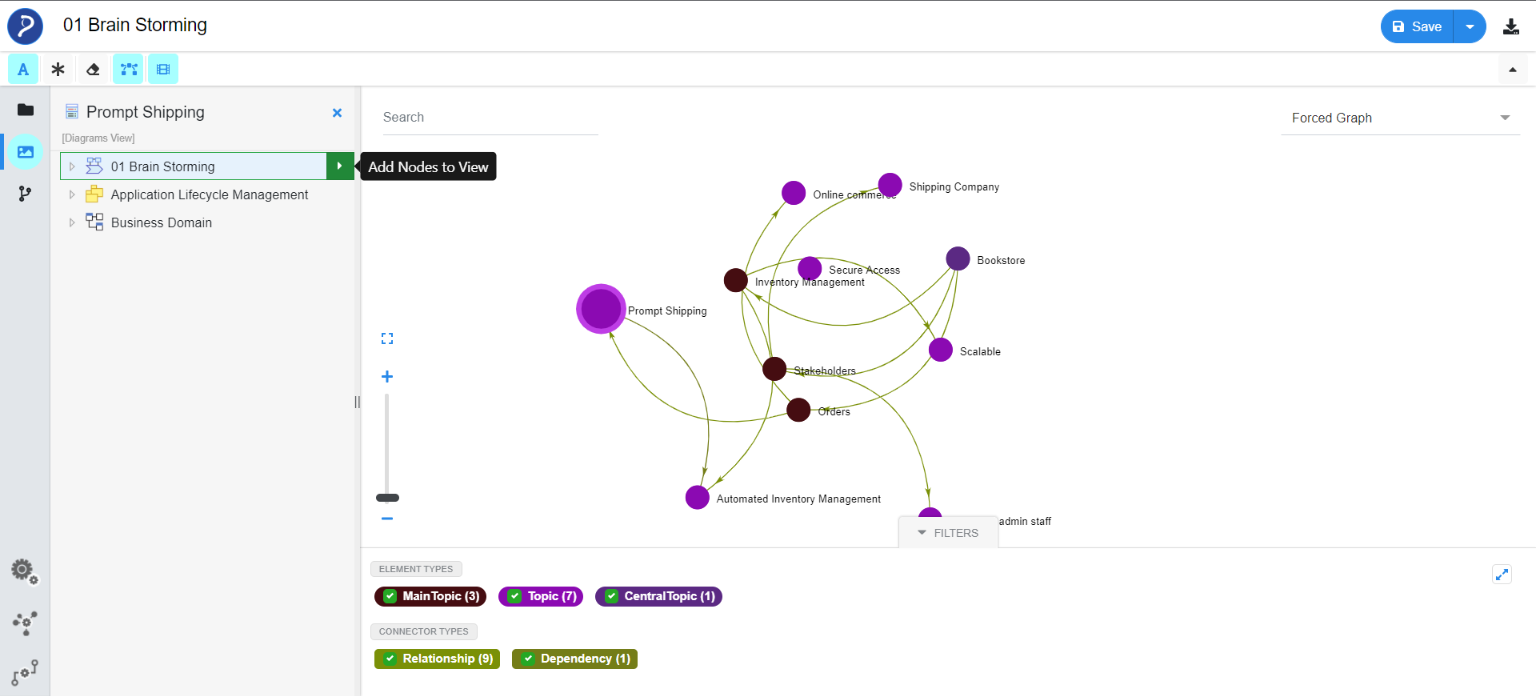
User can insert all artifacts present in a diagram as nodes in a single click by choosing the Add Nodes to View option when hovering on a diagram in Diagrams View.
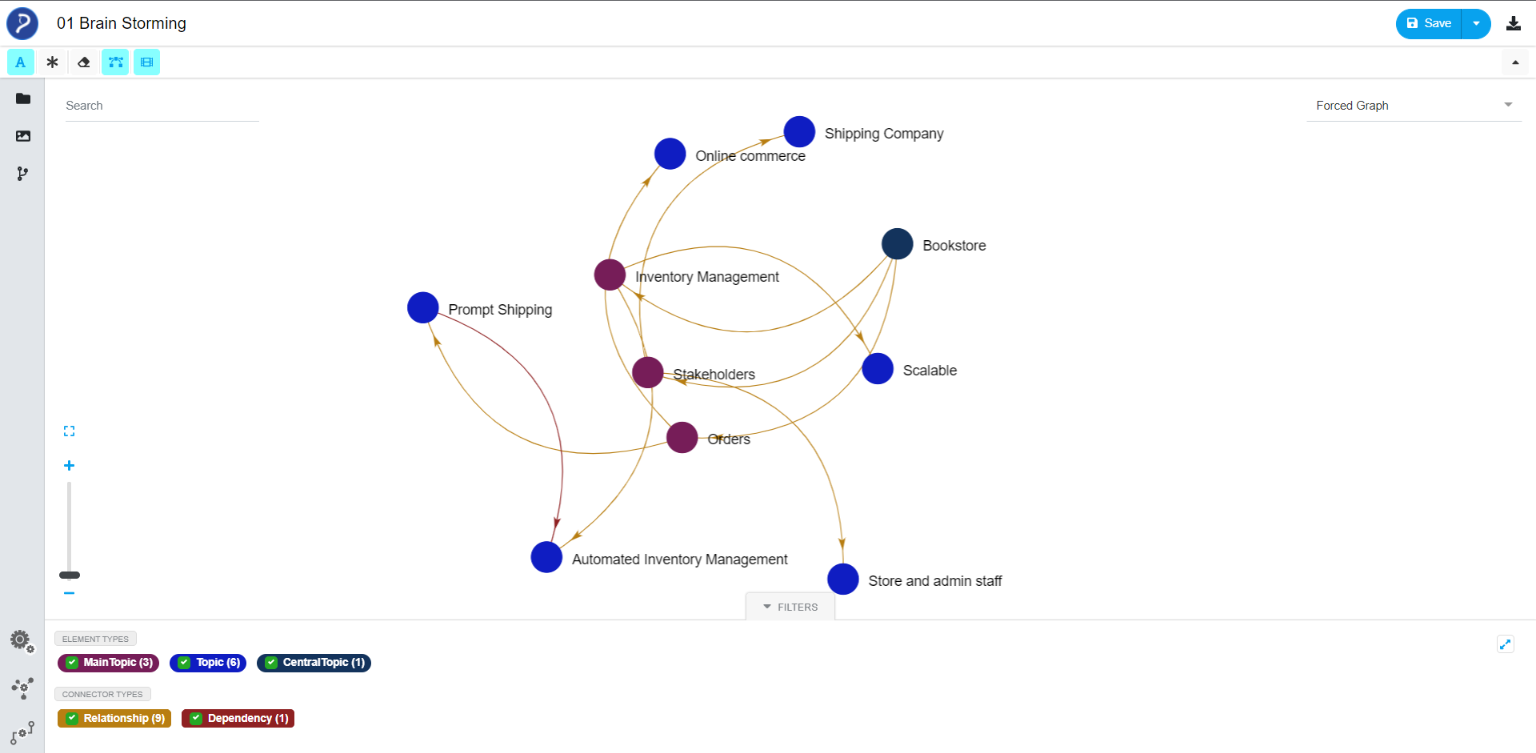
Step 3: View Relationship
Upon inserting the nodes to the view, relationship between nodes will be automatically displayed if there are any. Also, it will be very helpful for the users to analyze the impact of a change.
Reuse existing EA diagram for Analysis
To open an existing diagram in Analyzer, First open an EA diagram then select Switch to Analyzer View option.
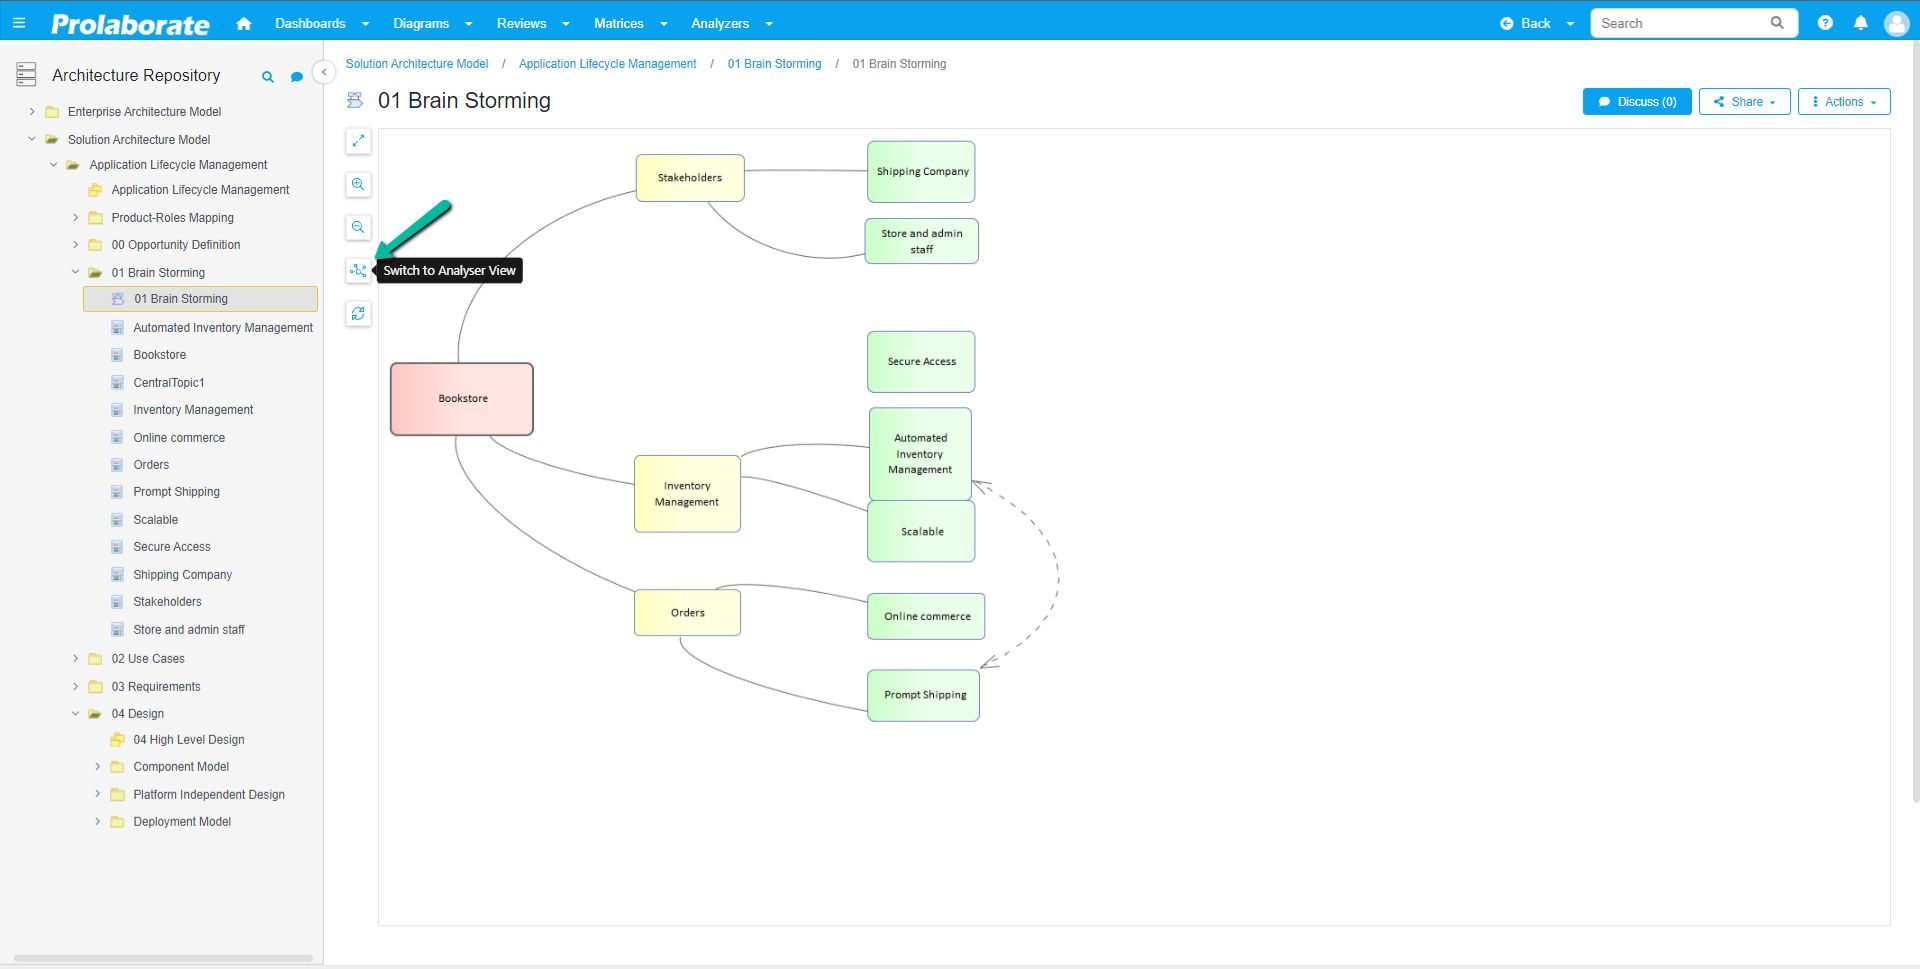
This option opens a new tab that displays all the artifacts available in the diagram with the relationships between them in Analyzer view.
Analysis Features
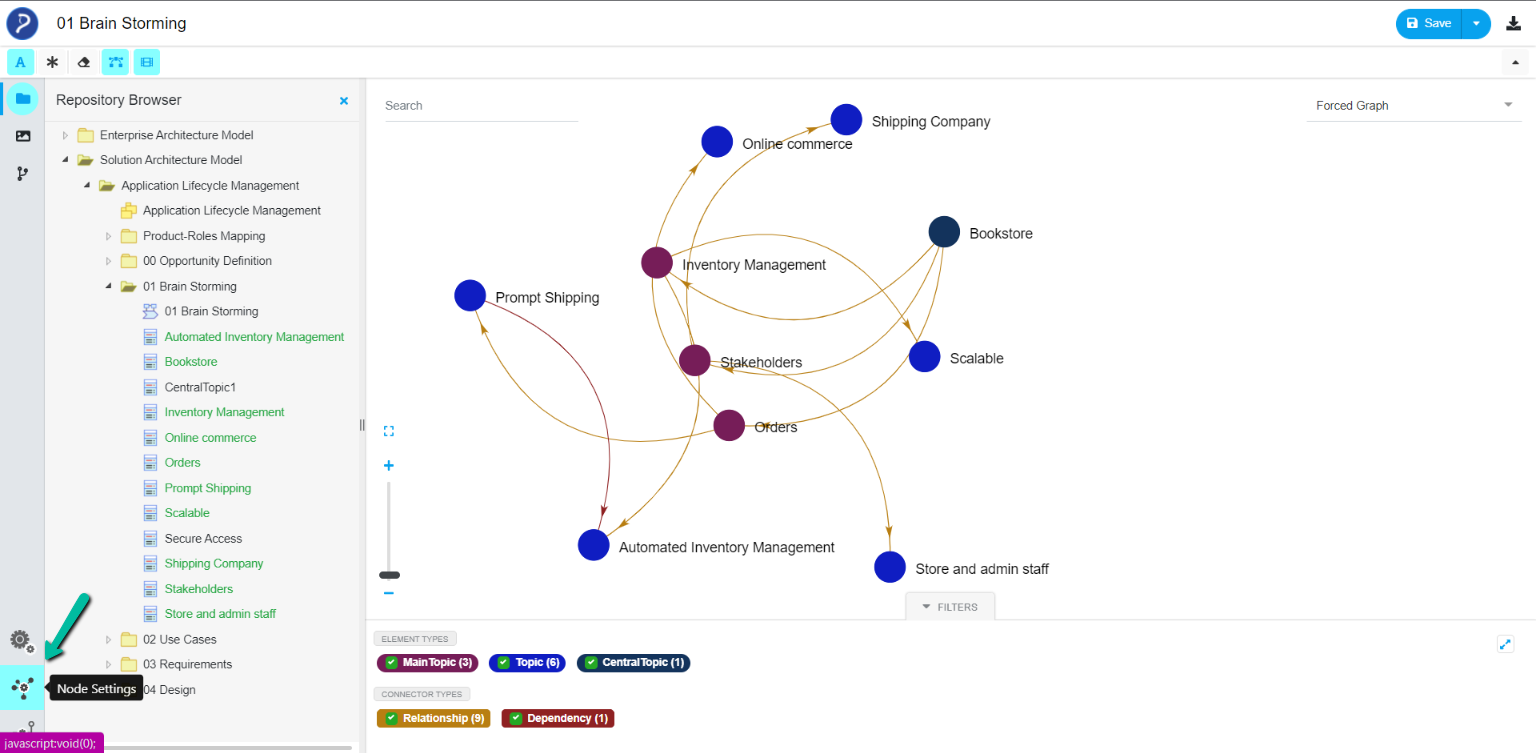
Locate Node in Repository Browser
Repository Browser lists all the sections configured in the repository. The artifacts that are already present in the ‘view’ will be highlighted in green.

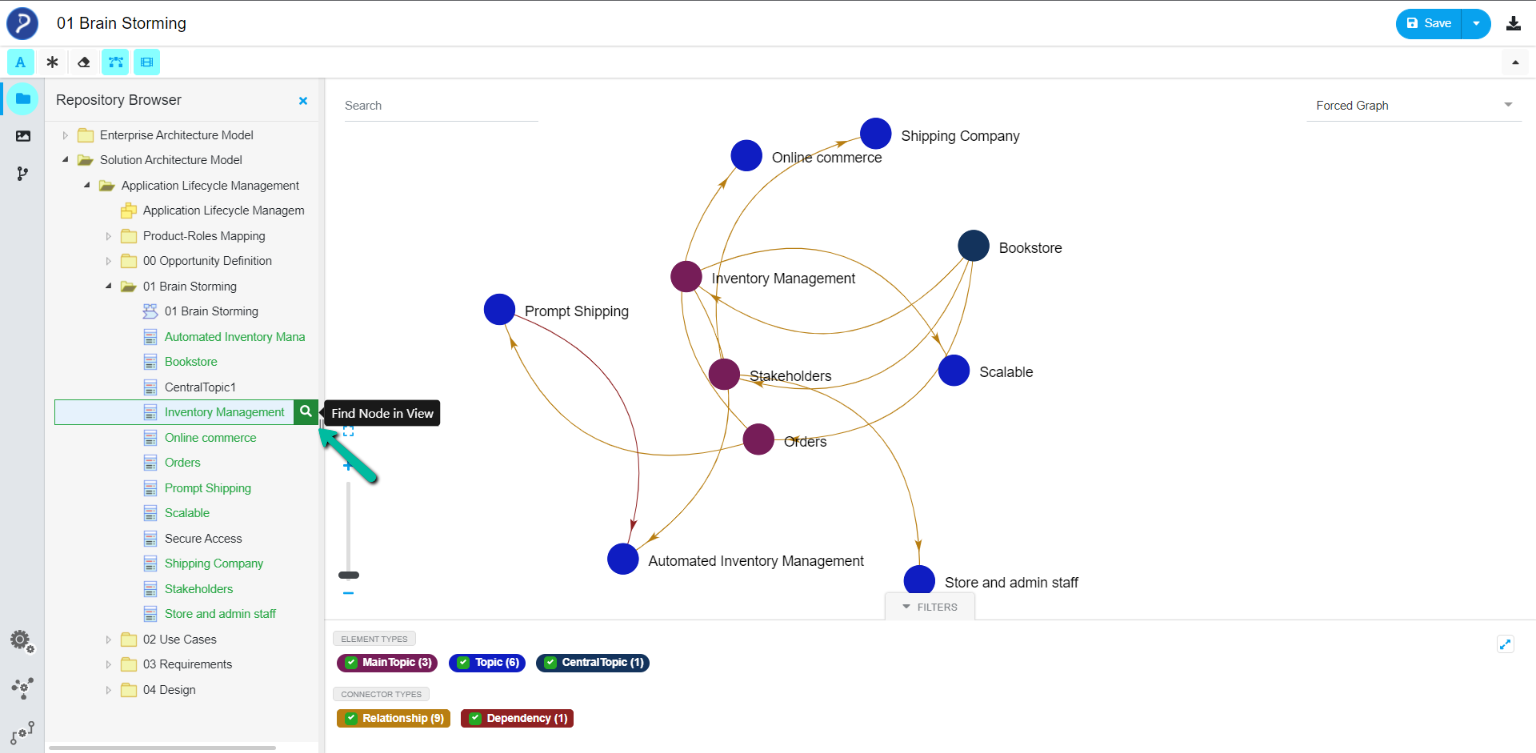
Locate Node in View
User can find the existing artifact in ‘view’ by choosing the Find Node in View option displayed when hovering on them in Repository Browser
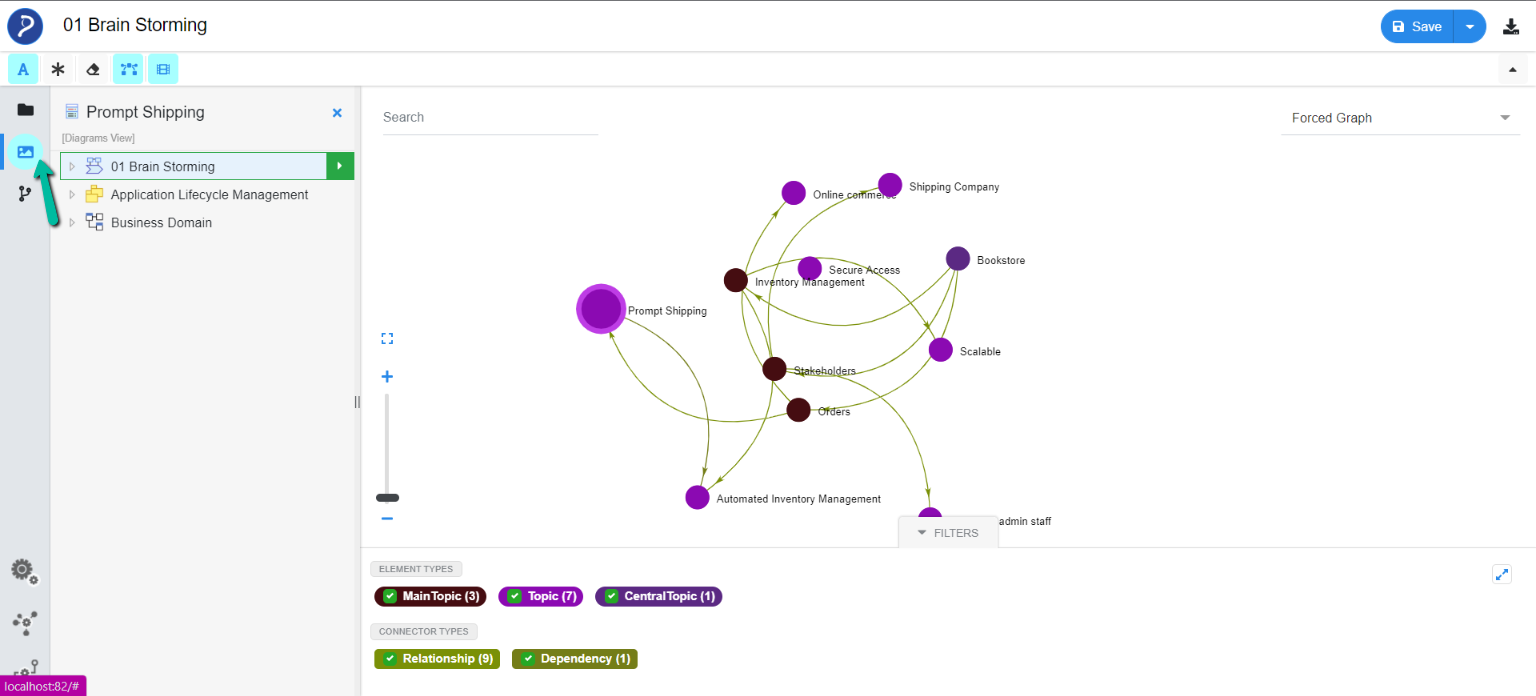
Find usage of a Node in EA diagrams
Diagrams View tab displays the list of all the diagrams where the node is currently present/used upon selecting it.
Traceability
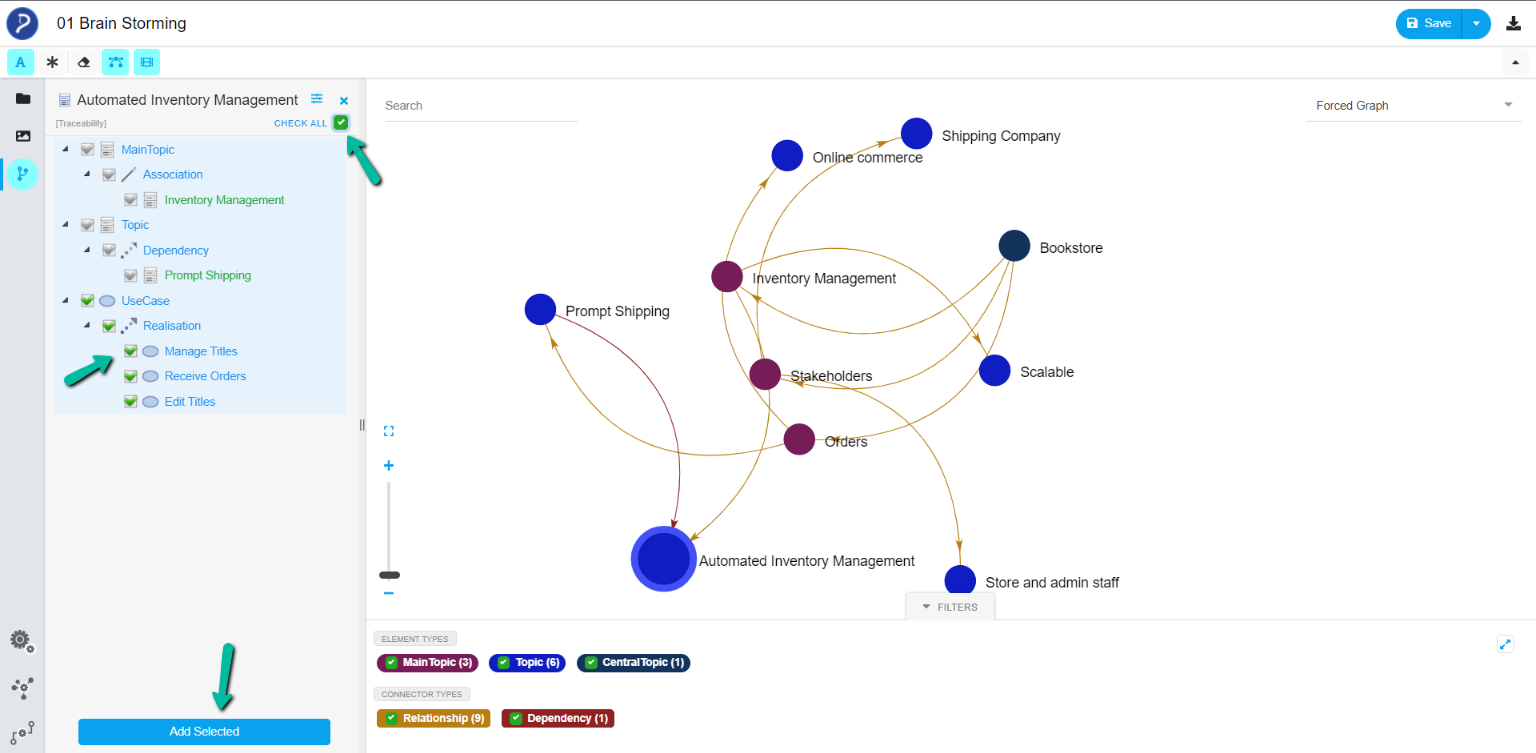
Traceability icon in Analyzer view reveals how a node is connected to other node in the repository along with the type of relationship.
Click a node in ‘view’ and the traceability tab lists all the types of elements that are linked to it along with the relationship type.
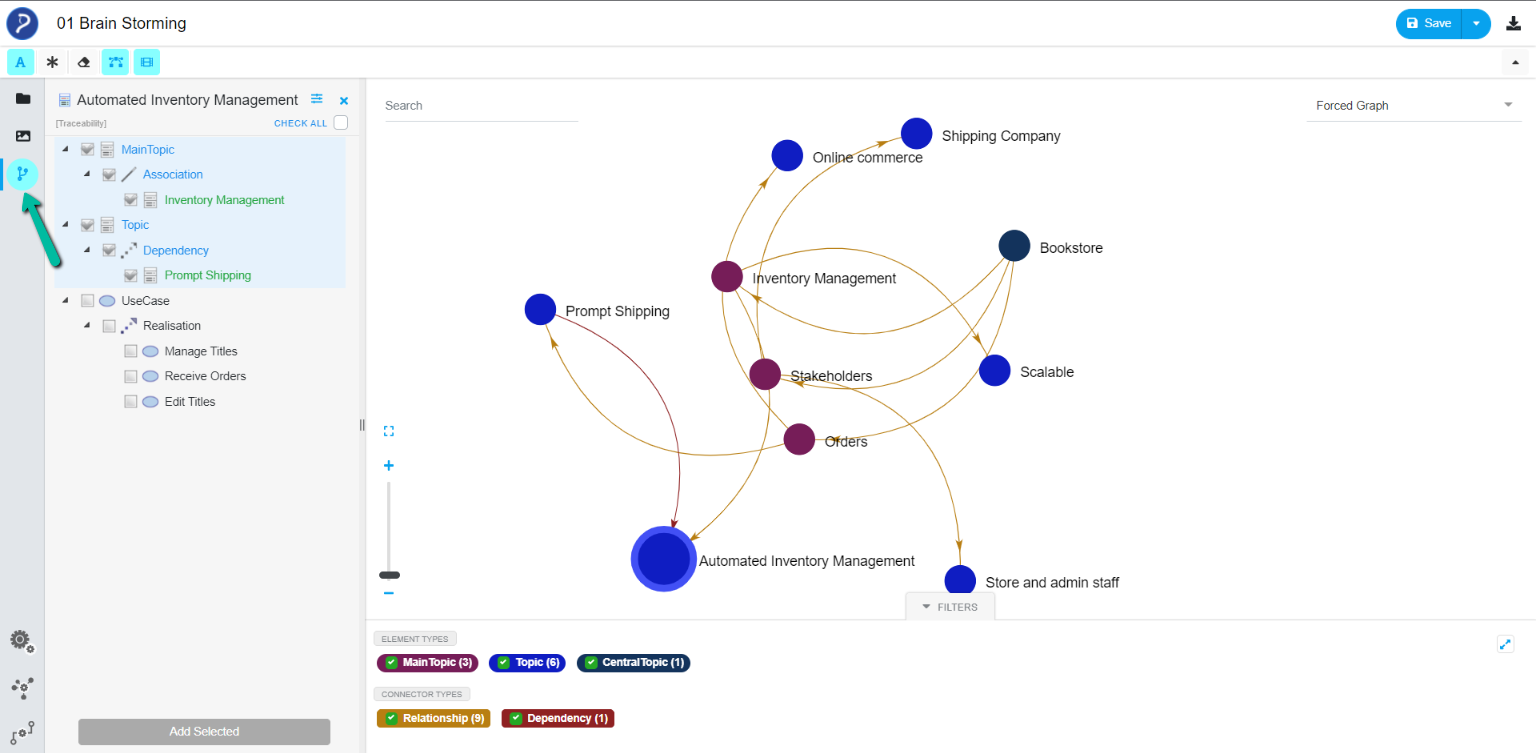
User can add and find nodes from the Traceability tab. Multiple elements can be selected by using the check box available or click Check All to select all the elements. Click on Add Selected button to add them to the view.
Filter
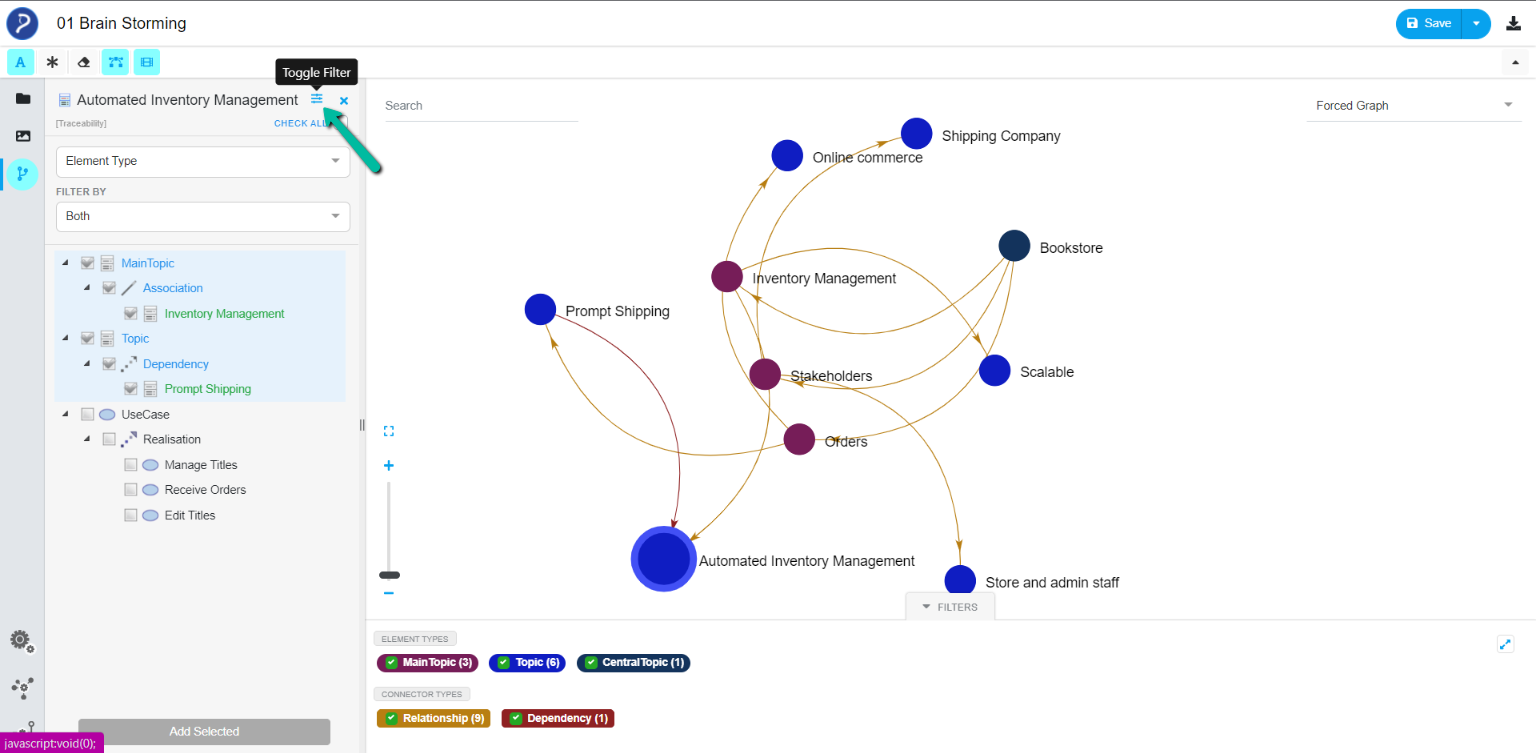
Click Toggle Filter option to show the filtering options.
Type:
- Element type
- Connector type
Filter By:
- Both – When clicked on a node, traceability lists all the elements it is connected with
- Source to Target – List all the nodes and relationships where the selected node is a source
- Target to Source – List all the nodes and relationships where the selected node is a target
Save/ Save as View for reuse
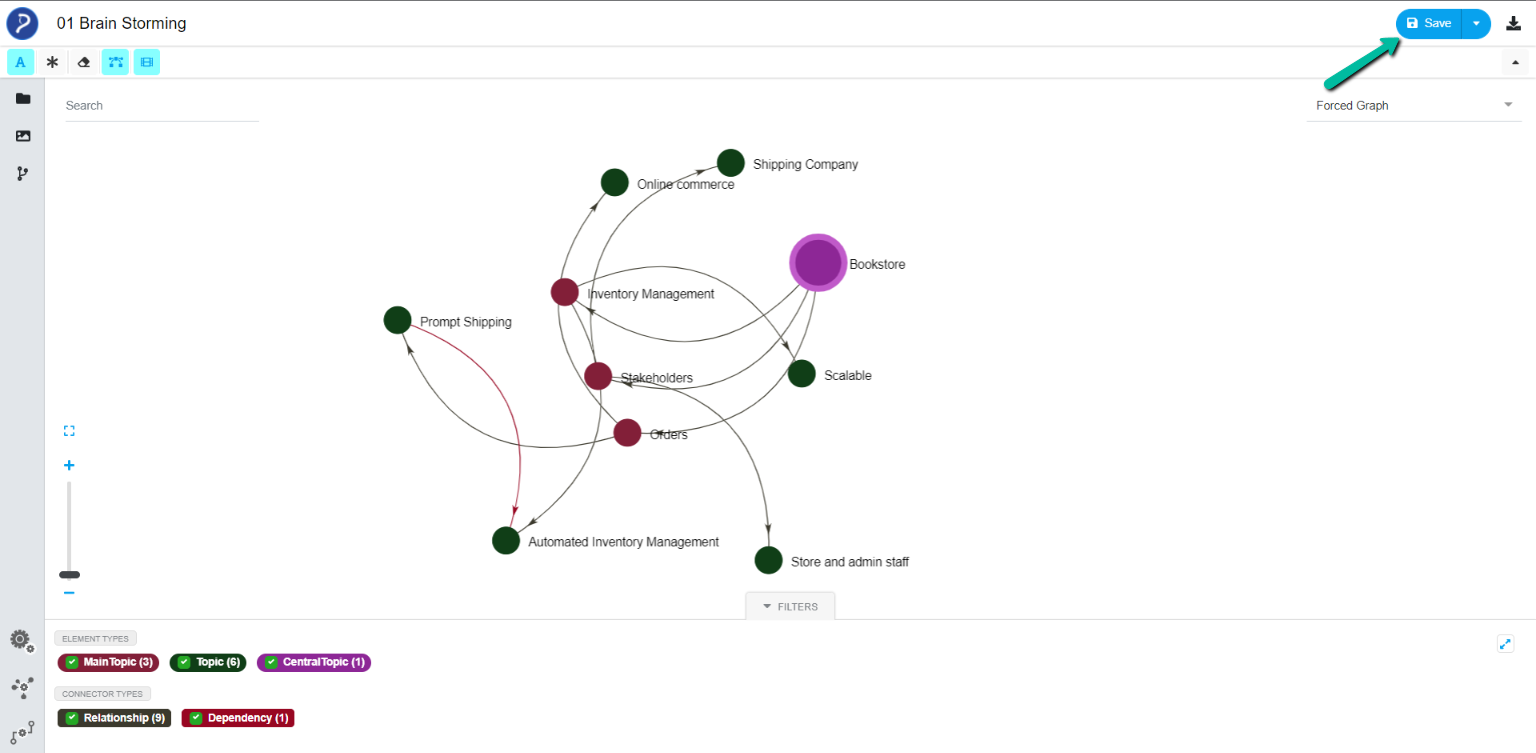
Save the current View using the Save option which can be reopened later to make changes.
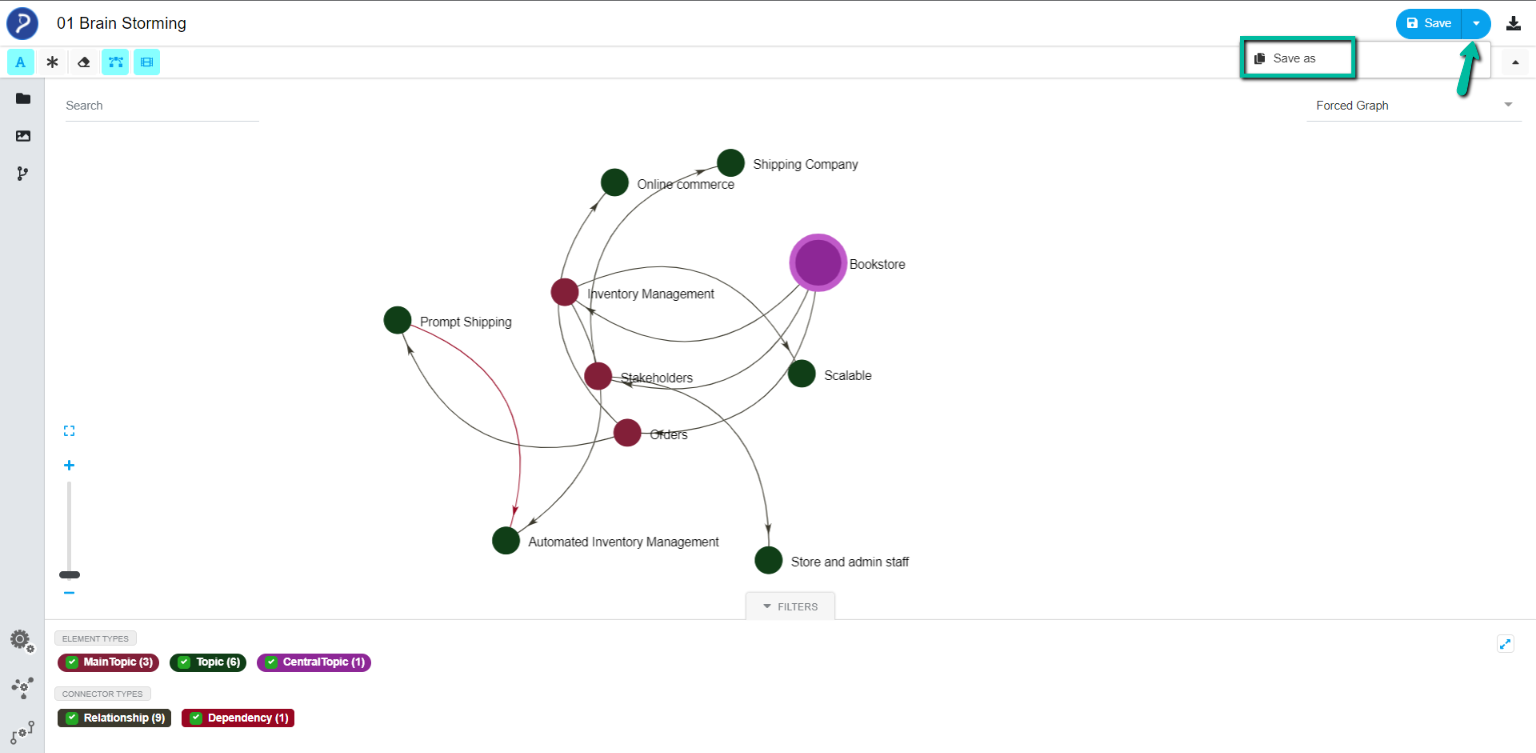
Save the current View as a copy using Save as option. Click the drop-down next to save to display this option
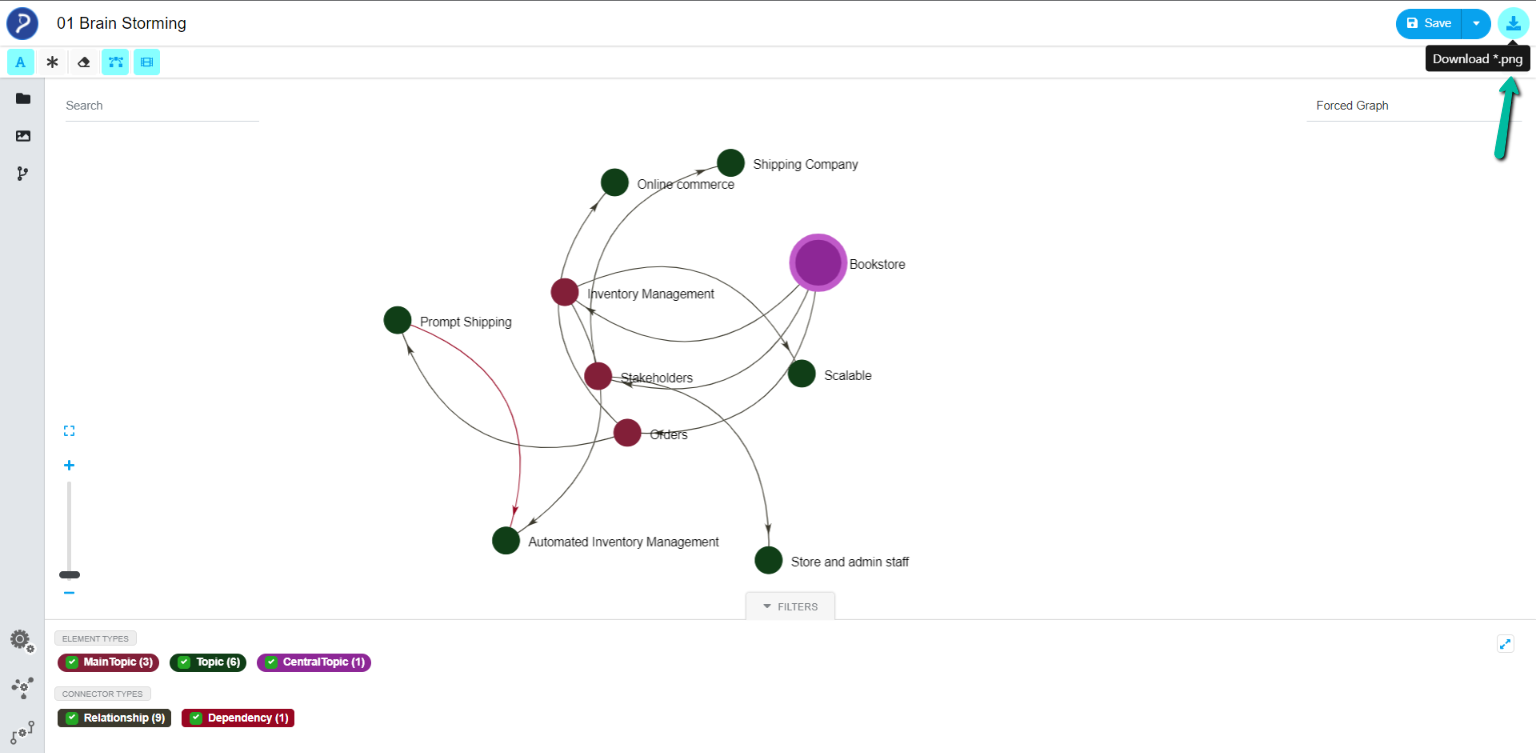
Download View as Image
Click the download icon to download the View in an image format.
Settings
The artifacts and the relationships that are displayed in ‘View’ can be customized using the following settings.
Filter Settings
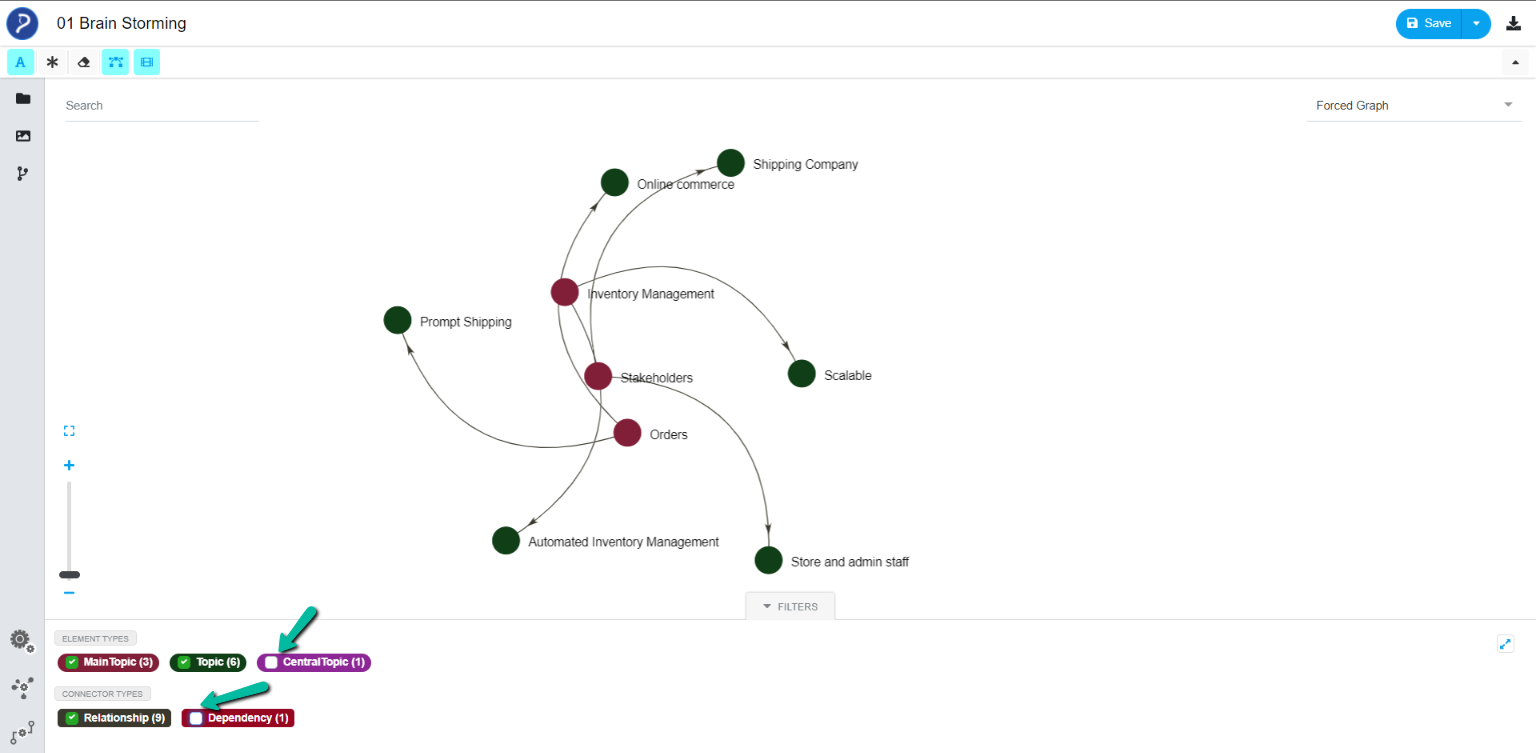
Users can show/hide the particular type of node or connector in ‘View’ using the Filter tab. The filter tab will be at the bottom of the layout where it displays all the types of elements and connectors present in ‘View’.
Uncheck the element or connector type to remove them from the layout.
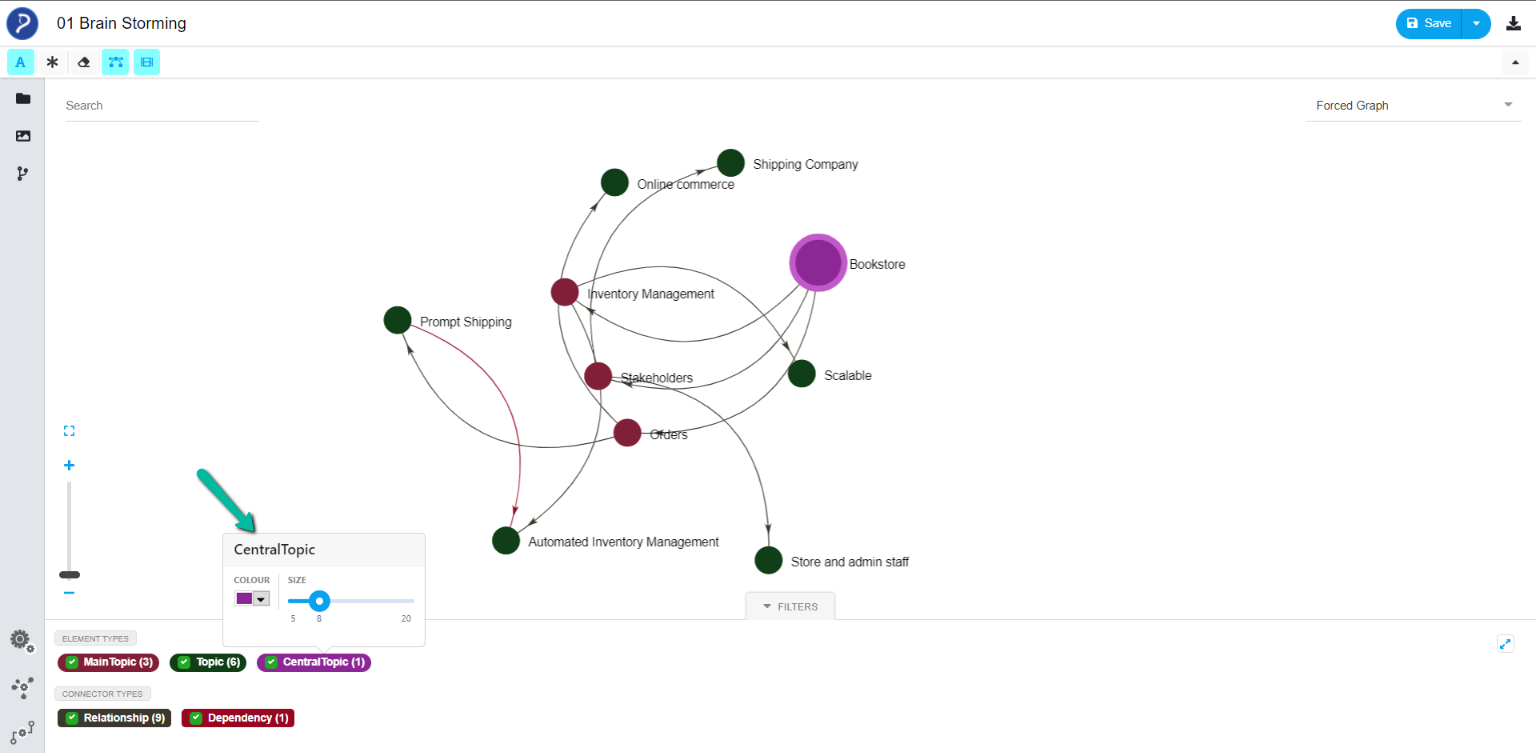
The color and size of both elements and connectors can be changed in the Filters tab. Click an element/connector type and change the color and size respectively.
Node Settings
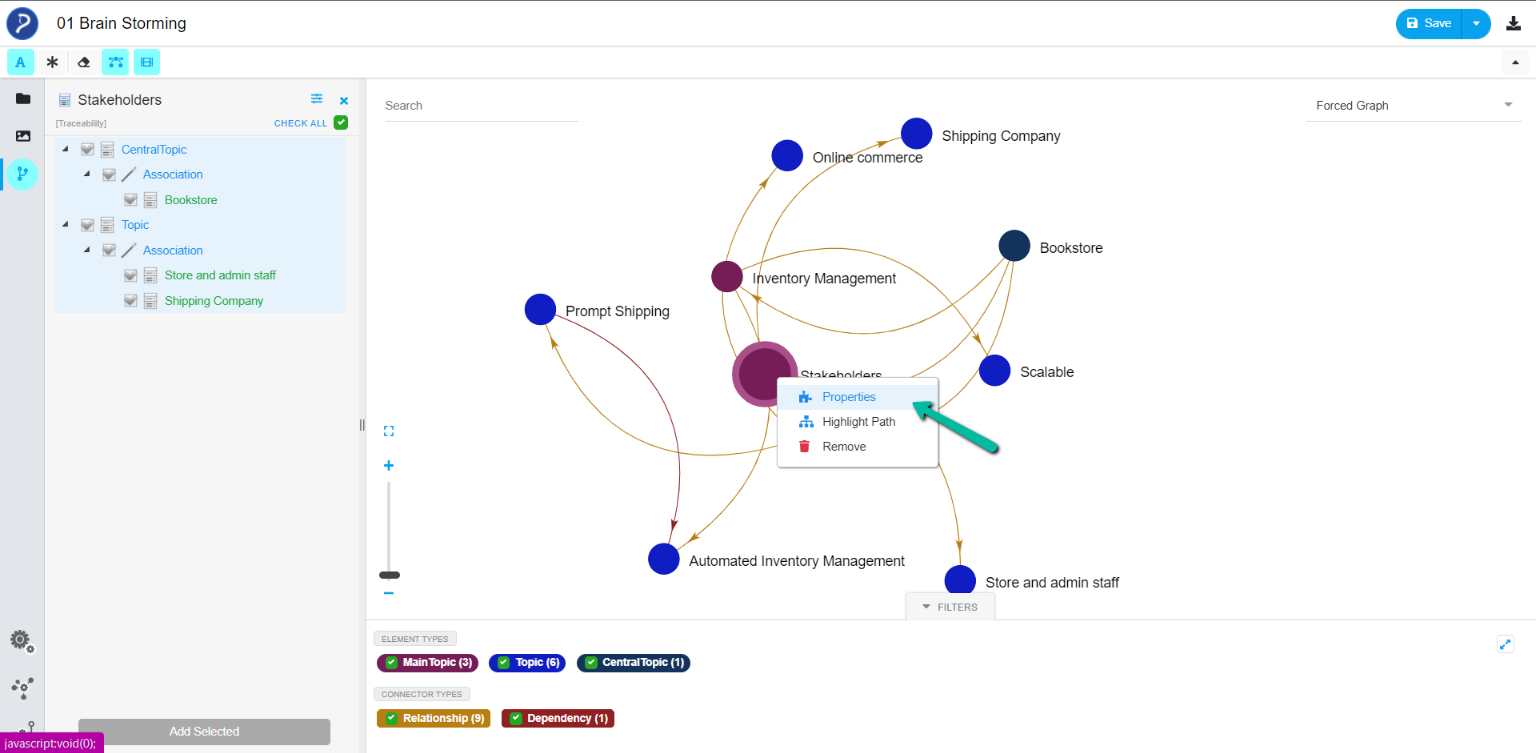
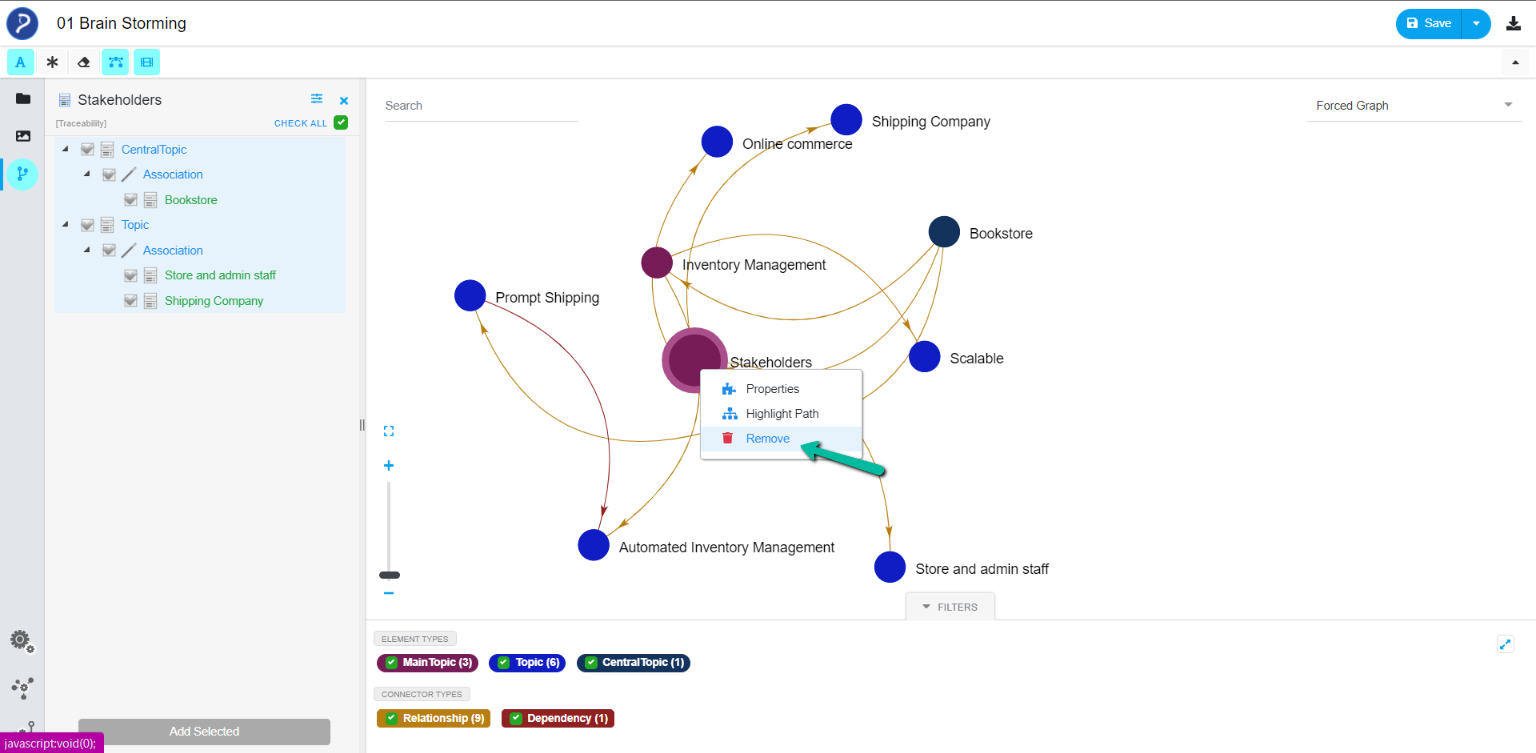
In View, right-click on a node displays a list of options.
Properties
This option opens the properties tab of the selected node
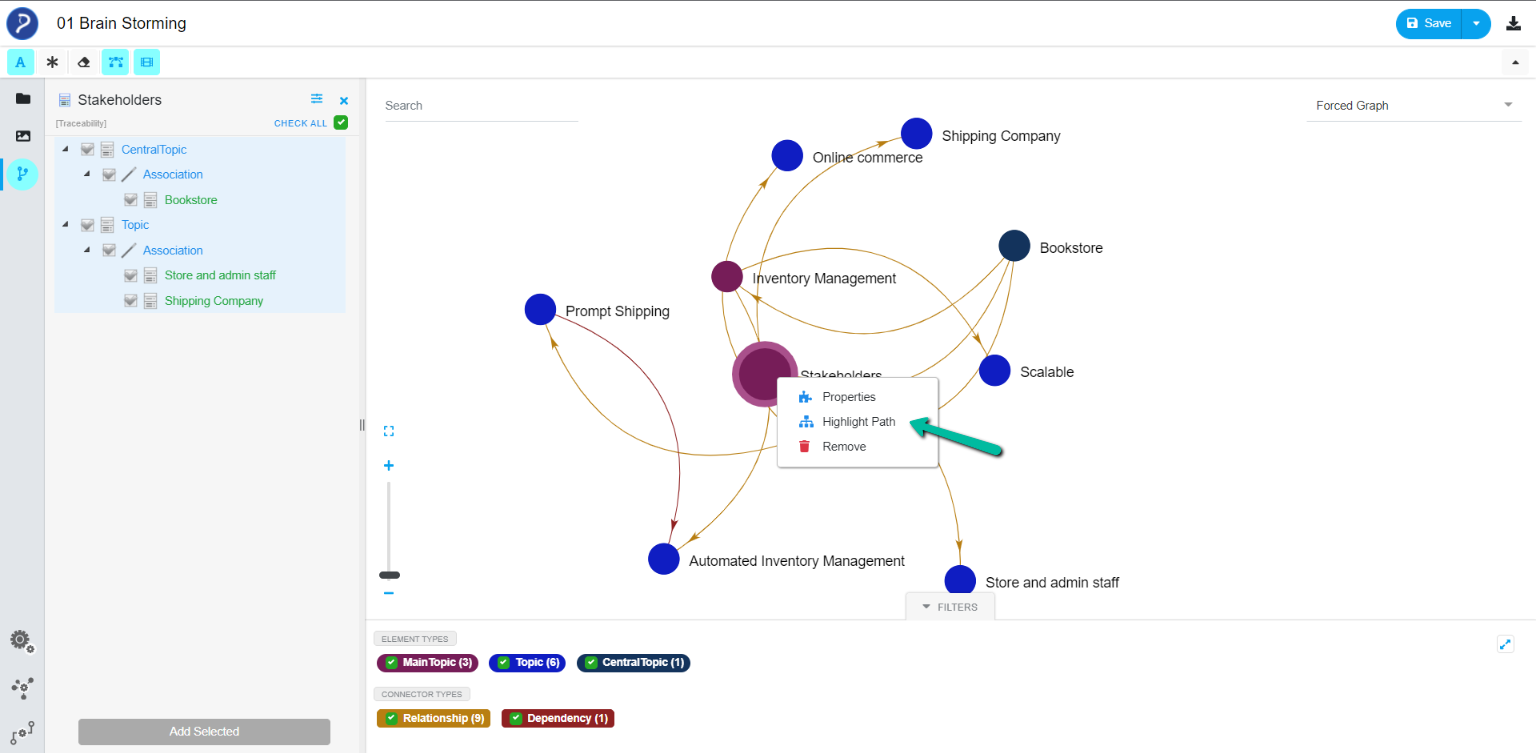
Highlight Path
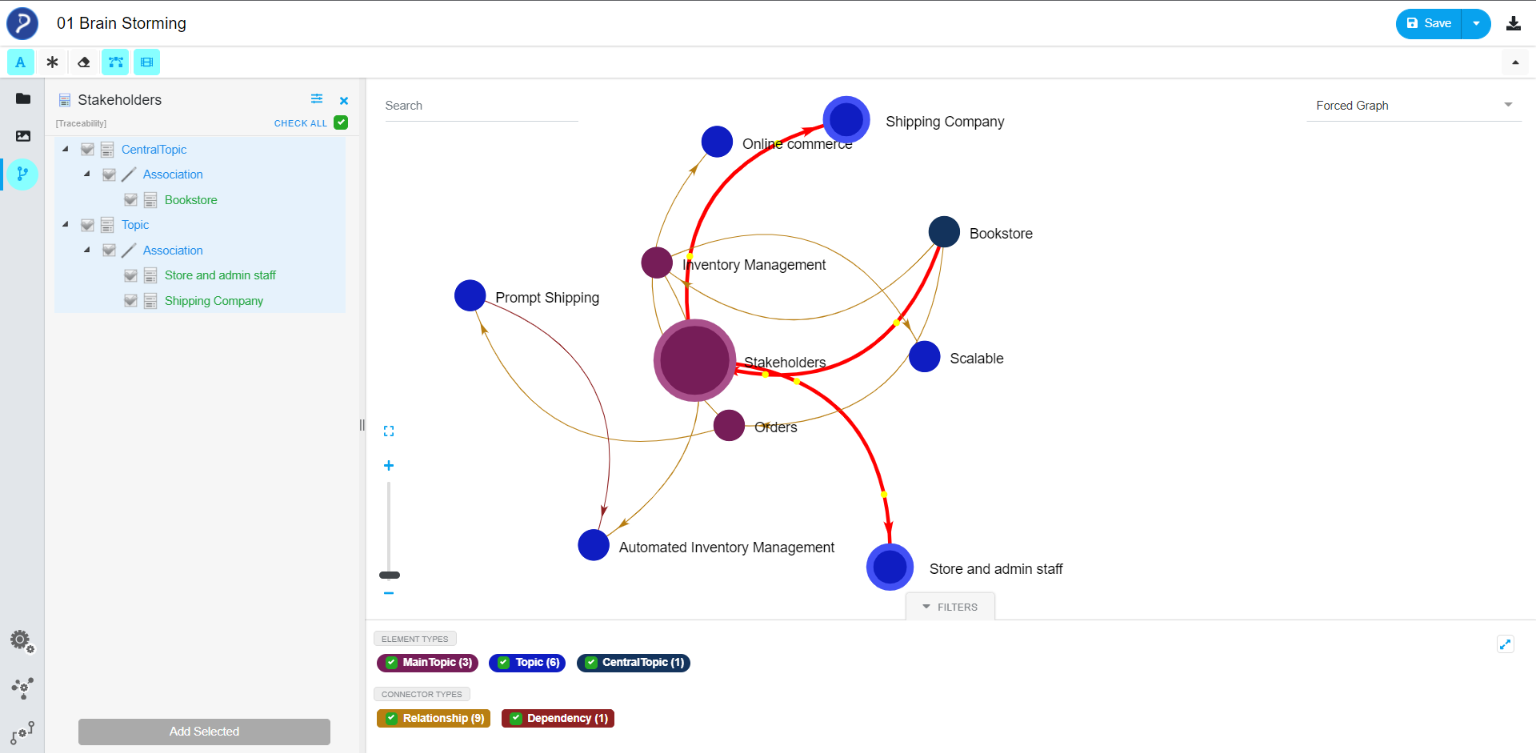
This option highlights all the relationships of the selected node.
After selecting the option, the relationships are highlighted in View.
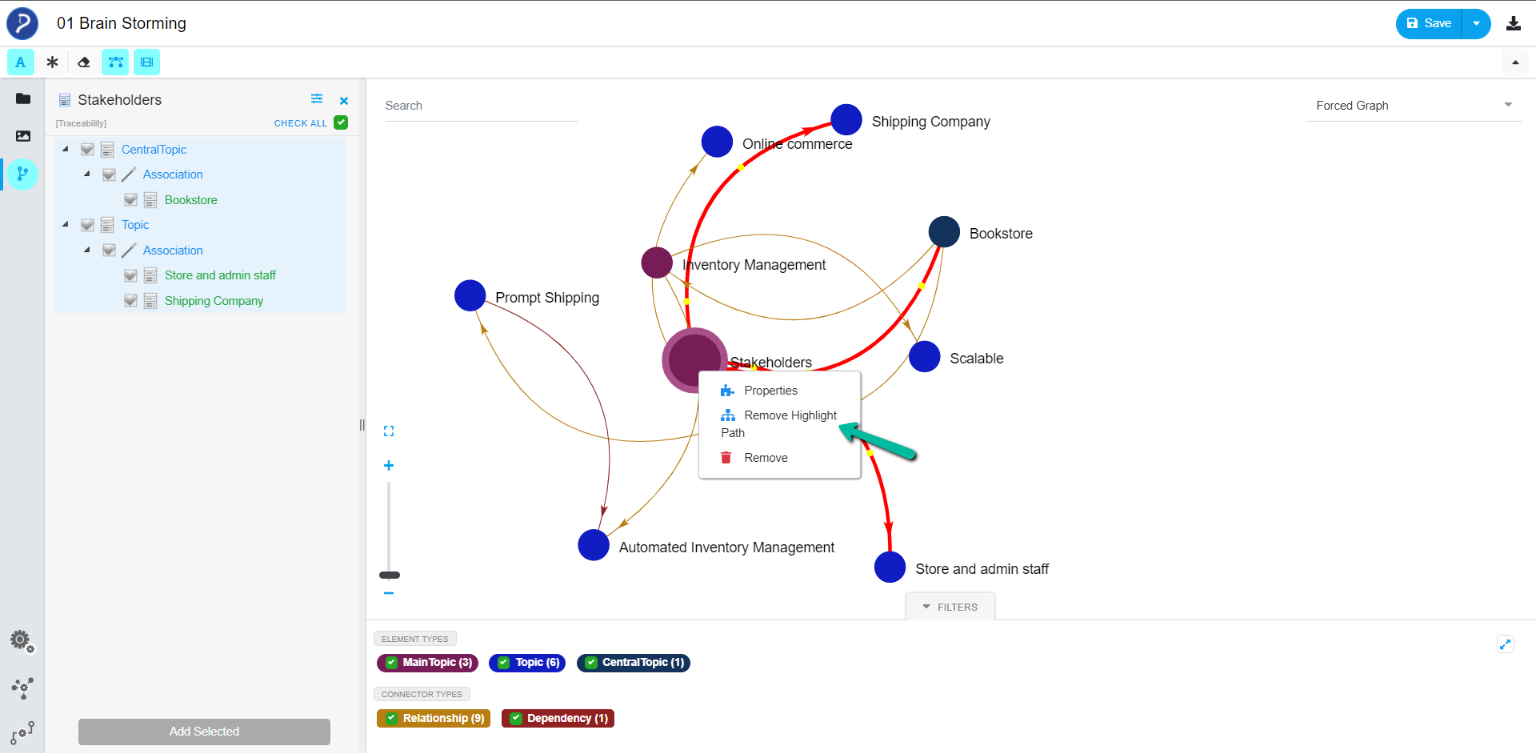
Remove Highlight Path
This option will disable the highlighted connectors.
Remove
This option will remove the selected node from View.
Show and Hide EA Icons
This option allows the user to change the appearance of node by show and hide EA icons in ‘View’.
Format Label Text
Users can configure the appearance of the node in View.
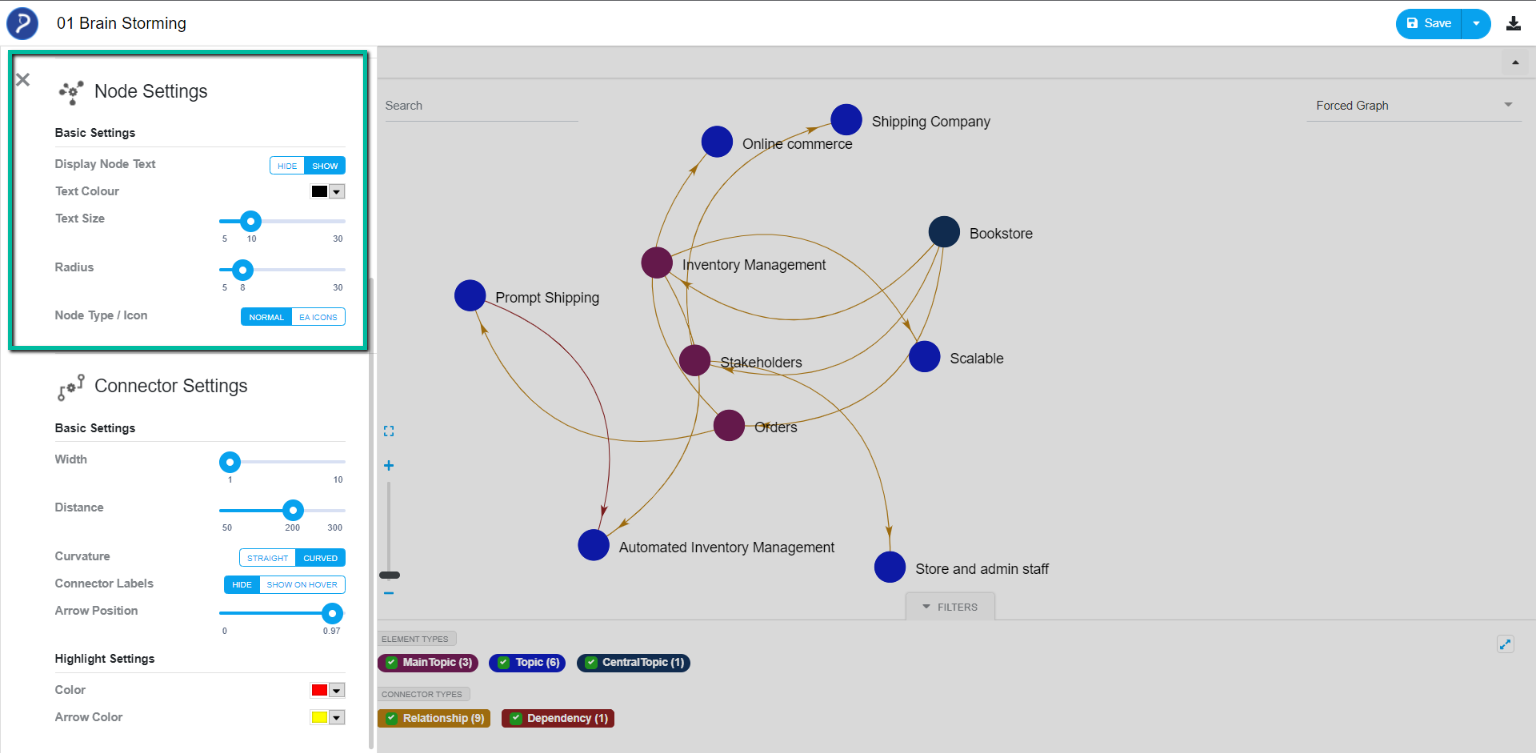
Display Node Text: This option allows the user to show or hide the node labels in ‘View’.
Text Color: This option allows the user to change the color of the node labels.
Text Size: This option allows the user to change the text size of the node labels.
Radius: This option allows the user to change the size of the node.
Node Type/Icon: This option allows the user to change the node appearance by showing them as EA or Normal icons in ‘View’.
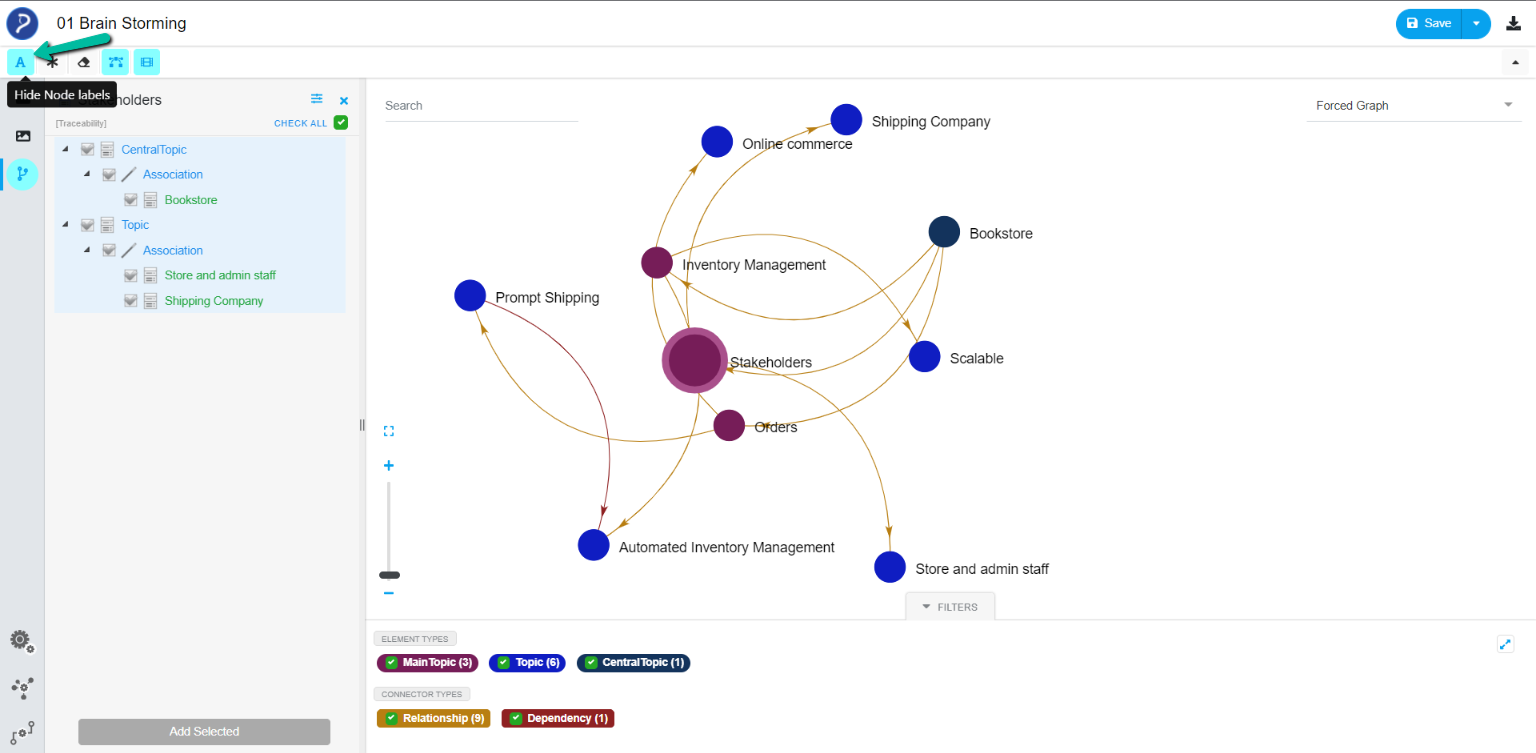
Hide/Show Node Labels: This option allows the user to show or hide the node labels in ‘View’.
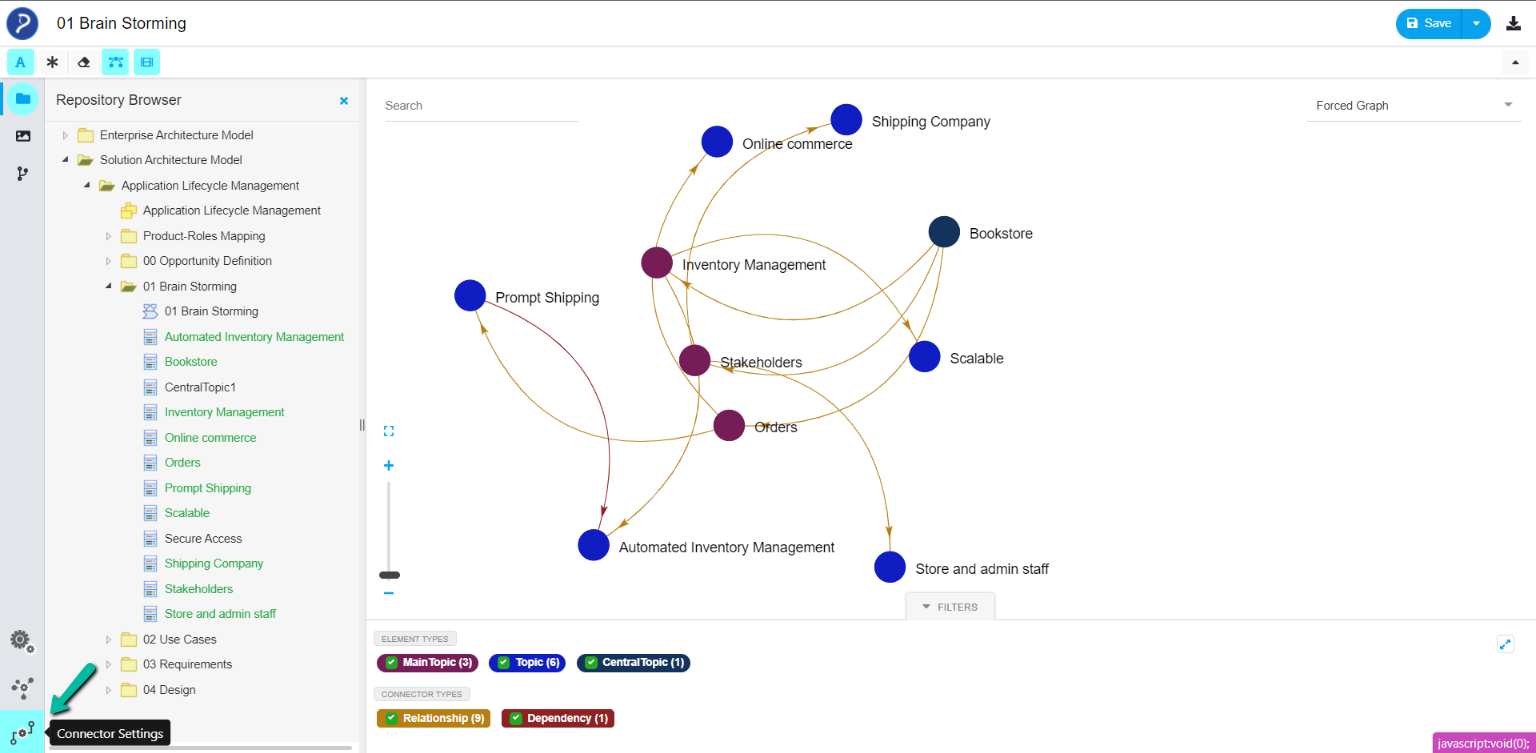
Connector Settings
Users choose to configure the appearance of the connectors in ‘View’.
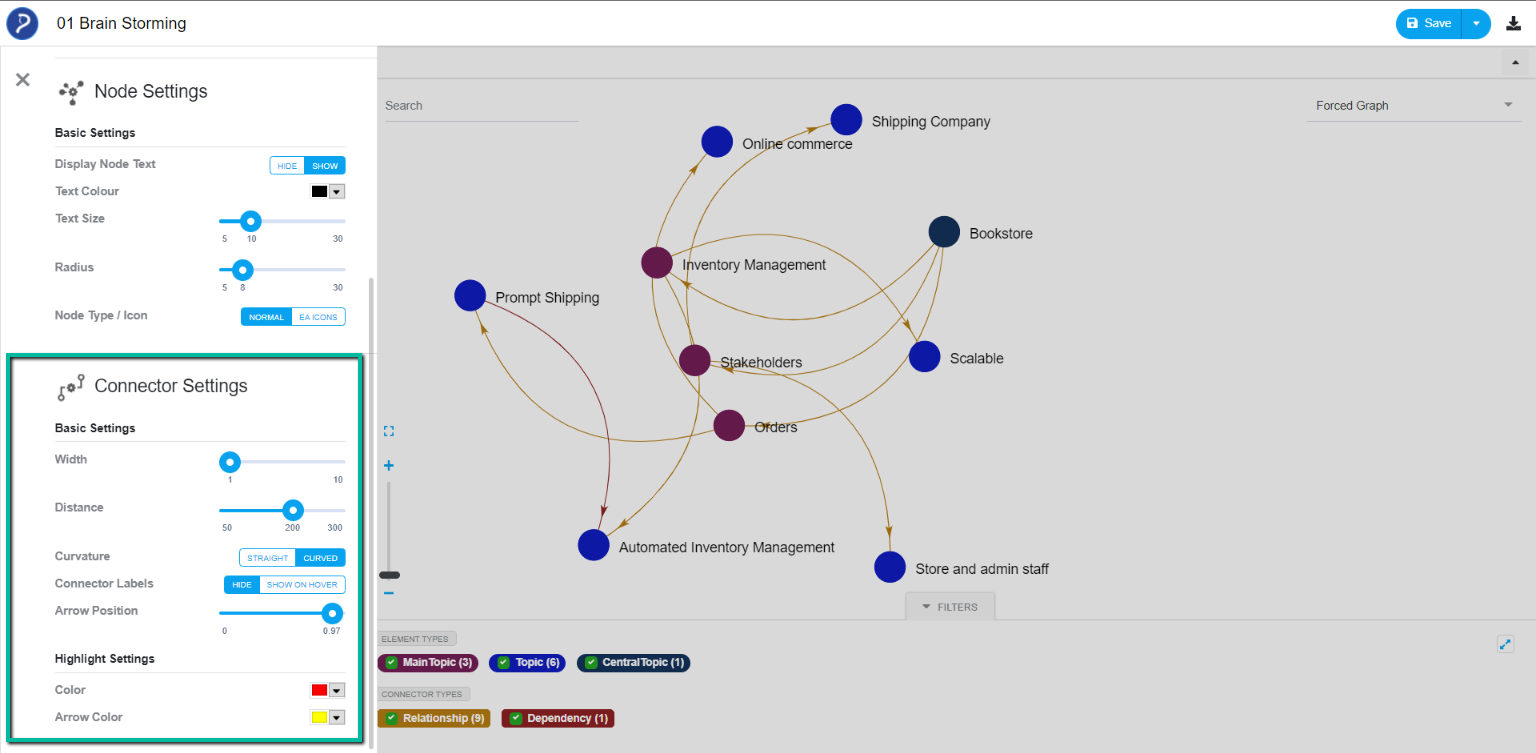
Basic Settings
Width: This option allows the user to change the width of the connecter.
Distance: This option allows the user to change the length of the connector between two nodes.
Curvature: This option allows the user to change the connector appearance and show them as a straight or curved line.
Connector Labels: This option allows the user to hide the connector labels or show them when hovering on the connectors.
Arrow Position: This option allows the user to change the position of the arrow in the connectors.
Highlight Settings
Color: This option allows the user to change the color of the connectors when they are highlighted.
Arrow Color: This option allows the user to change the color of the arrow in the connectors when they are highlighted.
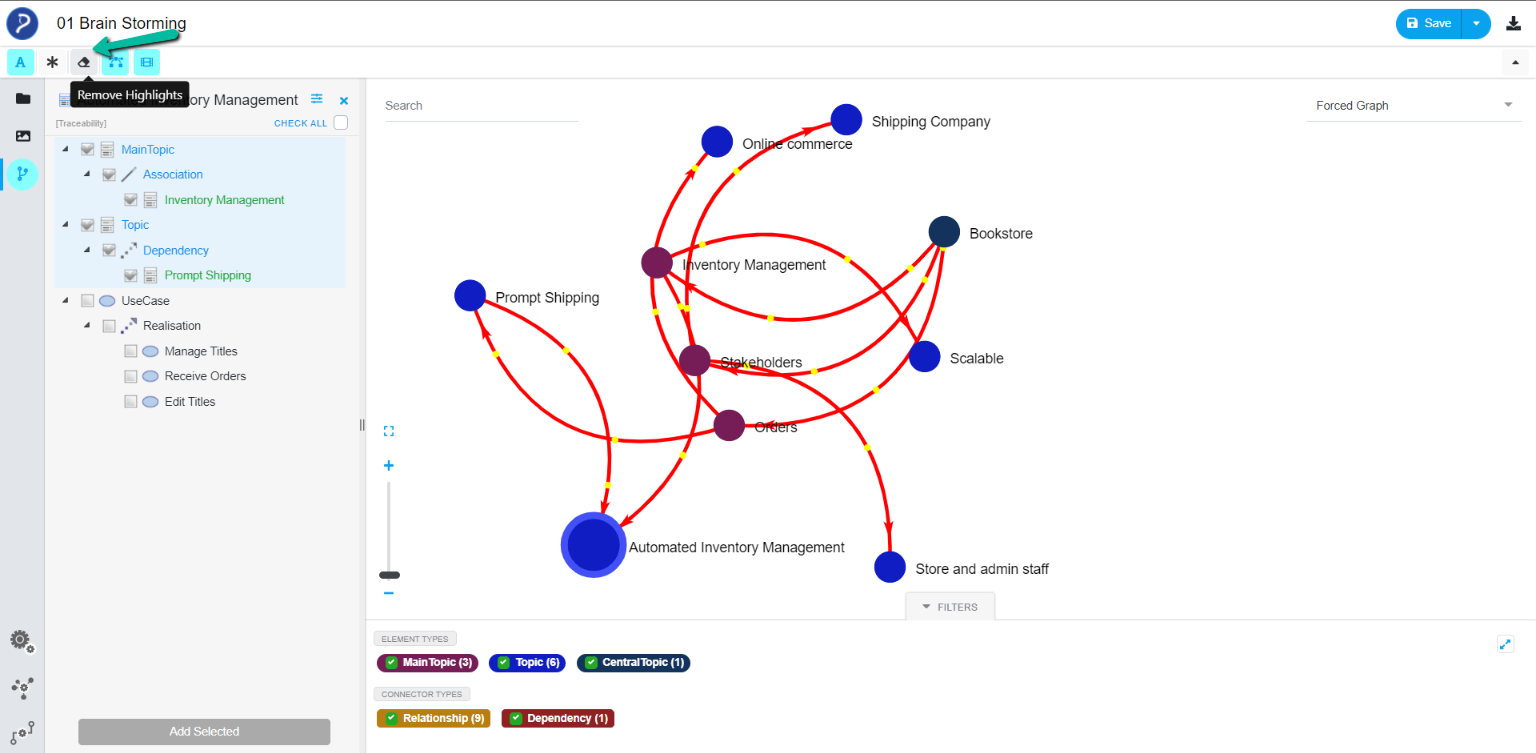
Remove Highlights
This option allows the user to remove all the connector highlights in ‘View’.
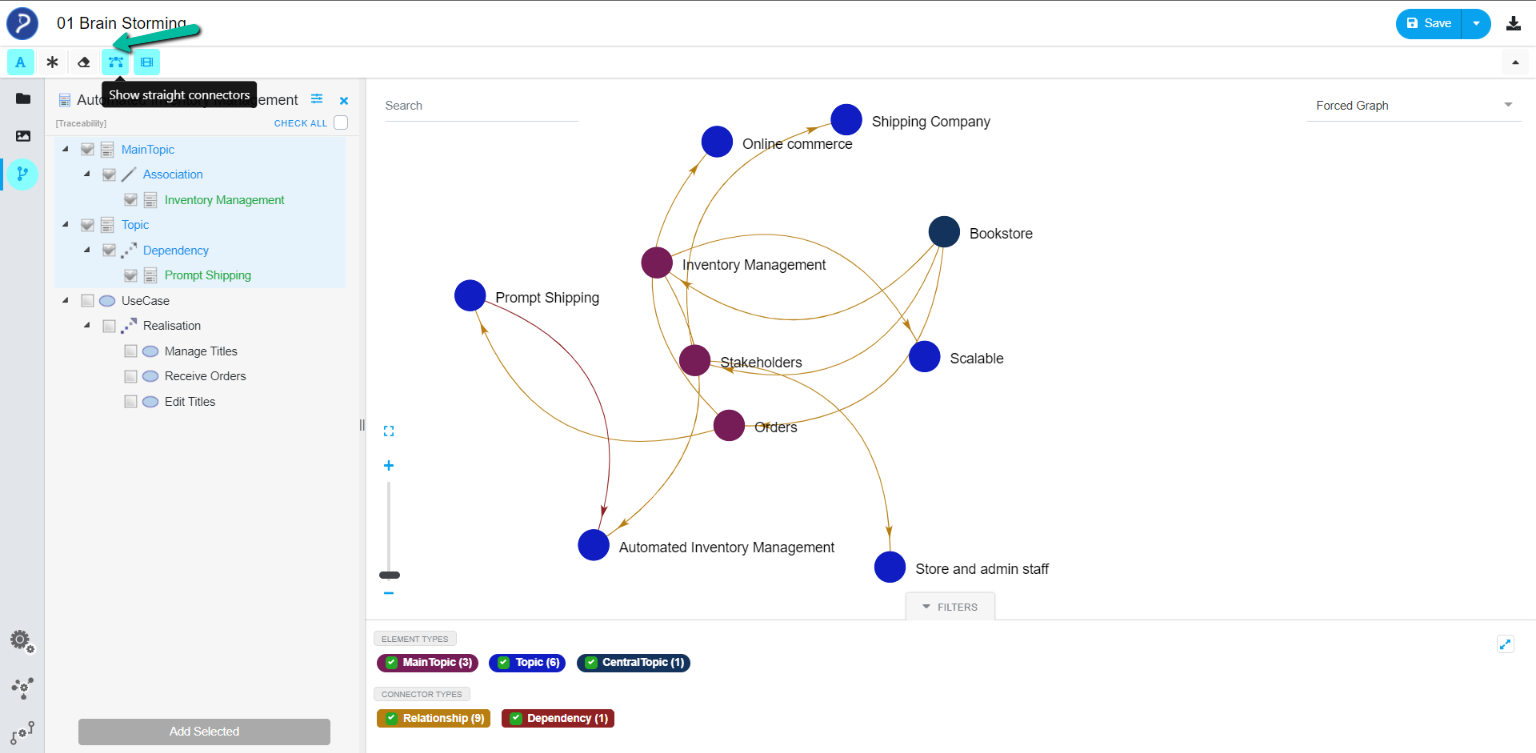
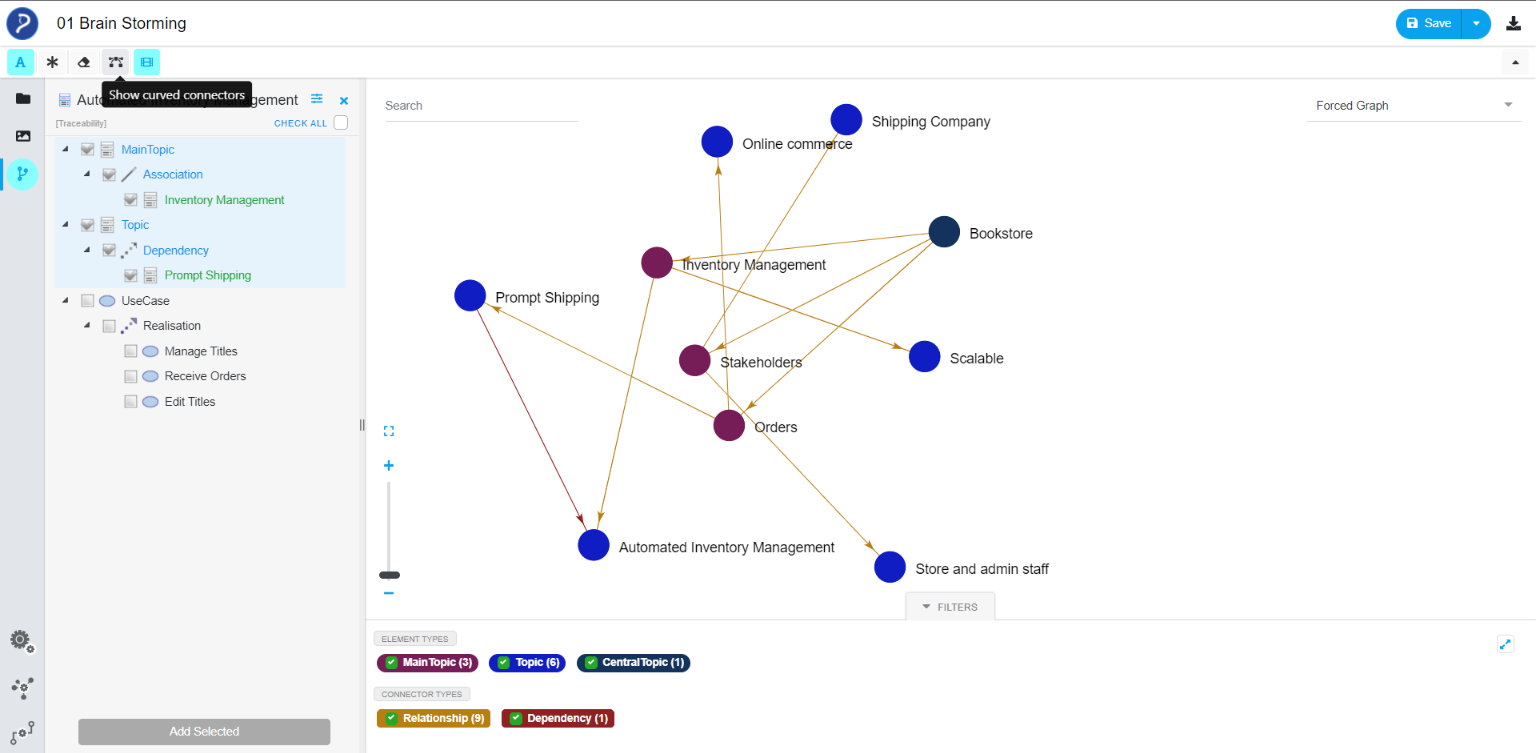
Show Straight/Curved Connectors
This option allows the user to change the connector appearance and show them as a straight or curved line.
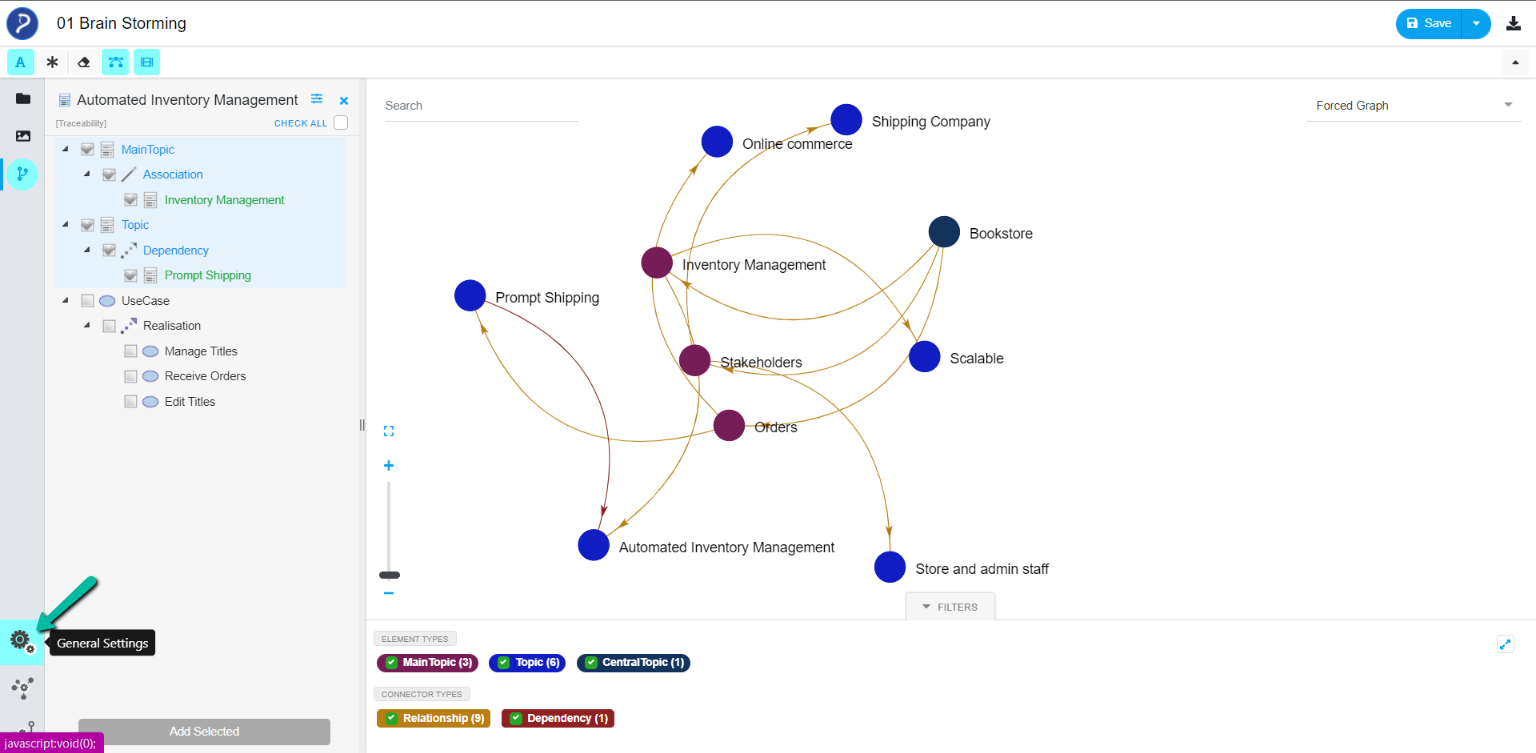
View Settings
General Settings
Users can configure the basic settings like changing the background color of view, highlight and filter settings in the Analyzer View.
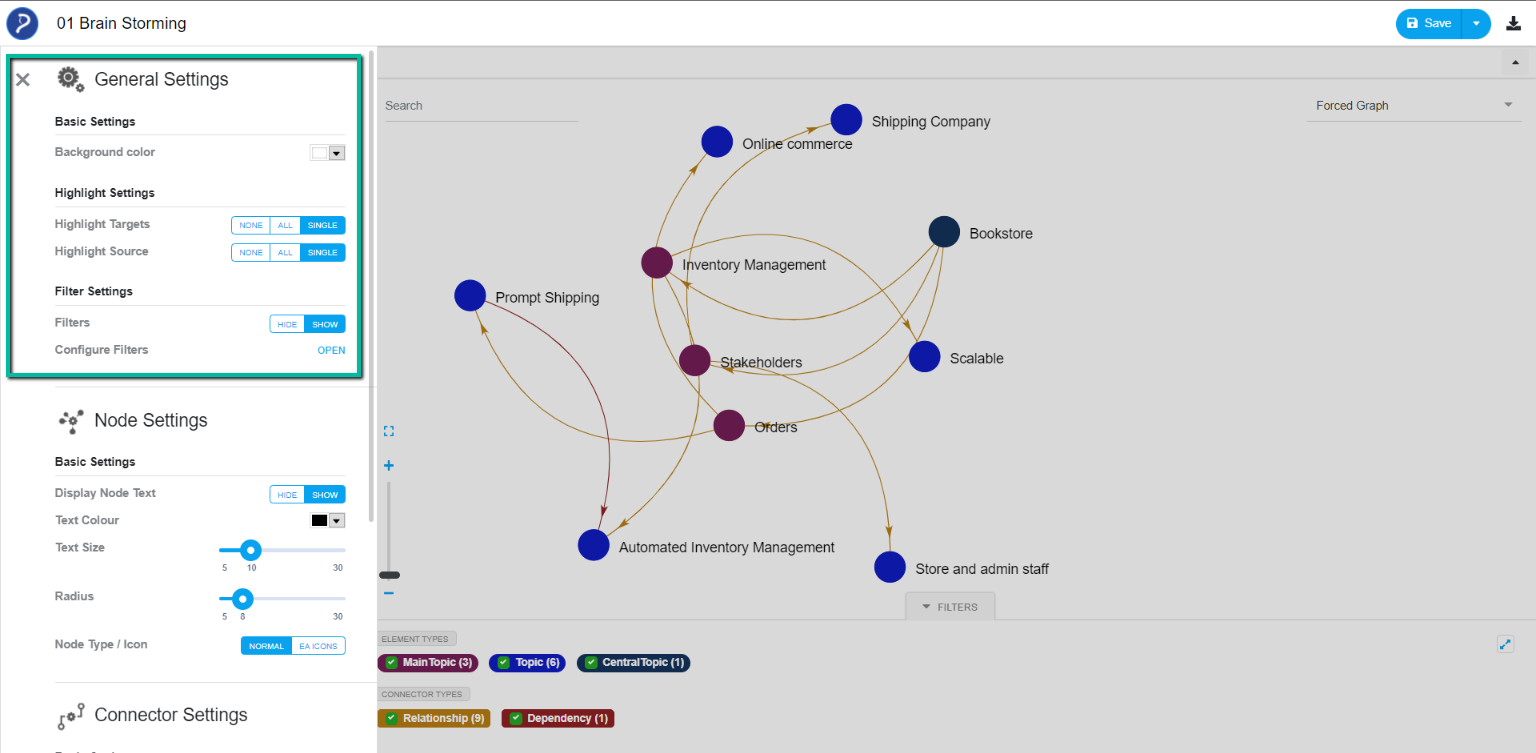
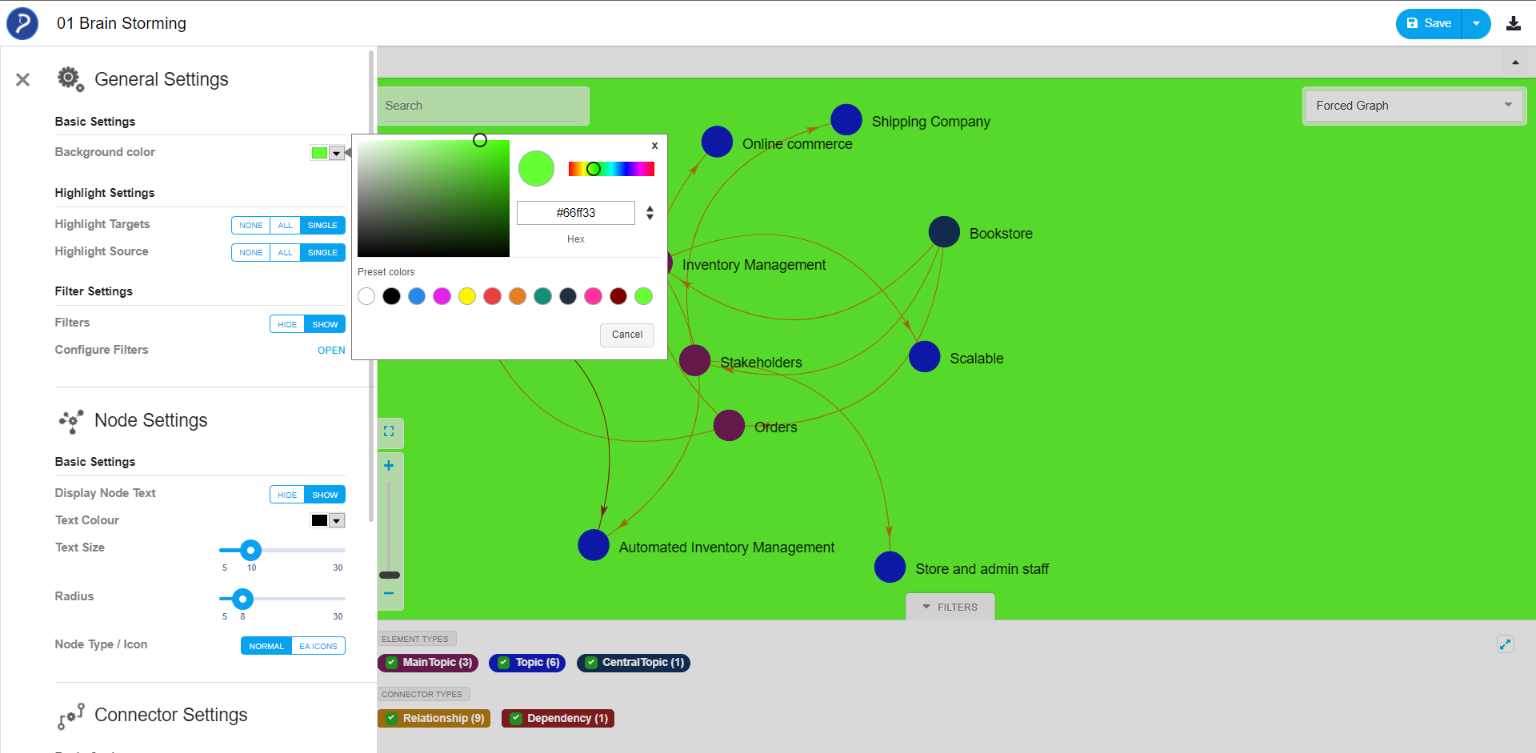
Background Color
User can change the background color of the view by choosing the required color in the dropdown.
Highlight
Highlight Targets:
- Single – Highlights single level relationships where the selected node is a target
- All – Highlights all level relationships where the selected node is a target
- None – Does not highlight any relationships where the selected node is a target
Highlight Source
- Single – Highlights single level relationships where the selected node is a source
- All – Highlights all level relationships where the selected node is a source
- None – Does not highlight any relationships where the selected node is a source
Filter
Filters: This option allows the user to show/hide the filters tab in ‘View’.
Configure Filters: The configure filters popup window gets displayed when the user clicks on open

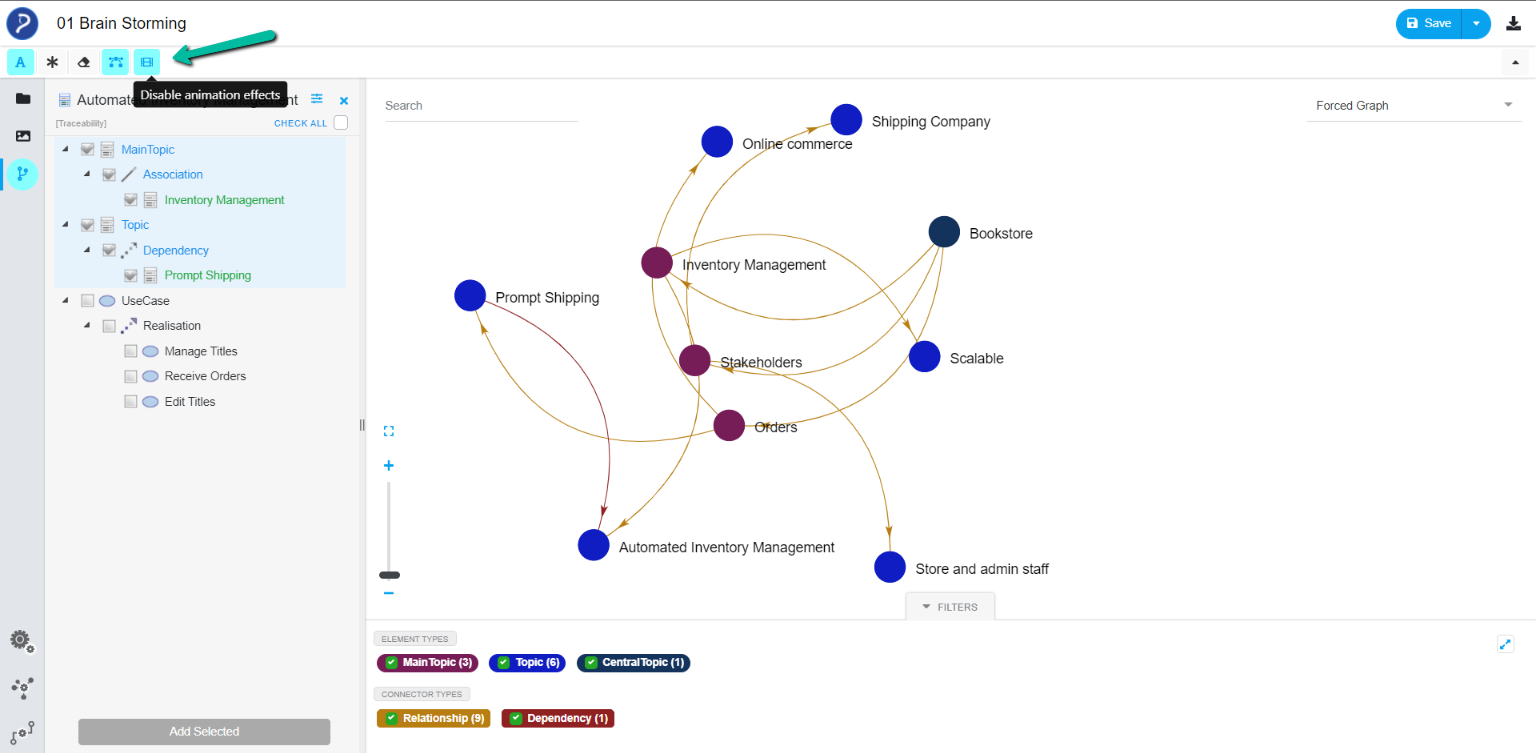
Enable/Disable Animation Effects
This option allows the user to enable/disable the animation effects in the View.
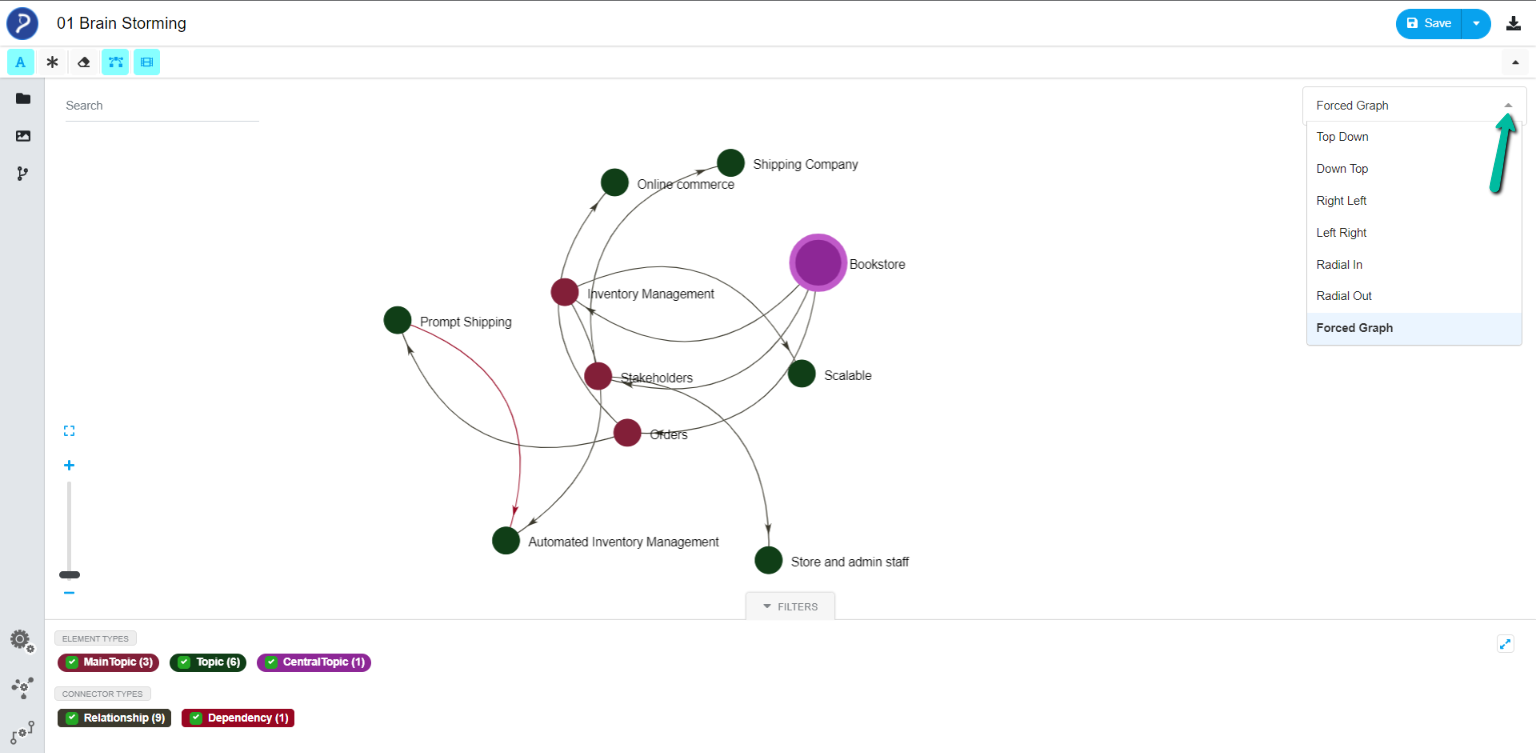
Layout Settings
Change Layout: Click the drop-down menu and choose from the list of options available to change the layout of the View as required.
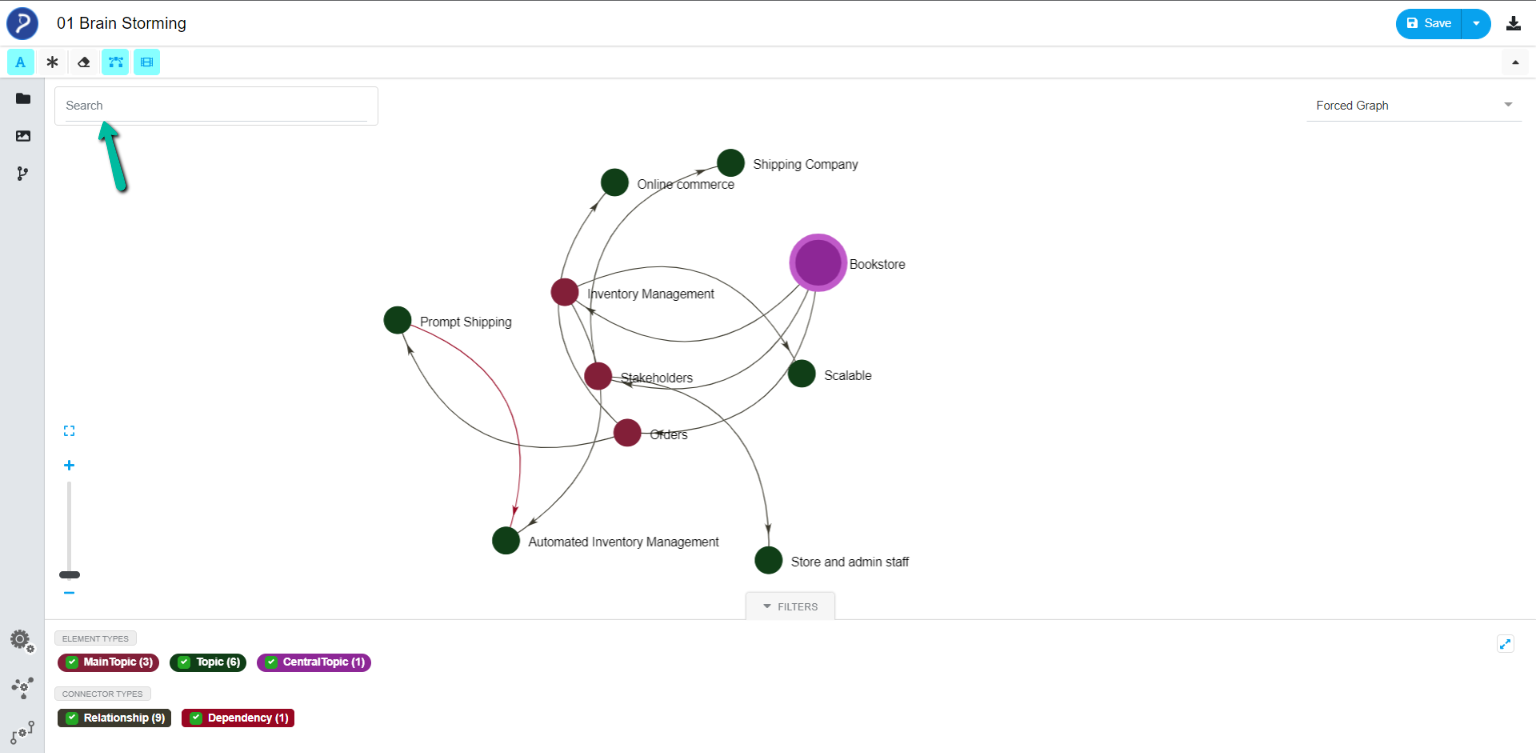
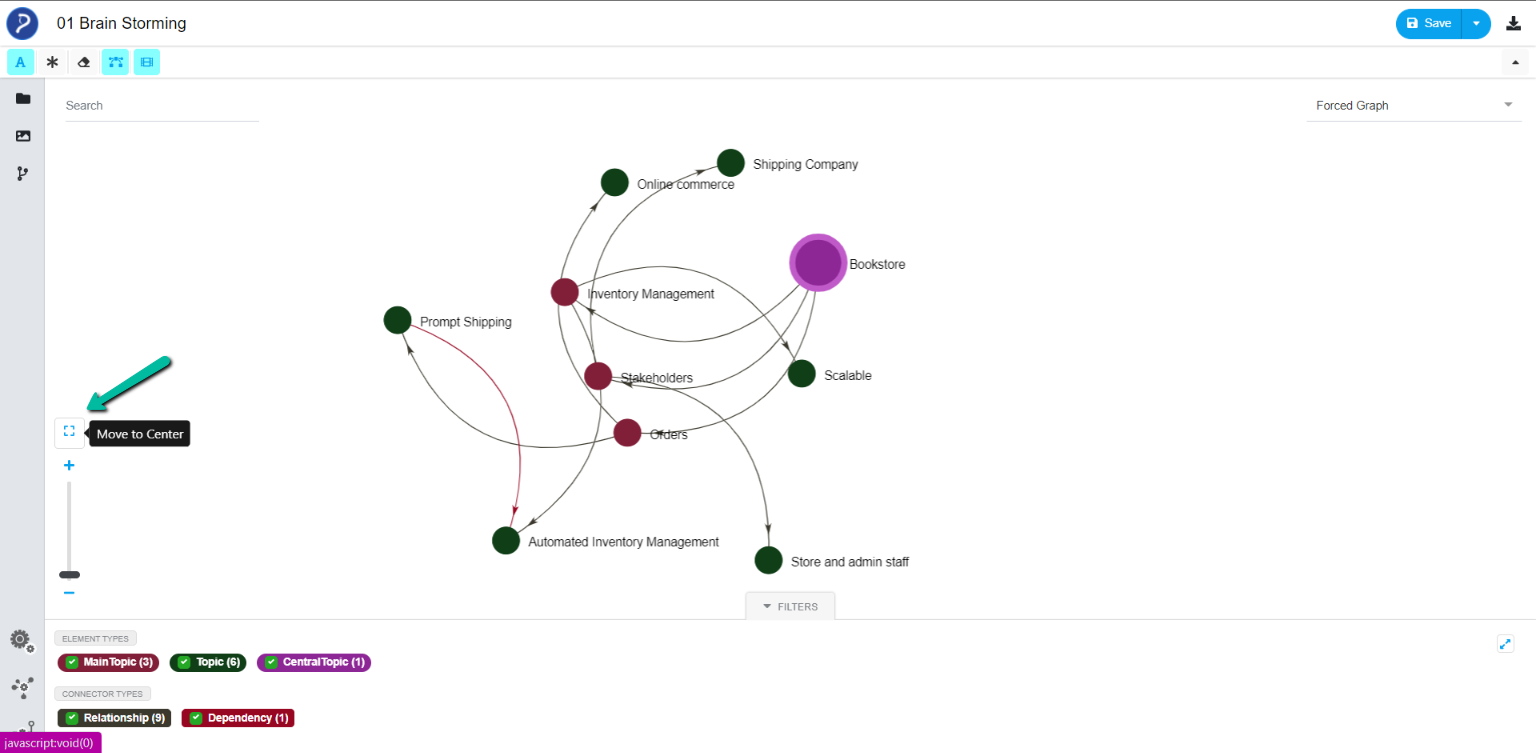
Search: By using the search field, the user can search for the elements available in ‘View’
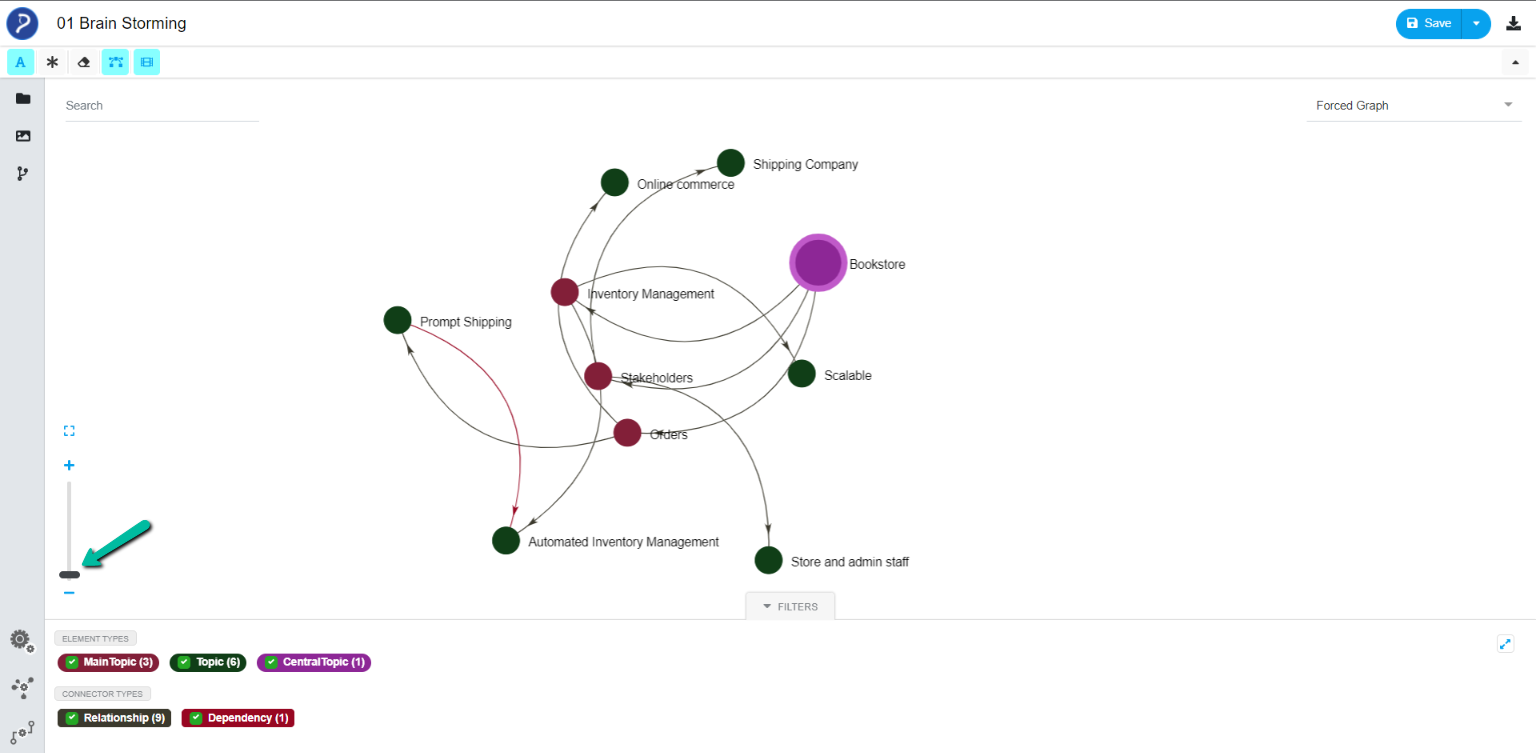
Zoom: Zoom in and out using the scroll bar.
Move to Center: Use this option to move the contents in ‘View’ to the middle of the layout.
Lets have a quick look about Analyzer through this video