Integrate SAML Single Sign-On
Integrate SAML Single Sign-On
Prolaborate enables access to Enterprise Architect models through SAML Single Sign-On capability.
While this integration should work with any identity provider, the tested ones are
- Azure Active Directory (Learn how to configure here)
- Microsoft Active Directory Federation Services (Learn how to configure here)
- Okta (Learn how to configure here)
- Mini Orange
- Oracle Identity Cloud Service (Learn how to configure here)
- IBM Security Access Manager
- Ping Identity (Learn how to configure here)
- Jump Cloud (Learn how to configure here)
In this guide, we will see how configure SAML Single Sign-on in general.
Configure SSO App
On top of the usual setup you do in your SSO app, do the following:
Attributes
The following attributes must be created:
- firstname
- lastname
Note:
- Case sensitivity applies to attribute mapping. therefore kindly use lower case as mentioned above
Claims
The following claims, as applicable, must be configured:
- Emailaddress
- Givenname
- Name
- Nameindentifier
- surname
Configure Prolaborate
Click on Menu > SAML Settings to go to the settings page.
Your Prolaborate site should have a valid SSL certificate and at least one repository should be added.
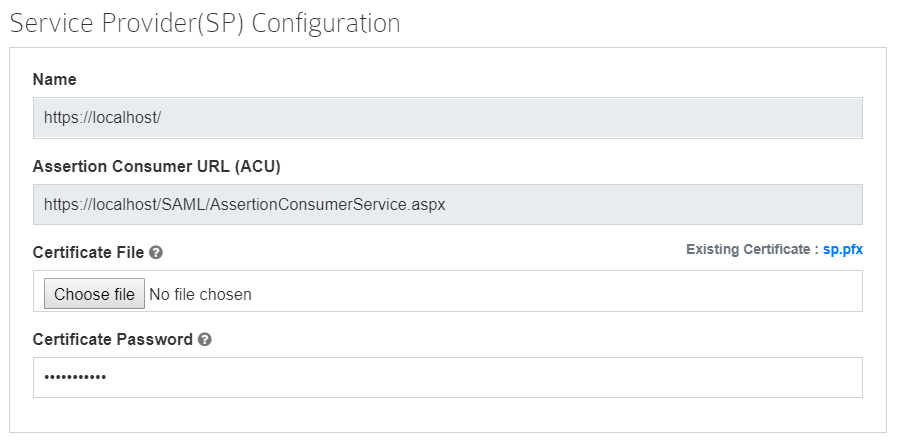
Service Provider Configuration
Please configure as below:
| Field | Description |
|---|---|
| Name and ACU | These fields will be prefilled |
| Certificate file | Choose the .pfx file of your SSL certificate |
| Certificate password | Enter the password of the .pfx file |


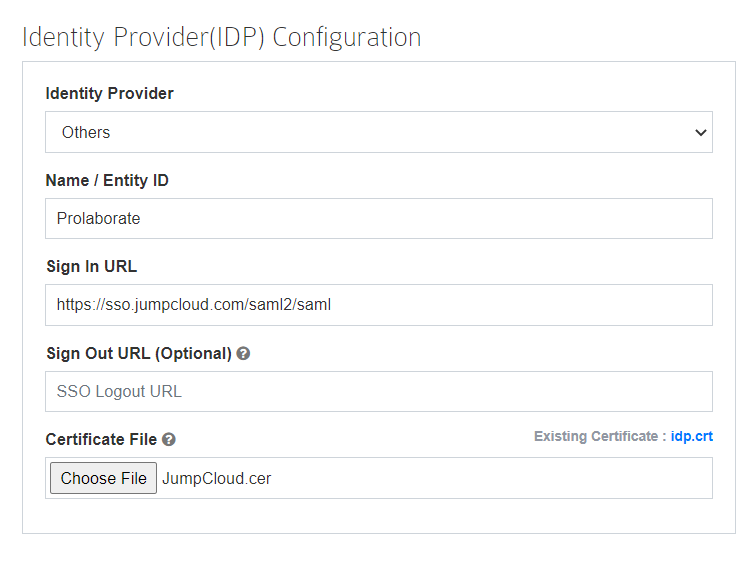
Identity Provider Configuration
Please configure as below:
| Field | Description |
|---|---|
| Identity Provider | Select ADFS if you are using it, select Others if you are using any other vendor. |
| Name and Sign in URL | Get this information from your Identity Provider |
| Certificate File | Get this information from your Identity Provider. You need to select a .cer or .cert file. |
Default Access Control Profile
Click on Manage Profiles to create a new profile.
Click on Create Profile.
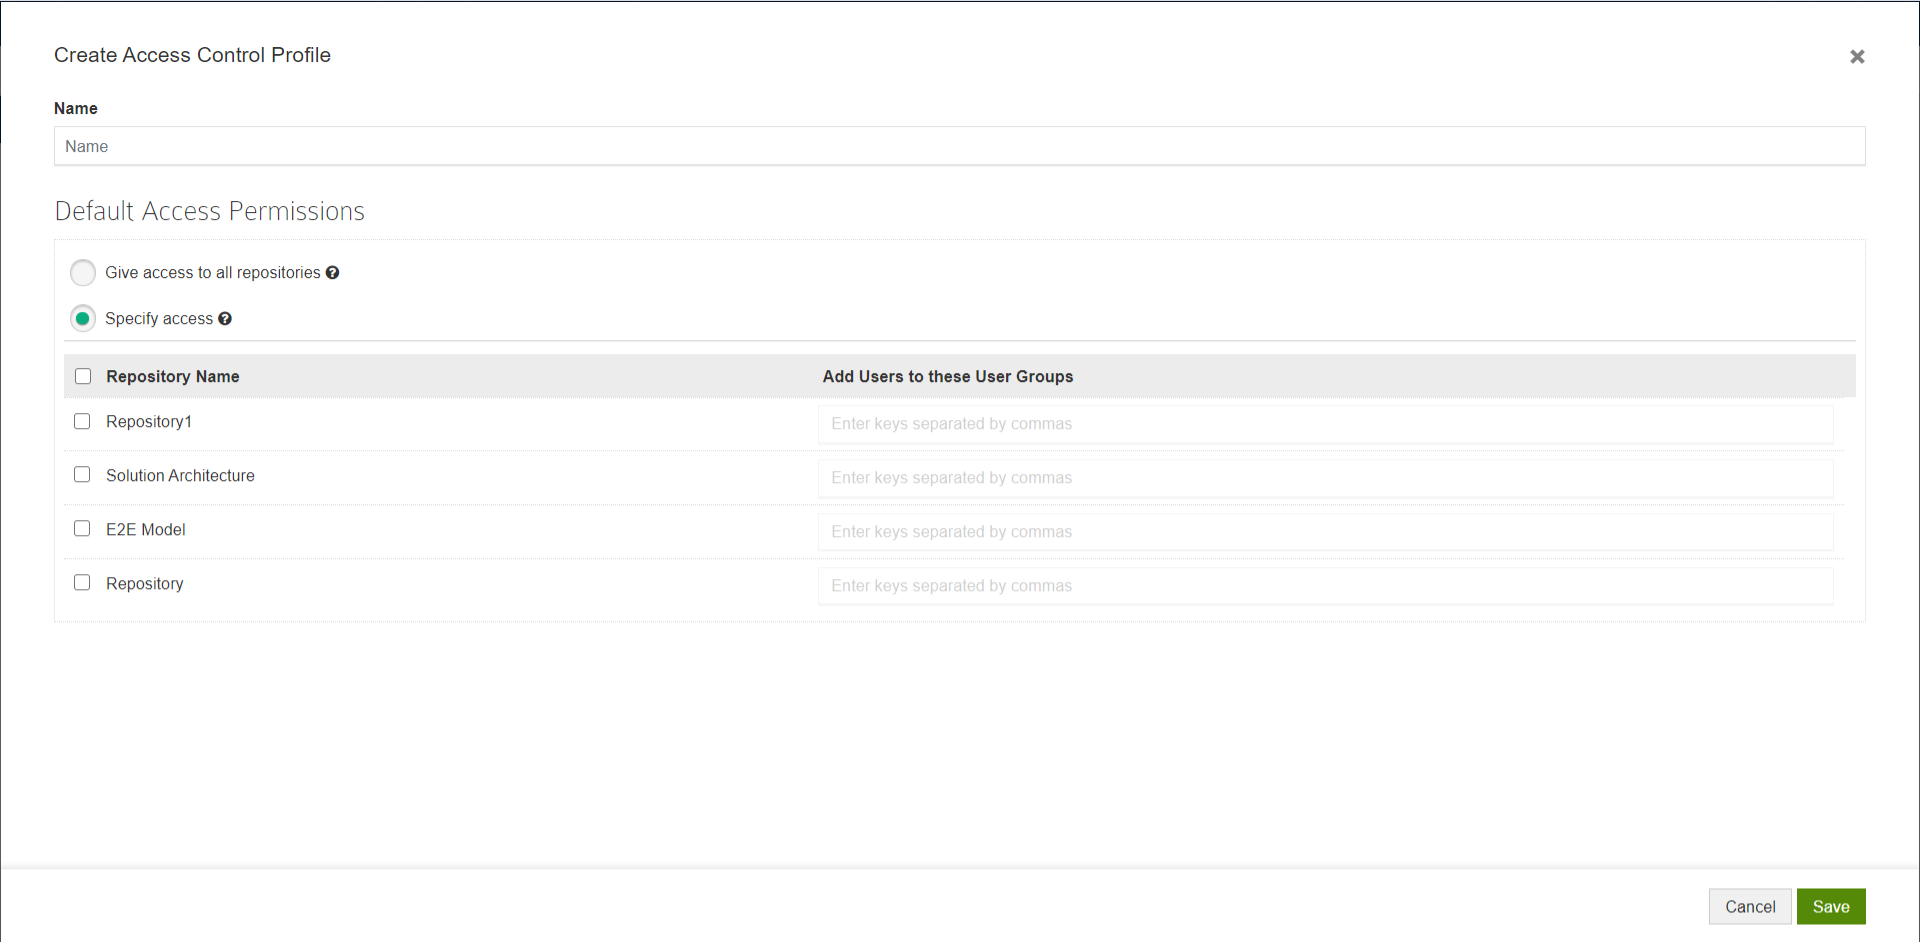
Give a Name to the Profile and configure permissions.
You can choose any one of the following options:
- Give access to all repositories – Any user logging with their SSO credentials will be given access to all repositories by adding them to the Default user group in each repository
- Specify access – Any user logging with their SSO credentials will be added to the user groups you have specified after selecting the repositories
Click Save.
Now, go back to SAML Settings page.
Select the newly created profile and click Save.
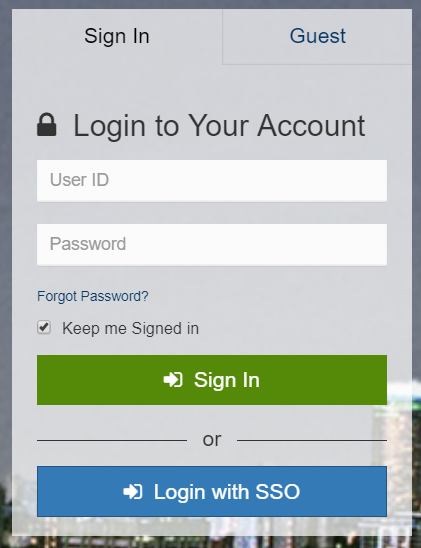
Log in with SSO
Once the configuration is done, ensure SSO is enabled.
Your users will start to see a new button on the login page called Login with SSO and they can click on it to login with their SSO credentials.