Enterprise Architect Jira Integration
Enterprise Architect Jira Integration
You can integrate Enterprise Architect models with their corresponding Jira projects easily using Prolaborate.
With this integration, you can
- Easily link EA model information with their corresponding Tasks, Requirements, Issues, etc.
These links can not only be viewed in Prolaborate but also in EA. A link back to Prolaborate is introduced in Jira as well.


2. View contextual reports from Jira alongside rich dashboards based on EA model data.
3. Create action items in Jira quickly from with in Prolaborate
Here’s a quick overview of the Jira Integration:
Here are some use-cases:
| Background | Problem | Solution |
|---|---|---|
| We use EA for managing requirements and Jira for managing the changes | EA users export documents to make model information available to Jira users. Jira users share links with EA users to add them to Notes in EA | Browse through Jira projects within Prolaborate easily and link requirements in EA with corresponding user stories and issues in Jira |
| It is hard to get a holistic view of model and project information | Create rich visualizations based on EA model data in Prolaborate and bring in contextual reports from Jira to a single dashboard and present it to management | |
| While browsing through EA models, if I want to create a Jira issue, I have to go to Jira to do it and come back here to add link to Notes | While browsing through EA model information in Prolaborate, you can quickly create Jira items and link them within Prolaborate in a few clicks |
The workflows involved are
- Enable Jira Integration
- Add Jira Project
- Configure Jira properties in Stereotypes’ Forms
- Link Jira items to EA elements
- Add Live Jira Reports in Dashboard
- Create Jira Items
- Manage Jira Projects
- Manage Integration Attributes
Enable Jira Integration
To integrate with Jira, the integration needs to be enabled first. Click on Menu > Manage Applications.
If Jira is in Inactive state, click on Edit and toggle the Status. No change needs to be done if Jira is already Active.

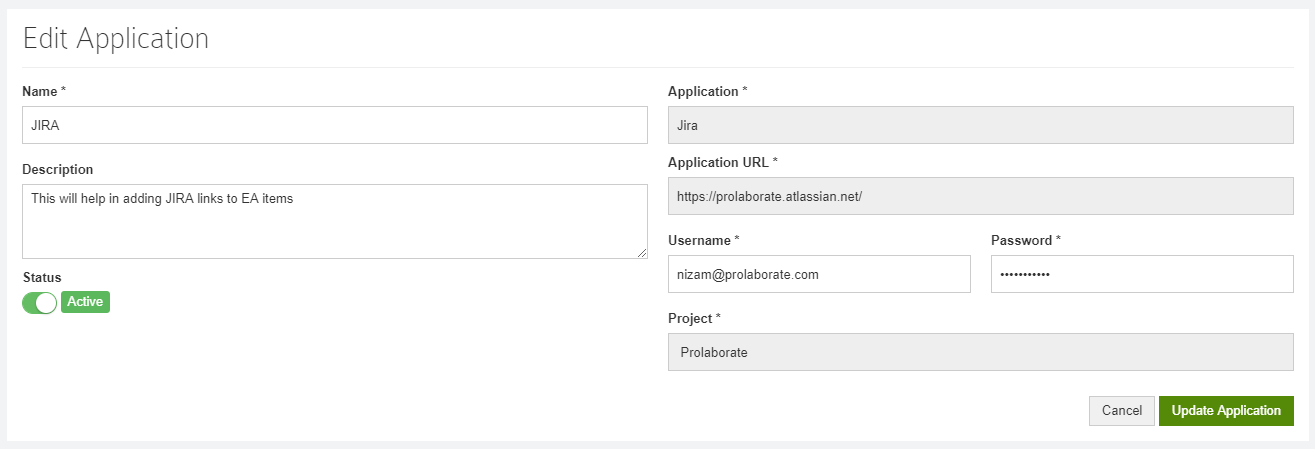
Add Jira Project
To create the integration bridge, you need to add a Project as detailed below.
Click on the Menu > Integrations You will be taken to the Integrations page.
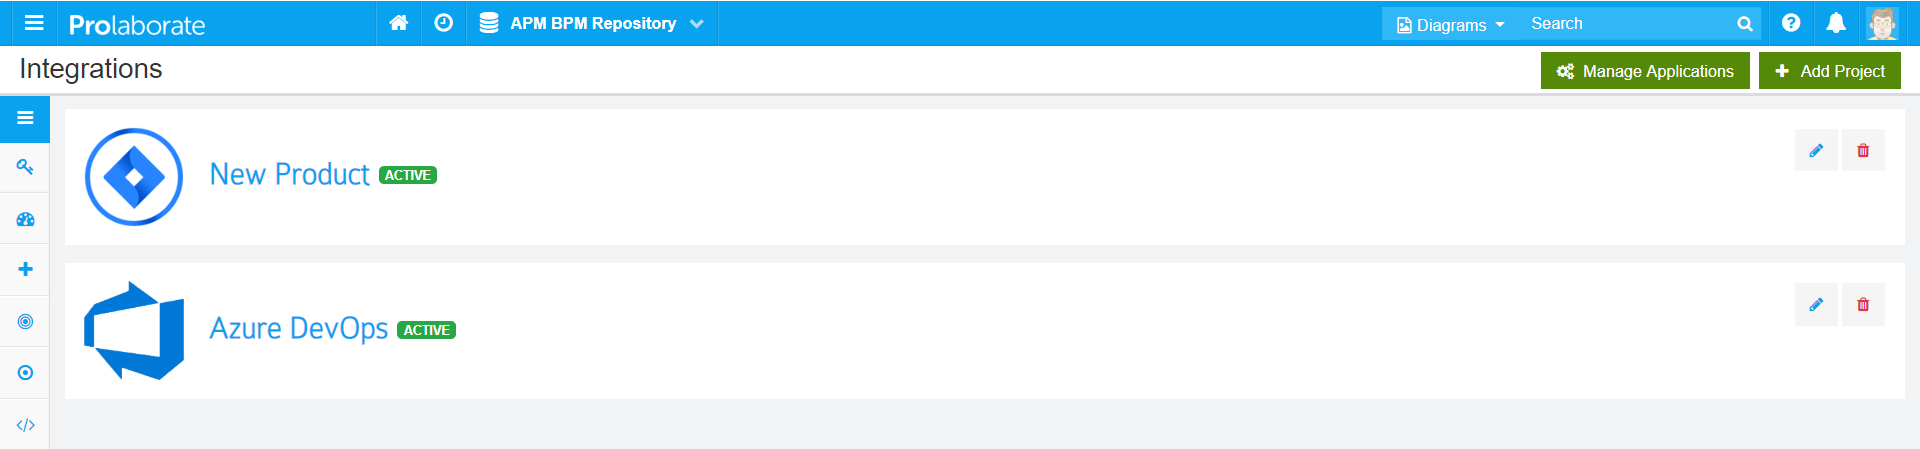
Click on Add New Project to add a Project and enter the details as below:
| Field | Description |
|---|---|
| Name | Enter a name which can be understood by your users. For example, name of the Jira project which you are going to select. |
| Description | Give a description to the application |
| Status | It would be set to Active as Default. Please do not change it unless you don’t want to use it anywhere in Prolaborate |
| Application | Choose Jira |
| Application URL | Enter the URL of your Jira account. For example, https://prolaborate.atlassian.net/ |
| Username and Password | If you are using Jira Server, enter the Username and Password of a Jira account. Please note, Prolaborate’s access to Jira will depend on these credentials.If you are using Jira Cloud, generate an API token and use it in the place of password. Learn more here. |
| Validate Connection | Click on this button once you have entered Application URL, Username and Password. If the credentials worked fine, you will get a success message and Project field will be enabled. |
| Project | Select a Project which you want to Connect to. If you use multiple projects in Jira, you can add another project in a similar way. |
Click on Add Project to complete adding the project and the new project will appear in the Integrations page.

Configure Jira Links in Stereotypes’ Forms
Add Jira Attribute
As we want the Jira link to be a part of metadata of Enterprise Architect’s elements, we need to create a Jira attribute and configure it for the stereotypes we need.
If you want the Jira attribute to be a part of all stereotypes, that can be done as well.
Click on Menu > Modeling Languages.
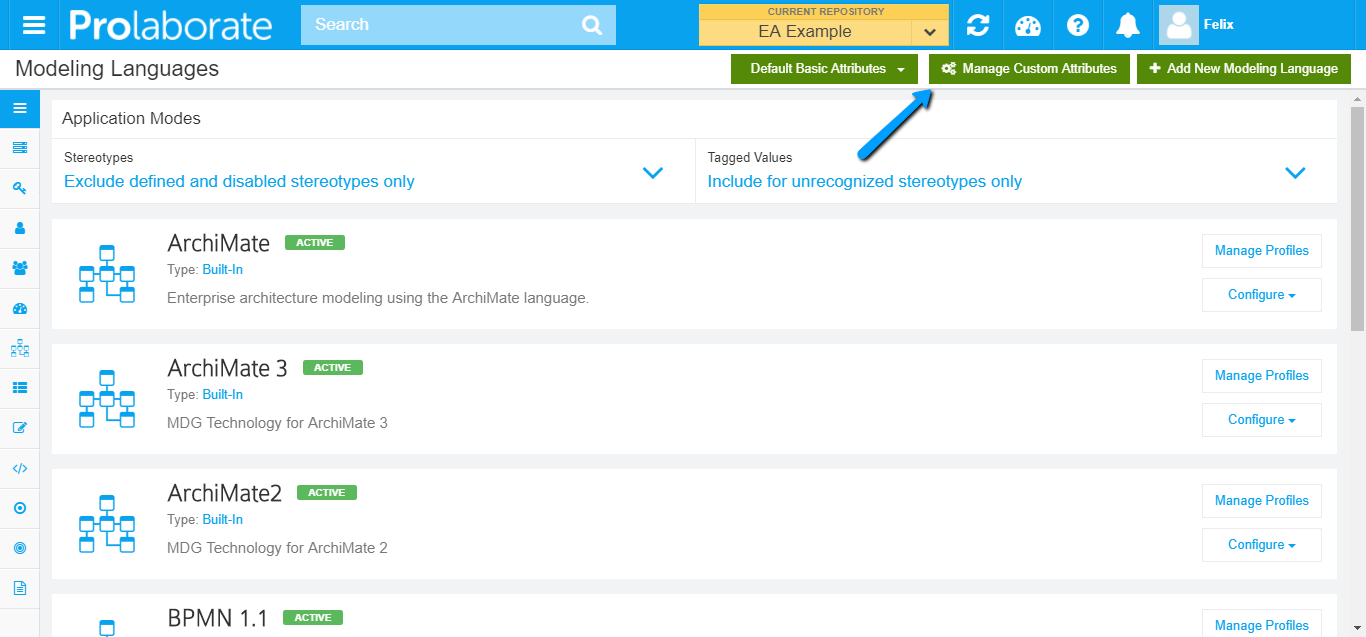
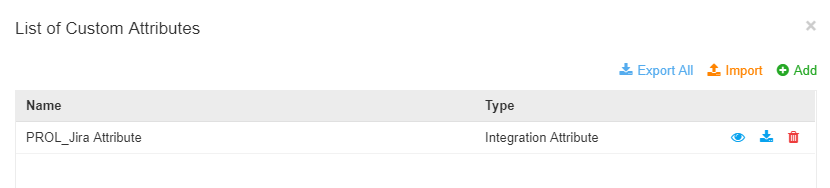
Click on Manage Custom Attributes button on the top and you will see the list of custom attributes which are already created in this repository.
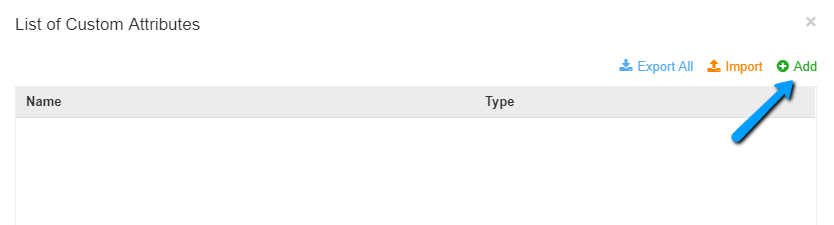
Click on Add and choose Attribute Type as Integration Attribute. Fill in the following details:
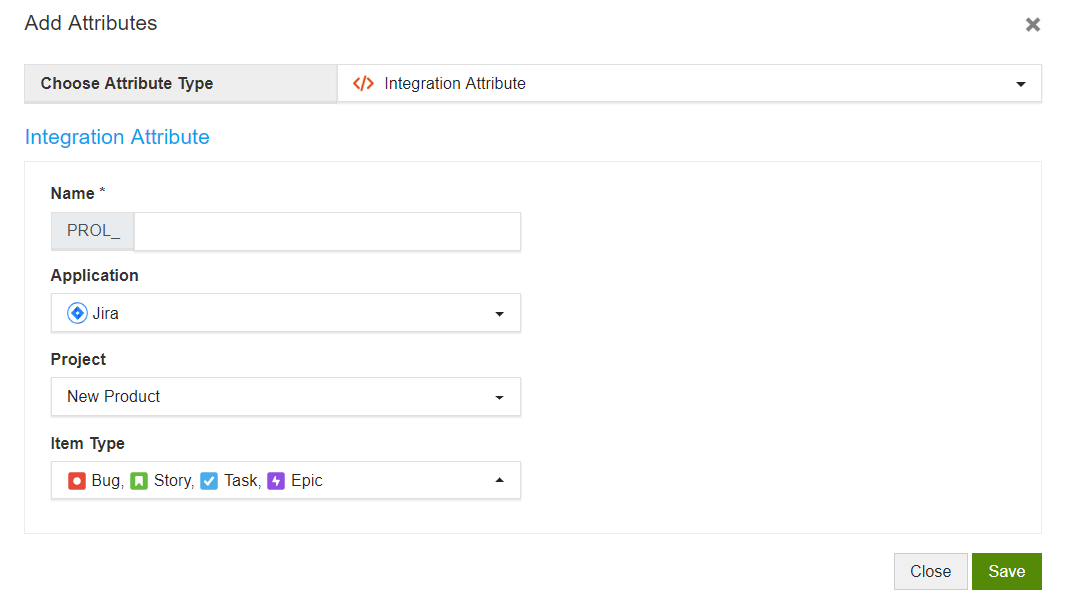
| Field | Description |
|---|---|
| Name | Give a name to the Attribute. “PROL_” will be prepended by default |
| Application | Select Jira |
| Project | Select a Project |
| Item Type | Select the Item Type(s) you want to link in Prolaborate. This will be useful if you want to refine the list of Jira items you want to see in Prolaborate. |
Click on Save to add the new integration Attribute.
Add Jira Attribute to a Stereotype’s Form
Let’s configure the newly created Integration Attribute to a Stereotype. . By doing this, we will be able to link a Jira item to an element with that stereotype.
For example, let’s add it to Activity stereotype belonging to BPMN 2.0. In the Modeling Languages page.
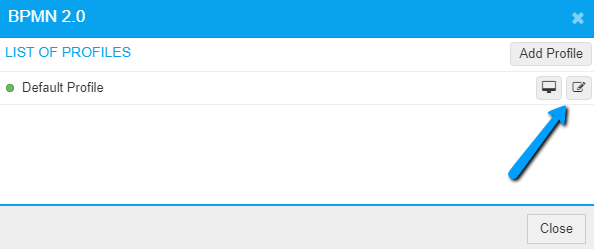
Click on Manage Profiles to see the list of Profiles created for this MDG.

Click on Edit against the Active profile.
Click on the Form Designer of the Stereotype you want to add the Jira attribute to. As per our example, it is Activity.
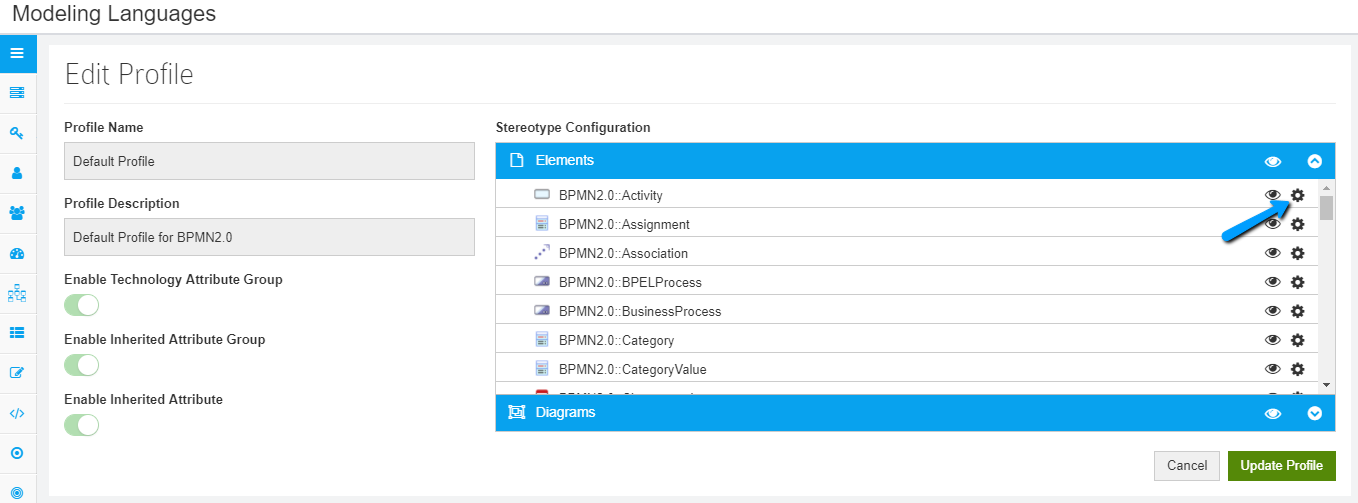
Add the Jira attribute from Custom Attributes section to the form. You can change the label here (Say Jira User Story) if needed.
Save the form and click on Update Profile in Edit Profile page to save the changes.
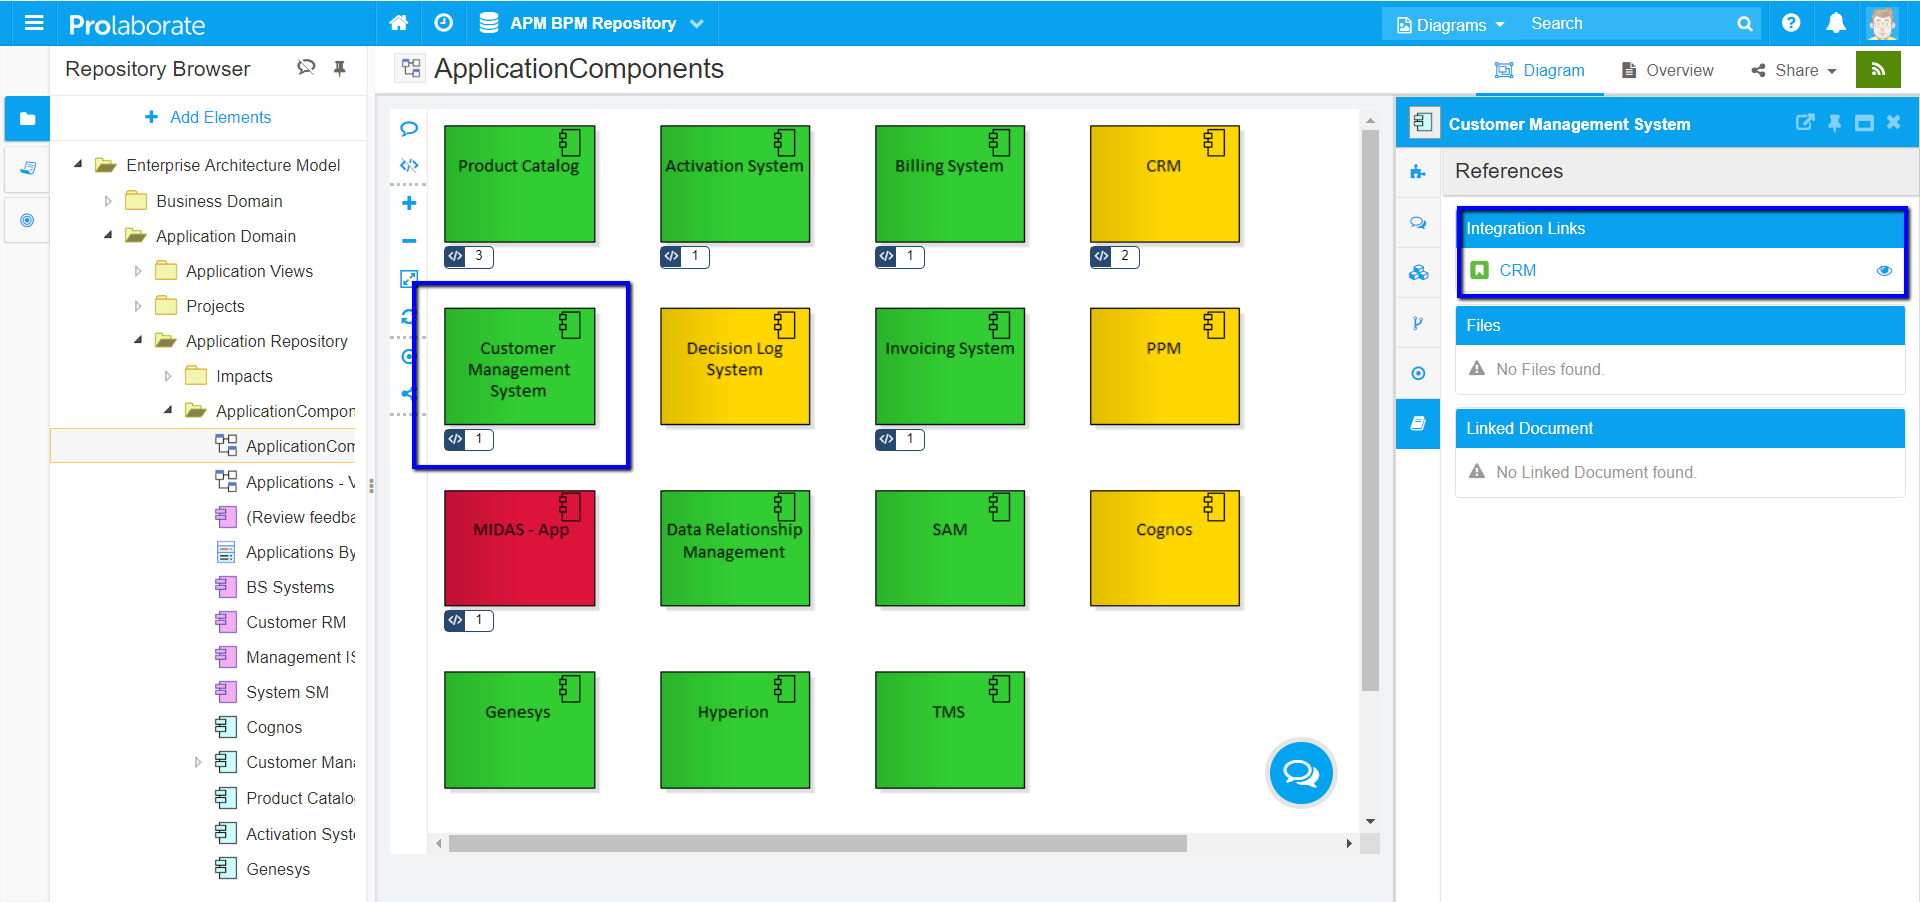
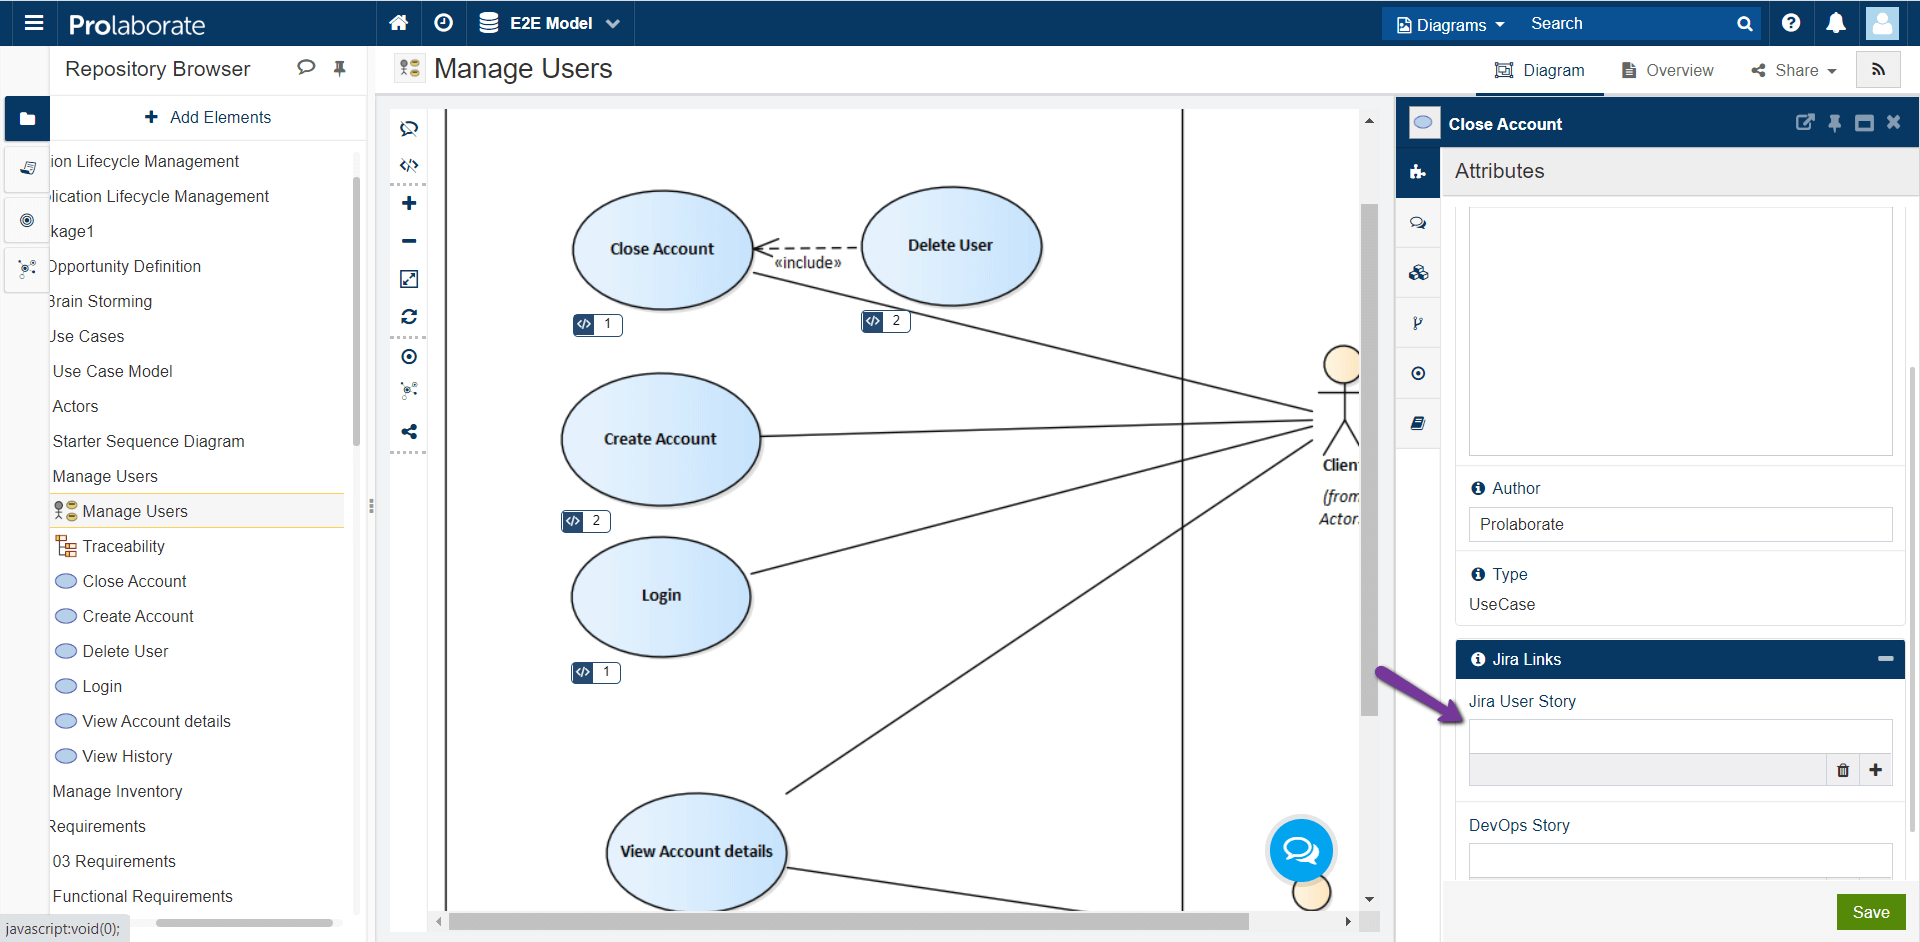
Link Jira items to EA elements
When you open the Properties window of the stereotype which we configured just now, it will show the Jira attribute.
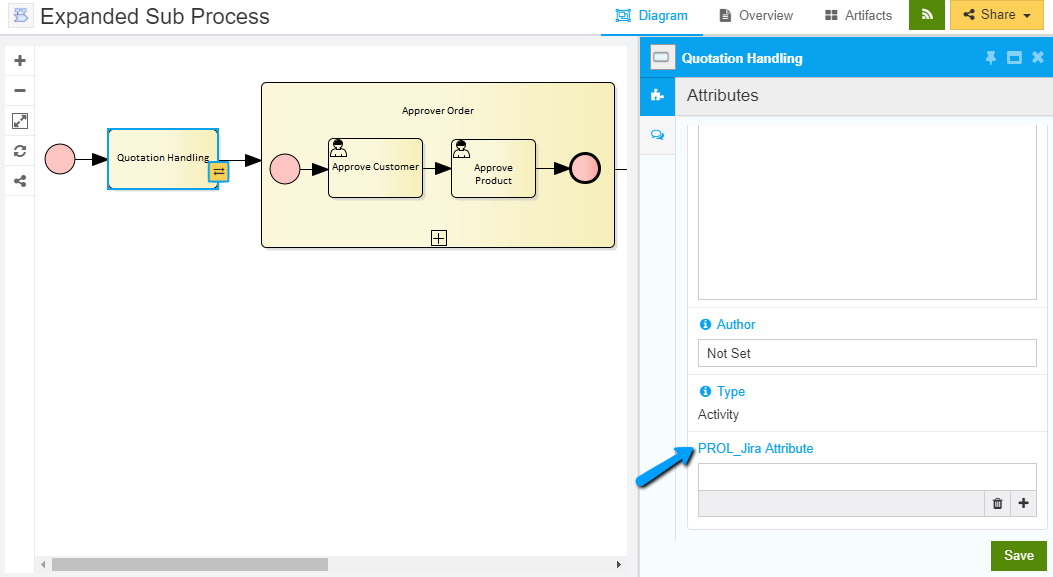
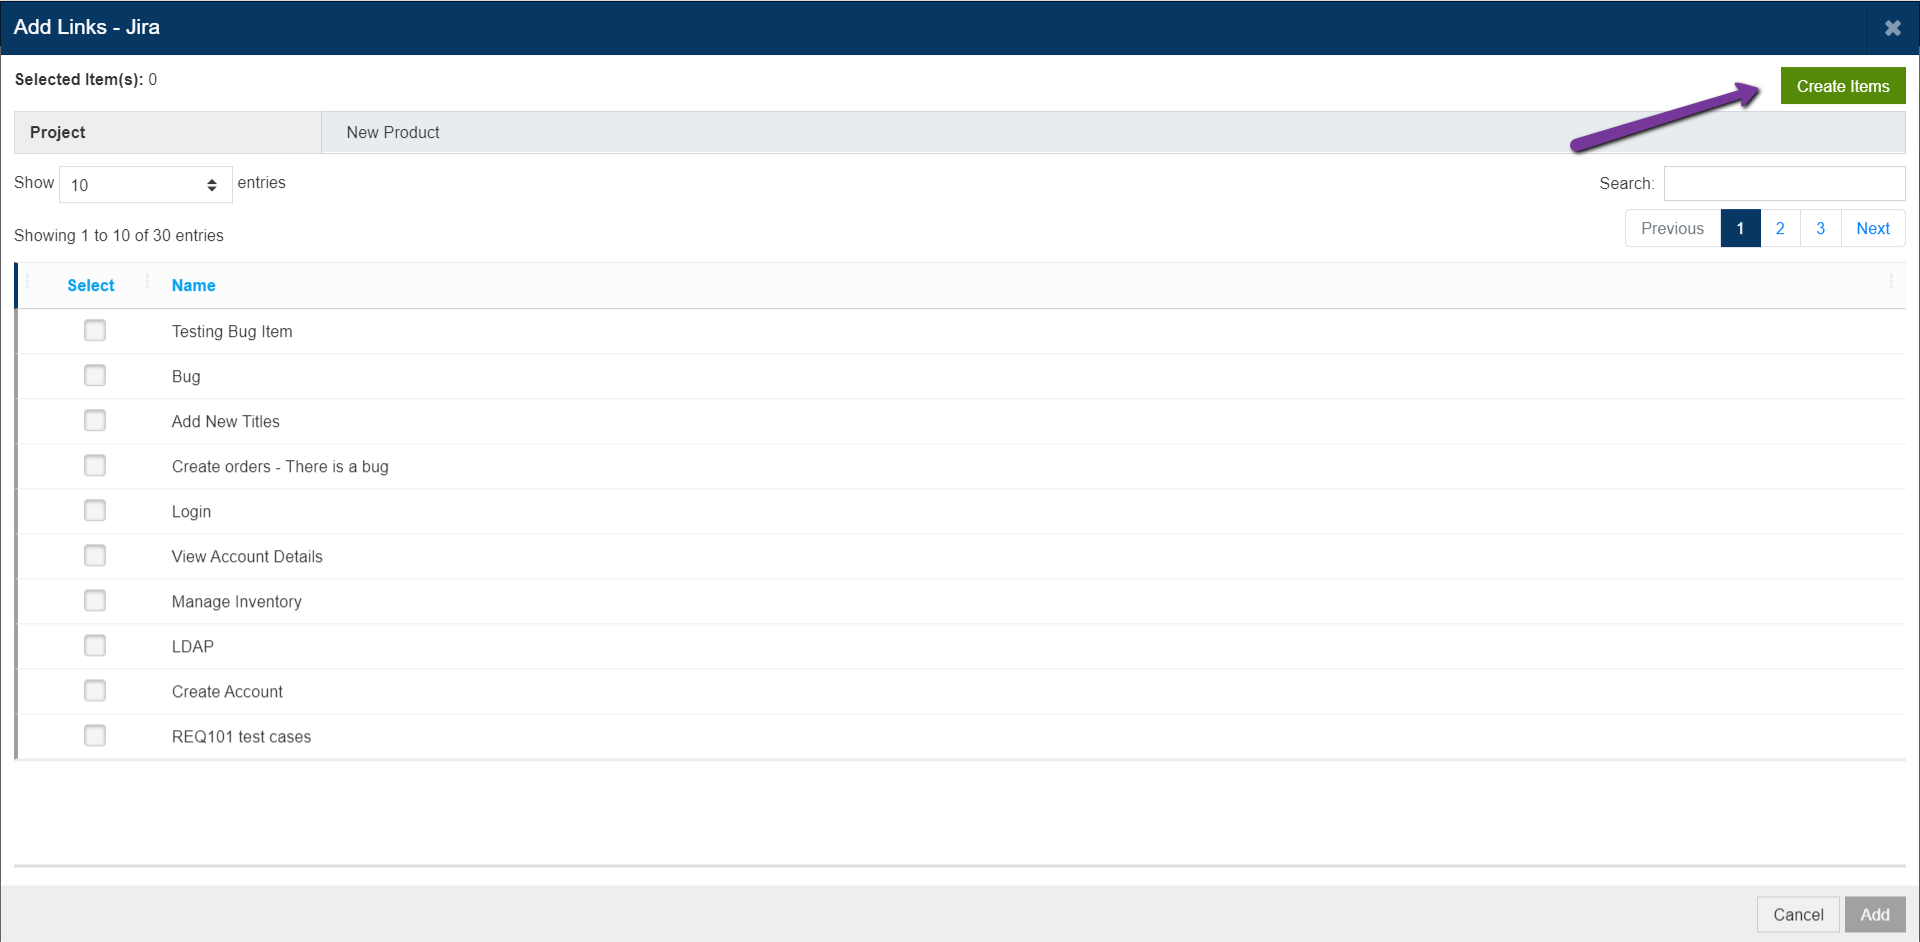
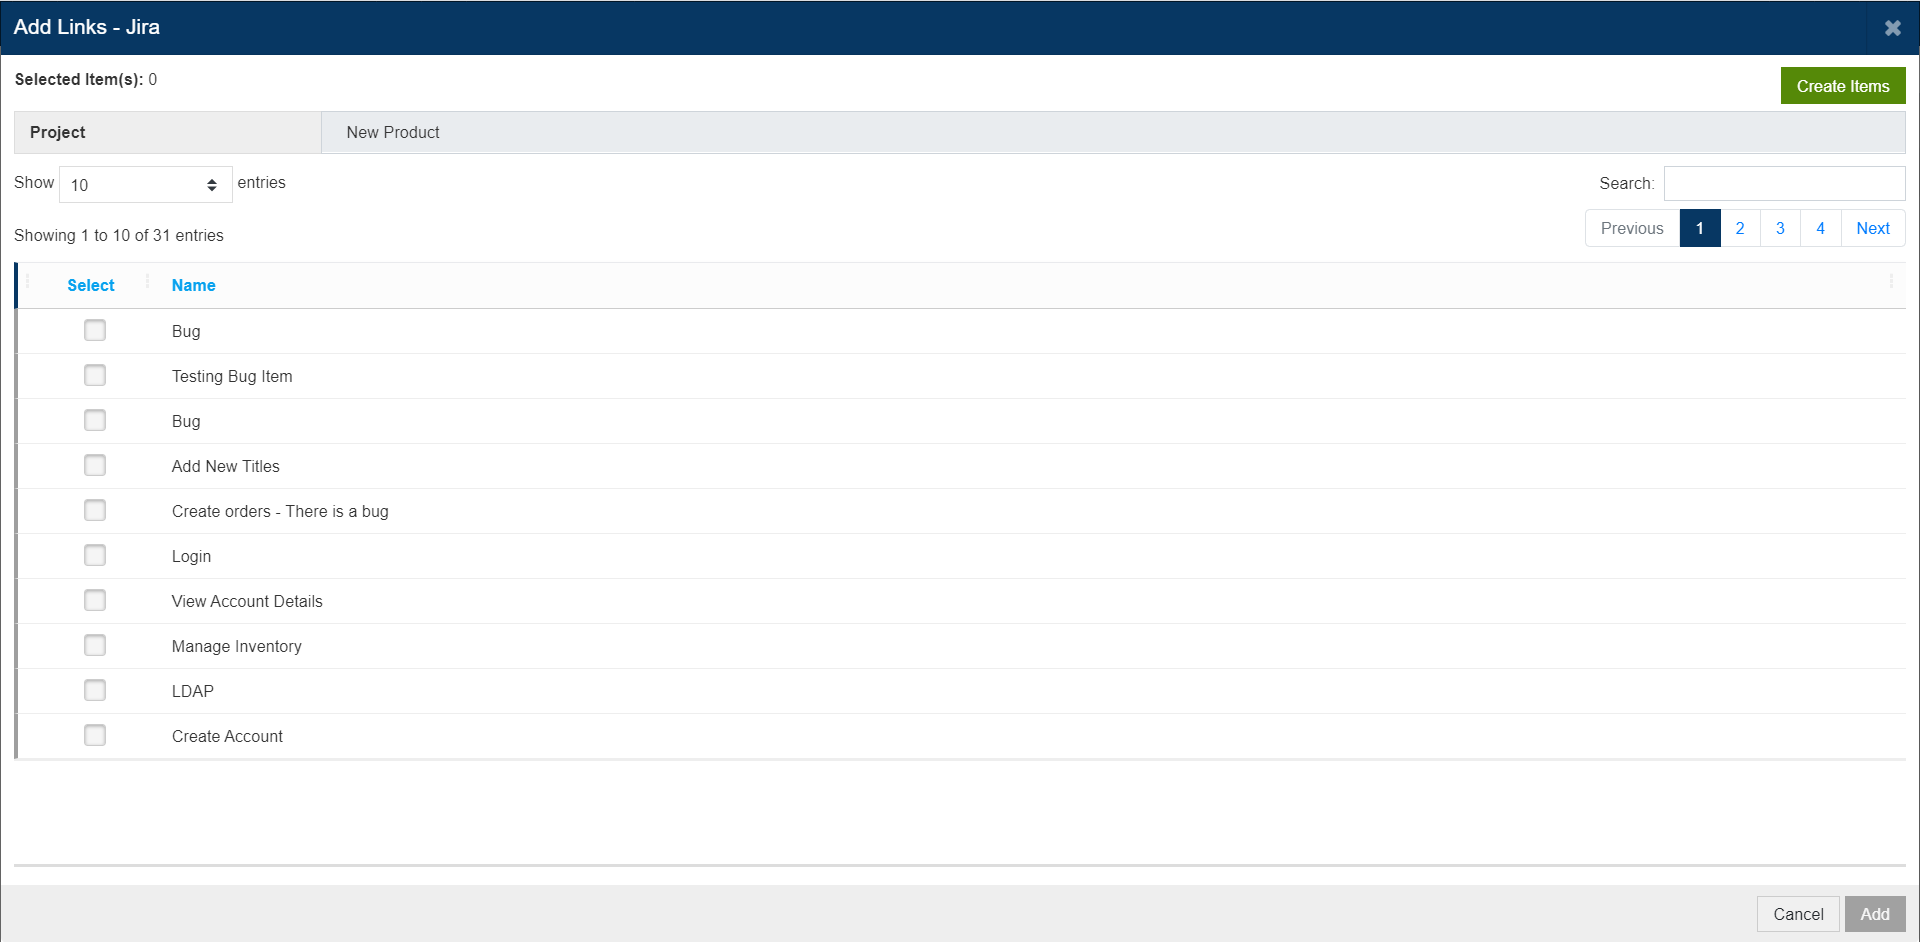
Click on the plus icon in the attribute and select a Project in the Add Links window.
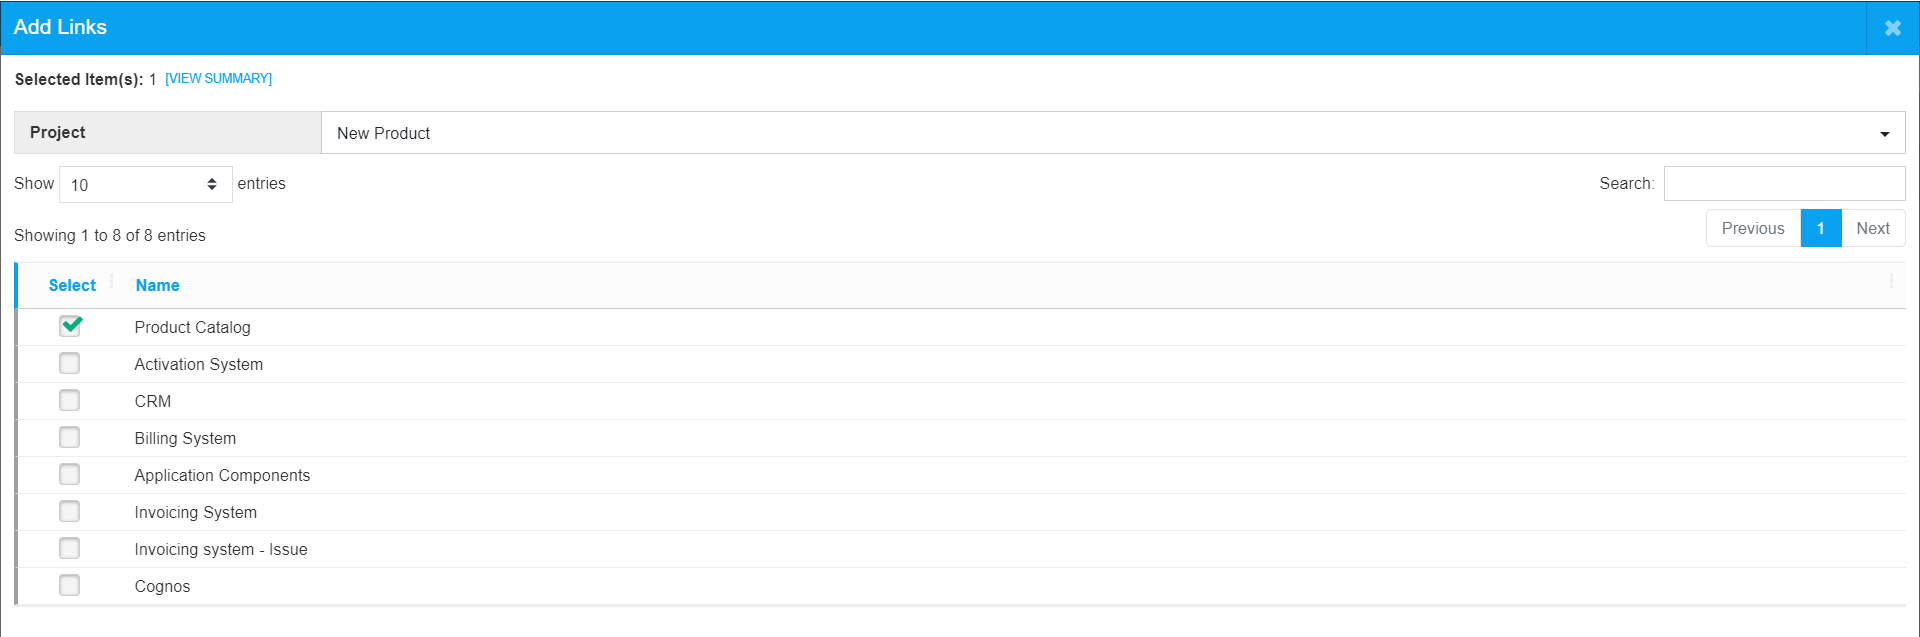
All the items that are part of the Project will appear in this window.
Please note the item types which get shown here will be based on the Item type you chose while adding this integration attribute.
You can Search for the item if you know the name of the Jira item.
Select a Jira item which you want to link to this EA element and click on Add. Click on Save in the Properties Window of this element.
Preview JIRA items
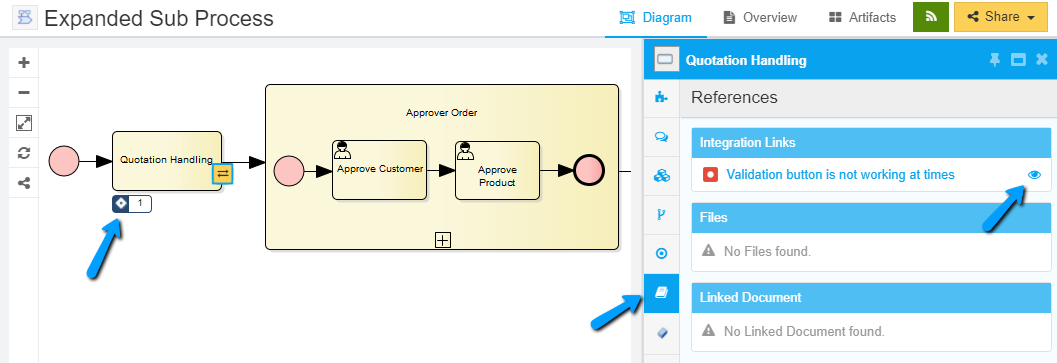
As you notice, Jira overlays will be added to the elements in the diagrams along with the count of the Jira items it has been linked to. You can click on that bubble to see the list of Jira items
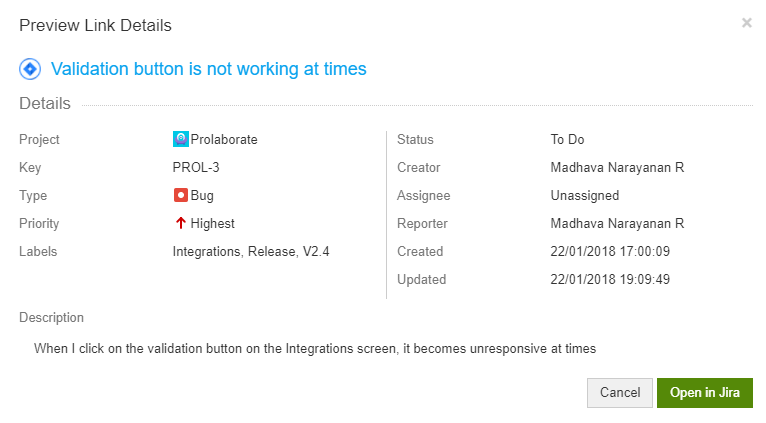
Click on the eye icon to preview the Jira item. You can see all the basic details of the Jira items from Prolaborate itself. To view the complete details and to edit this issue, click on Open in Jira.
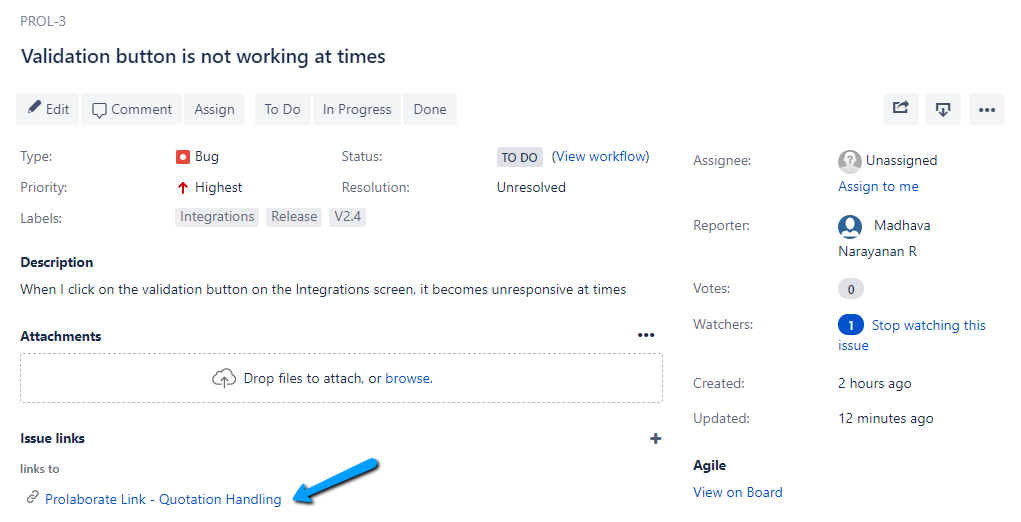
Jira item will open in a new tab and if you notice, a link back to this Enterprise Architect element has also been added.
View JIRA item Links from Enterprise Architect
Let us assume certain users use only Enterprise Architect. They will also be able to see the links added to an element from Prolaborate.
As you can see, the Jira attribute has been added as a tagged value. You can click on browse button to view the issue link in a browser.

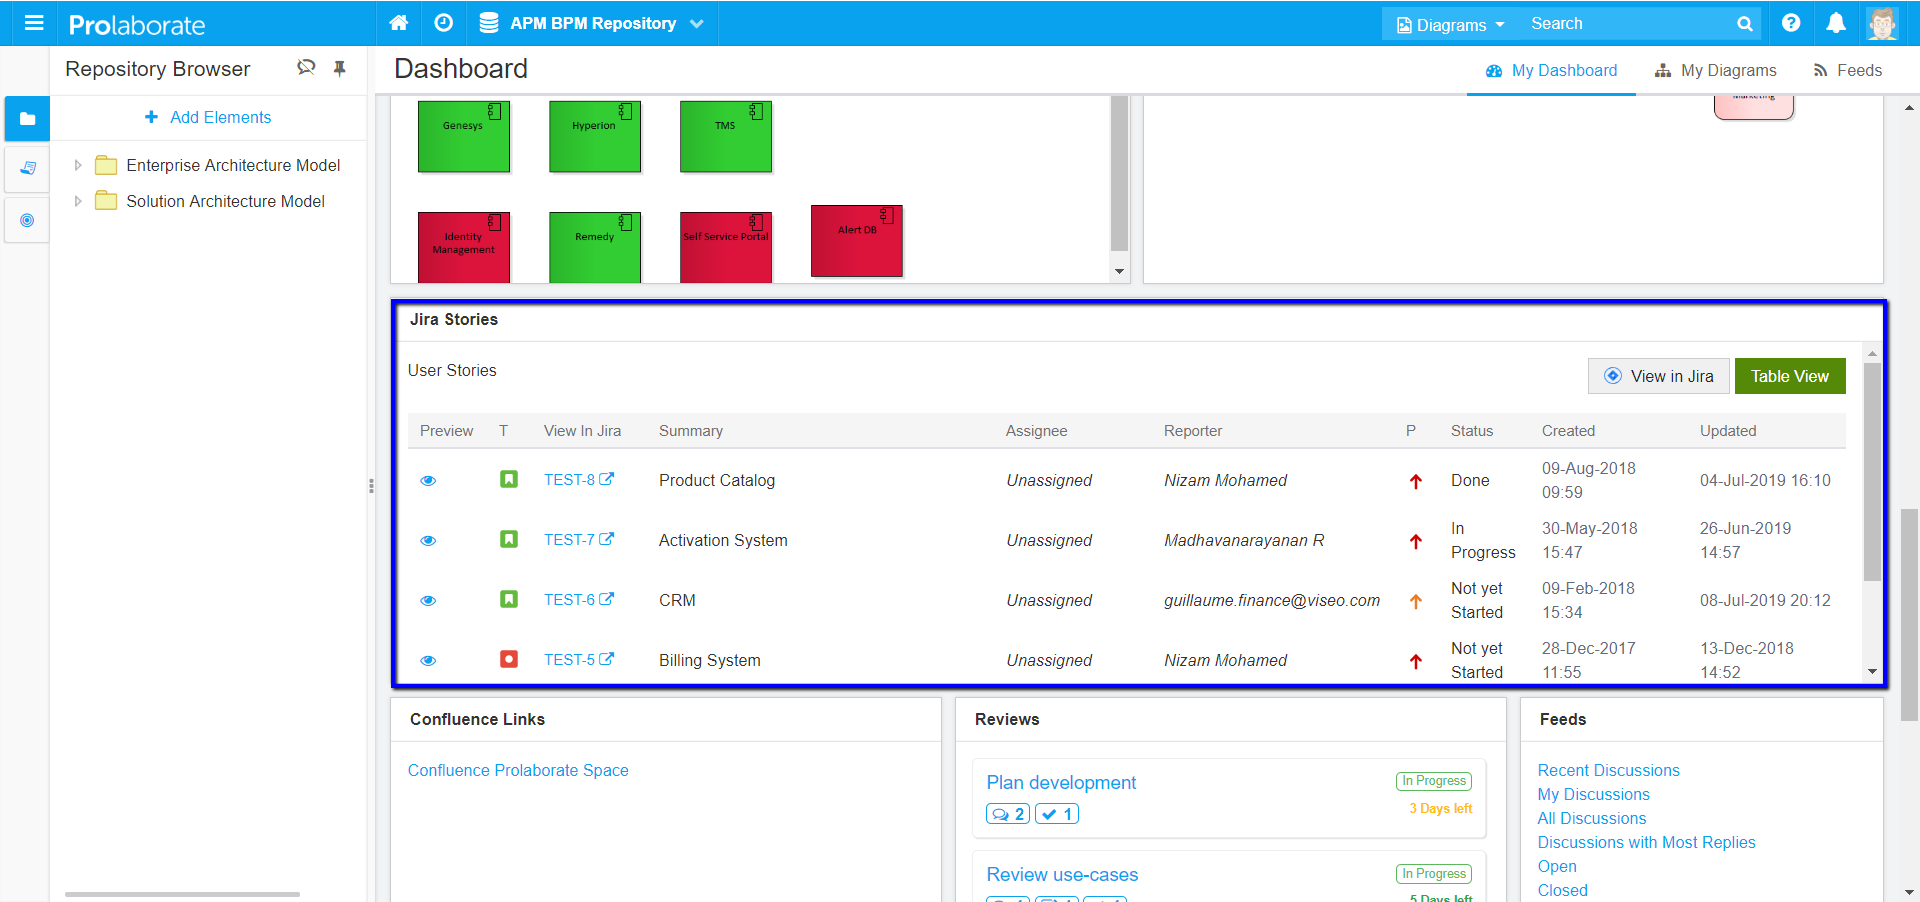
Add Live Jira Reports in Dashboard
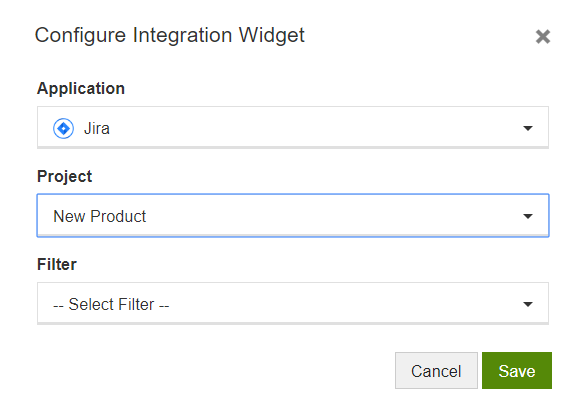
Select Integration Report widget in Dashboard. Learn more about Dashboards here.
Select Jira under Application and the Filter.
How it looks in the Dashboard?
The complete list of items from Jira will be shown in the widget.
You can
- Click eye icon to preview the item
- Click on Jira ID to open a specific item
- Click on View in Jira to open the filter in Jira
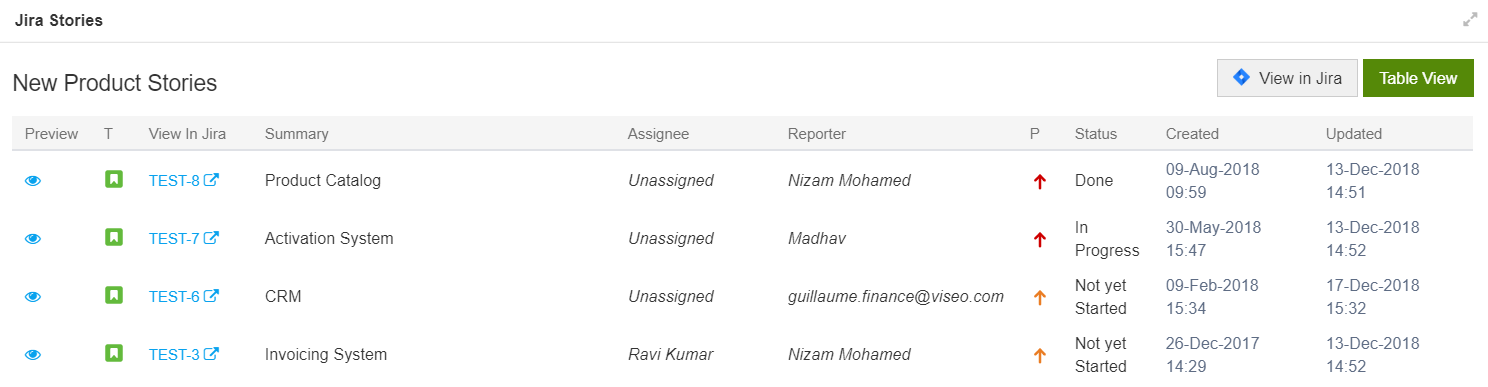
4. Click on Table View to see the complete list of items as you can only see 10 Jira items in the dashboard
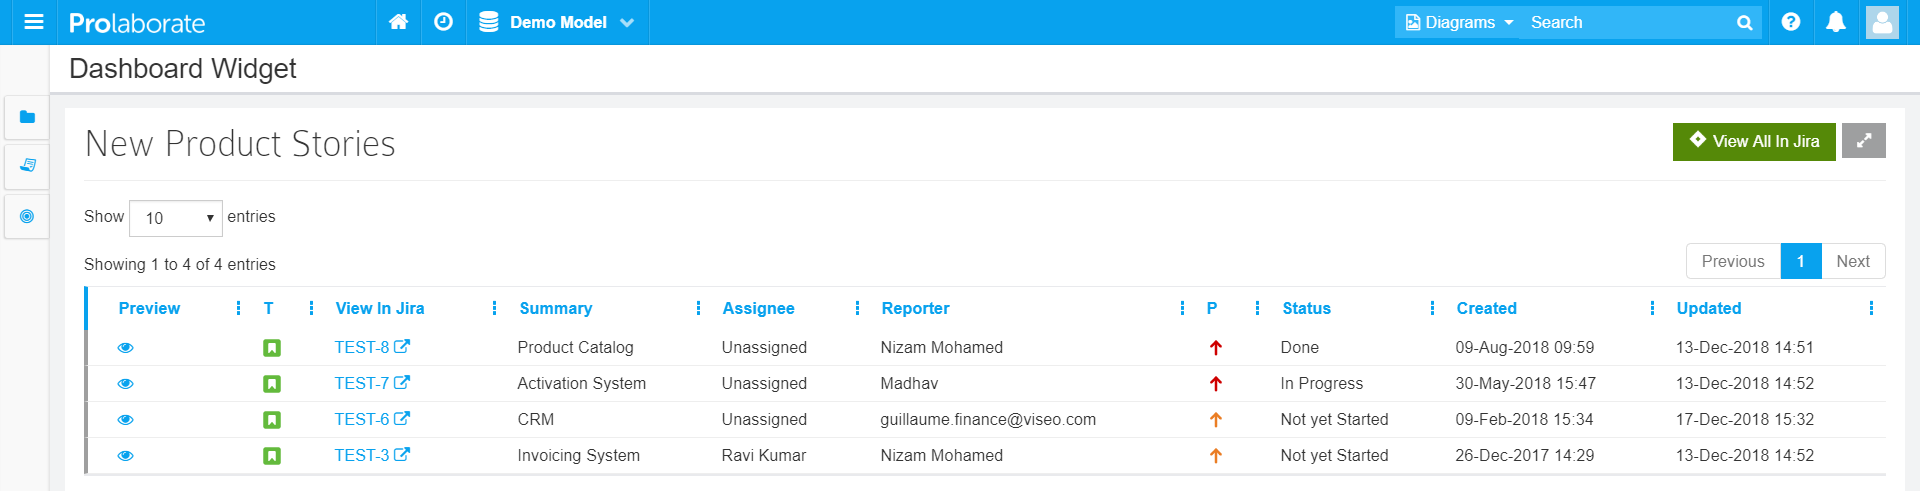
View All in Jira works in the same way as View in Jira in Dashboard.
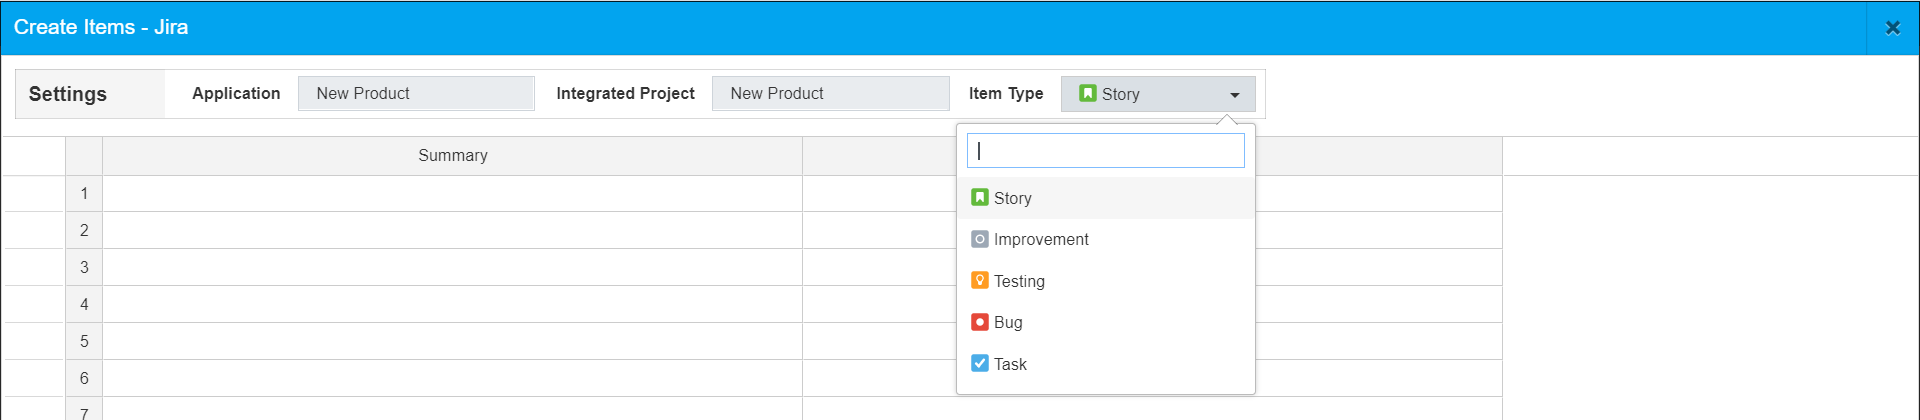
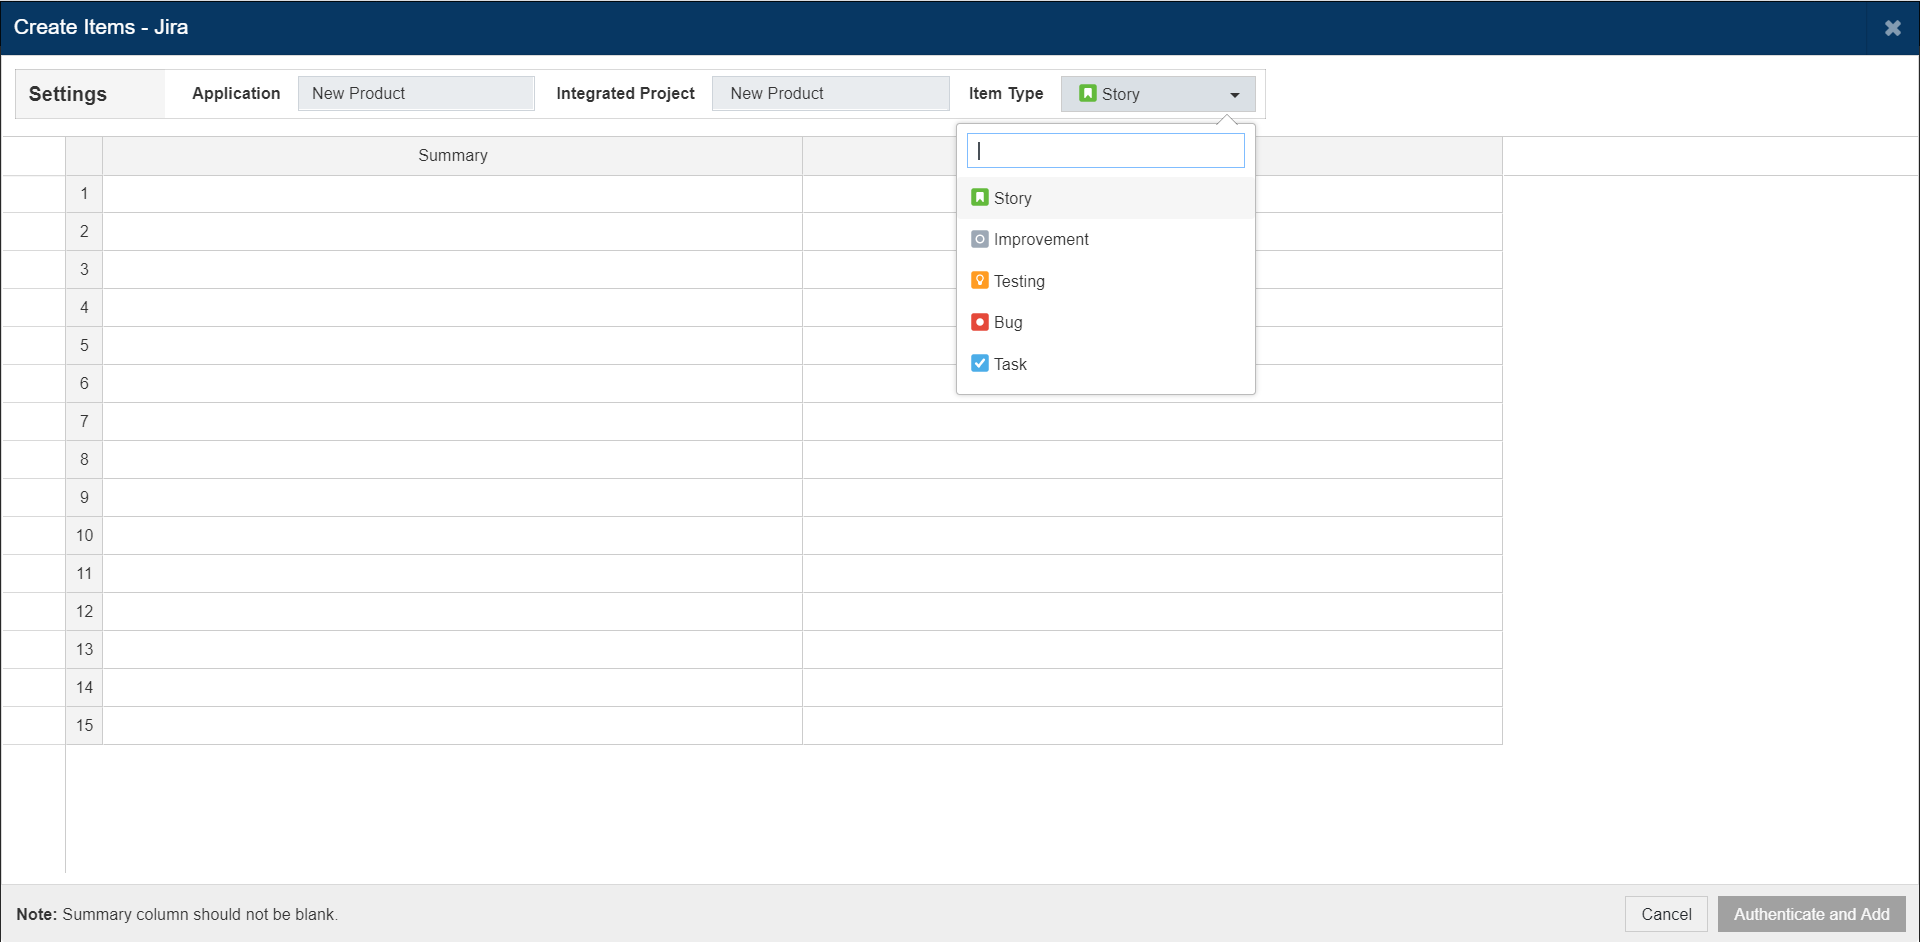
Create Jira Items
While browsing the Jira project, if you feel a new story, issue, or a task needs to be added, you can do it from within Prolaborate.
Click on Add icon.
Click on Create Items.
The excel editor will open and you can see that you can create all the item types that are available to add as per the types you have configured.
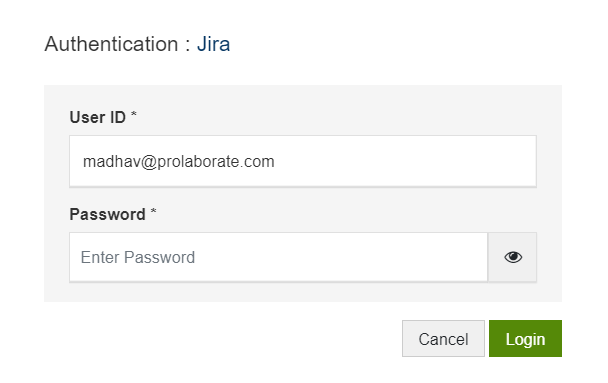
Select an Item Type, fill in Summary and Description and click on Authenticate and Add.
Jira Server users can give their credentials and Jira Cloud users should enter their User ID and API Token.
On successful authentication, the item will be created. Click on Close.
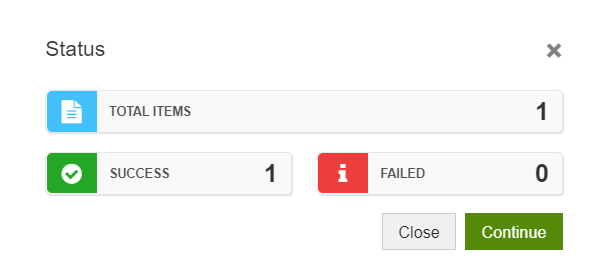
You will be taken back to this page and the newly created item will be visible now.
You can link the item as per the steps explained earlier in this guide.
Manage Jira Projects
You can edit or delete the Projects from the Integrations page.
Click on edit icon to edit a Project.
Update the password in Prolaborate if your password has expired in Jira and you have updated it.
Manage Integration Attributes
You can view or delete Integration attributes from the custom attributes window.