
Enable HTTPS in Prolaborate
Enable HTTPS in Prolaborate
To make your connections to Prolaborate more secure, you need to enable HTTPS.
We will look at the steps in detail in this guide.
Prerequisites
- A valid SSL certificate (.pfx file to be exact)
- Successful Prolaborate installation
Enabling HTTPS for Prolaborate website from IIS
Please follow these steps:
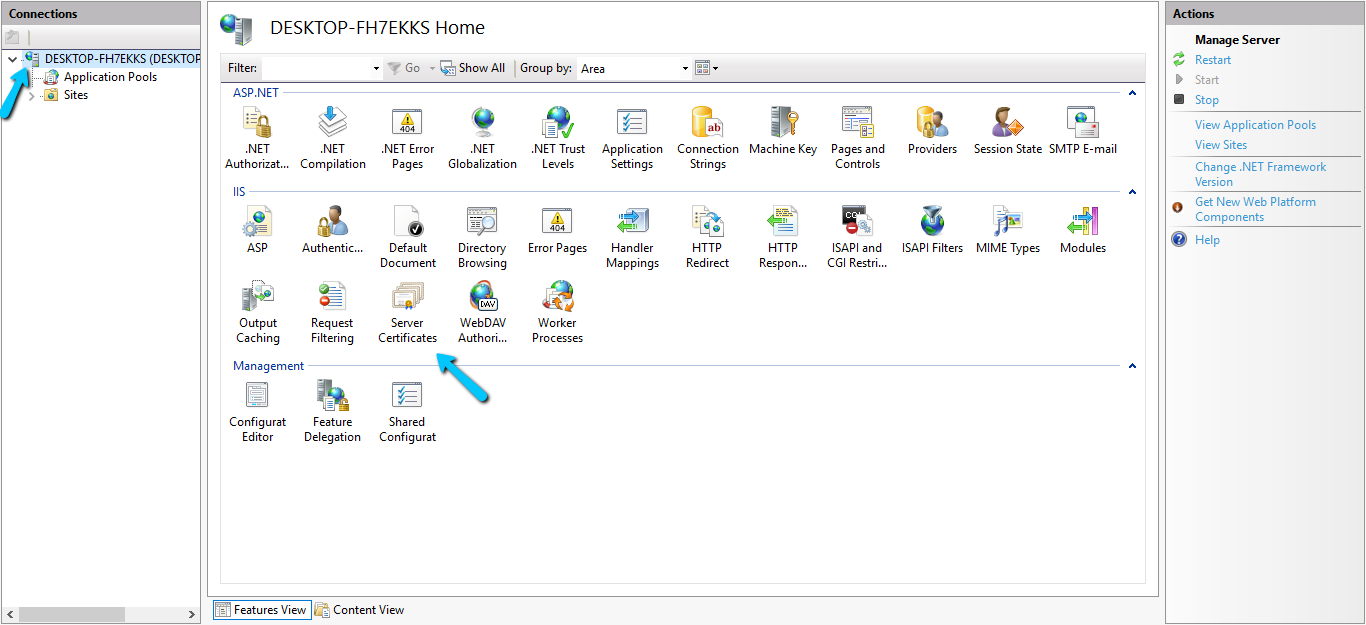
- Open Internet Information Services (IIS) Manager in the server where Prolaborate is installed
- Select the appropriate connection under Connections and double click on Server Certificates


3. Click on Import under Actions
4.Import Certificate window will open
- Select the location of the PFX file
- Enter the password
- (Optional) Select the appropriate certificate store
- Click on OK

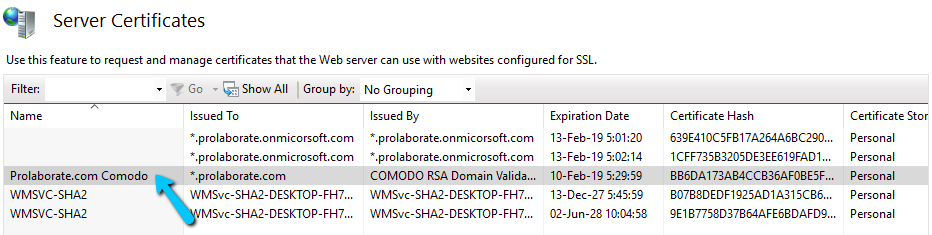
5. The certificate will be added to the list of Server Certificates
6. Now click on Sites, select your Prolaborate website and click on Bindings

7. Site Bindings window will open. Click on Add
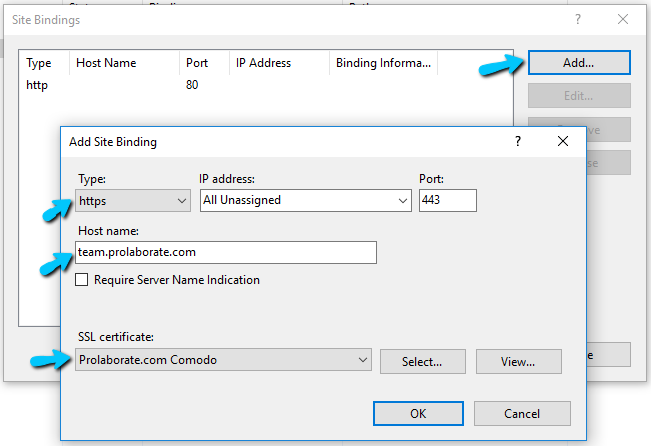
8. In the Add Site Binding window,
- Set the Type as https
- Give the host name of Prolaborate instance
- Select the SSL certificate which we recently added
- Click on OK
9. Now a new Browse option will be available on the right-side panel when you select Prolaborate website. Click on it to visit Prolaborate using HTTPS connection.

Enabling HTTPS for WebSocket
Prolaborate version 3.3 is the prerequisite
Prolaborate uses WebSocket for sending push notifications and so, when you enable HTTPS for the website, you also need to enable HTTPS for WebSocket as well.
Please follow these steps:
- Place .pfx file in the bin folder (Typically located at C:\OpenSSL-Win32\bin\)
- From the same bin folder, run OpenSSL.exe with administrative privileges and run the following command:
pkcs12 -in [certificate].pfx -out server.pem -nodes
[certificate] refers to the name of your .pfx file.
3. server.pem file will be generated in the same folder location
4.Open the server.pem file in notepad
5. Copy the Private Key part and save it as private.key (—–BEGIN PRIVATE KEY—– To —–END PRIVATE KEY—–)
6. Copy the Certificate first part and save it as certificate.pem (—–BEGIN CERTIFICATE—– To —–END CERTIFICATE—–)
7. Run the Service Management (Located in Prolaborate installation folder)
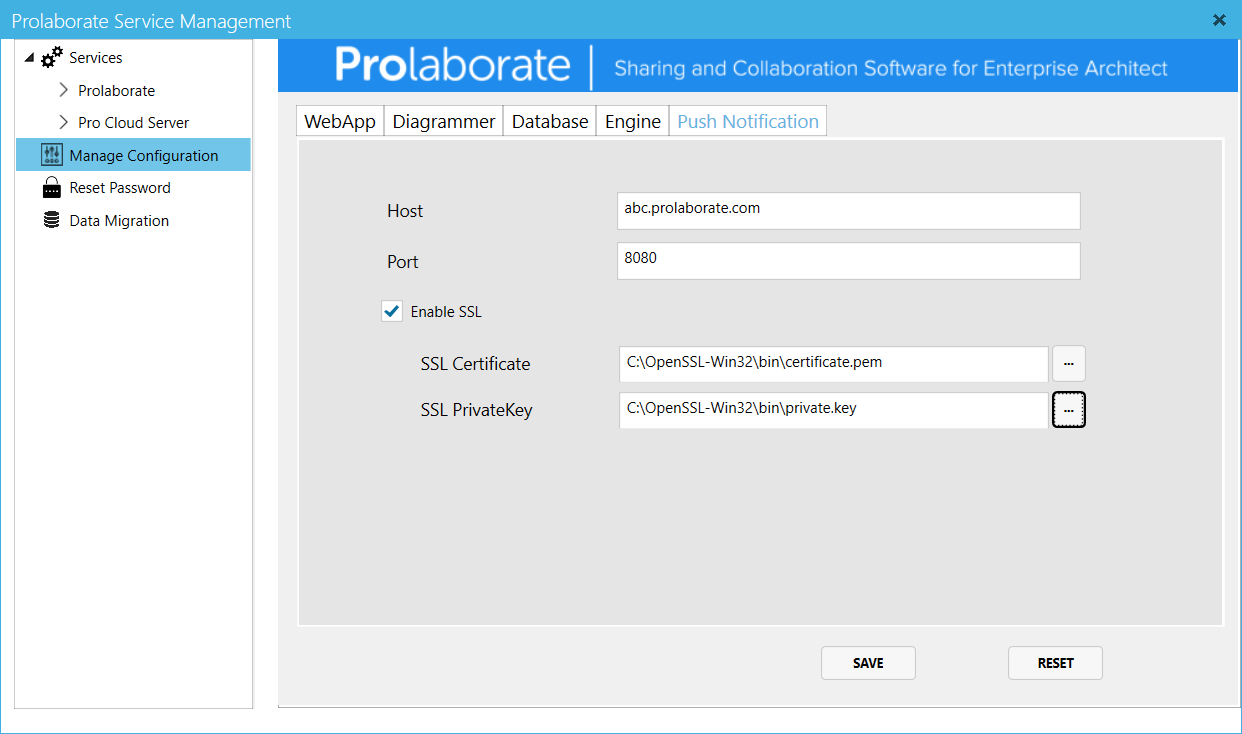
8. Click on Manage Configuration > Push Notification tab
9. Enter the Prolaborate site domain name in the Host field. (For example: abc.prolaborate.com)
10. Enable SSL and SSL Certificate and SSL Private key file path fields will be enabled
11. Browse and select the SSL Certificate and Private key files.
12. Hit Save
13. Stop Prolaborate service and websocketd.exe using the task manager
14. Start the Prolaborate service and check whether websocketd is running in Task Manager