
Create Connectors in Prolaborate
Create Connectors in Prolaborate
Prolaborate allows users to create and manage connectors in a controlled manner without having to create diagrams and draw connectors. The advent of this feature enhances the user capability to establish traceability, visualize and manage relationships effortlessly between EA Artifacts.
View Connections
Connection between EA Artifacts now displayed in the property window and overview page.
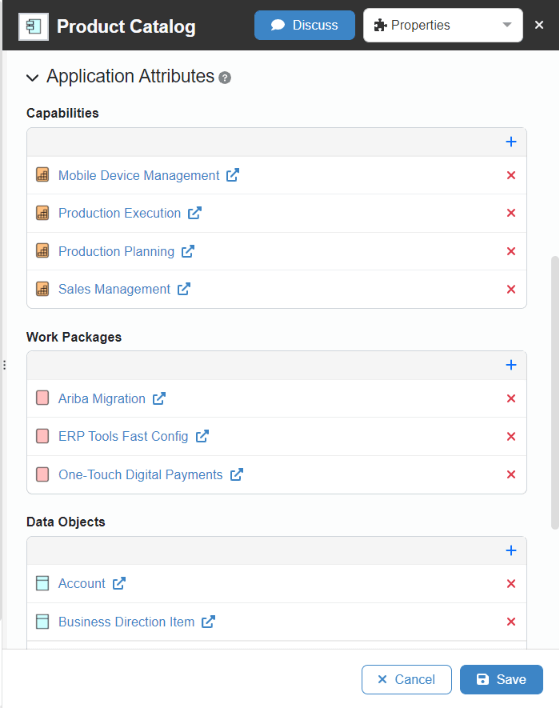
Properties Window
The Property Window allows users to view the connected target element, search and create a connector between the source and target element. When a connector is created in Prolaborate the same is reflected in the EA model as well, and it can be viewed and deleted in Prolaborate when it is not required.


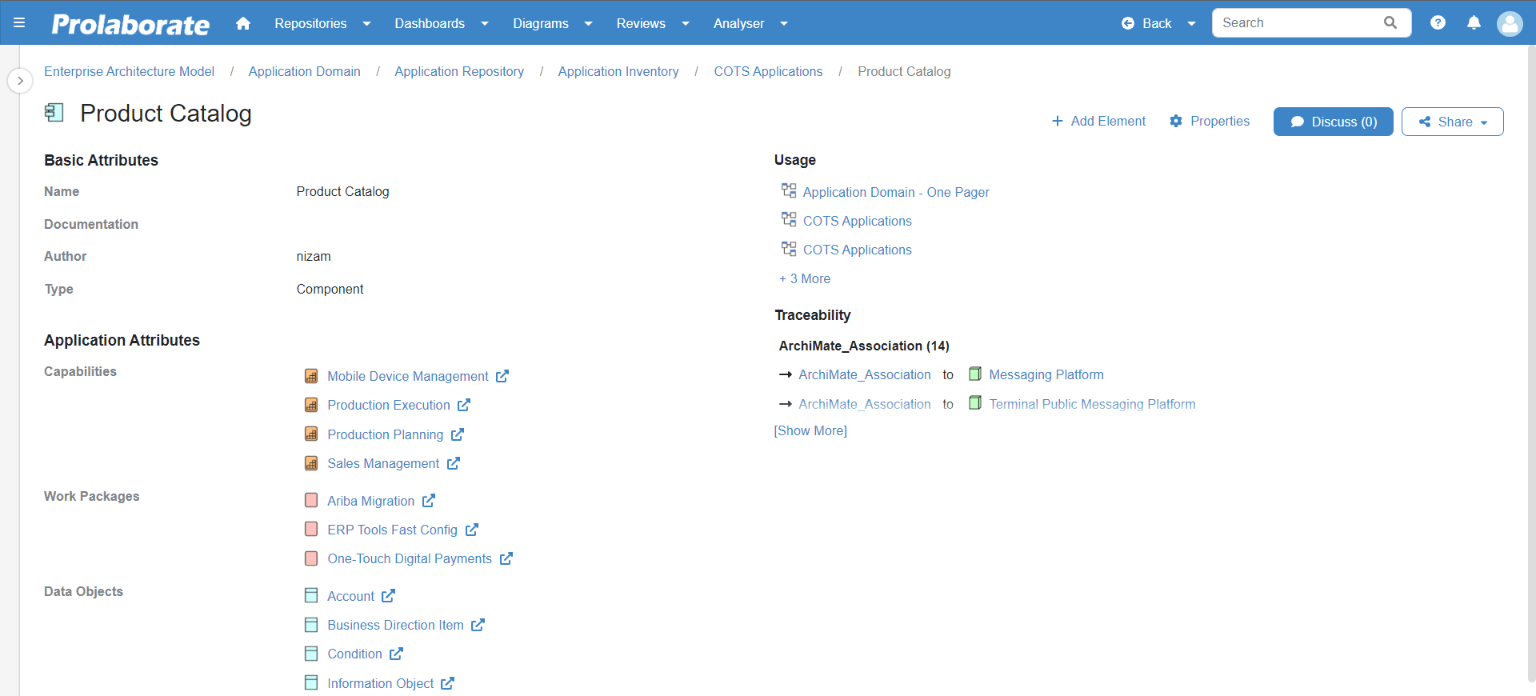
Overview Page
Similar to the Properties Page Users can view the connected elements from the Overview pages.
Create a Connector Between Artifacts
Prerequisite
As a prerequisite, one should have created a Connector Property and configured it to a specific source element(stereotype) under the Modeling Language to establish a connection between elements.
When creating the Connector Property, the Target element configuration can be done using,
- Using Designer Configuration Click here
- Using Query Configuration Click here
Predefined reports from Report Configuration can be used to configure target elements when creating connector property.
Note:
- Only single level reports of type designer and query can be used in Connector Creation.
Create Connector
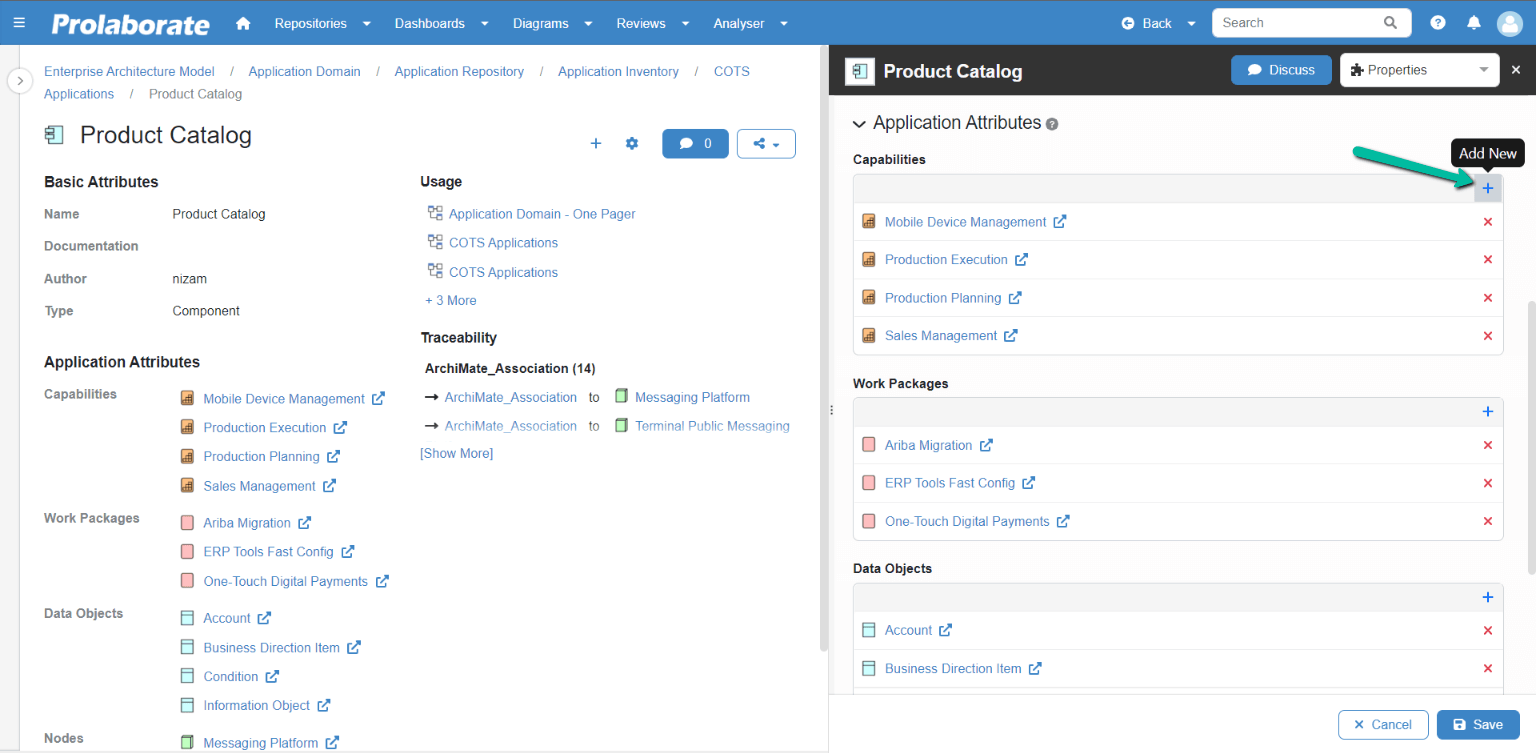
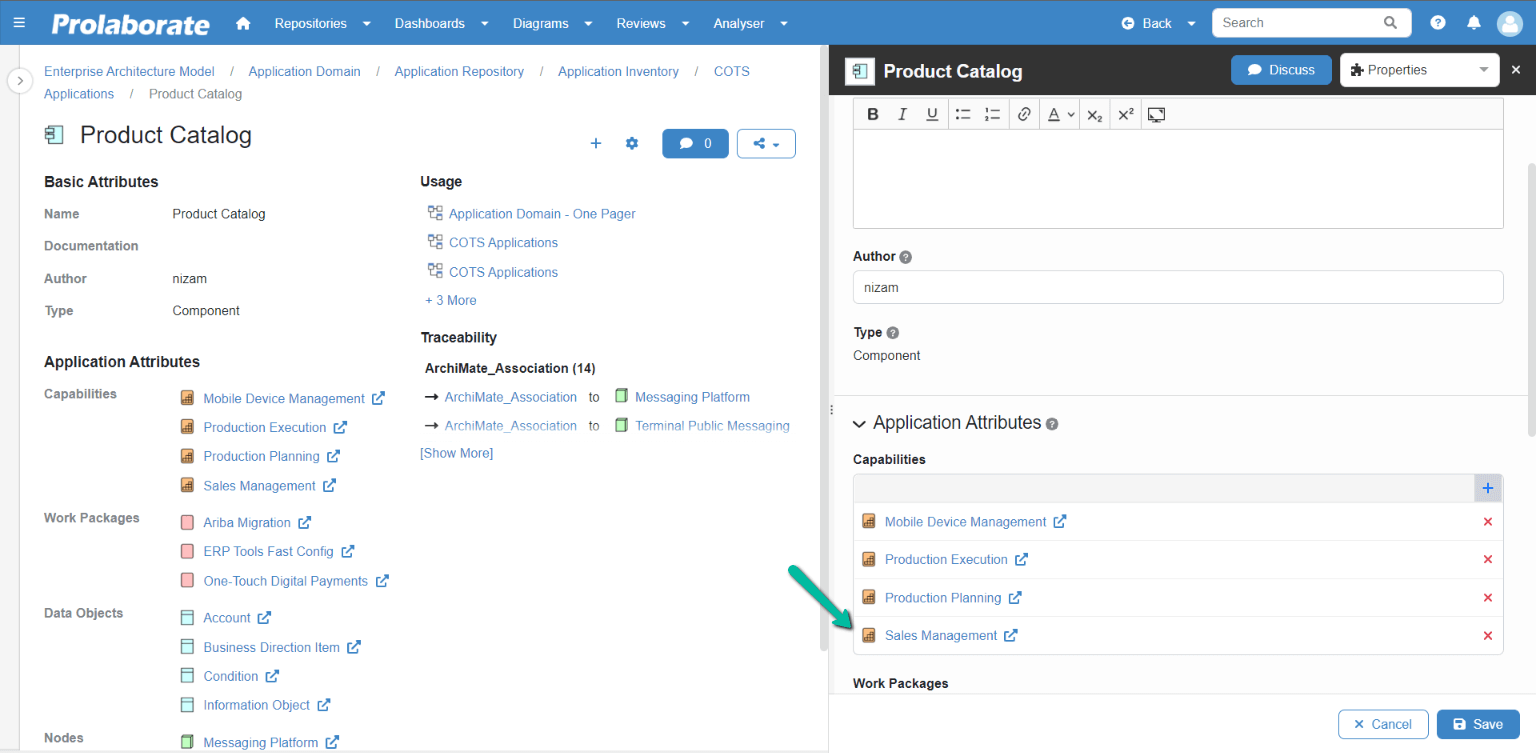
To establish a connection, select the artifact to which the Connector Property is added in the repository browser and click on Properties to open the Properties window.
Existing relationships based on the configured Connector Property are automatically listed in the Properties window and Overview page. Click on the Plus Icon in the Properties window to create a new connector.
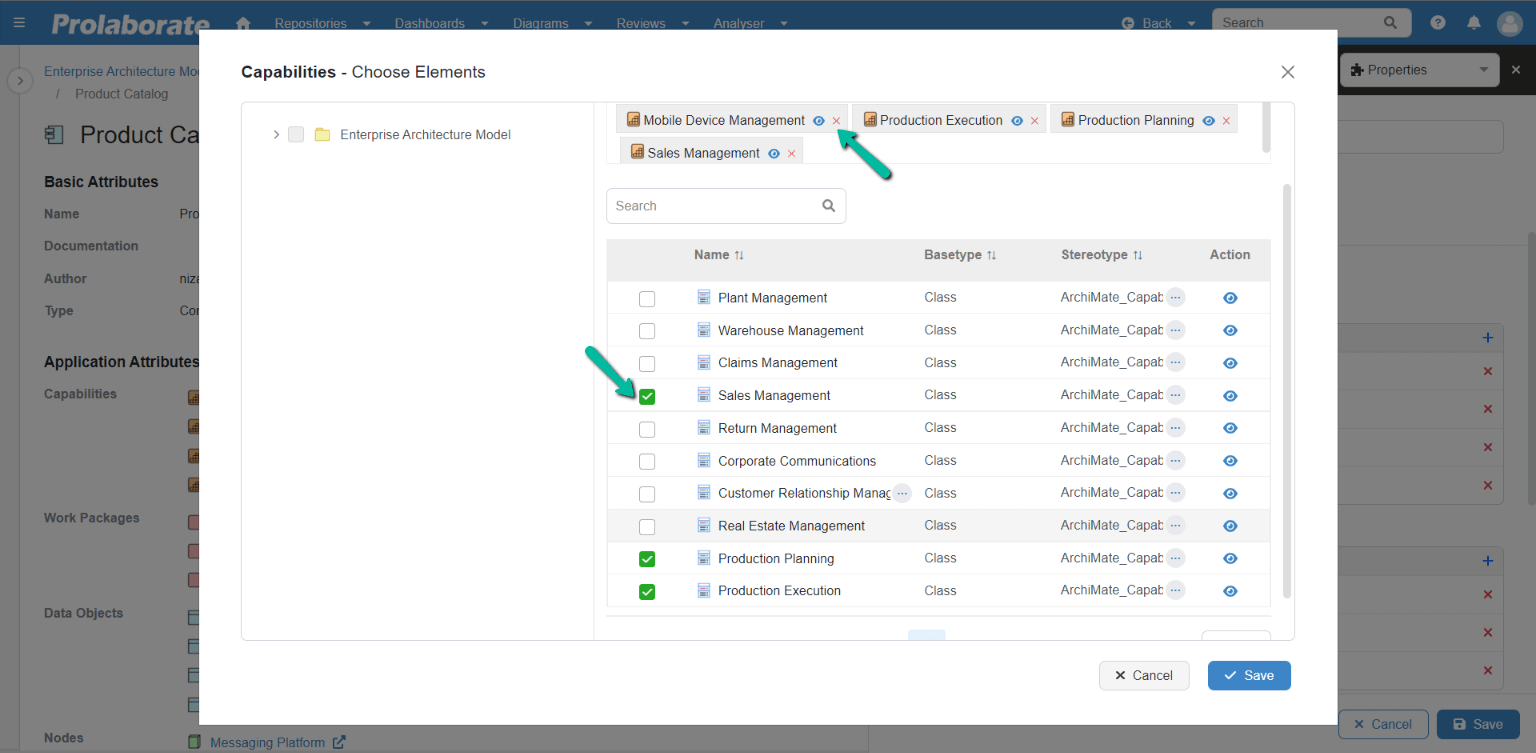
A popup window displaying the list of target elements configured when creating the Connector Property in a table view. The tree view shows all the artifacts.
Note:
- Only the artifact type or stereotypes configured in the target element can be selected in the tree view.
Check the box of the artifacts and click Save to create a connector.
Once the connection is established the same will be reflected automatically in the Properties window.
Delete Connector
To remove the connection between elements from Prolaborate, click the Cross Icon in the Properties window.
A popup will appear to confirm the deletion. Click Delete to delete the connector permanently from the model.

Connectors can be deleted in bulk by unchecking the box in tree view and table view or by clicking the Cross Icon under selected elements in the popup window.

Create and Configure Connector Property
Step 1: Create Connector Property
As mentioned in the prerequisites, it is important to define a Connector Property to create connector between Artifacts from Prolaborate.
To create a Connector Property, click on Menu > Modeling Languages under Repository Settings.
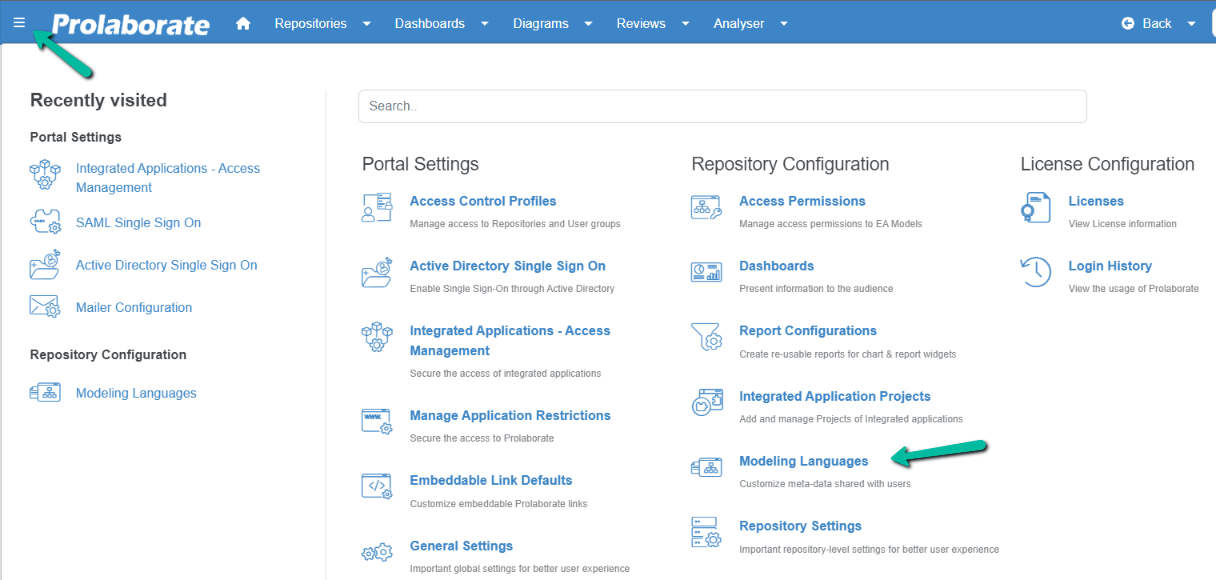
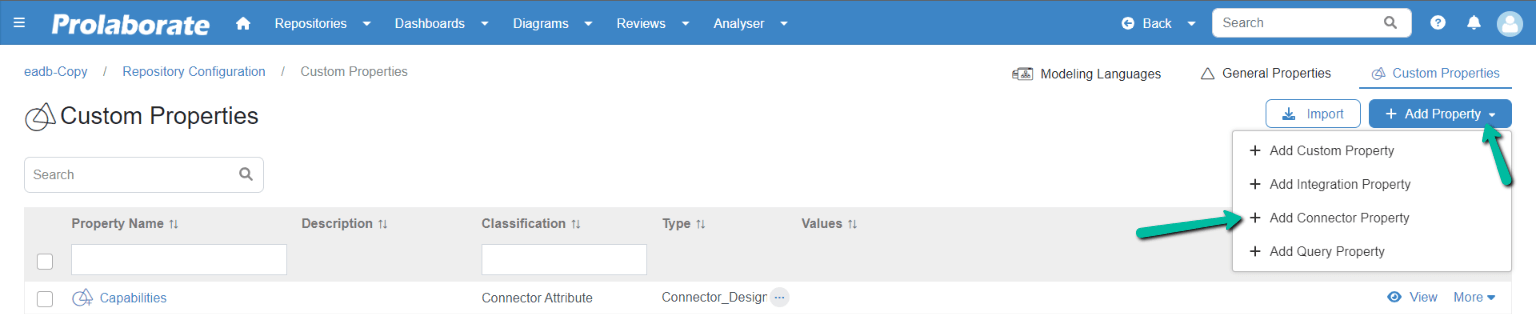
Click on Custom Properties at the top right corner of the page.
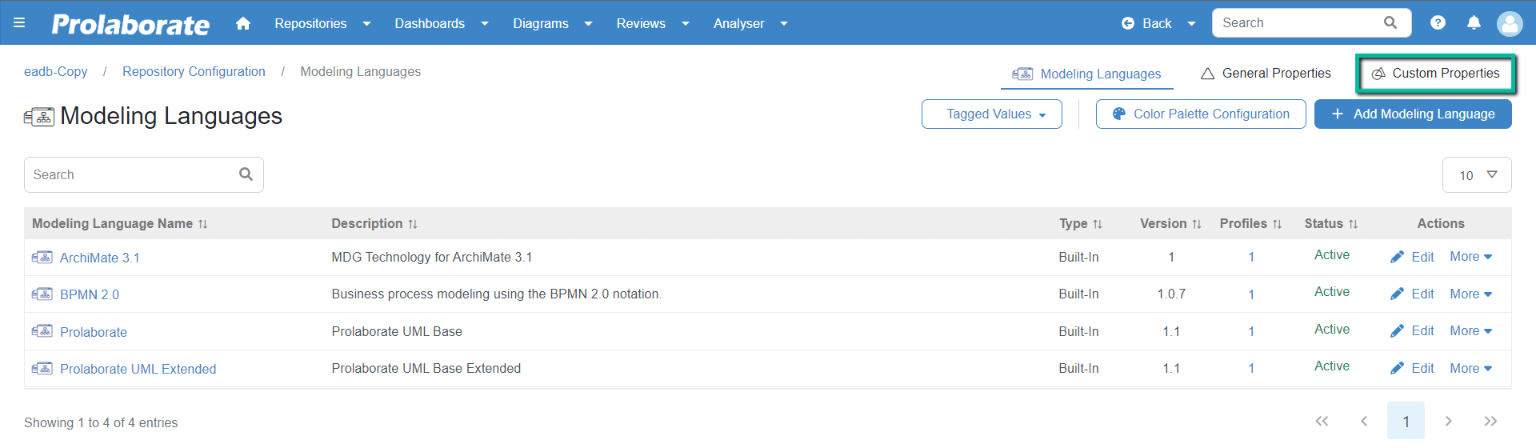
Click on the Add Property dropdown and choose Add Connector Property.
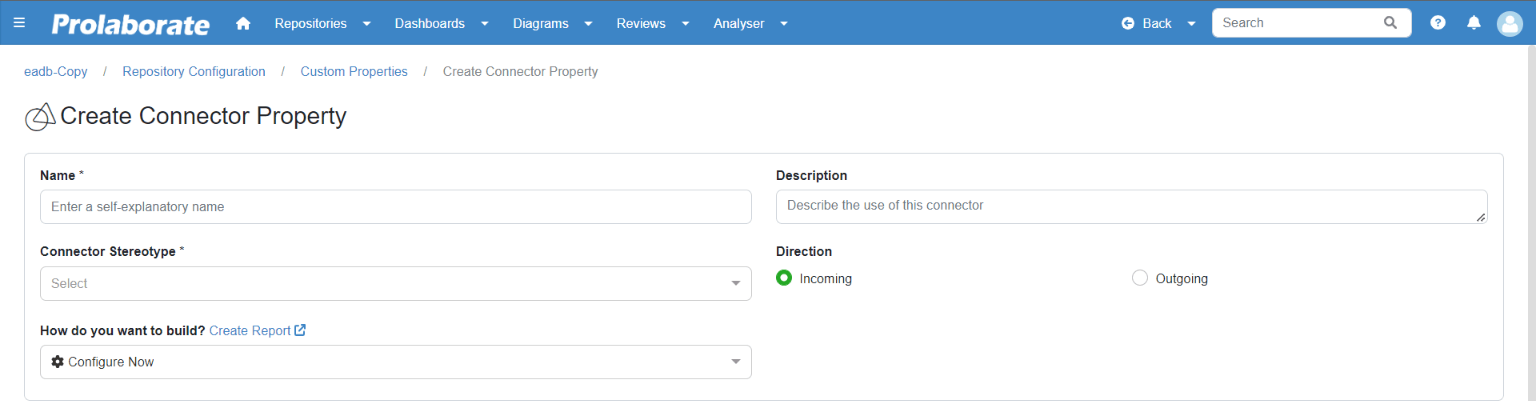
In Create Connector Property, fill in the required details.
| Field | Description |
|---|---|
| Name | Give a suitable name for the connector property |
| Description | Write a short description about of the property if required |
| Connector Stereotype | Upon clicking the Stereotype dropdown, you will get the list. Choose the connector stereotype from the dropdown |
| Direction | Choose the direction of the connector either Incoming (Source to Target) or Outgoing (Target to Source) |
Next step is defining the target element configuration for the connector property.
Target Selection – Using Designer Configuration
This option is for users who are unfamiliar with SQL queries. It allows the user to filter the list for target element when adding a connector.
| Field | Description |
|---|---|
| Browser | One can view the package by clicking on this section |
| Search Repository | This helps search packages and elements. Click the Search icon to open the repository search page, where the user can search for elements by name, or the user can choose object type, type, and stereotype from the dropdown menu |
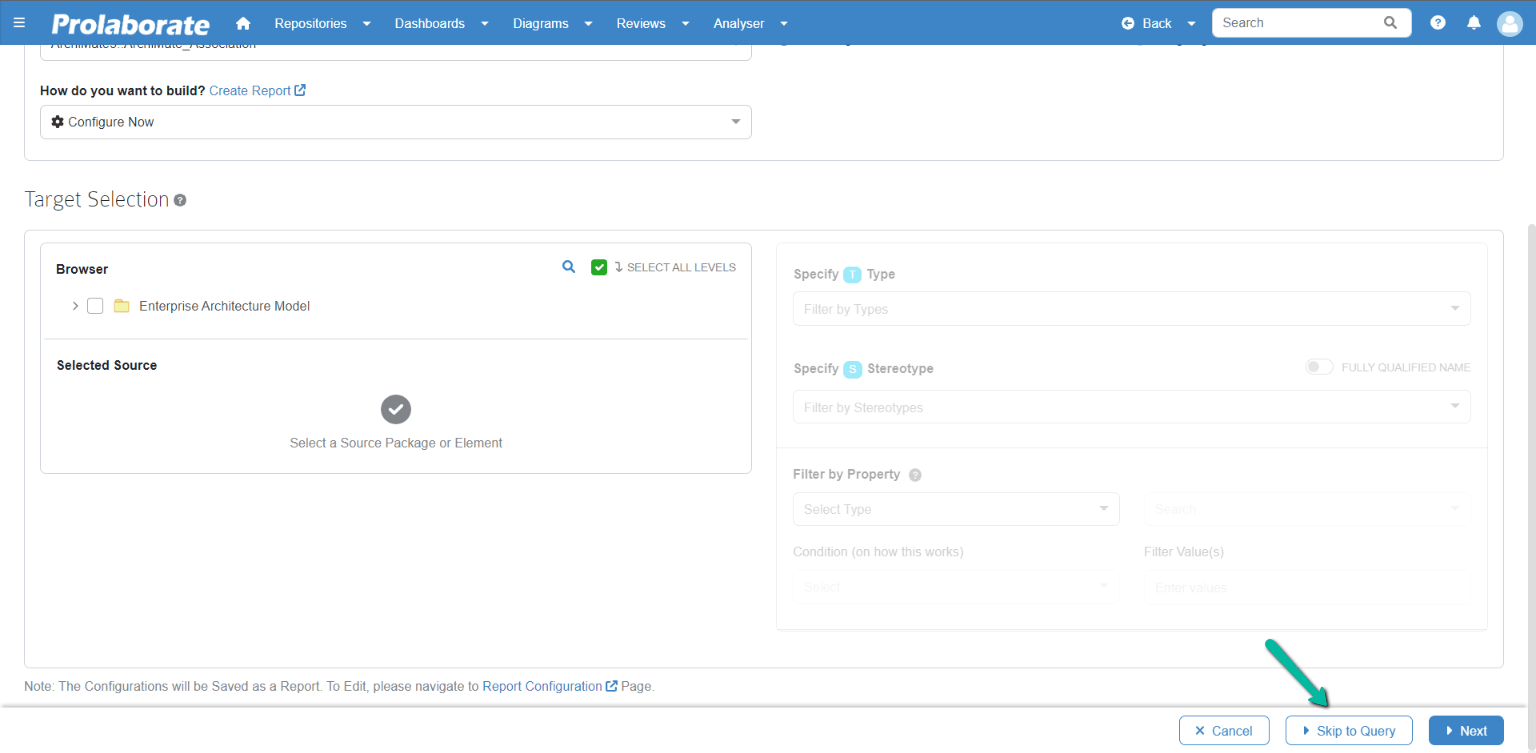
| Select All Levels | When Select All Levels is selected, the sub packages and elements within a package are selected automatically once the user selects the package |
| Specify Type | Select the Object type from the dropdown that is available from the package |
| Specify Stereotype | Select the stereotype from the dropdown |
| Fully Qualified Name | By enabling this option, one can see the name of the Stereotype along with its technology. If not enabled, you will be able to see only the name of the Stereotype |
| Filter By Property | You can filter the elements based on the basic properties i.e., Name, Stereotype, Status, Notes, etc, or tagged values Condition (on how this works): User can filter based on the conditions like IN, NOT IN from the tagged value and Basic Properties Filter values: Based on the above Tagged value or Basic Property, user can filter in detail by using the values from the Tagged value or basic property? |
After choosing all the filters click Next.

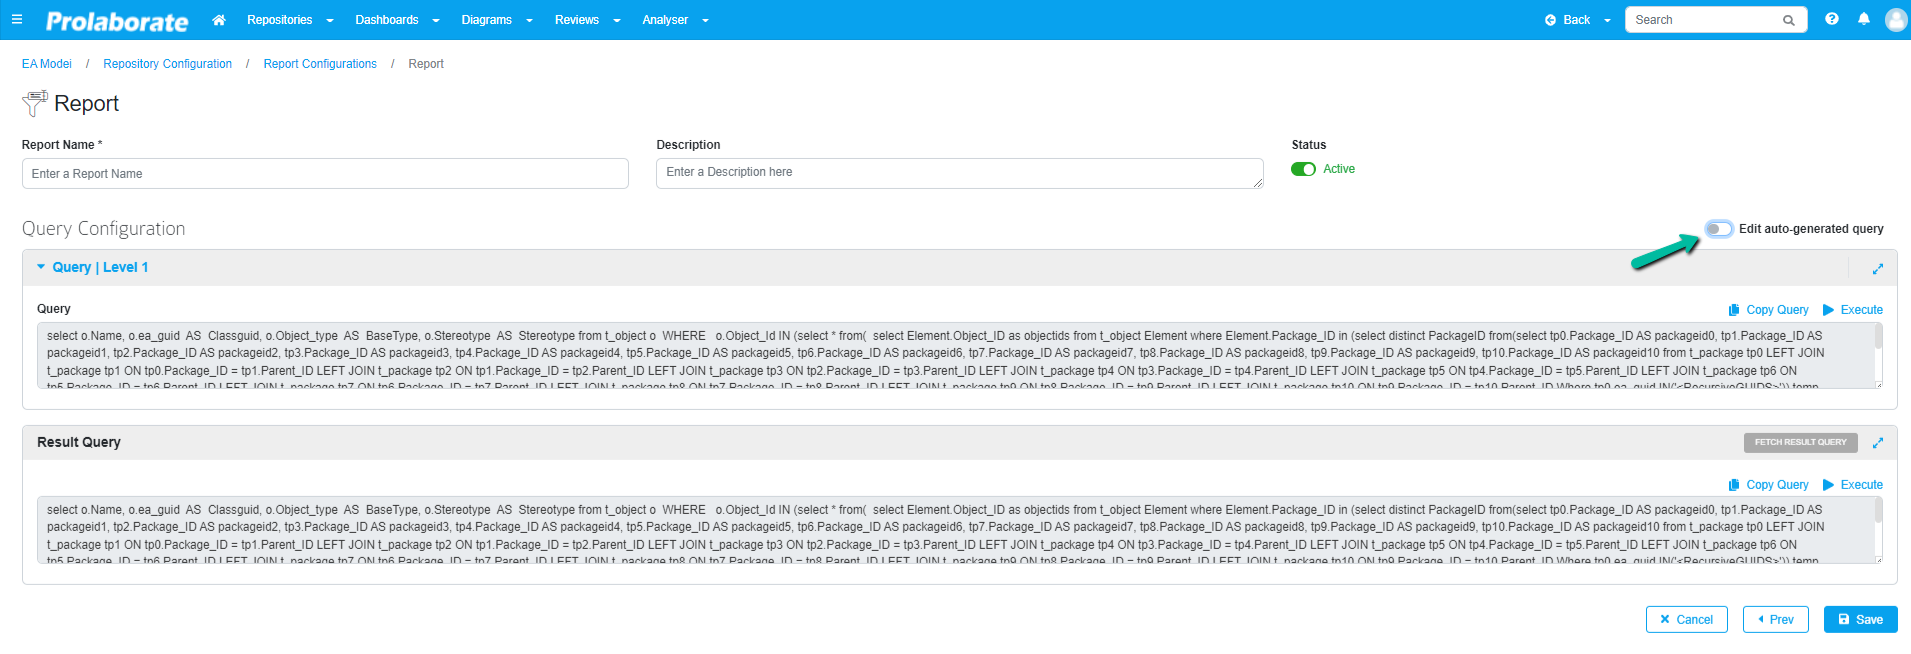
On the query configuration page, the queries for the designer configuration will be displayed. Users can either customize the query if required by enabling the Edit auto-generated query option or copy the query and use it later for customization.?
Note:
- Enabling ‘ Edit auto-generated query’ option will result in loss of traceability between the selected designer configuration from the previous page and the query.?
Click Save to create the Connector Property. After clicking Save, the target element selection is saved as a report in Report Configuration.
One can edit the saved report from the Report Configuration page and the edited changes are reflected to the property. The changes are also reflected wherever the property is used and visible in the Properties Window, Overview Page, etc.
Note:
- Connector Property created in Prolaborate V3 will not be created as a report in V4. This means when a user migrated from Prolaborate V3 to V4, the migrated connector property cannot be modified in V4. In the case of modification, Admin must delete & recreate Connector Property.
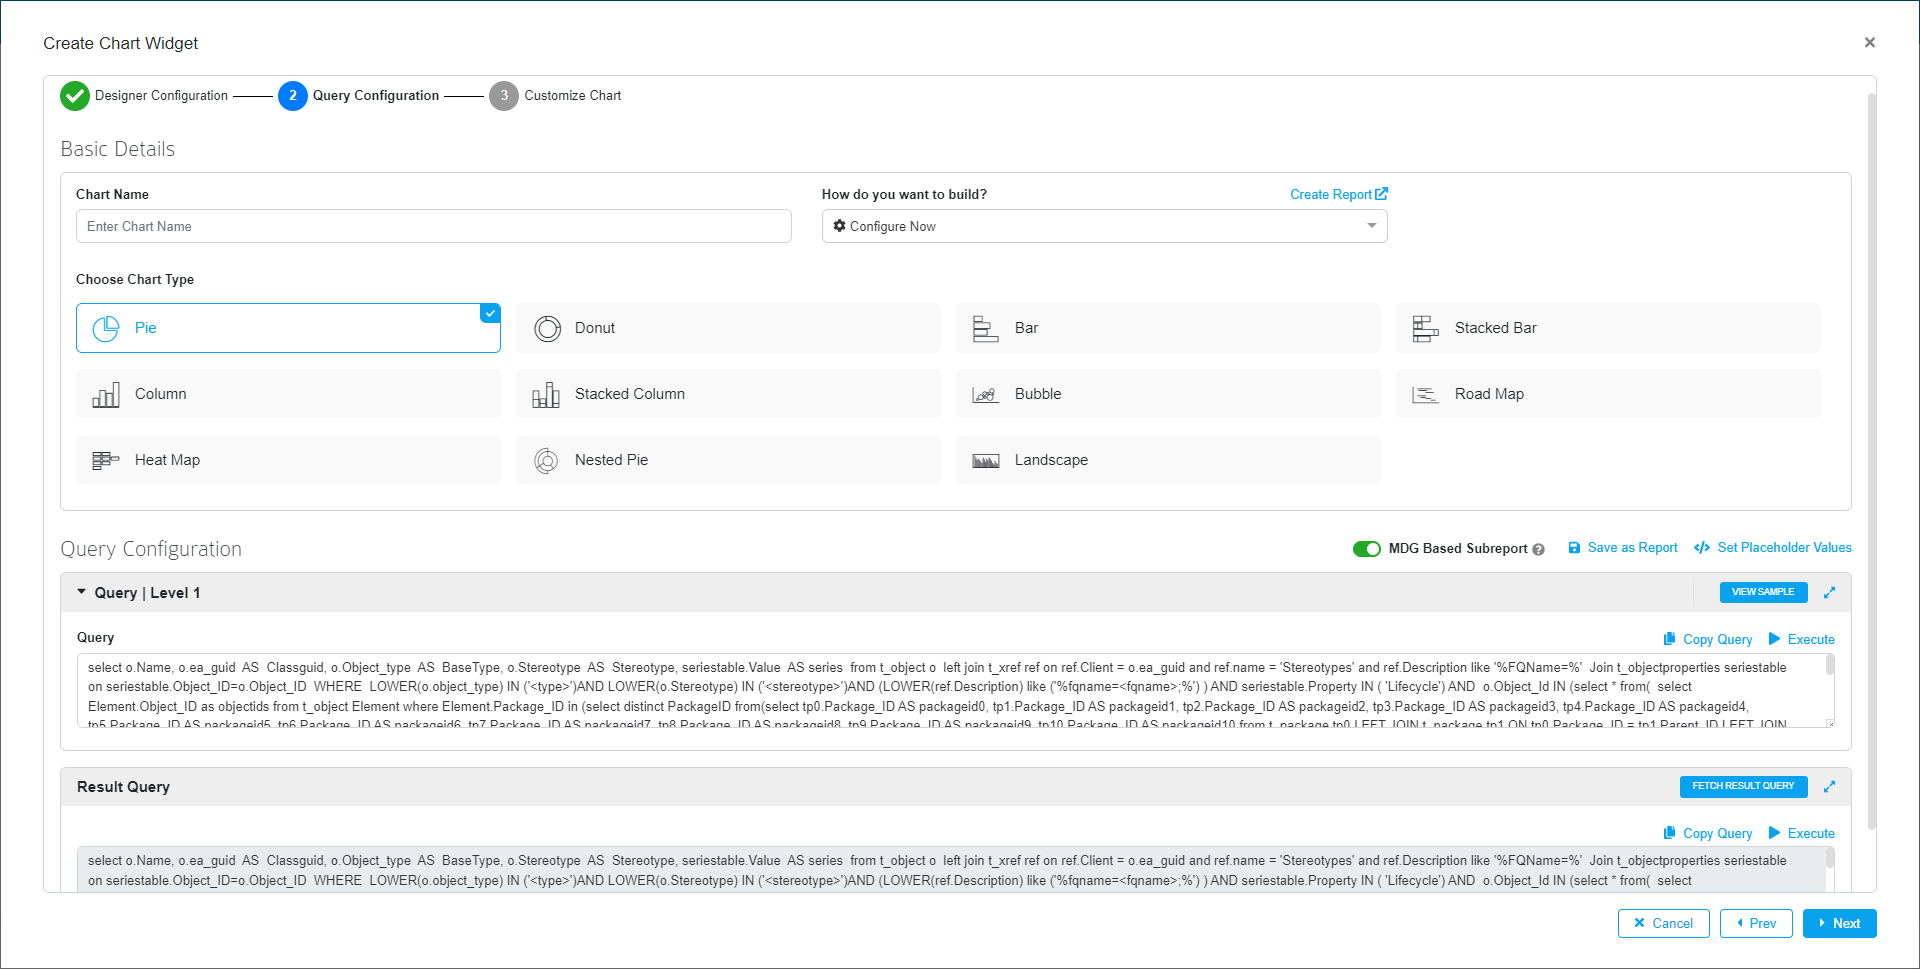
Target Selection – Using Query Configuration
This option is for users who prefer writing queries. In the Create Connector Property page, click on Skip to Query option.
This section allows the user to write query and it consists of Query | Level 1
| Field | Description |
|---|---|
| View Sample | It displays a sample query with the option to see more |
| Query | Enter the query in the space provided based on requirements |
| Copy Query | Click this button to copy the entire query, with no manual selection required |
| Execute | Click on Execute to see the query’s results |
| Set Placeholder Values | Displays the list of placeholders in the query, if there is any. Enter values for the respective placeholders and save them. To know more, click here |
| Fetch Result Query | Click this button to fetch the result query |
| Result Query | This text box will display the result query upon clicking on the Fetch Result Query button. |
Click Save to create the Connector Property. After clicking Save, the target element selection is saved as a report in Report Configuration.
One can edit the saved report from the Report Configuration page and the edited changes are reflected to the property. The changes are also reflected wherever the property is used and visible in the Properties Window, Overview Page, etc.
Note:
- Connector Property created in Prolaborate V3 will not be created as a report in V4. This means when a user migrated from Prolaborate V3 to V4, the migrated connector property cannot be modified in V4. In the case of modification, Admin must delete & recreate Connector Property.
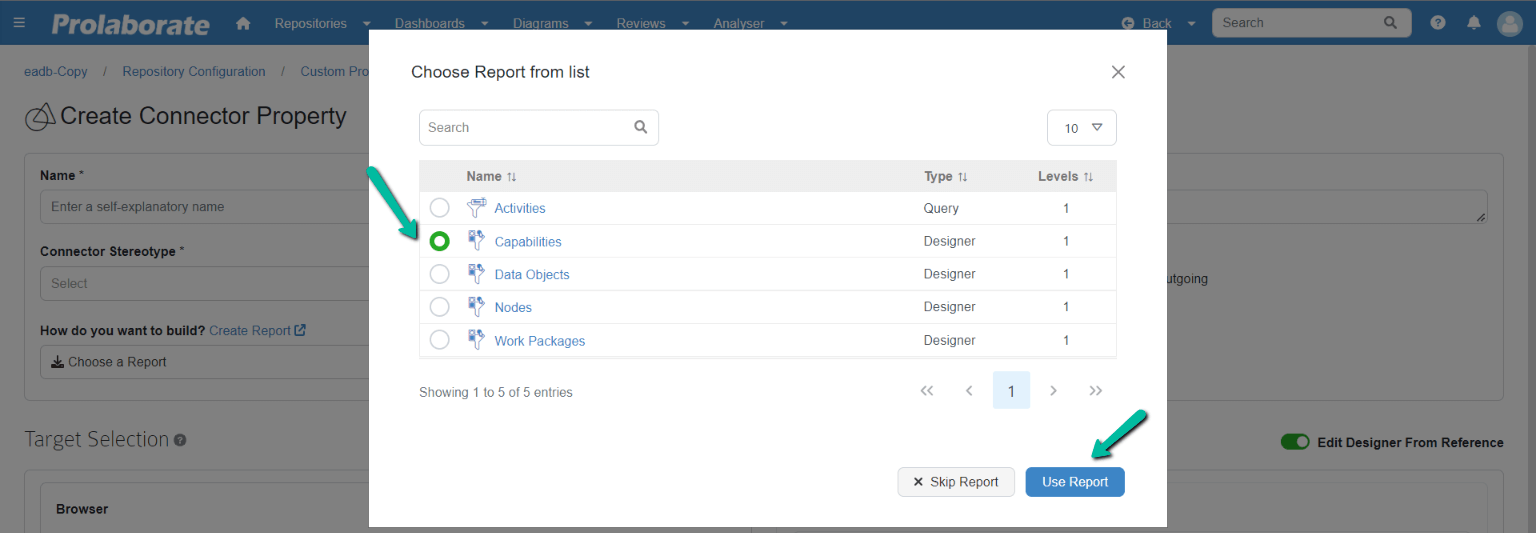
Reuse Report to Create Connector Property
When creating Connector Property, target element selection can be configured by using predefined and reusable reports from Report Configuration. To know more about Report Configuration, click here.
For Connector Property, the app display only single level report of type designer and query. The column (Levels) denotes the number of levels configured in the report.?
Report can also be selected by selecting Choose a Report from the dropdown How do you want to build? option.
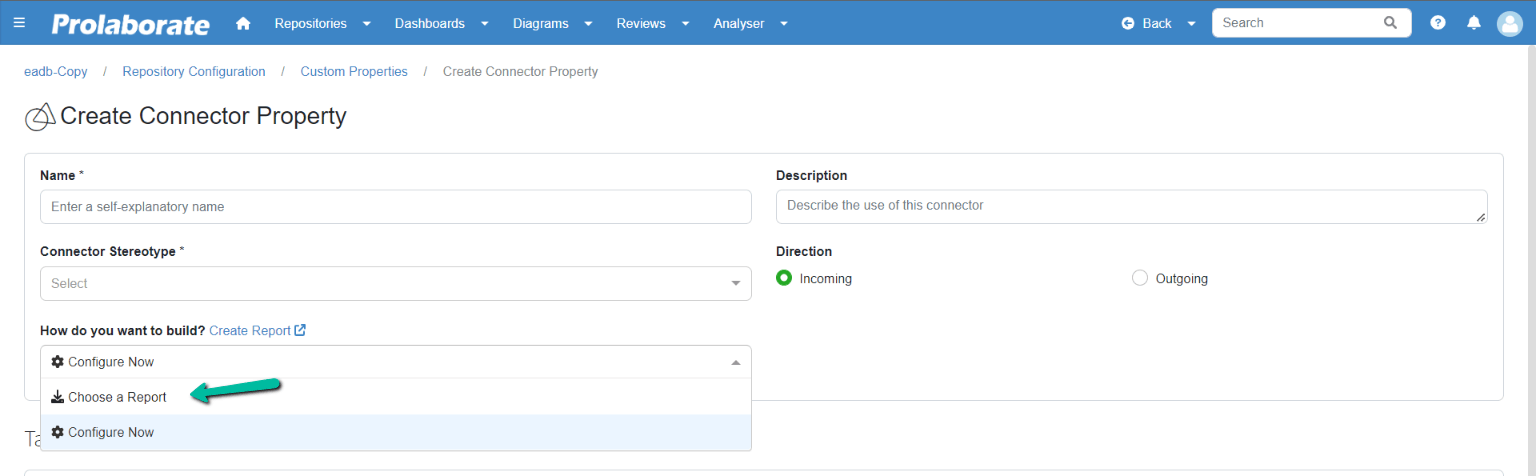
Click Save to create the Connector Property after choosing a report.
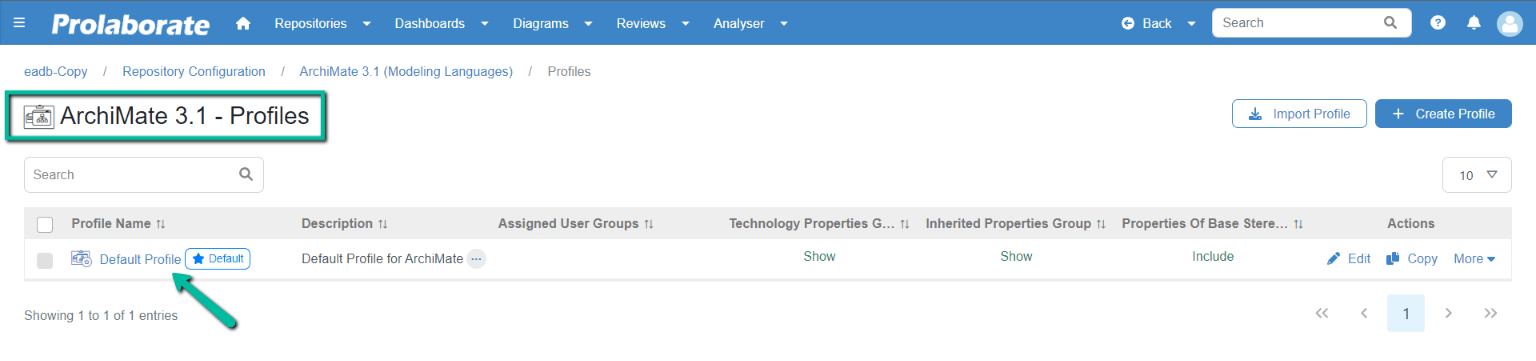
Step 2: Configure Connector Property to a Stereotype
The next step is to add the Connector Property to a stereotype in Modeling Language to create connectors from the property window.
In the Modeling Languages page, select a MDG and a Profile.
Open the required profile and choose a stereotype to which the Connector Property is to be added. Click on Form Designer to edit the attribute list for that stereotype
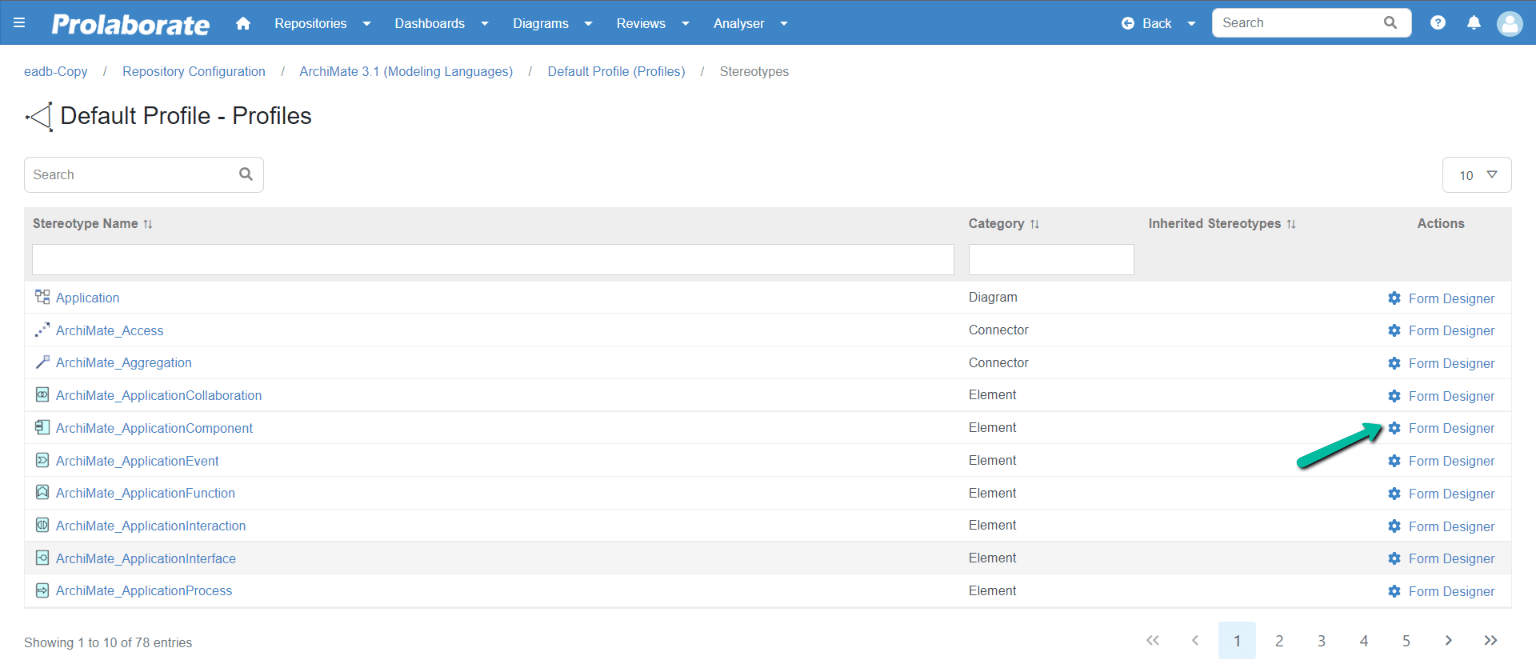
The connector properties are available under the Custom Properties section on the Form Designer page. Drag and drop the required Connector Property to add to the stereotype.
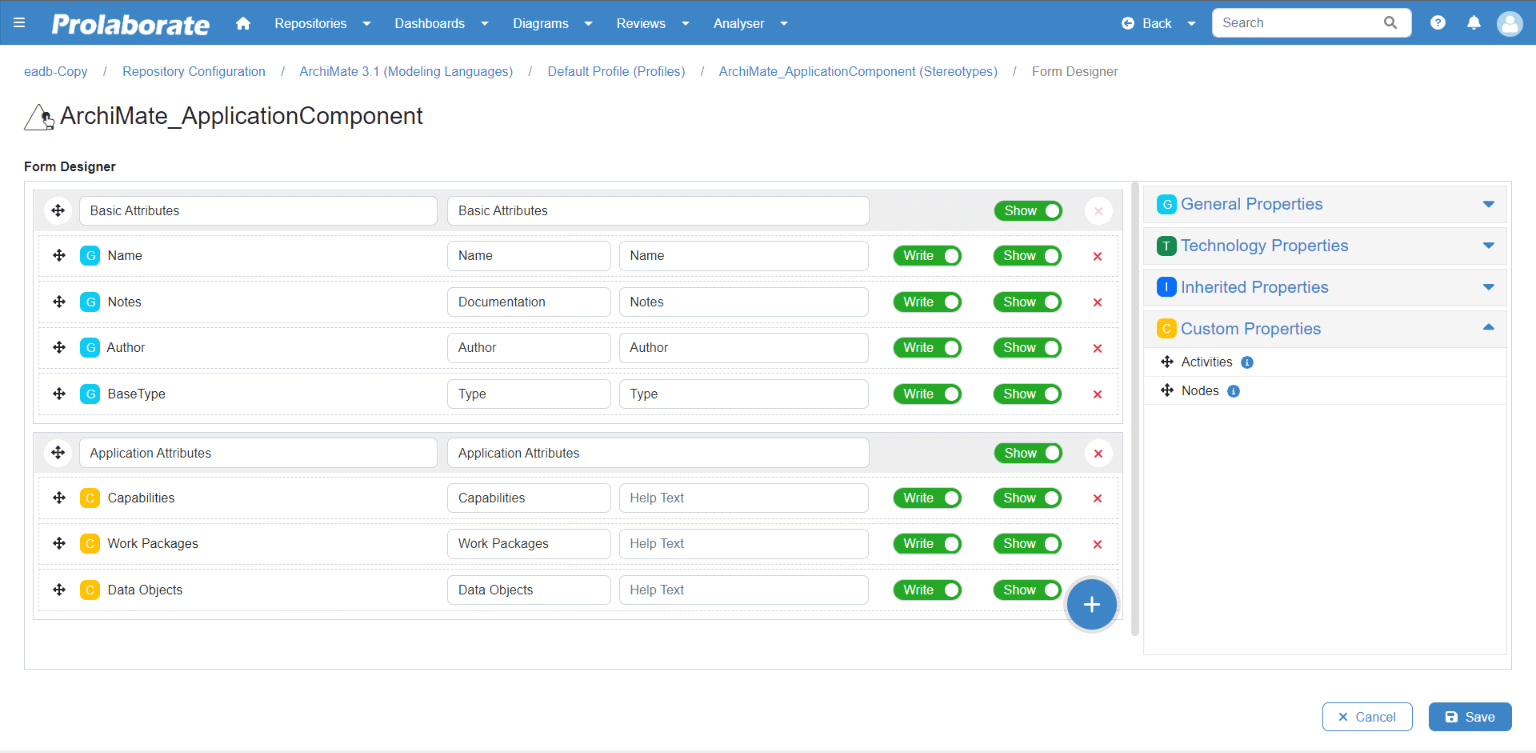
Toggle Show/Hide is to display a property in the Properties Window and Overview Page for visibility, and toggle Read/Write is to access permission to edit.
If Write access is given, user can create connectors and If Read access is given to the property, user can’t create connectors from the properties window.
Click Save to save the configurations.
Modify Connector Property
When you save a Connector Property, the target selection configured is saved as a report in Report Configuration. User can edit the report to modify the configurations and the changes are reflected in the Properties window and Overview page where the Connector Property is used.
Manage Connector Property
All the Connector Properties created in Prolaborate are listed on the Custom Properties page. It shows the connector property name and description if added. The type is based on the target selection configured (Designer or Query)

User can perform the following actions,
- View the connector property
- Export
- Import
- Delete
View Connector Property Details
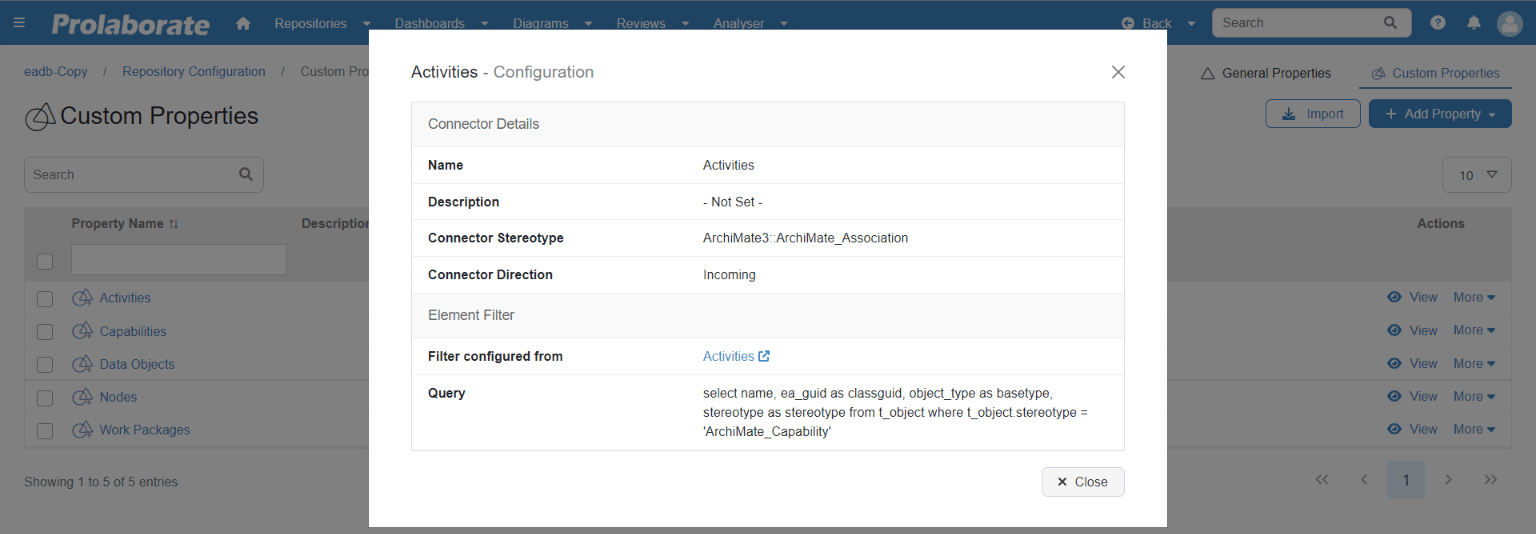
Clicking on the Eye Icon lets you see the connector details including the type, stereotype, direction, etc.
A popup window is opened showing the configurations.
Below shows the configurations for a Connector Property with target selection configured using designer method.
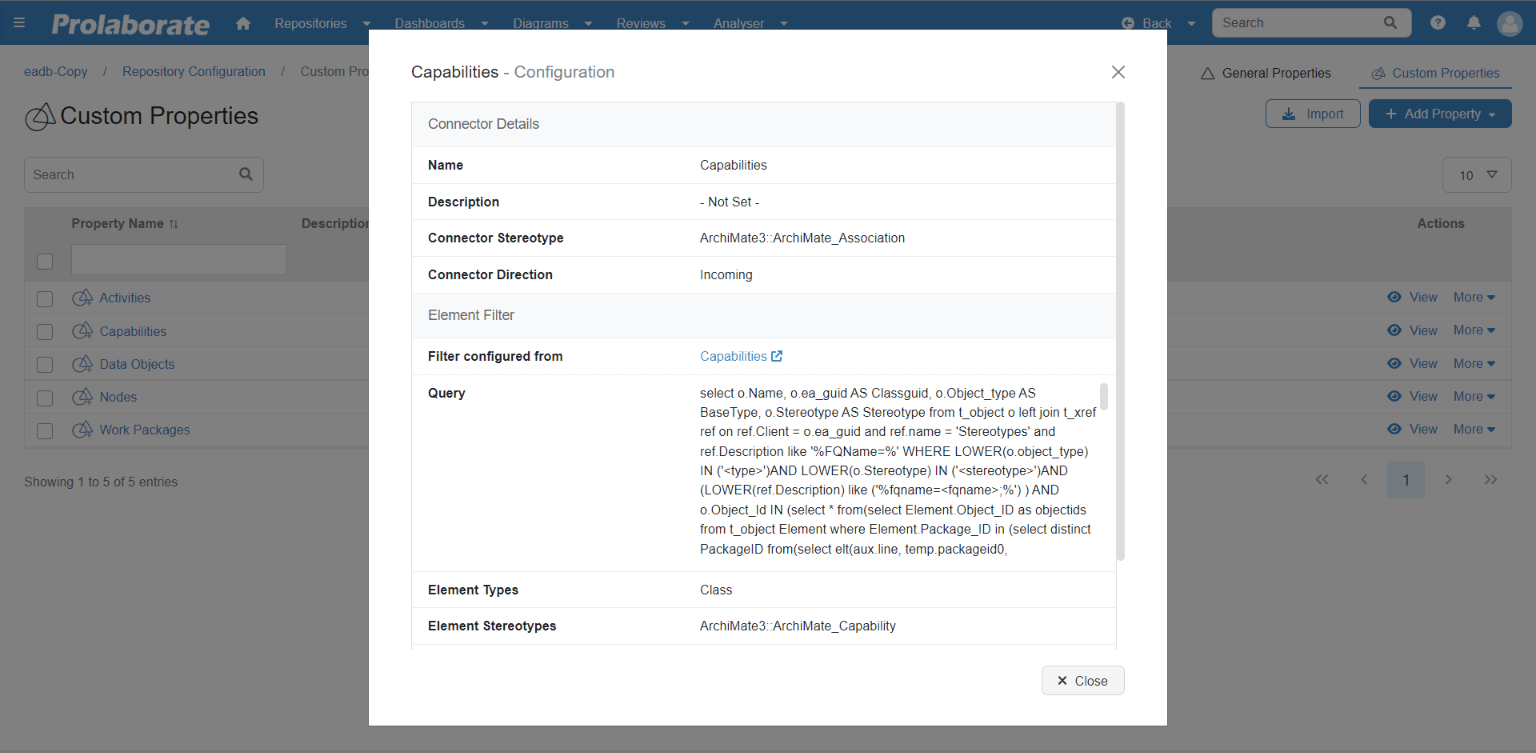
Below shows the configurations for a Connector Property with target selection configured using designer method.
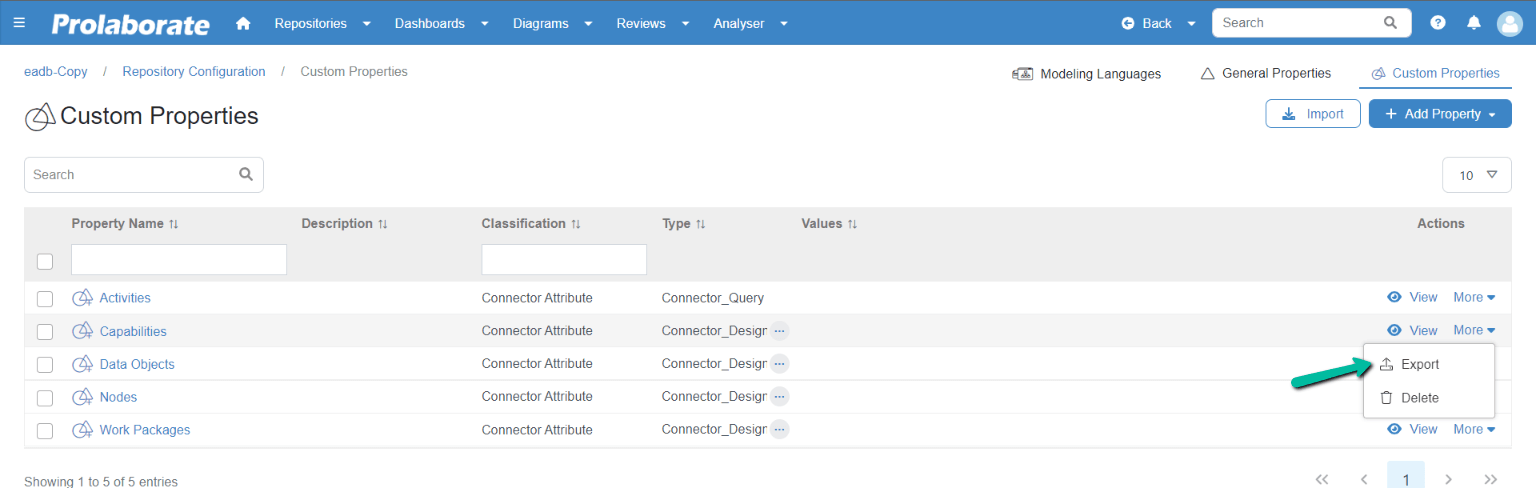
Export & Reuse Connector Property
Export the Connector Property to reuse across repositories or instances. Click on the Export option under Actions to export the properties individually.
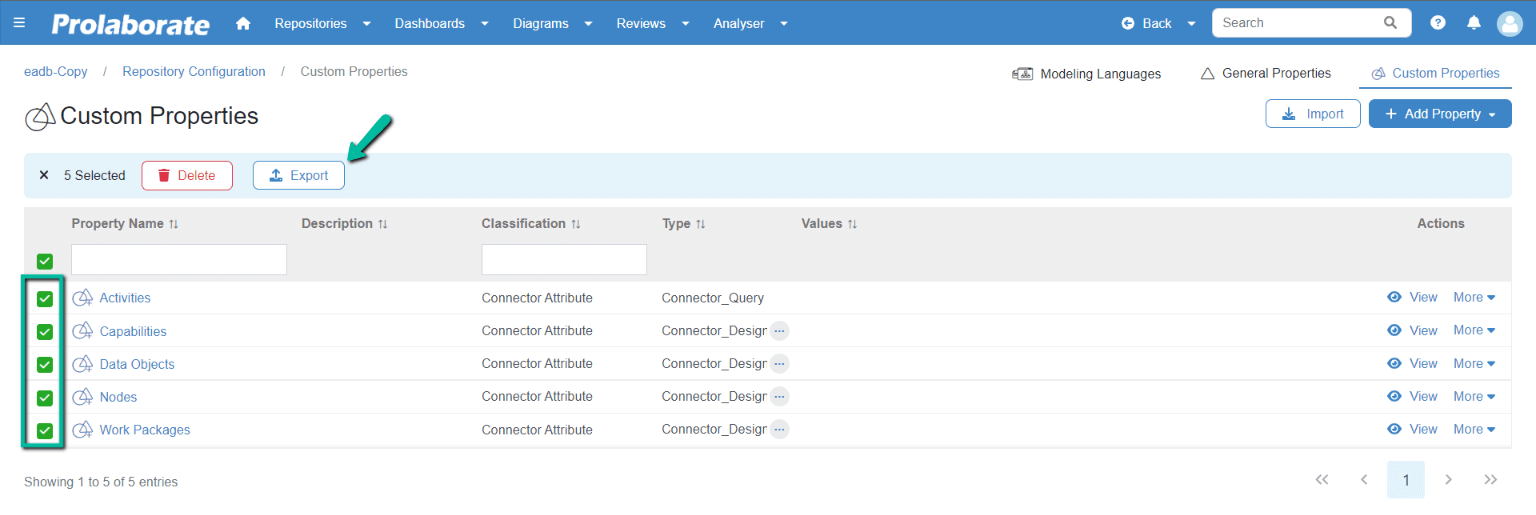
Properties can also be exported in Bulk. Select multiple properties and click Export.
Delete Connector Property
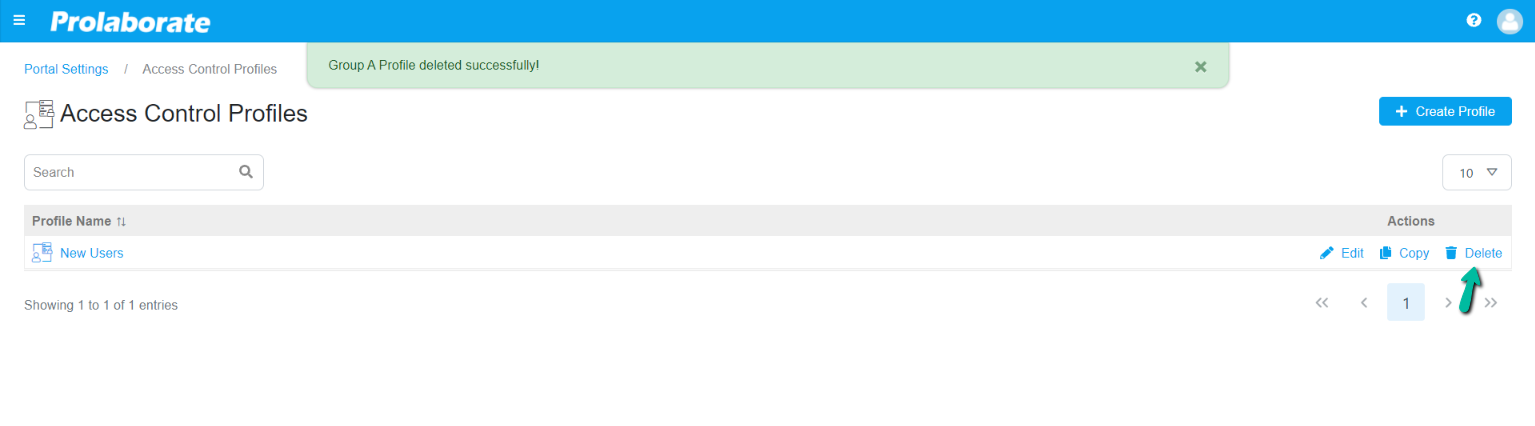
To delete a Connector Property, click on the Delete option under Actions to delete the properties individually.

Properties can also be deleted in Bulk. Select multiple properties and click Delete..
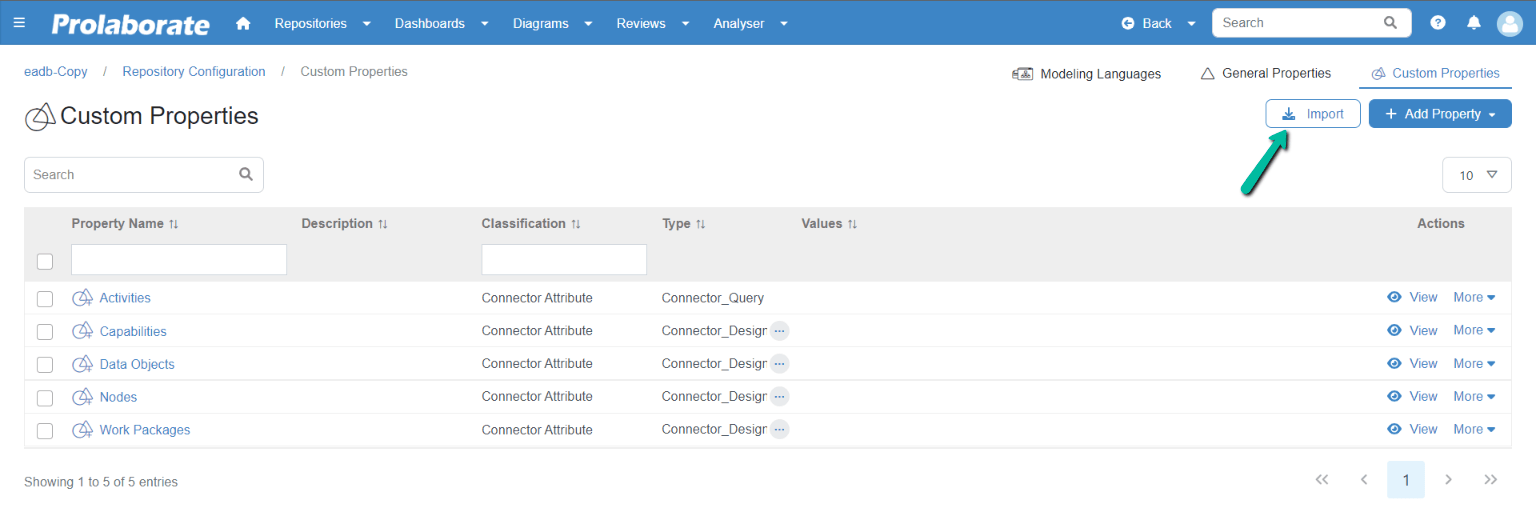
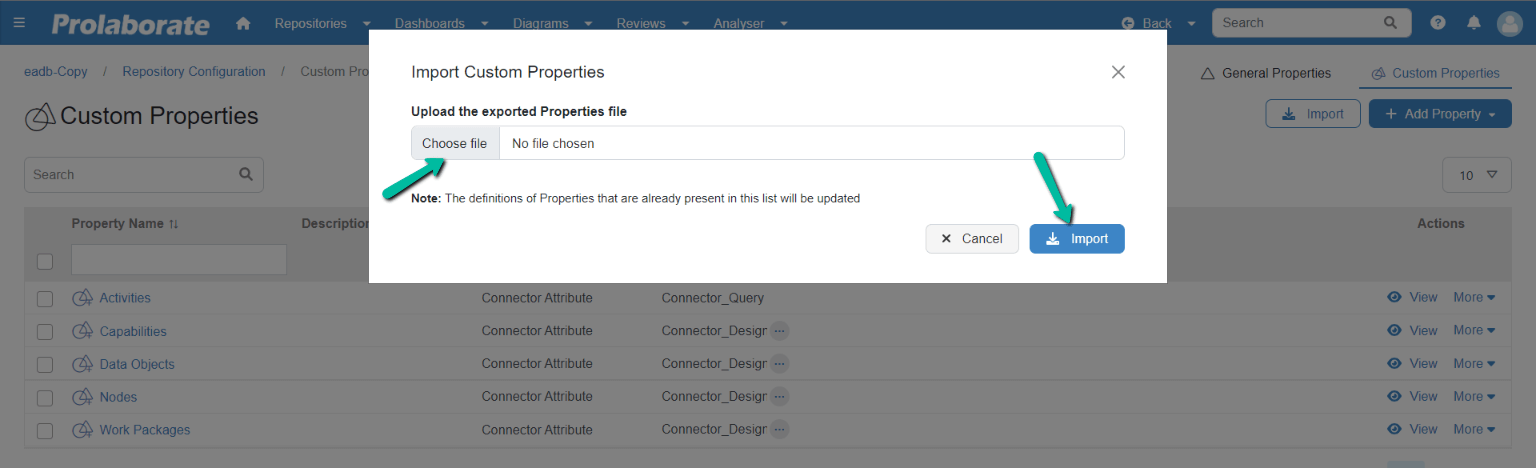
Import Connector Property
Import the Connector Property created in other repositories or instances. Click on the Import option.
Choose the xml file to upload and then click Import to add the properties.
Importing the Connector Property does not create a report in Report Configuration and therefore, the target selection configuration cannot be modified.
To have the editing privilege, one must import the report along with the properties to create a reference. This allows the users to modify the target selection configured for the imported Connector Properties.