
Setting up a SAML Application in Oracle Identity Cloud Service
Prerequisites
Your Prolaborate site should have a valid SSL Certificate.
Incase there isn’t a valid SSL certificate, then a self -signed certificate can be created. Please get in touch with the Prolaborate team to know more about it.
Service Provider Configuration
To configure the Service Provider, click on Menu → SAML Single Sign On
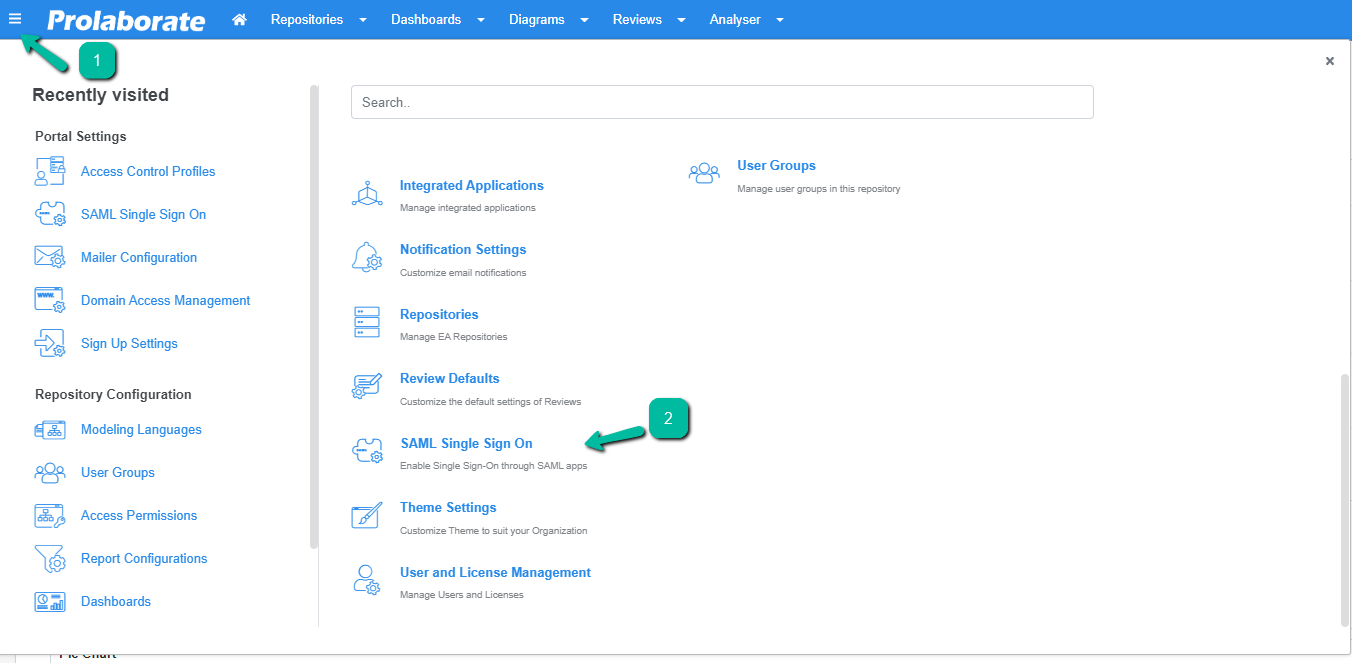


From the top of the page, click on Enable.
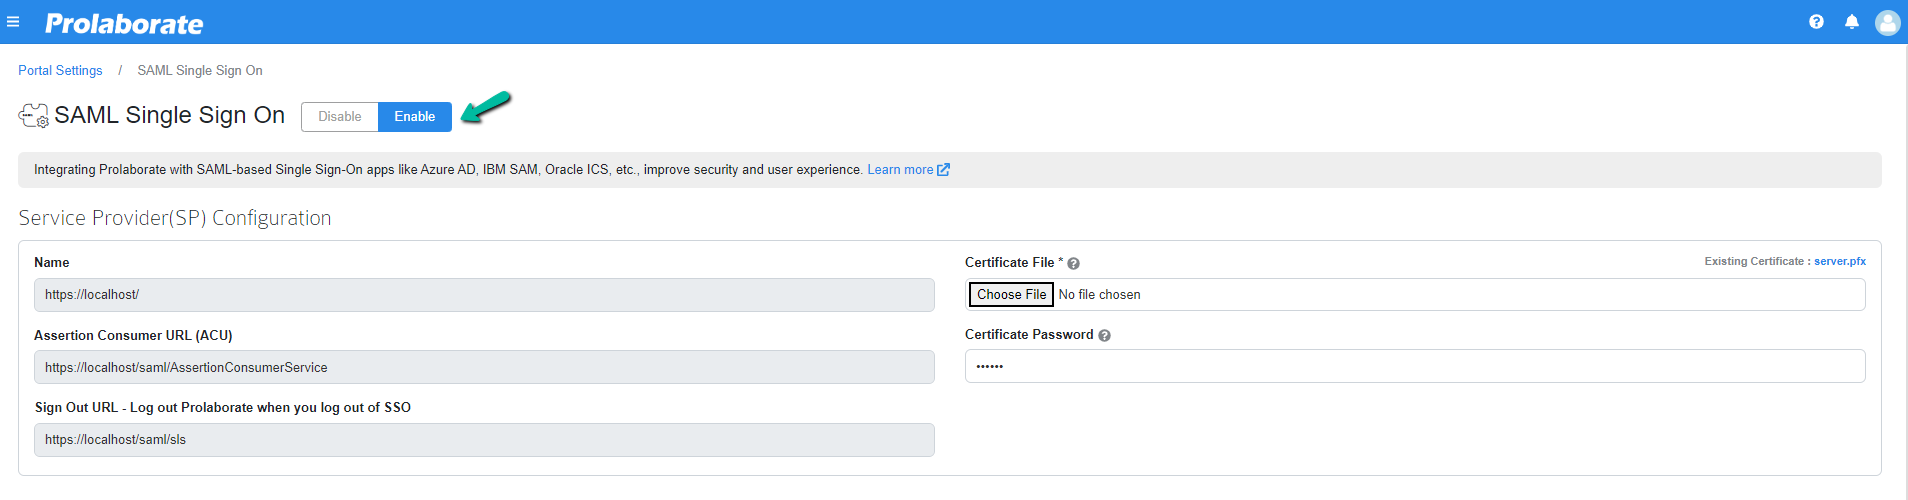
Under Service Provider Configuration,
| Name | The name will be prefilled |
| Assertion Consumer URL | Enter a suitable chart nameAssertion Consumer URL will be Prefilled |
| Certificate File | Choose the .pfx file of your SSL certificate |
| Certificate Password | Enter the Password of the .pfx file |
Configuring Prolaborate in Oracle
The following sections will elaborate the steps involved in setting up Prolaborate in Oracle.
Create a new SAML Application
To create a SAML application, please follow the below steps:
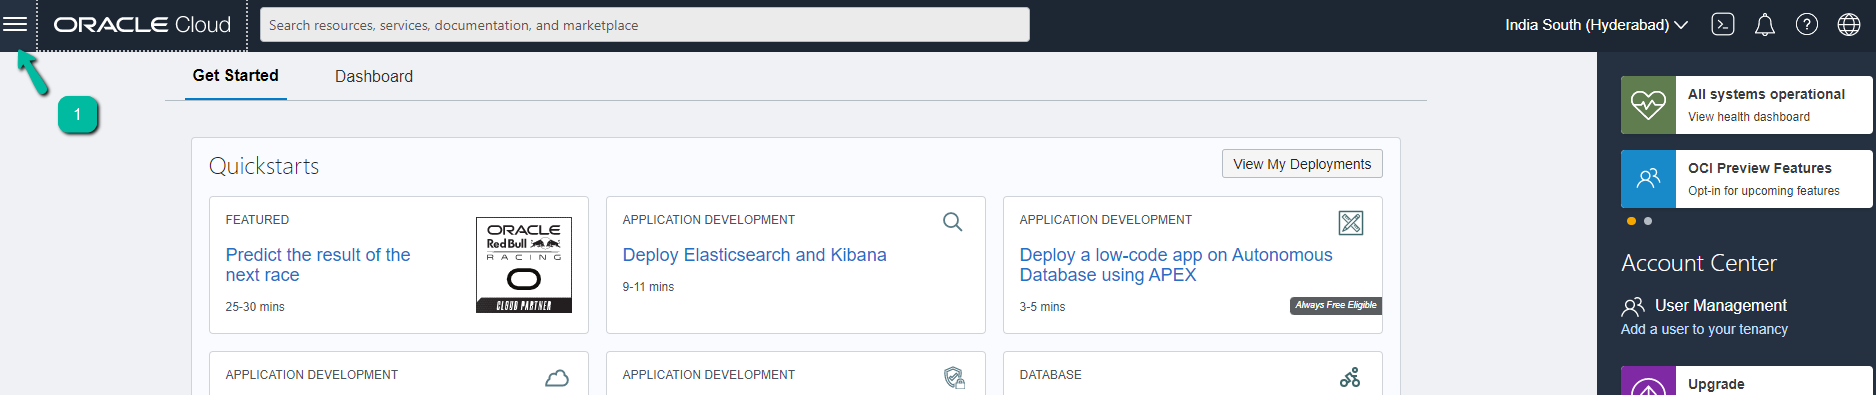
Log in the Oracle account as a user and Click on Menu.
Select Identity & Security and then choose Federation.
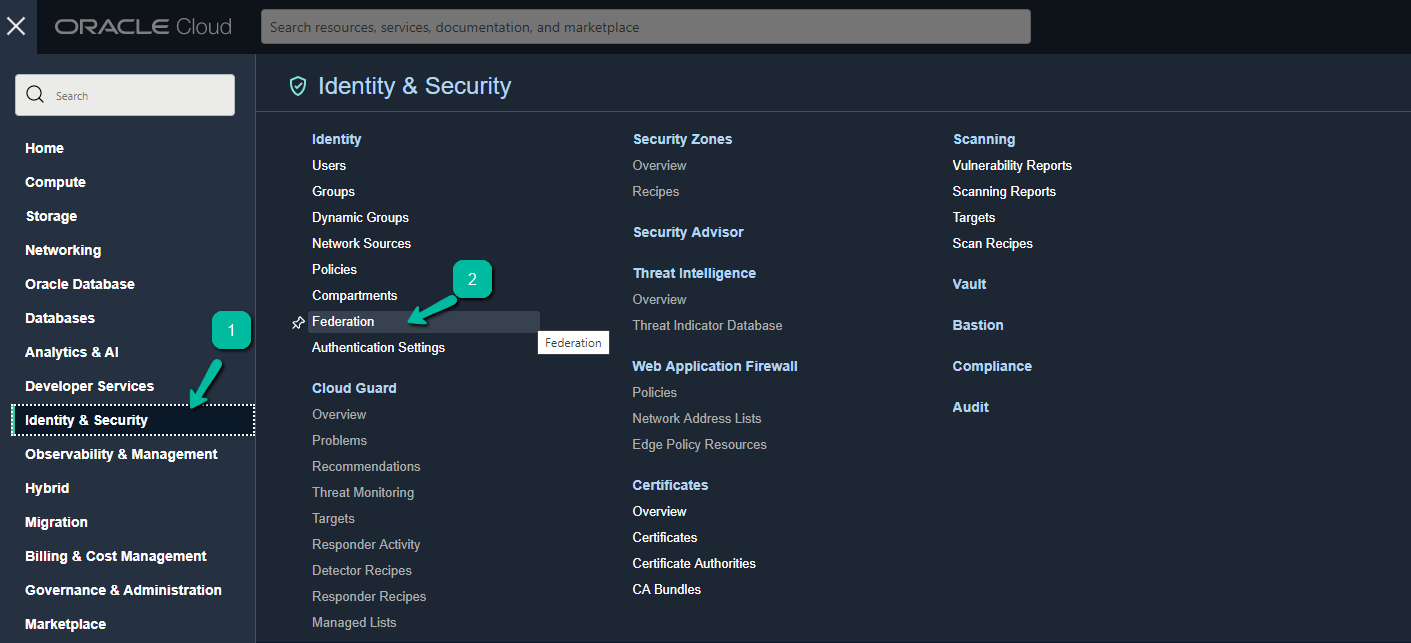
Click Federation Name from the list.
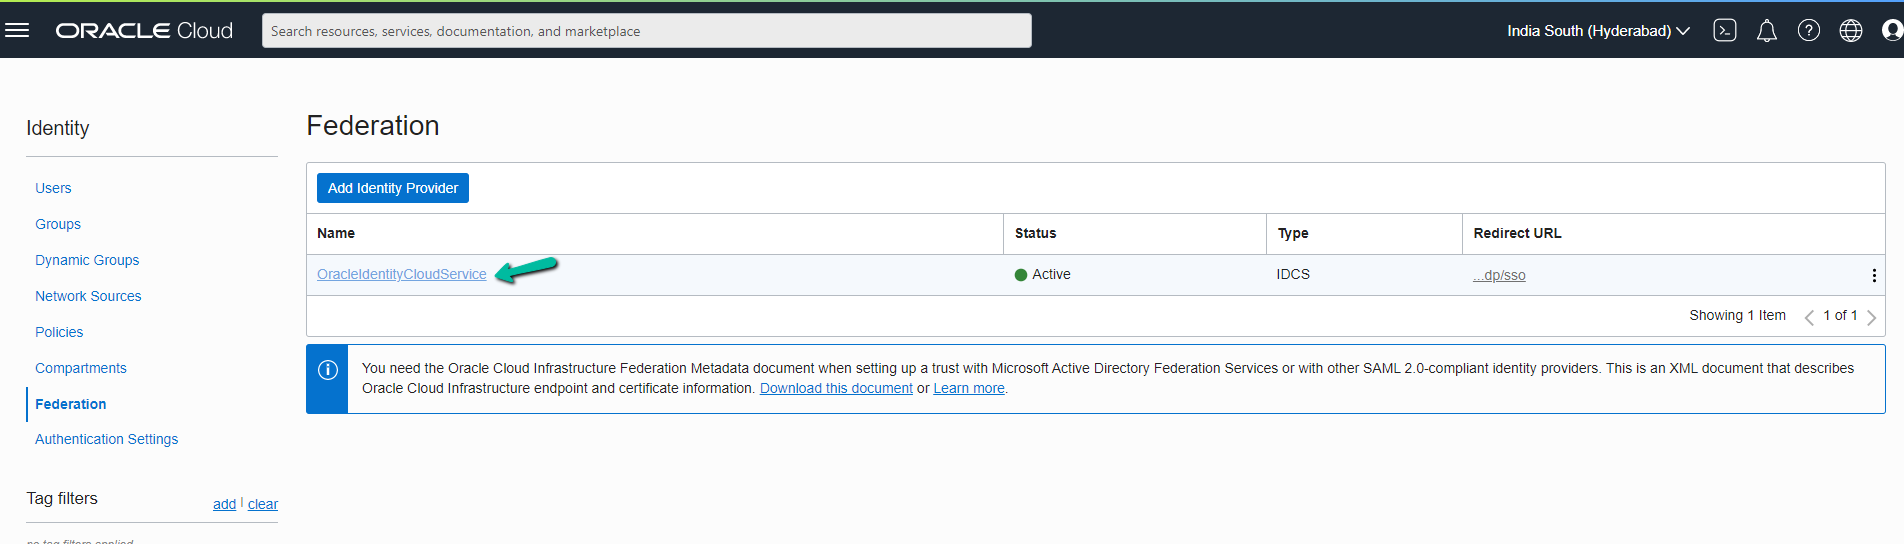
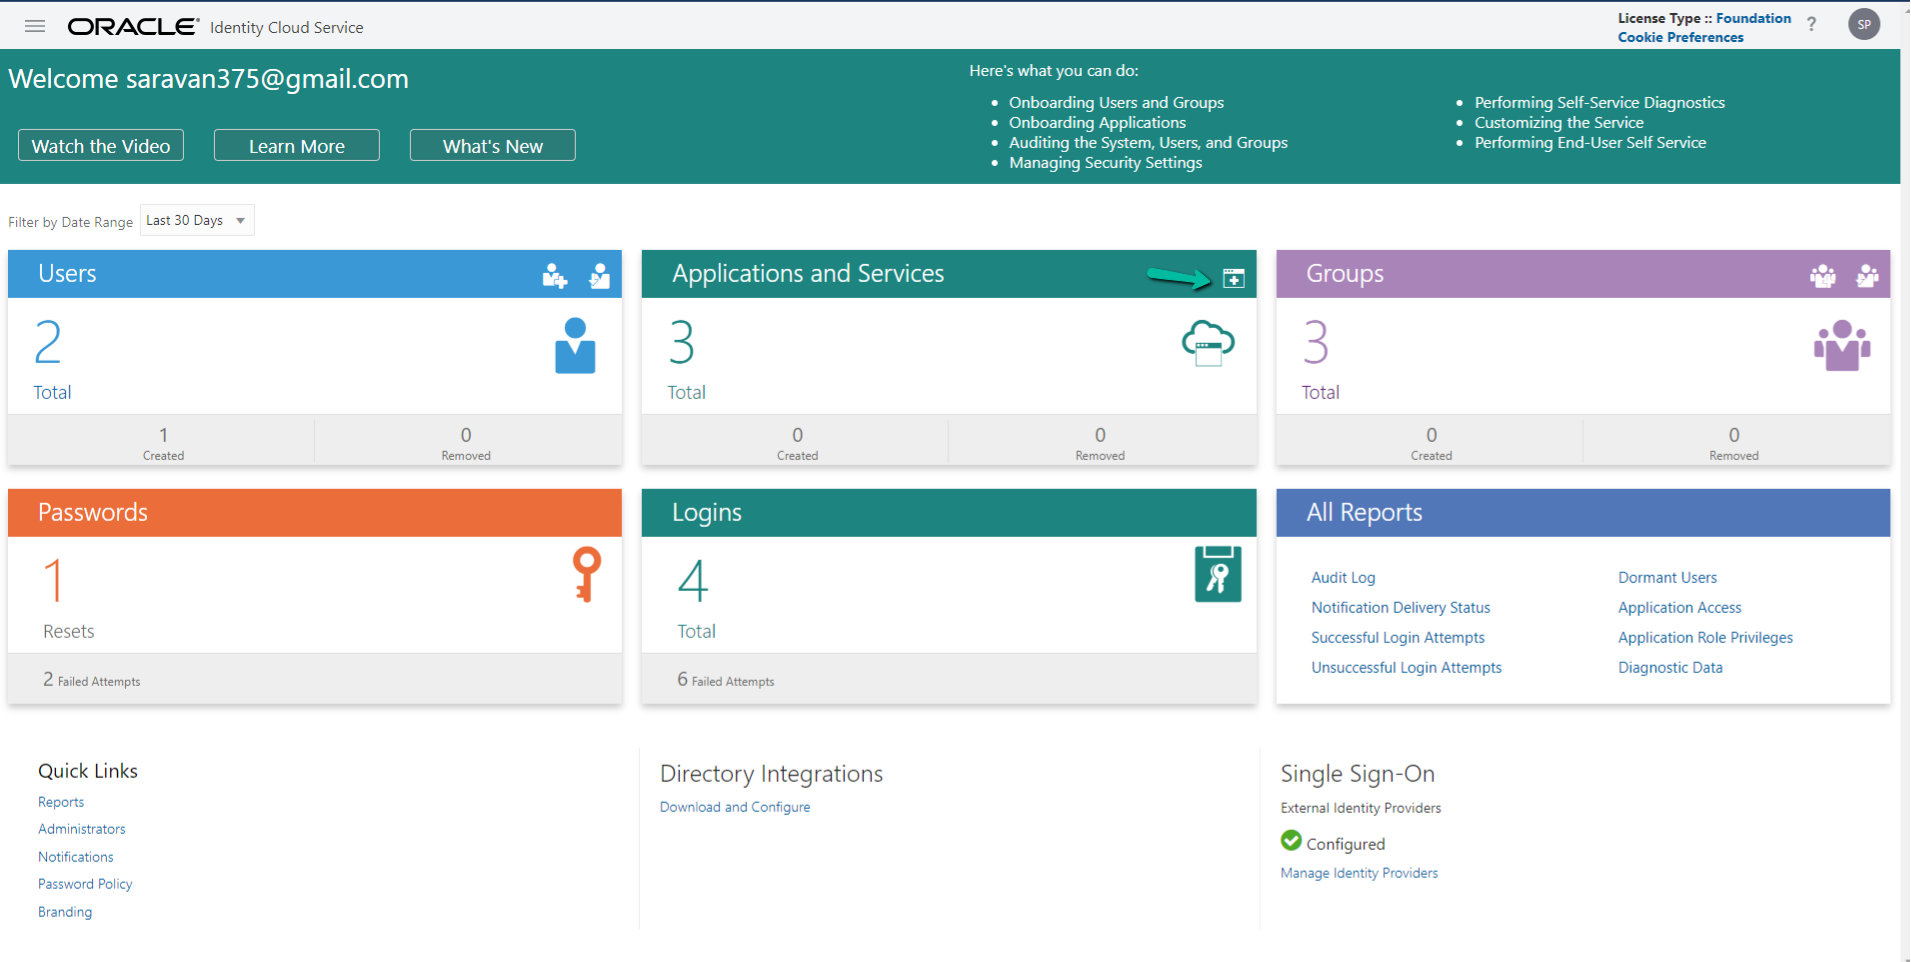
Click Oracle Identity Cloud Service Console URL in the page.

User will be redirected to the Admin console page. Now Click Add icon in the Applications and Services Tab
Click SAML Applications from the Add Applications pop-up
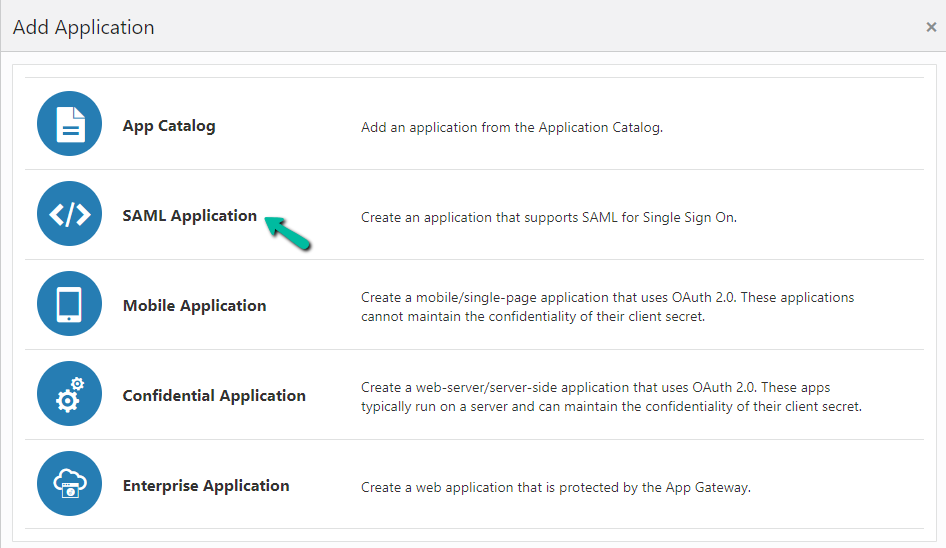
User will be redirected to the Applications details page.

Fill the following details and Add SAMl Applications
| Field | Description |
|---|---|
| Name | Enter your Application Name (for eg. Prolaborate). |
| Description | Enter fewer characters to describe your Prolaborate |
| Icon | Click Upload to add an icon for your Prolaborate application |
| Application URL / Relay State field | (leave this field blank) |
Click Add to add App Links that are associated with the application. The Link window will appear.
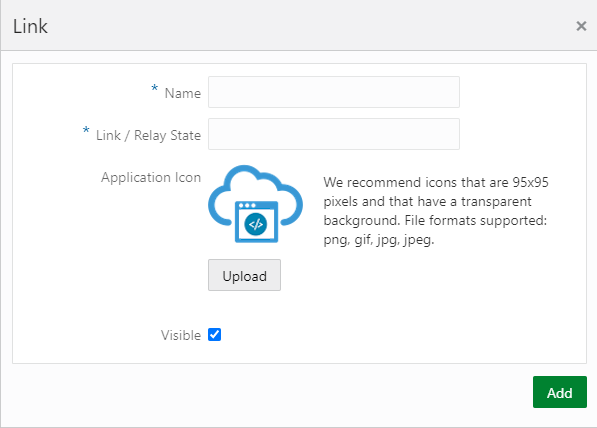
Fill the following details in the given fields.
| Name | Enter the App Link name |
| Link/Relay State | Enter the URL used to access the application. (Copy Assertion Consumer URL (ACU) from Prolaborate Application and paste it into the Link/Relay field) |
| Application Icon | Add an icon for your Prolaborate application. |
Click Add button.
| Custom Login URL | leave this field blank |
| Custom Error URL | leave this field blank |
| Linking callback | leave this field blank |
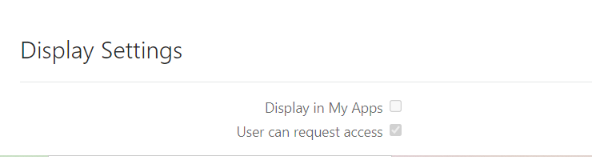
In the Display Settings section, enable User can request access and click Next at the top right side of the page.
SSO Configuration
Click on SSO Configuration Tab to define SSO attributes.
In Step 1, General section of the SSO Configuration

In the General section of the SSO Configuration page, define the following:
| Field | Description |
|---|---|
| Entity ID | Copy Assertion Consumer URL fields from Prolaborate Service Provider and paste it in Entity ID field. |
| NameID Format | Select the type of format to use Email address. The service provider and the identity provider use this format to easily identify a subject during their communication. |
| NameID Value | Select the NameID Value as Primary Email to identify the user that is logged in. |
| Signing Certificate | Upload the .cer certificate file that is used to encrypt the SAML assertion. |
Advanced Settings in SSO Configuration:
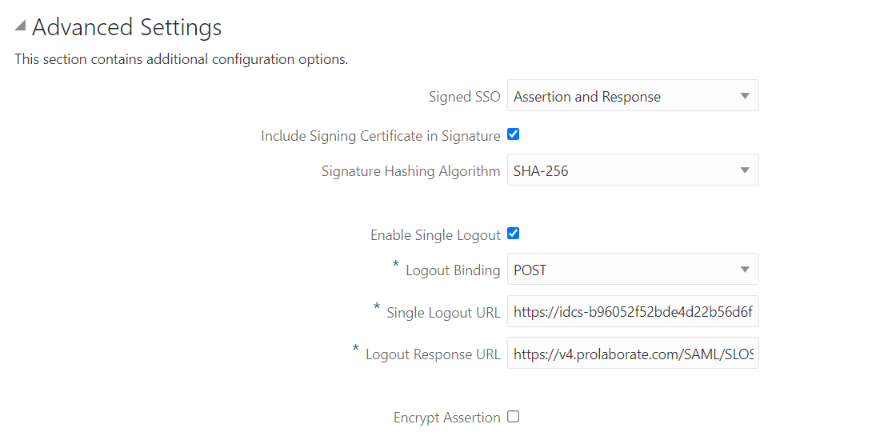
In the Advanced Settings of the SSO Configuration page, define the following:
| Field | Description |
|---|---|
| Signed SSO | Selectem Assertion and Response option from drop down list at Signed SSO field and Enable Include Signing Certificate in Signature. |
| Enable Single Logout | Select to configure SAML single logout. Single logout enables a user to log out of all participating sites in a federated session almost simultaneously. This check box is selected by default. |
| Logout binding | Select log out request is sent as POST (transported in HTML form-control content, which uses a base-64 format). This list box appears only if you select the Enable Single Logout check box. |
| Single Logout URL | Open the Identity Provider Metadata Xml file to copy the Single Logout Service URL with SP configuration like below image. |
| Logout Response URL | Copy Sign Out URL – Log out Prolaborate when you log out of SSO URL from Prolaborate Service Provider and paste it in Logout Response URL |
Attribute Configuration
Expand Attribute Configuration on the SSO Configuration page to add user-specific and group-specific attributes to the SAML assertion. Click on plus(+) symbol to add the attributes.
| Attribute Name | Value |
|---|---|
| firstname | First Name |
| lastname | Last Name |
| username | User Name |
| Primary Email |
To configure SAML user group in the Prolaborate Application, please choose relevant value from the dropdown and copy the claim from the page and then paste it in Prolaborate Attribute mapping field.

Enter the Attribute Configuration details and Click Save.
Download the certificate file.
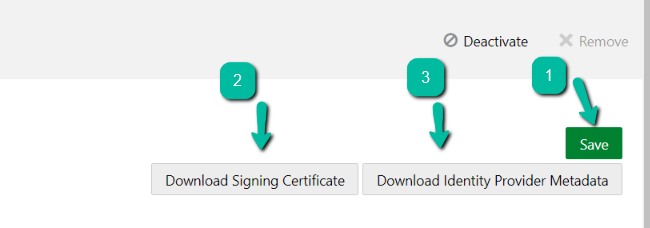
Click Activate to activate the Prolaborate application.
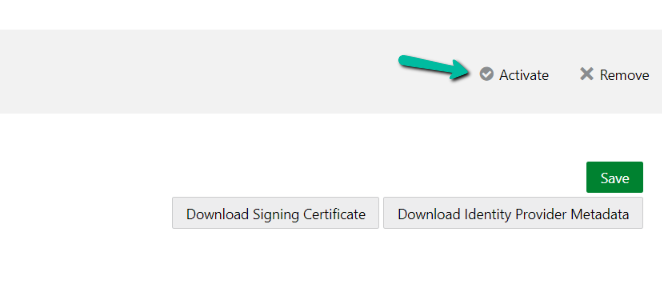
In Activate Application window appear and click Activate Application.
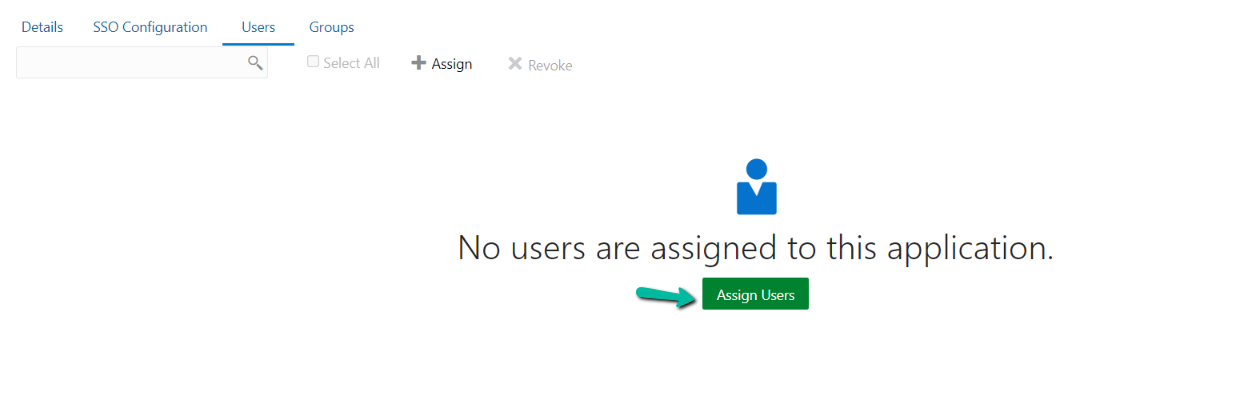
Assign Users to the Application
Click Assign Users button.
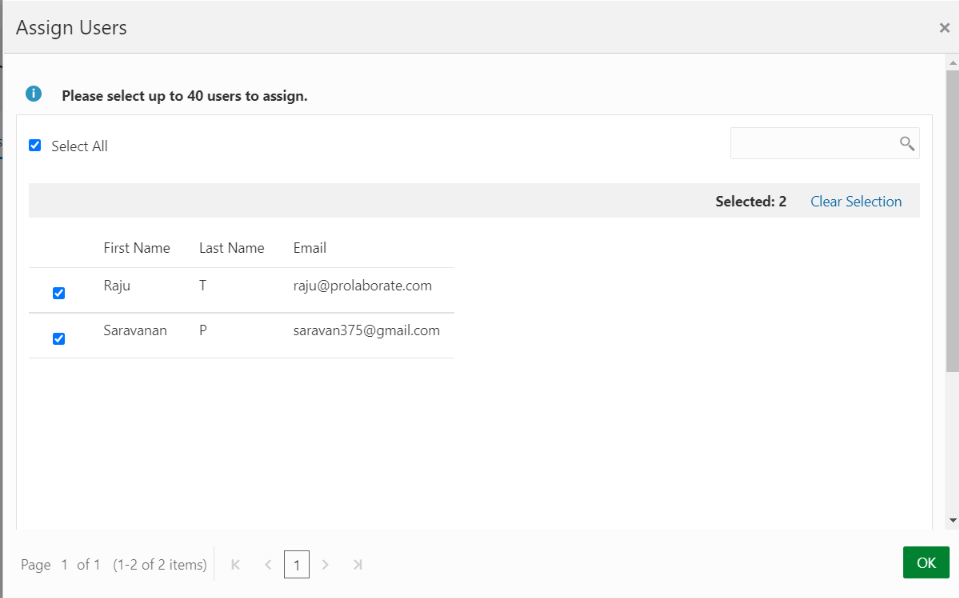
Select the users to whom to give access to Prolaborate and Click Ok.
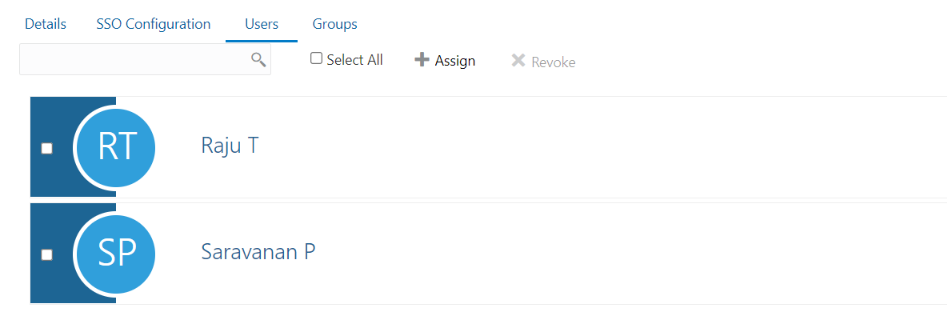
The users whom we have selected will now show up in Users tab.
Identity Provider Configuration in Prolaborate

Fill the Identity Provider Configuration as per the instructions below:
| Field | Details |
|---|---|
| Name | Identity Provider Entity id availed from from Identity Provider Metadata Xml. |
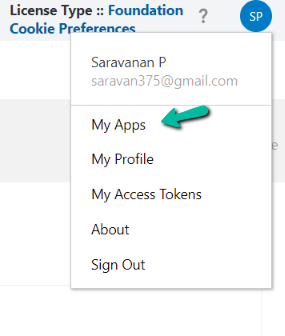
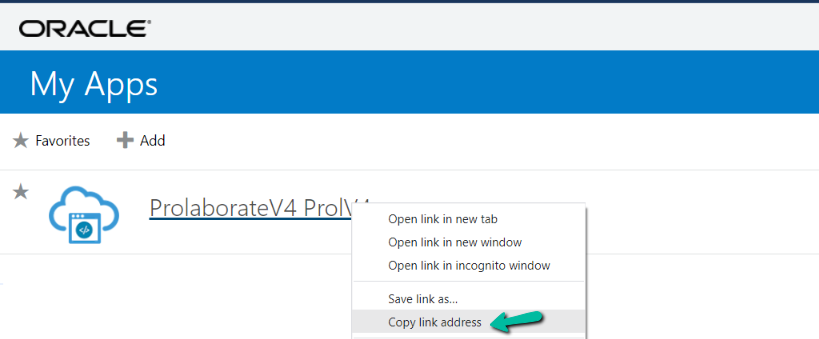
| Sign In URL | Sign in using the SAML application link address at Oracle as per the instructions belowOpen Prolaborate application in an Oracle user account and copy the application link address, then paste to Sign in URL field in your Prolaborate Identity provider configuration.Click on My Apps to log in your Oracle account as a user with User Sign in URL. |

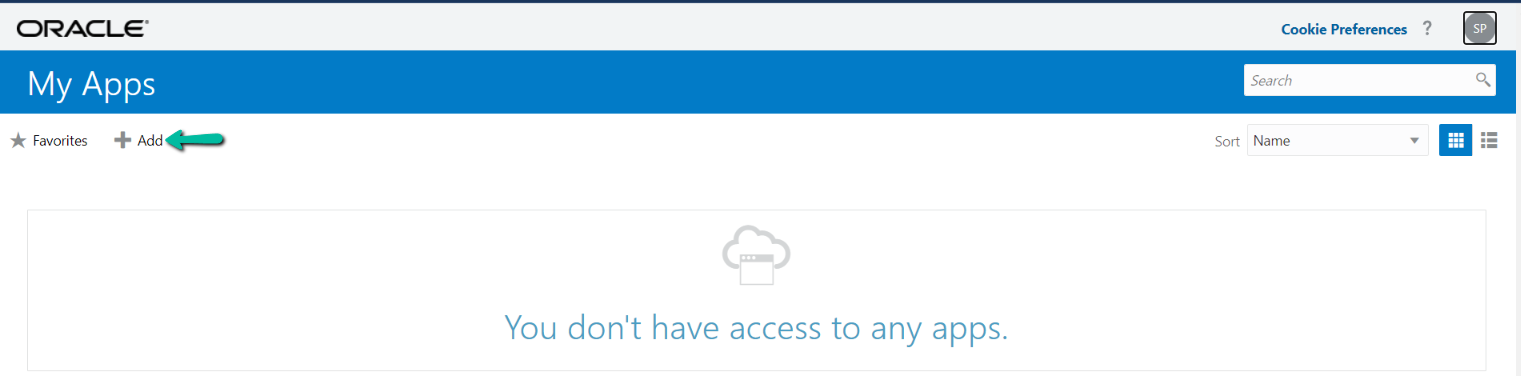
Click on Add
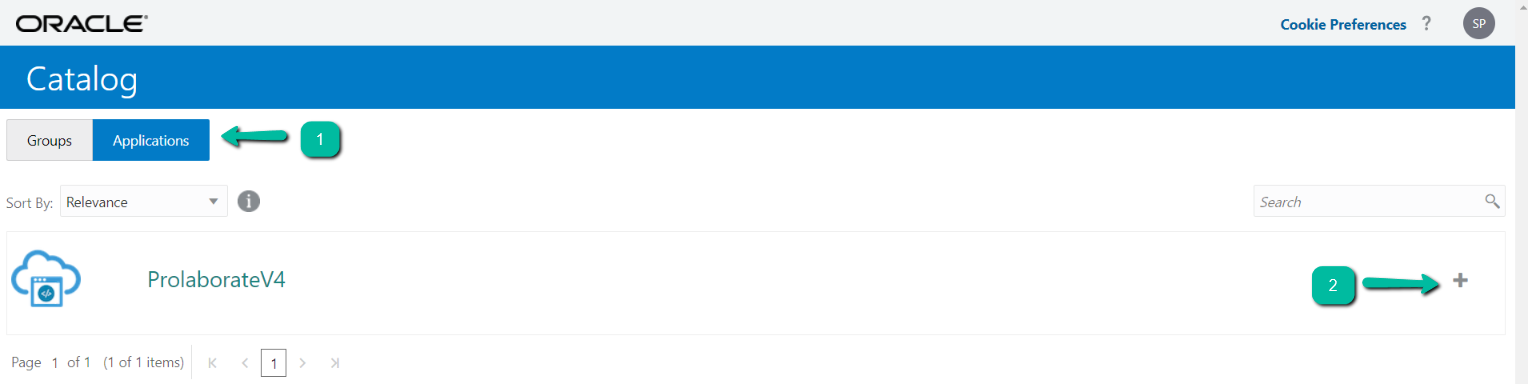
Select Application and Click on Add (+) symbol to your Prolaborate application
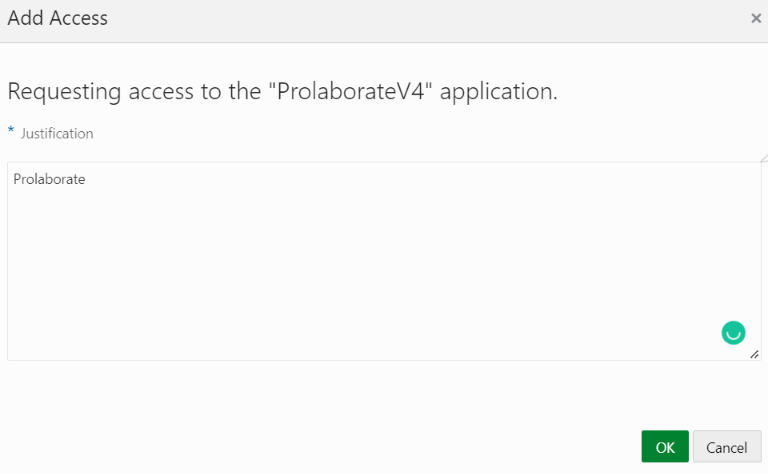
Give justification as Prolaborate and click on OK.
Copy your Prolaborate application link address.
Paste the URL to Identity Provider Configuration Sign in URL field of your Prolaborate Identity Provider configuration.
| Field | Details |
|---|---|
| Sign Out URL – Log out SSO when you log out of Prolaborate (Optional) | Fill Sign Out URL using Identity Provider Single Logout Service availed from from Identity Provider Metadata Xml file (Refer to section SSO Configuration tab). |

| Field | Details |
|---|---|
| Certificate File | Choose the converted .cer Certificate file from Oracle Configuration |
Enter the Identity Configuration fields in your Prolaborate SAML Settings and Click on Save.
Log in with Oracle Credentials
Once the configuration is done, your users will start to see a new button on the login page called Login with SSO
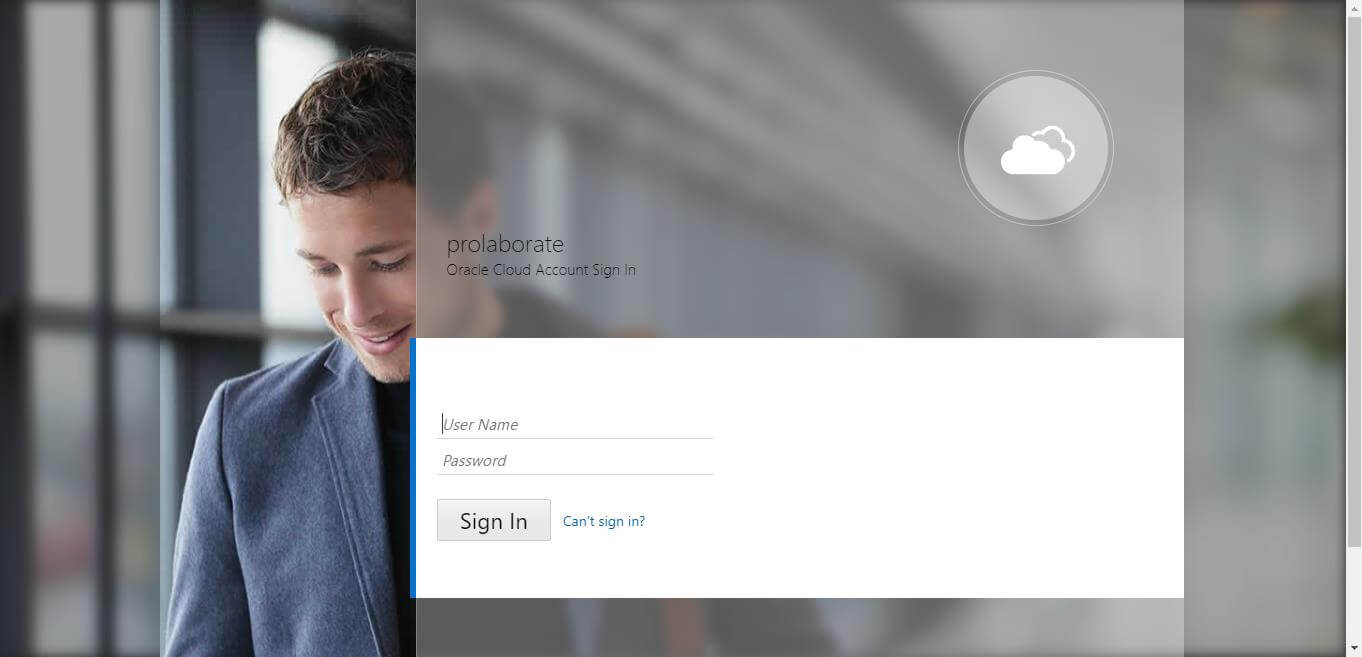
When they click on Login with SSO, they will be redirected to an URL as per configuration. They can then give their Oracle credentials to login to Prolaborate.
You will be redirected to Prolaborate successfully if the configuration is done right as per the instructions in the document.
If you’re experiencing challenges signing in using SSO, go at SAML Assertion Validation to debug the SAML configurations.
Note
The Repositories you see will be based on Default Access Control Profile.

Configure Default Access Control Profile in Prolaborate
Access Control Profiles let you define repository access rules and default user group membership for users added via SSO or Sign up. Click here to know more.
To create an Access Control Profile, click on Menu > Access Control Profiles under portal settings.
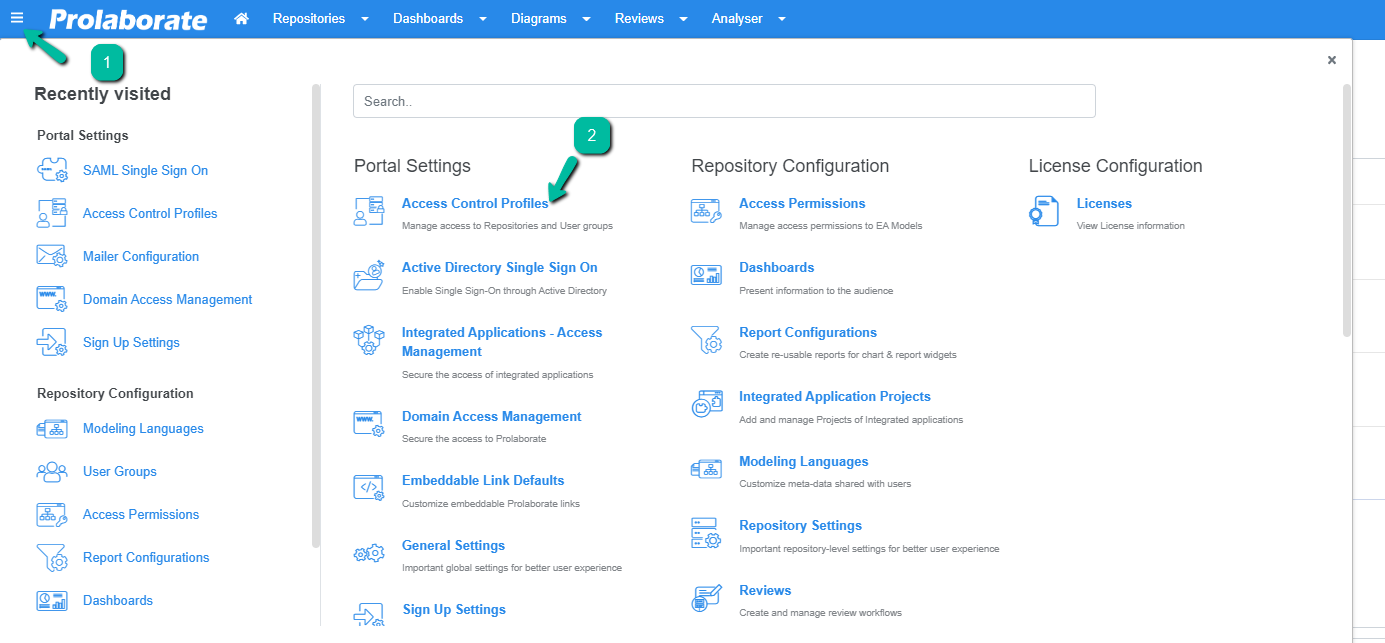
Access Control Profiles lists profiles which are created earlier.
To create a new profile, click on Create Profile to create a profile

When you click on Create Profile you will land on the below page.
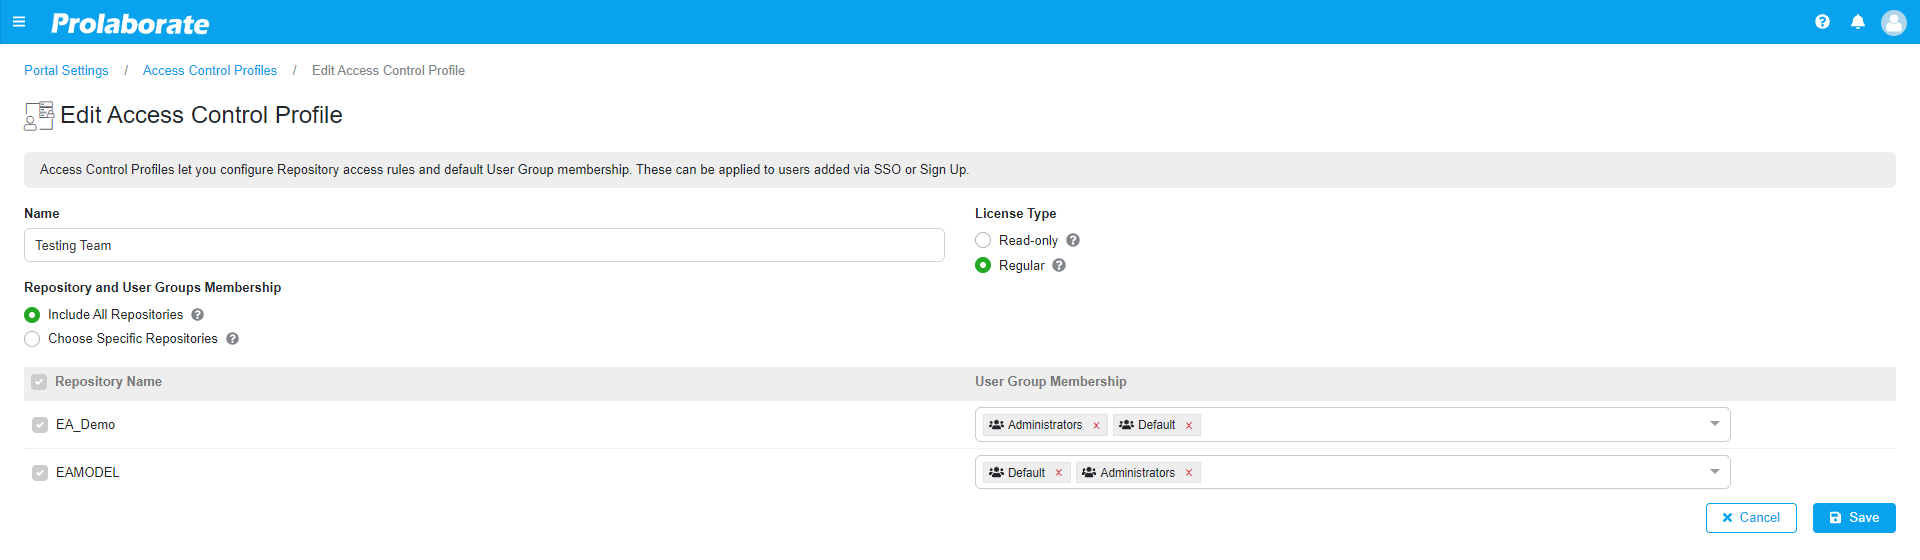
| Name | Give a suitable name for the profile |
| Include All Repositories | Choosing this will allow users who are logging in through SSO or Sign up get access to all the repositories |
| Choose Specific Repositories | This feature lets one the Repository and the corresponding User Group Membership. In addition, the user who is logging in through SSO or Sign will get access based on the user groups they are added to. |
Now click on Save.
Now, go back to the SAML Settings page.
Select the newly created profile and click Save.
Logging out from Prolaborate
When a user initiates a logout, the user will be logged out from all applications in the current Identity provider login session.