
Prolaborate and Jump Cloud SAML Integration
Prerequisites
Your Prolaborate site should have a valid SSL Certificate.
If you don’t have an SSL Certificate, you can create a self-signed certificate yourself. Please get in touch with the Prolaborate team to know more about it.
Service Provider Configuration
To configure the Service Provider, click on Menu → SAML Sign On..
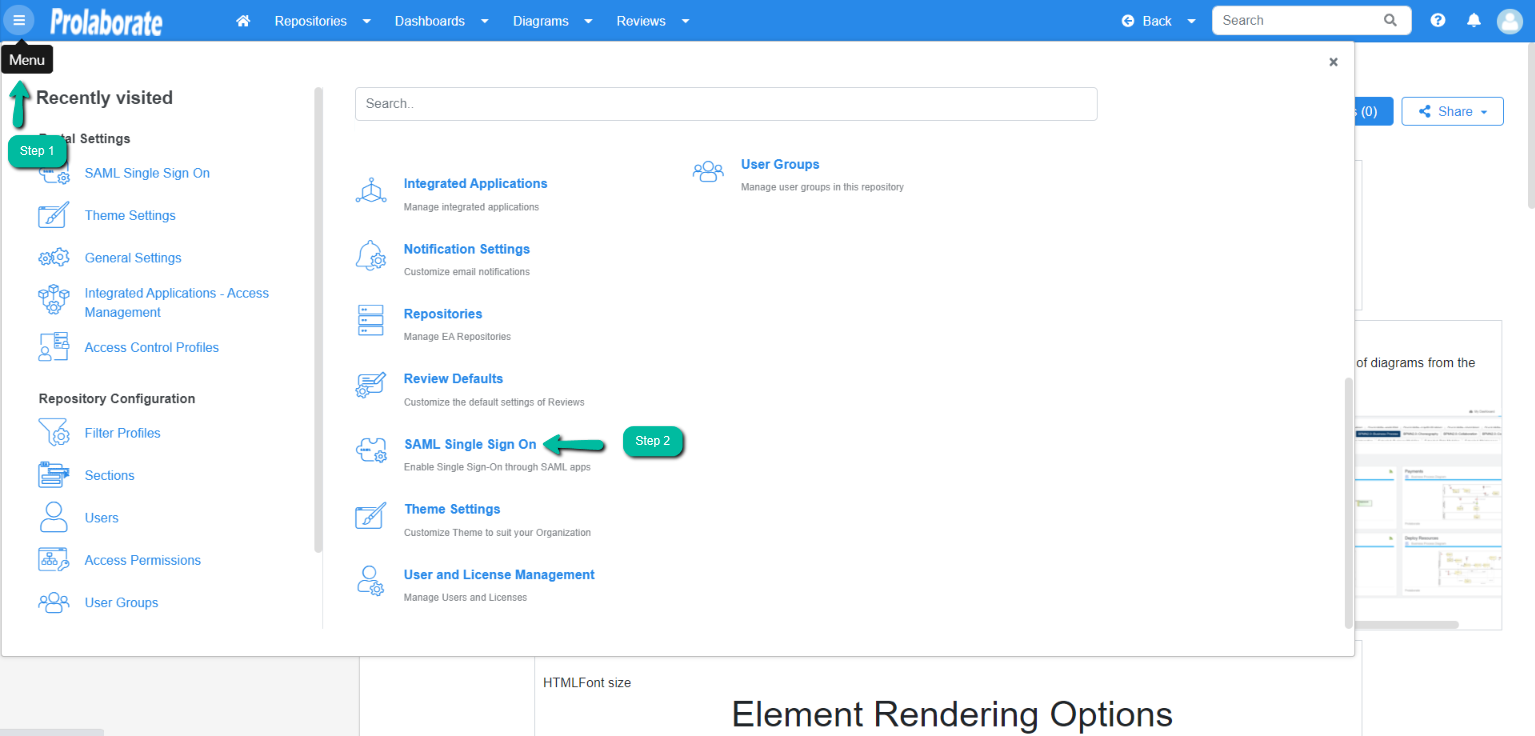


From the top of the page that opens, click on Enable
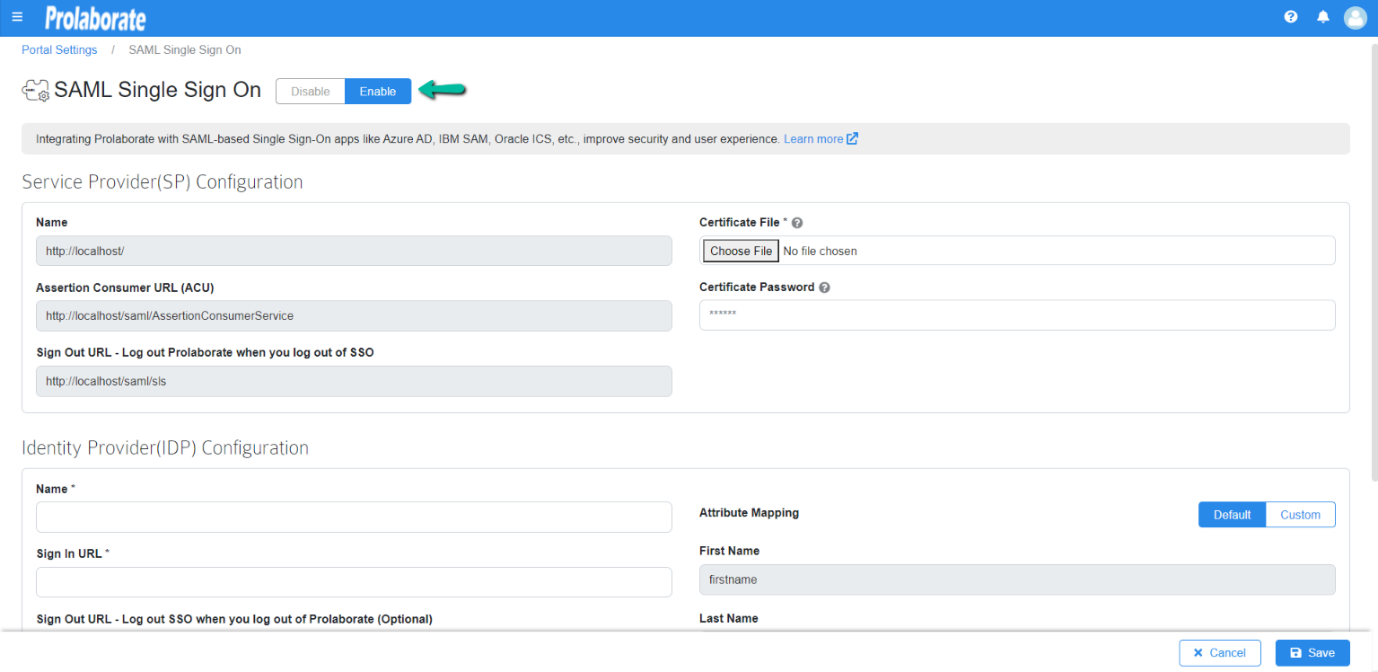
Under Service Provider Configuration
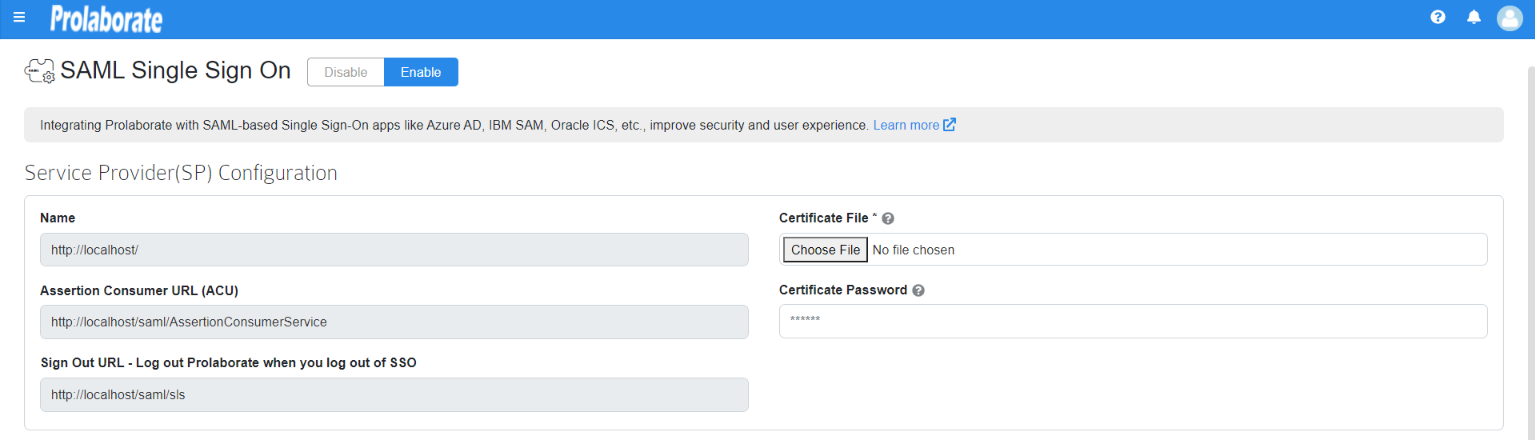
| Name | Name will be prefilled |
| Assertion Consumer URL | Assertion Consumer URL will be Prefilled |
| Certificate File | Choose the .pfx file of your SSL certificate |
| Certificate Password | Enter the Password of the .pfx file |
Configuring Prolaborate in JumpCloud
The following sections will elaborate on the steps involved in setting up Prolaborate in JumpCloud.
Create a new SAML Application
To create a new SAML application, follow the below steps:
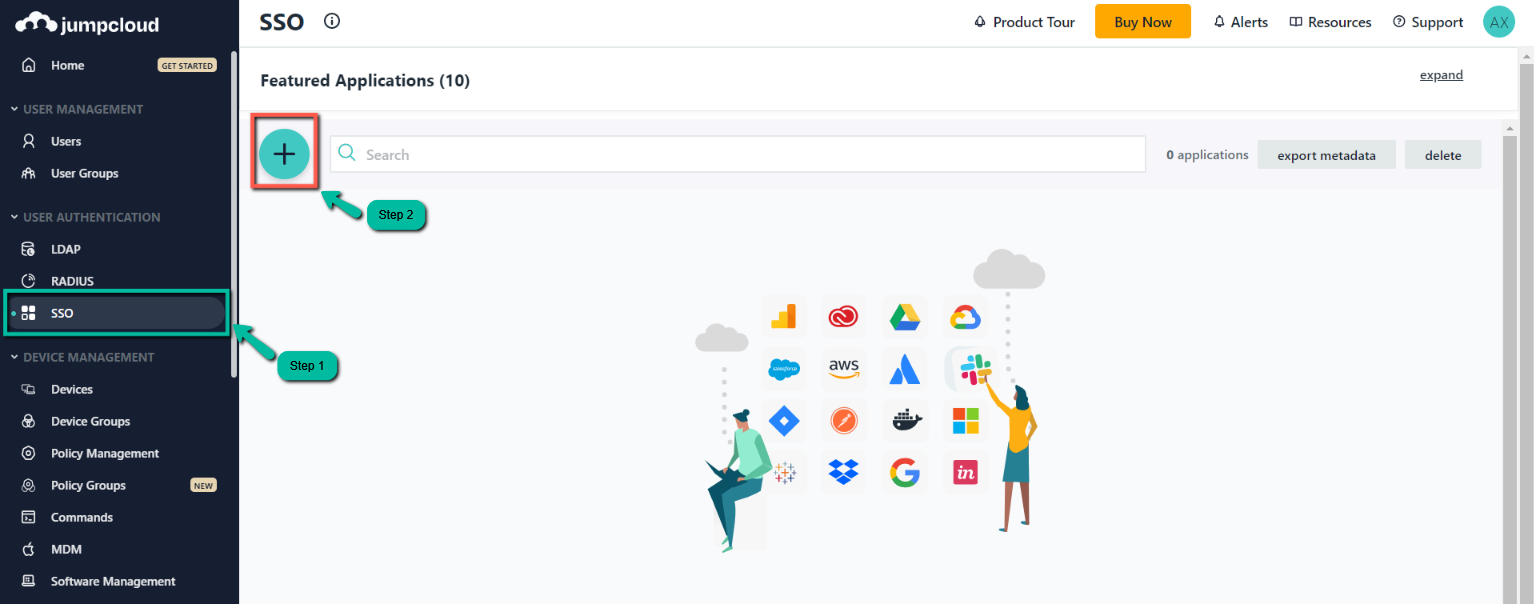
1. Log in to your JumpCloud account
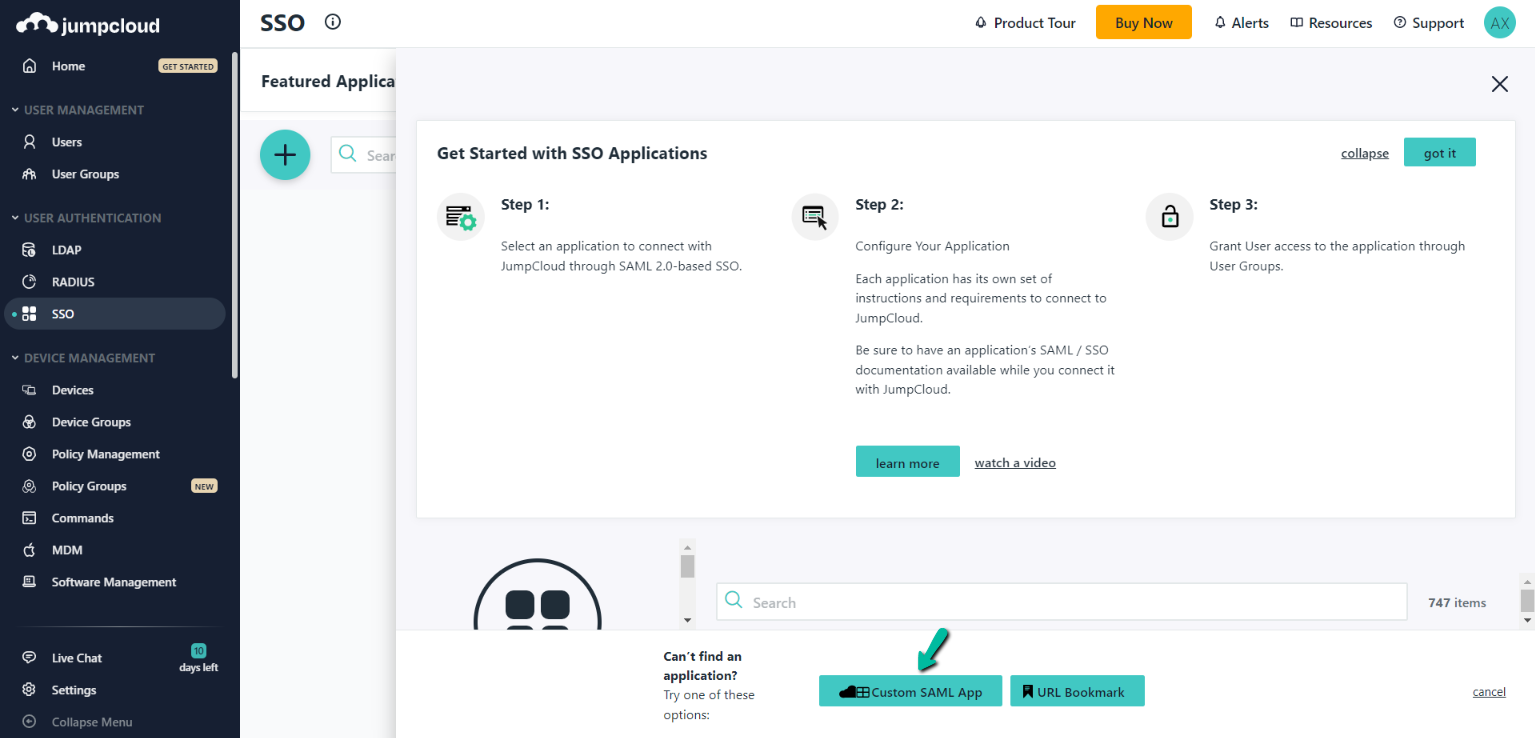
2. Select SSO and Click on Add Applications button
1. In the Configure New SSO Application window click on Custom SAML App to create a new application
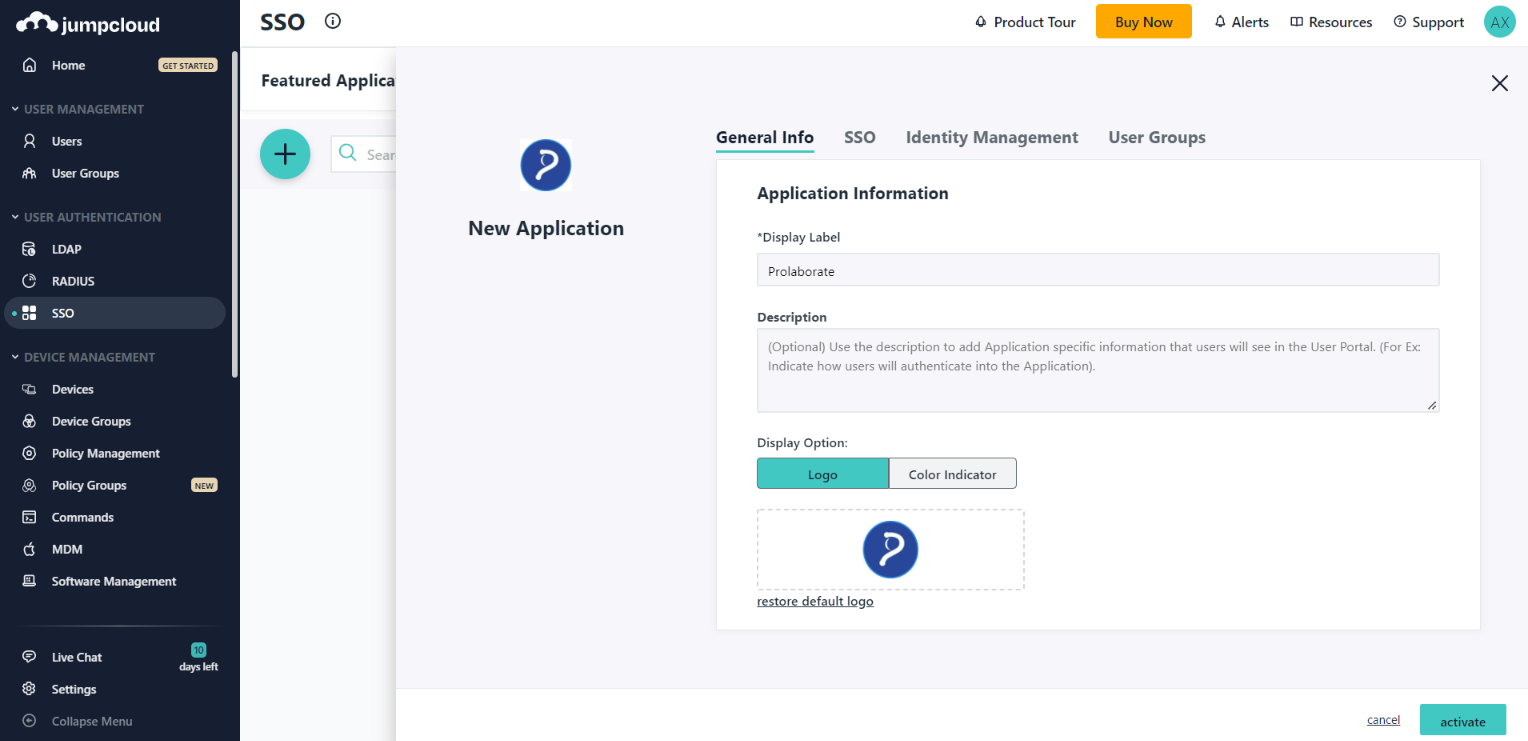
General Info
| Field | Description |
|---|---|
| Display name | Enter your Application Name (say Prolaborate). |
| Description (Optional) | Enter the application Description |
| App logo (Optional) | Review the tooltips for details about the type of image you can use for your logo |
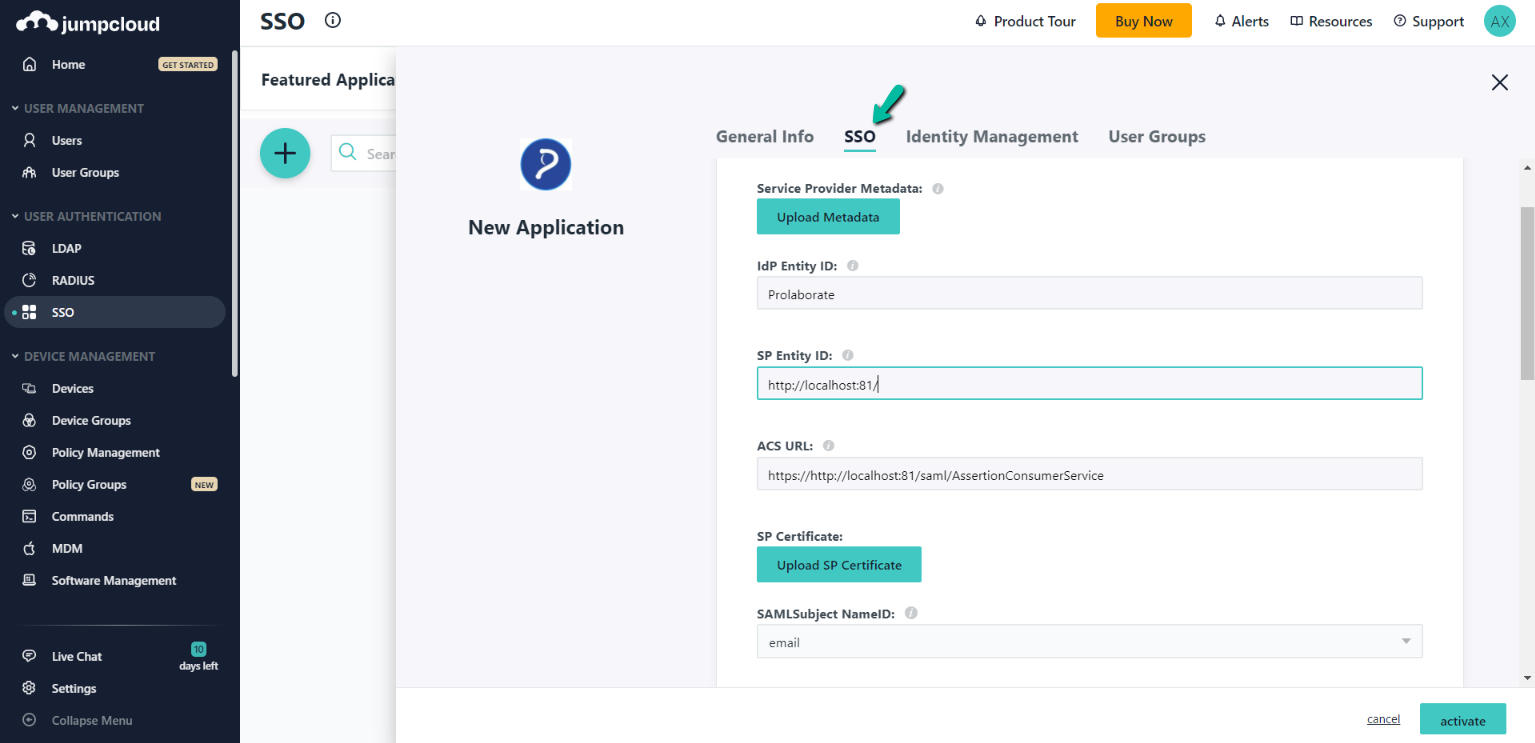
Single Sign-On Configuration
| Field | Description |
|---|---|
| IDP Entity | Enter your Application Name (say Prolaborate). |
| SP Entity ID | Fill ‘SP Entity ID’ and ‘ACS URL’ fields from Prolaborate Service Provider configuration as stated above (In section SSO). SP Entity ID – Enter the URL from the Service Provider Name/Entity ID field from Prolaborate |
| ACS URL | ACS URL – Enter the URL from Service Provider Assertion Consumer URL (ACU) field from Prolaborate. |
| SP Certificate | Upload SP certificate – Browse SSL certificate (.cer file) of Prolaborate instance and click on Upload Certificate |
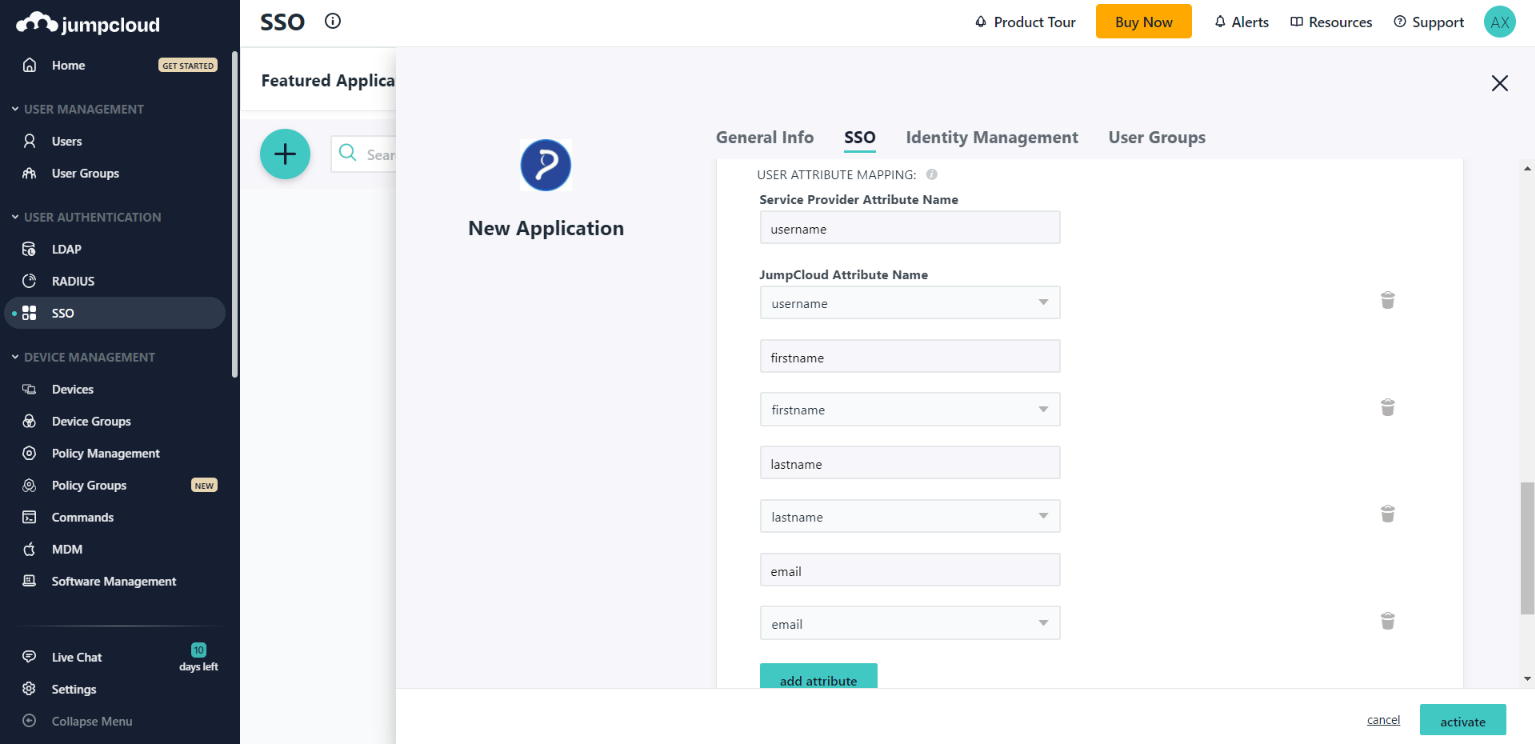
User Attributes mapping
Attribute Statements should be configured as below:
| Attribute Name | Value |
|---|---|
| username | username |
| firstname | firstname |
| lastname | lastname |
| UserGroup | UserGroup |
Click on Activate
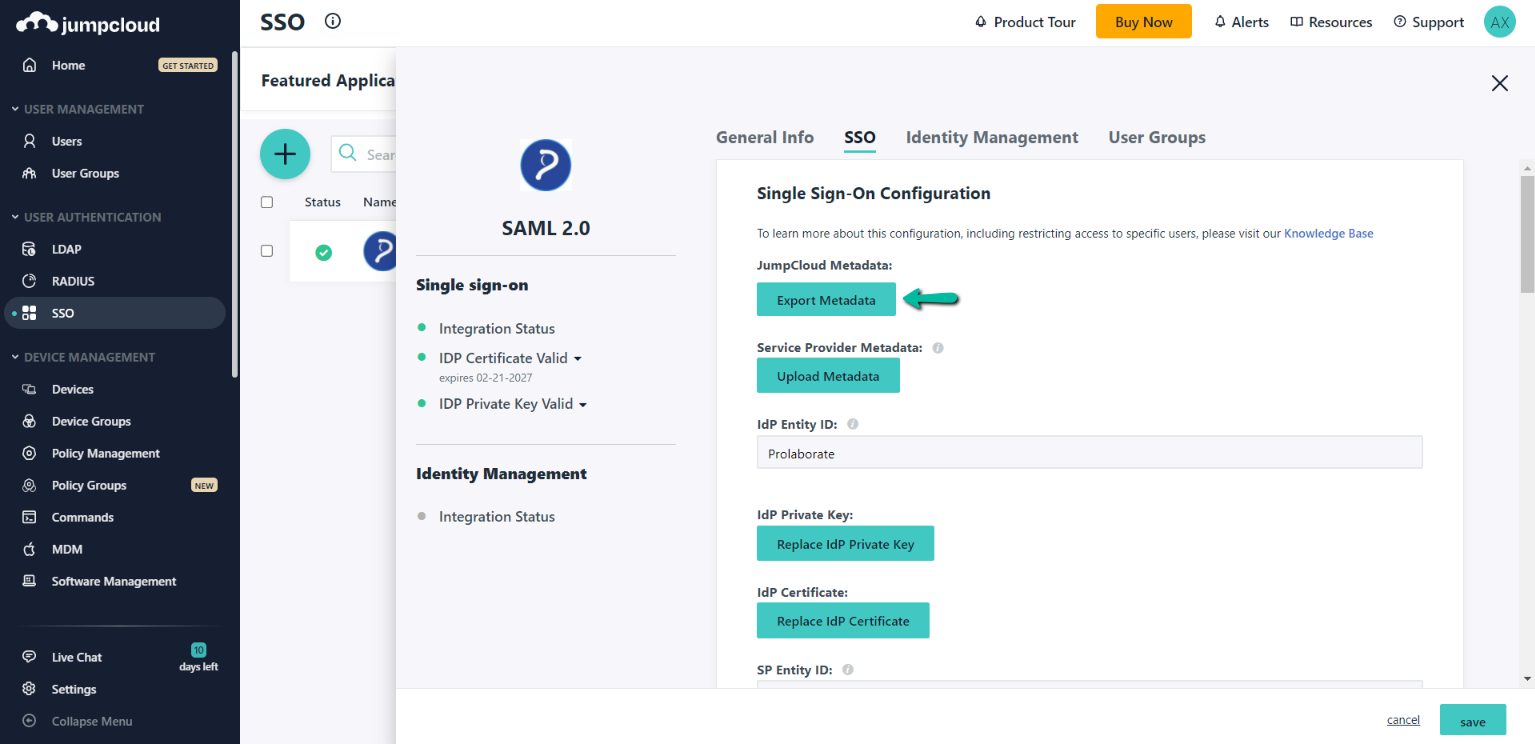
Click on Export Metadata to download.
Open the Prolaborate application again and expand Single Sign-On Configuration, click on Export Metadataunder JumpCloud Metadata to download the file.
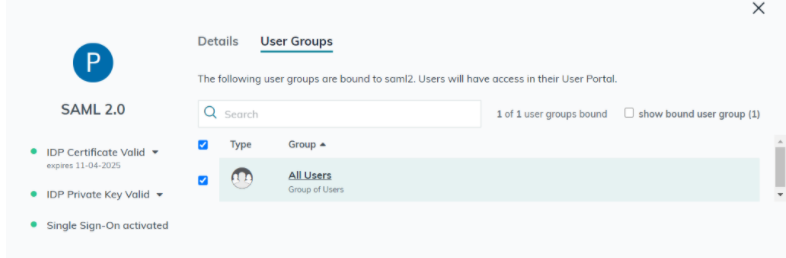
Usergroup Configuration
Click on User Groups to configure User/ User groups to the Prolaborate application
Identity Provider Configuration
Go back to Prolaborate, click on Menu → SAML Sign On.
Fill the Identity Provider Configuration as per the instructions below:
1. Fill Name/Entity ID using Entity id availed from JumpCloud Metadata Xml file (Refer to section Download JumpCloud Metedata ).

2. Fill Sign In URL field using Location URL from the JumpCloud Metadata Xml file (Refer to section Download JumpCloud Metedata )

3. Certificate File: Follow the steps to upload JumpCloud Certificate file
Copy the Certificate URL from the JumpCloud Metadata Xml file (Refer to section Download JumpCloud Metedata).

Open the Notepad application, and paste the certificate URL
Save the Certificate as JumpCloud.cer file
Choose the JumpCloud.cer file In the Certificate File field
Log in with JumpCloud Credentials
Once the configuration is done, your users will start to see a new button on the login page called Login with SSO.
When they click on Login with SSO,
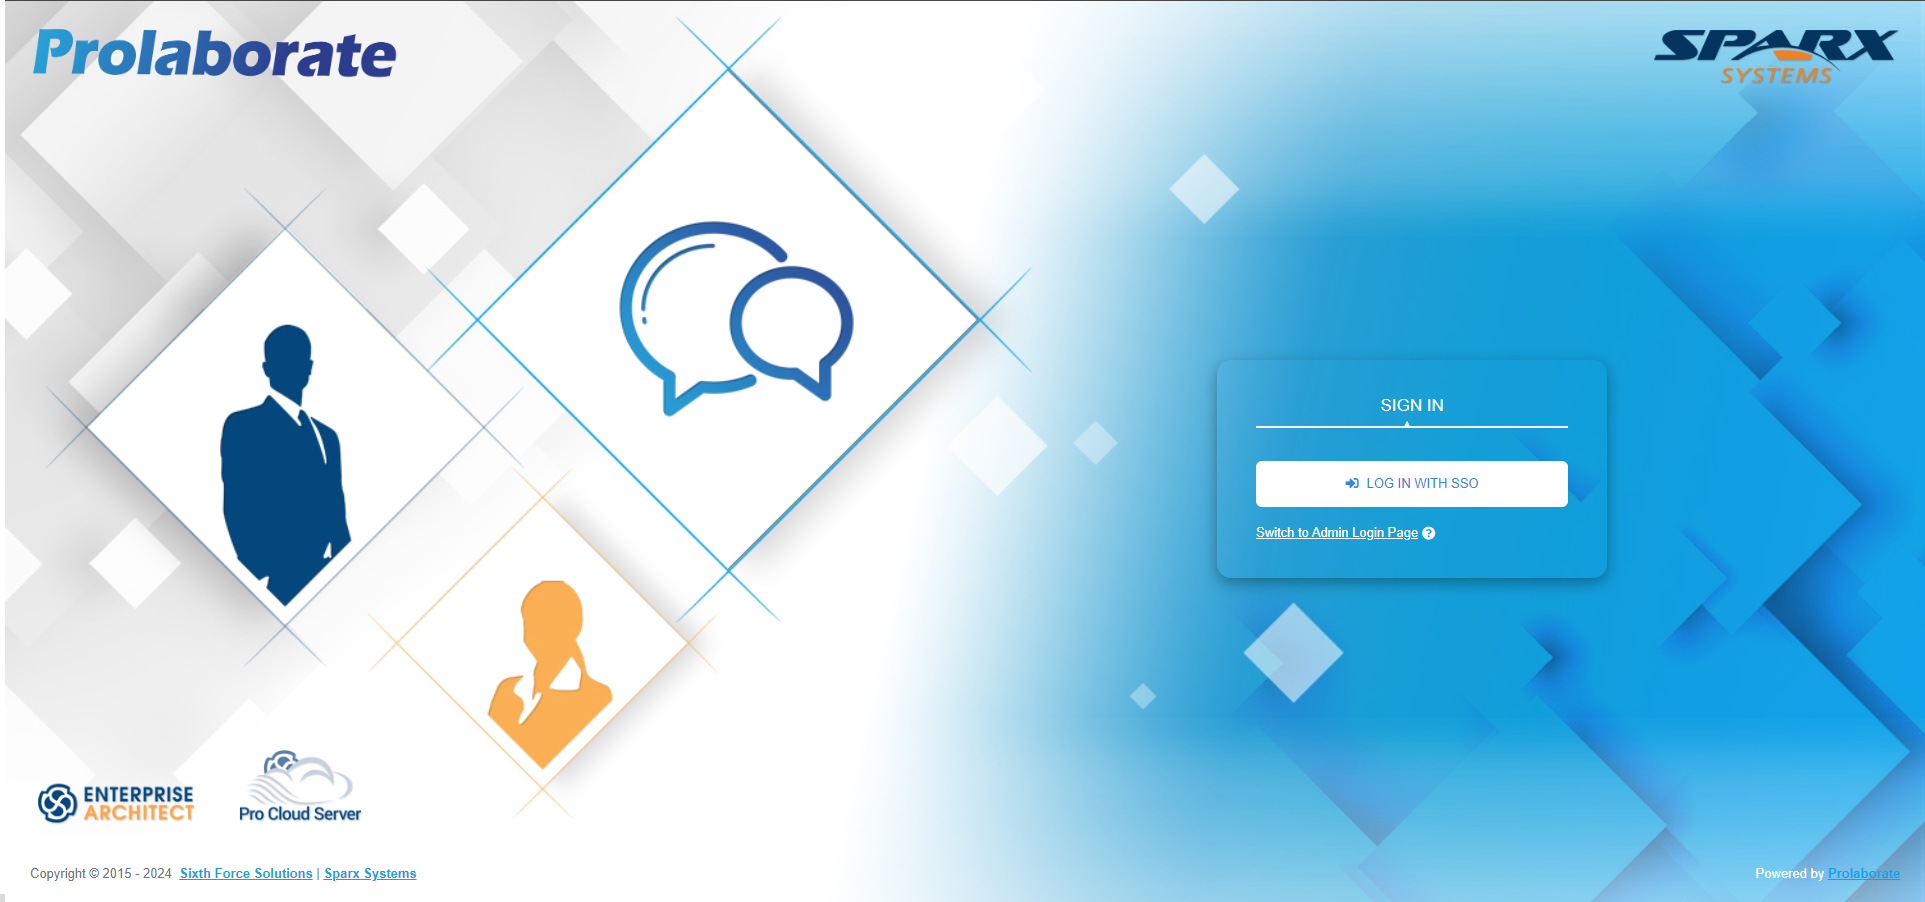
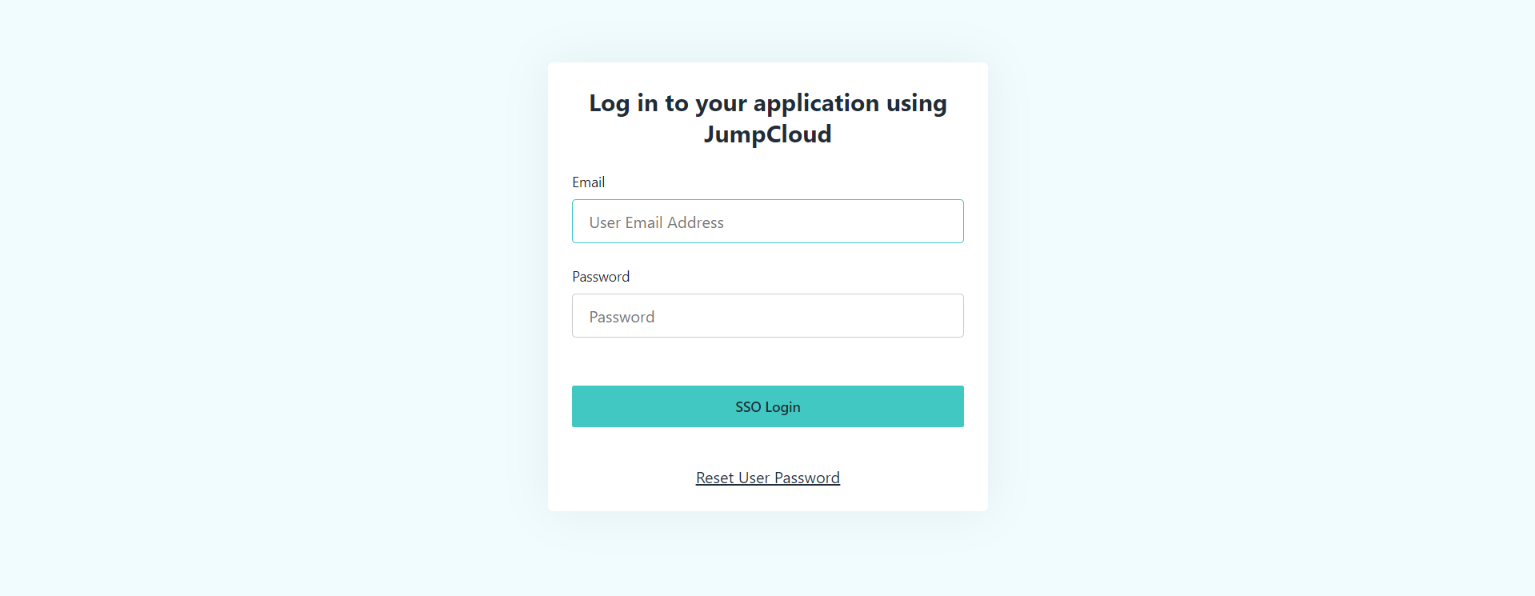
They will be redirected to the corresponding URL. They can then give their JumpCloud credentials to login to Prolaborate.
If you’re experiencing challenges signing in using SSO, go at SAML Assertion Validation to debug the SAML configurations.