
Enterprise Architect Model and Confluence Page Integration
Prolaborate makes it easier to share live architecture and modeling information from your Sparx Systems Enterprise Architect (EA) models to your Confluence pages.
There is no export/import or copy/paste needed and everyone will always see the latest/updated information from your EA models.


It is even possible to publish an interactive view that lets your users click and view more information like notes, properties, tagged values, Jira links, traceability, linked document, etc.

Most importantly, once configured and published, there is nothing expected to be done in the Confluence page. Even a small modification to a diagram in your EA model will reflect in Confluence page automatically.
To know Confluence integration better, check out the Frequently Asked Questions here. In this user guide, we have covered two approaches for sharing EA models in Confluence using Prolaborate:
- Share with Prolaborate Macro
- Share without Prolaborate Macro
Note:
- Enable the Embedded Share option in the Repository setting.
Share with Prolaborate macro
Setup Macro
Prerequisites to add Prolaborate Macro in Confluence
- For Confluence Cloud, the Prolaborate macro is designed to support seamlessly with Prolaborate version 3.x and Confluence.
- For publishing data from the latest version of Prolaborate (V5) to Confluence Cloud, we recommend using Prolaborate 4 macro.
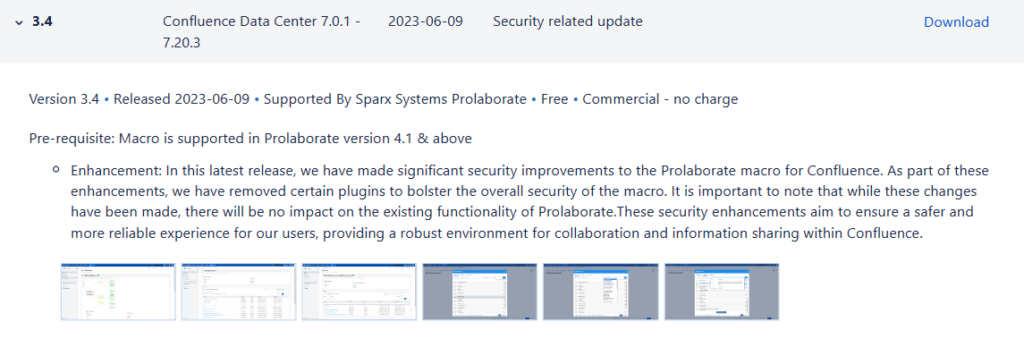
- For Confluence Server, the Macro version should be 3.4 and the Macro supports latest version of Prolaborate.
4. If you are upgraded from Prolaborate V3 to latest version (V5), users must upgrade the Prolaborate Macro on the Marketplace to establish support with Prolaborate.
5. Confluence server version should be between 7.0.1 – 7.20.3
6. Confluence server should be able to access Prolaborate server i.e., the port of Prolaborate server should be open to Confluence server.
7. To know more about the version history of Prolaborate macro in Confluence, please click here.
Note:
For users currently relying on Macro 8, please be advised that it is currently under active development.
Integration Confluence in Prolaborate
Click on Menu > Integrated Applications – Access Management > Click Add Application

In Add Application page user must enter details such as Name, Application ID to add Confluence application. Click on Save to Add Application. An entry would be added
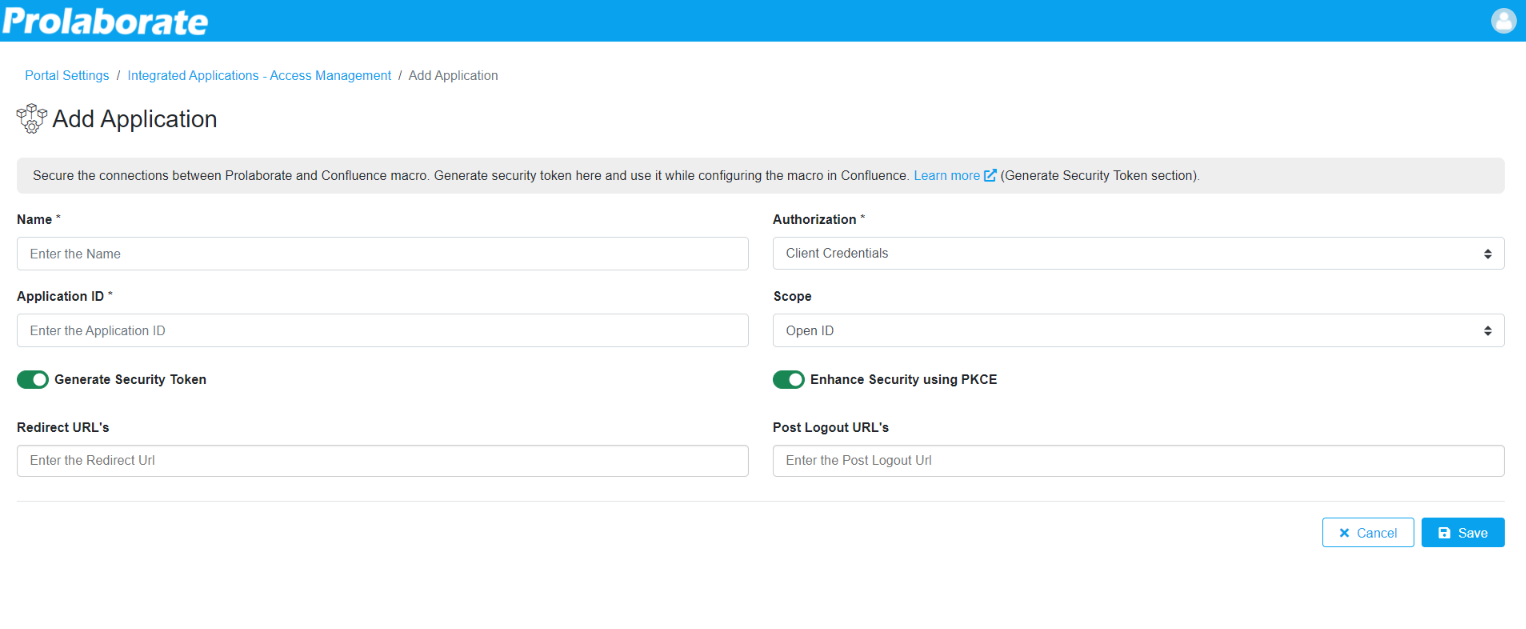
Please enter the below details in the respective fields.
| Field | Description |
|---|---|
| Name | Application Name (Ex. Confluence) |
| Application ID | Application Name as ID |
| Authorization (Please Choose Client Credentials if you have limited knowledge on the options) | Authorization Code, Refresh Token, Implicit, Client credentials |
| Scope (Please Choose Open ID if you have limited knowledge on the options) | Address, Email, Phone, Profile, Roles, Groups, Offline Access, Demo API, Open ID |
| Generate Security Token | If it is enabled in Prolaborate, A Security Token is generated automatically. |
| Enhance Security using PKCE | If it is Enabled in Prolaborate, the option prevents malicious attacks. It adds one more security layer to the authorization code flow in OAuth and OpenID Connect. |
| Redirect URL’s | Enter the Redirect URL |
| Post Logout URL’s | Post Logout URL’s |
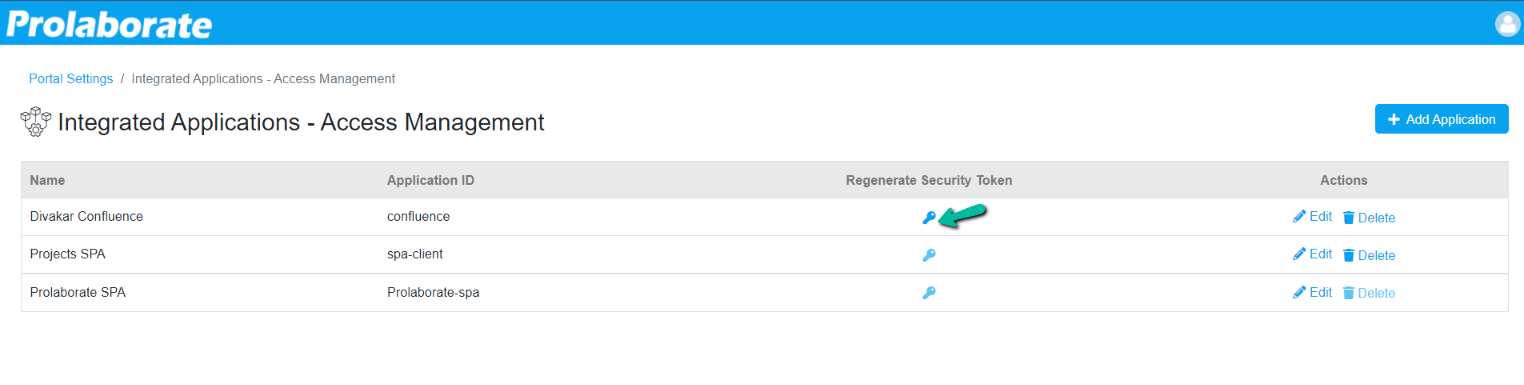
You can click on the key icon to view and copy the security token.
Configure Prolaborate Macro in Confluence
Please follow the below steps:
- Open Atlassian Confluence at web browser.
- Login by using valid login credentials.
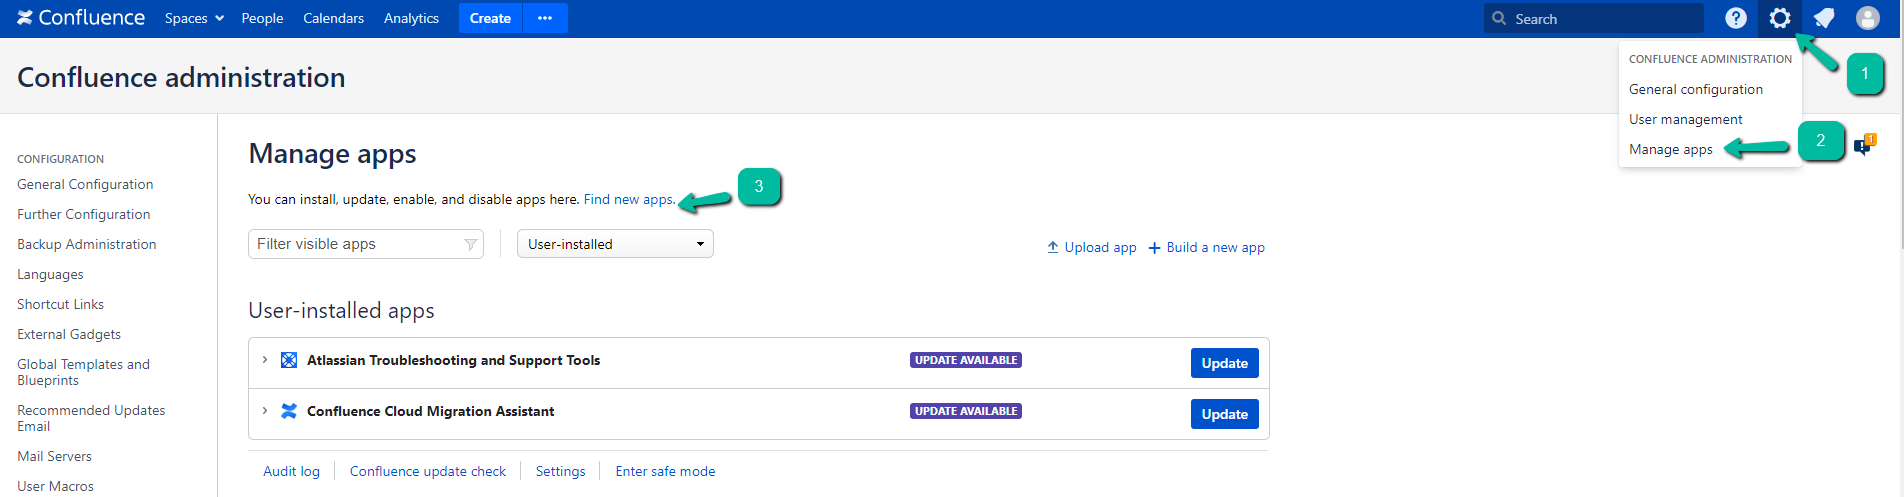
- Once landed on the home page. Please Click Settings Icon from the Ribbon.
- Click Manage apps from the list then please click the Find new apps.
5. Search Prolaborate 4 macro by using search bar.

6. If the Prolaborate macro is downloaded already from the Market Place, use Upload Apps option to upload the macro .
7. Click Install Button.
8. Please Confirm app Installation by Clicking Accept & Install Button.
9. After Installation, users get the App installation status message. User then clicks Get Started Button.
10. As a result, User gets redirected to the configuration page.
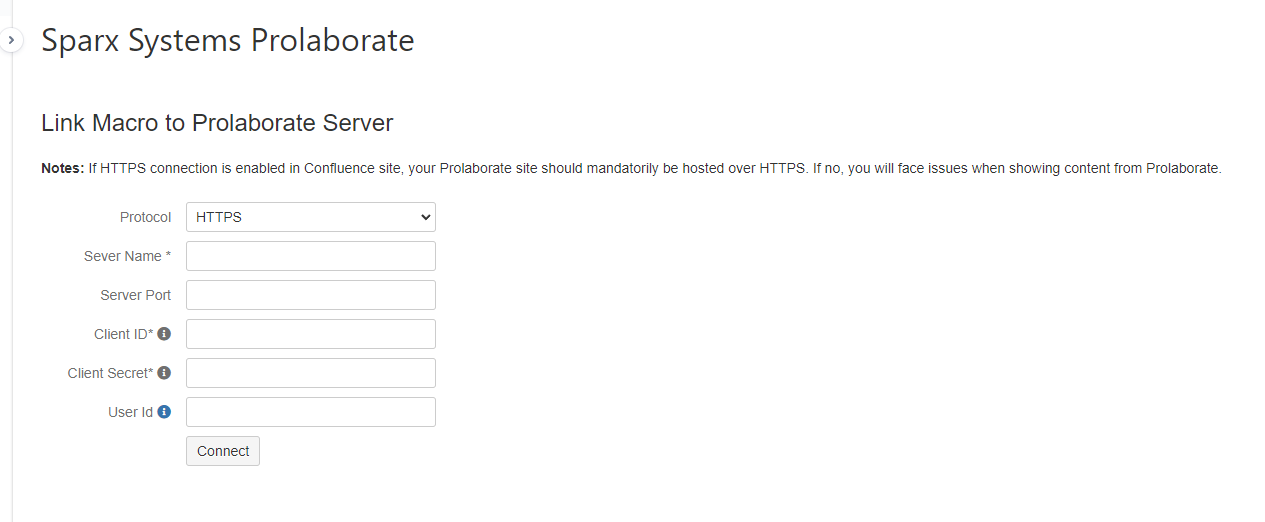
Enter the details as per instructions below and click on Connect.
| Field | Description |
|---|---|
| Protocol | Protocol of Prolaborate website. Refer the Note mentioned above the field. |
| Server Name | IP of Prolaborate application server or its URL |
| Server Port | (Optional) Port of Prolaborate site |
| Client ID | Enter the Application ID which is added in confluence application at Prolaborate under Integrated Application Access Management.(Application ID which is generated in the previous section) |
| Client Secret | Security token which is generated for confluence application at Prolaborate under Integrated Application Access Management. |
| User Id | Enter e-mail address of Prolaborate User (Admin Account is preferred) |
If the connection is successful, user will get the list of repositories you have created in Prolaborate.
Below is the screenshot for the reference.
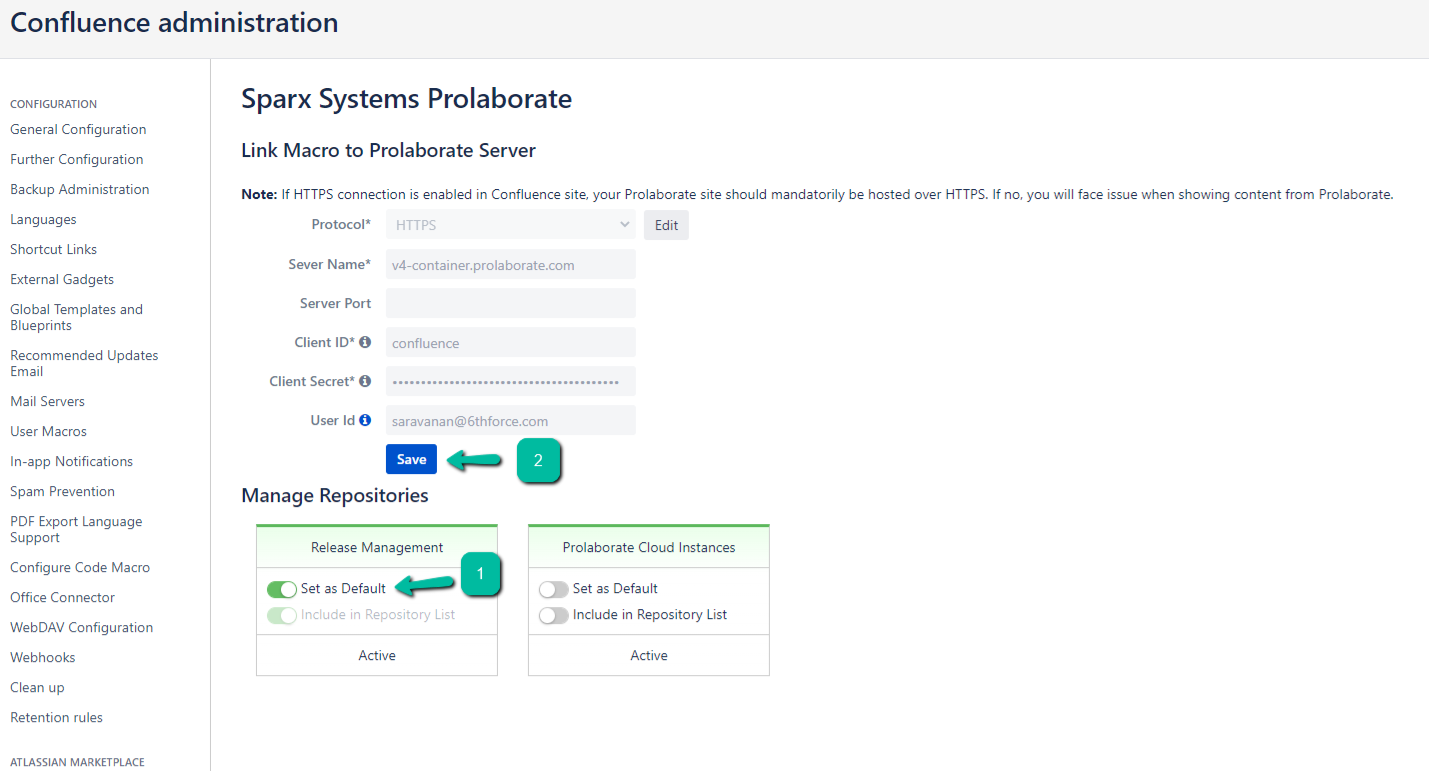
User can choose to set a repository as the default selection while publishing model content using ‘Set as Default’.
Select the Repositories you want to access in Confluence by selecting ‘Include in Repository List’ and click on Save.
Sharing Diagrams at Confluence
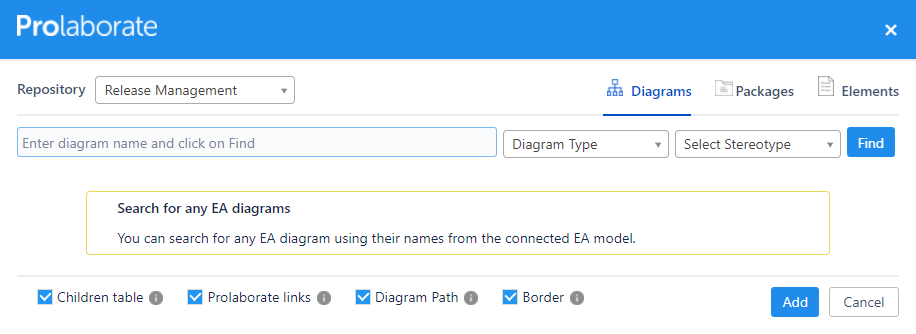
Select the Enterprise Architect Repository which has the diagram that user wants to add to Confluence. Enter a search text or select Stereotype or Type and click on Find.
Based on the filter selection, A list of diagrams will get populated.

Important Note: Before clicking on Add, please note the options at the bottom of the window.
- Children table – If you enable this option, details of objects on the selected diagram will be shown in a table in the page.
- Prolaborate Links – If you enable this option, links will be enabled on Objects. You can click on them to see their overview in Prolaborate
- Diagram Path – Uncheck to hide the path of the Diagram.
- After adding the diagram, Please Click Save Button to save the details.
After adding the diagram, Please Click Save Button to save the details.
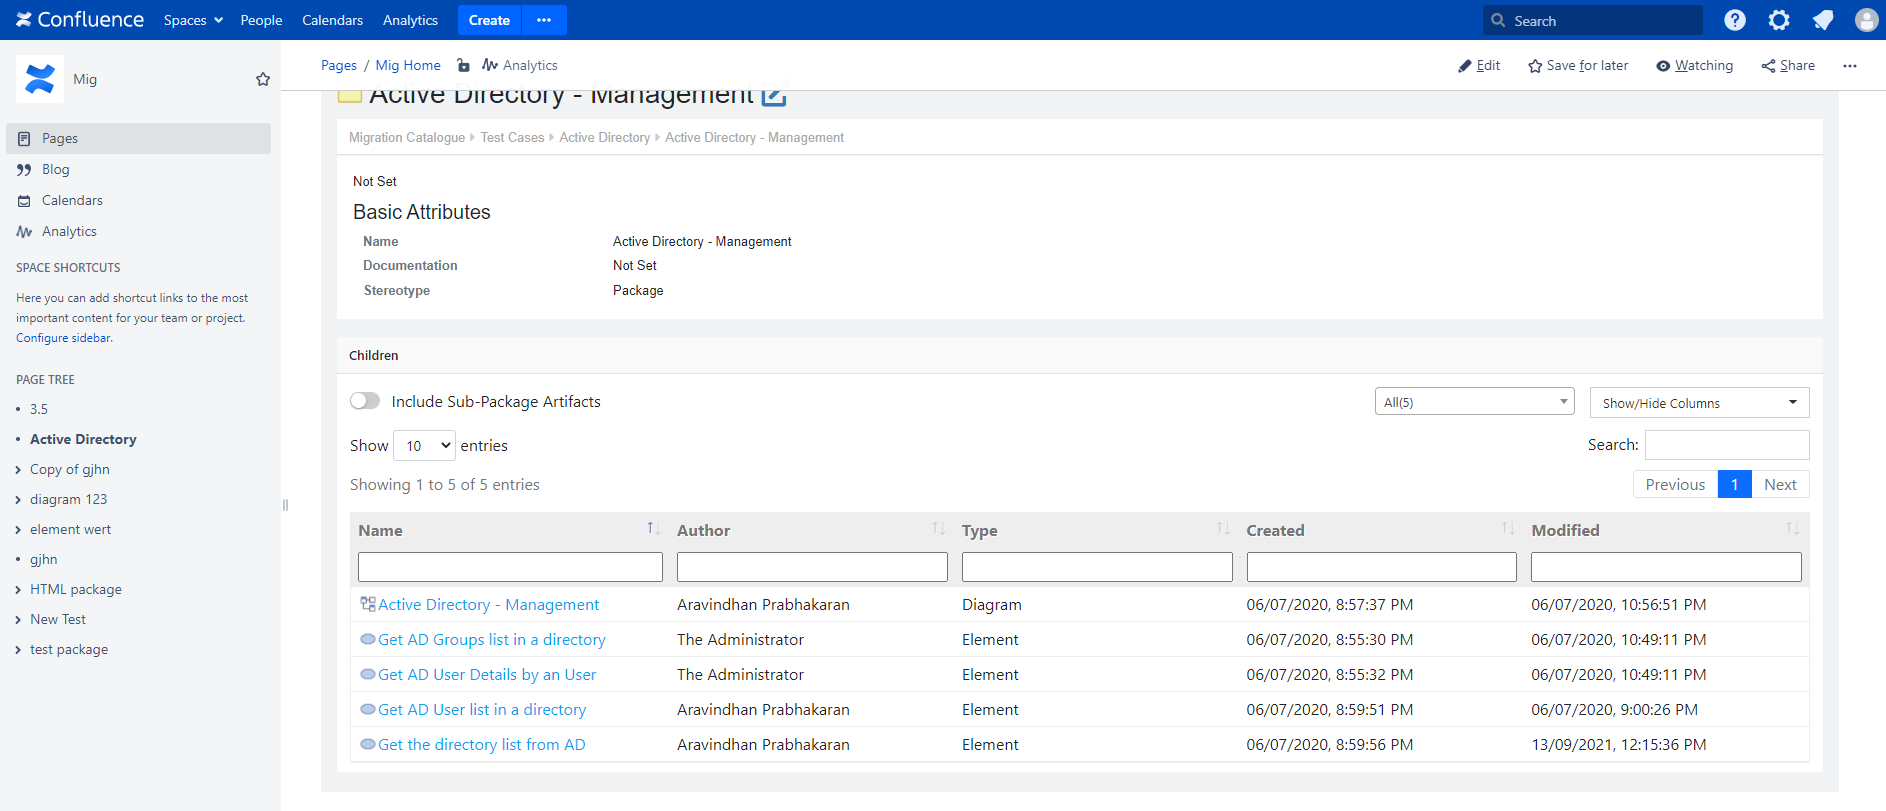
Once User adds the diagram and updates the page, the page will have the following components:
A live image of the diagram which you have selected.
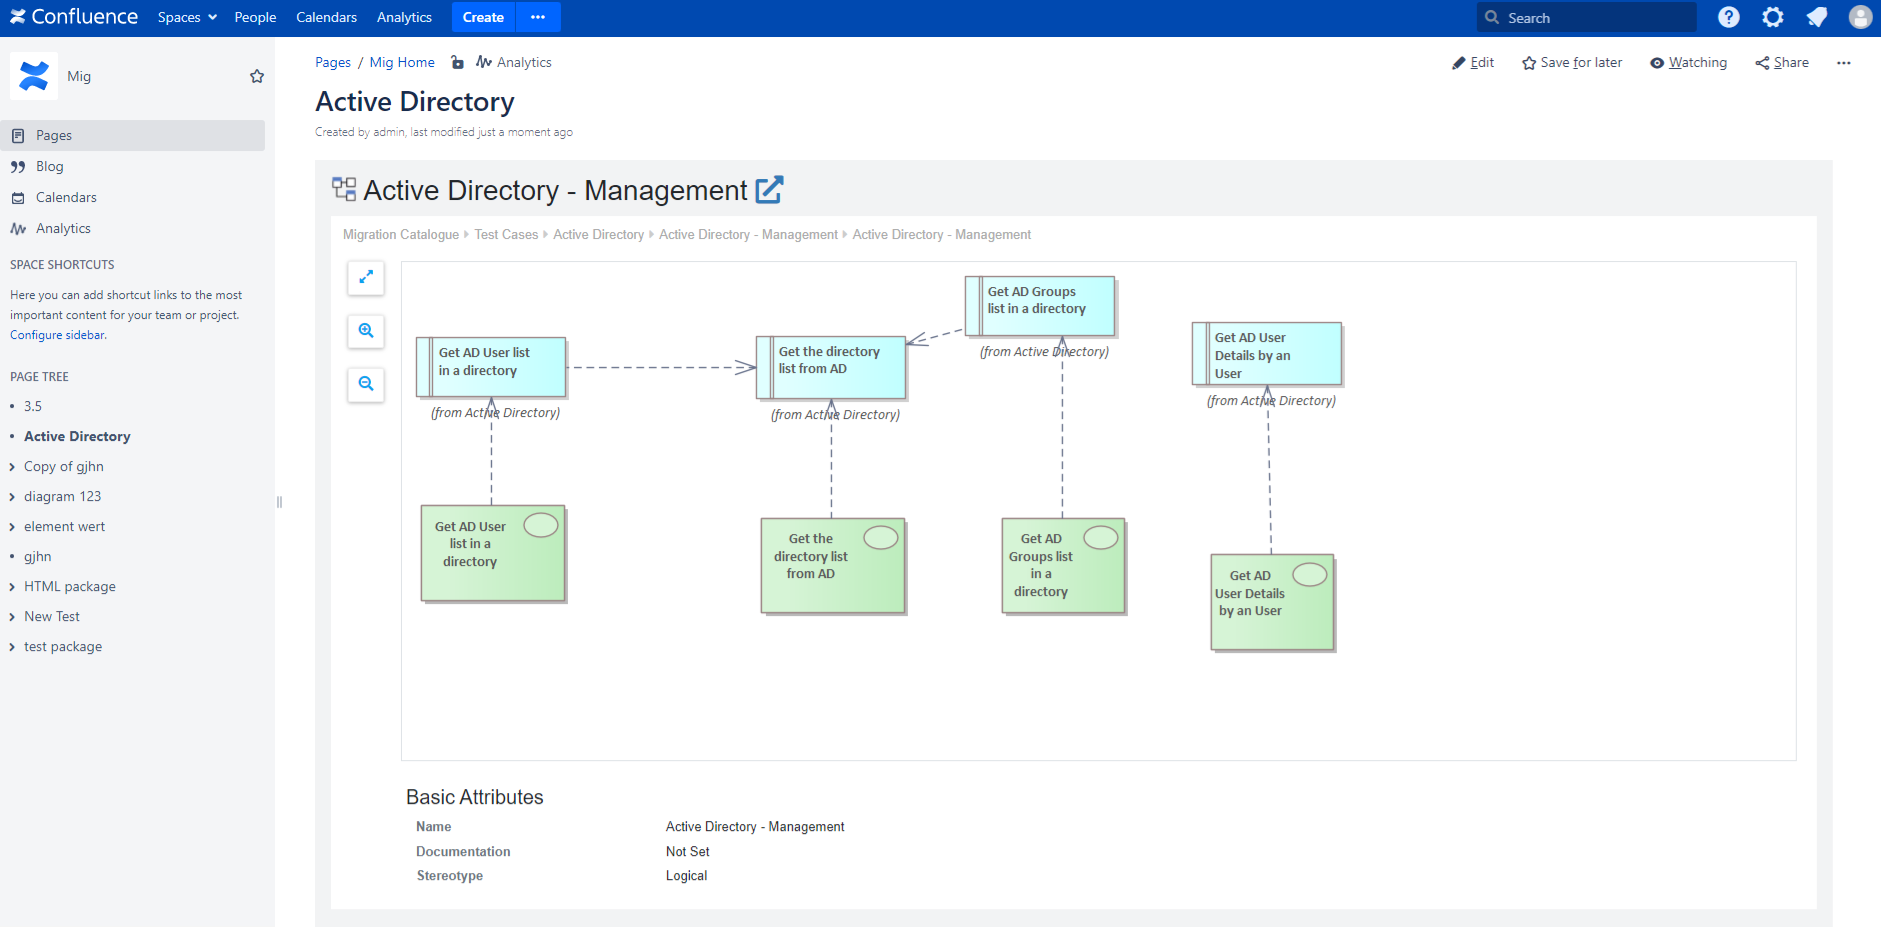
If you have enabled Show Diagram objects in a table setting, you will see the details of objects on this page. This table will behave exactly as it does in Prolaborate.
- You can do the following:
- See more than 10 entries at a time
- Search for any text either from the whole table or from a specific column
- Filter the elements by Stereotype. If you select a stereotype, all the properties that you have configured for that stereotype in Prolaborate will be shown
- Show/hide the columns in the table
Sharing Packages at Confluence
Select ‘Packages’ tab from the Prolaborate macro window to search for Packages.
Click on ‘Find’ to view all the packages from the connected repository. And then you can select the package which you want to share in confluence page.
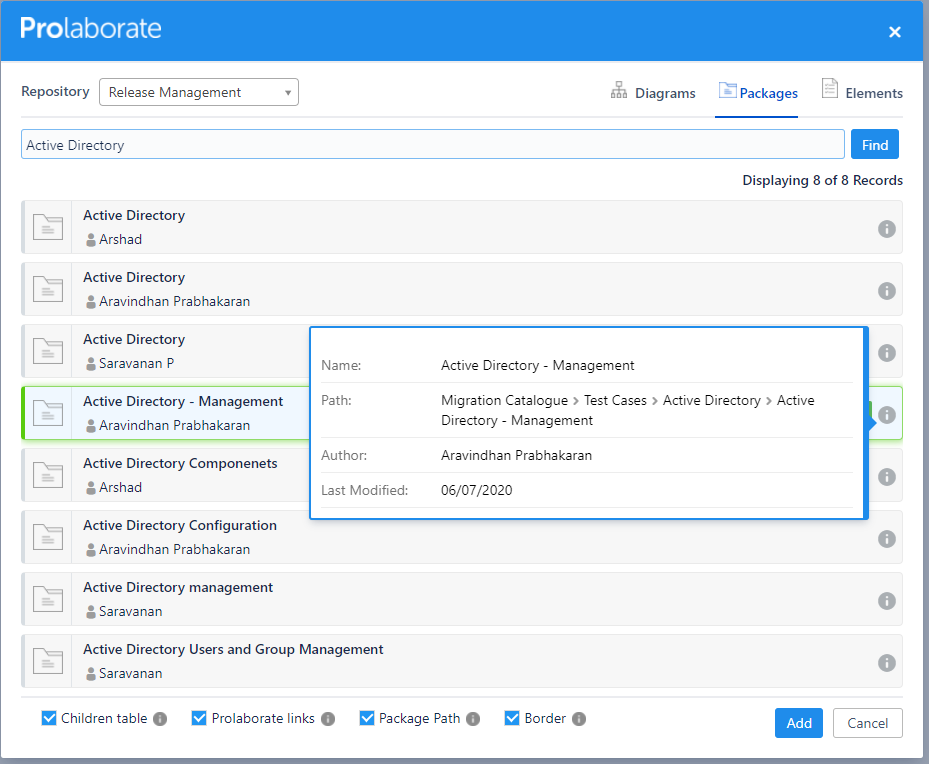
Before clicking on Add, please note the options at the bottom of the window.
- Children table – If you enable this option, details of objects on the selected package will be shown in a table in the page.
- Prolaborate Links – If you enable this option, links will be enabled on Objects. You can click on them to see their overview in Prolaborate.
- Package Path – Uncheck to hide the path of the Package.
- Border – Uncheck to hide the grey border around the diagram that displays package.
Please Click Save Button to save the details.
Once User adds the Package and updates the page, the page will display a live image of the Package which you have selected.
Sharing Elements at Confluence
To share details of elements you wish, enter first few characters of element name, or Stereotype, or Type and then click on Find.
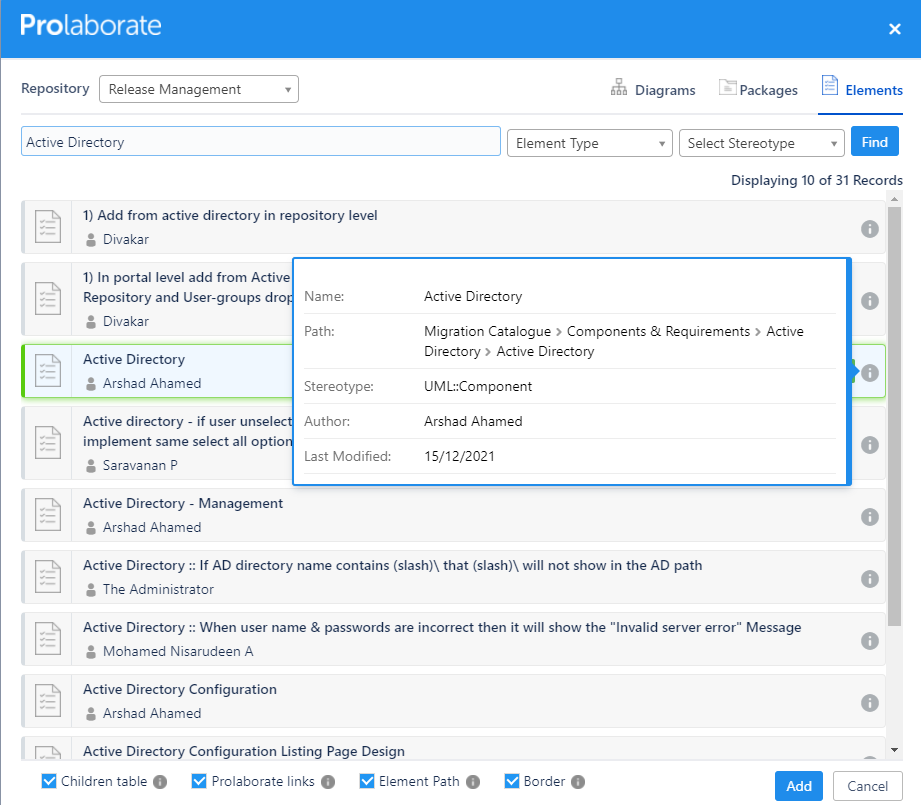
Select the element you wish to add to your page. To view more details of an element, you can click on the info icon and see the details.
Before clicking on Add, note the options at the bottom of the window.
- Children table – If you enable this option, properties of the selected element will be shown in a table in the page.
- Prolaborate Links – If you enable this option, links will be enabled on Objects. You can click on them to see their overview in Prolaborate.
- Element Path – Uncheck to hide the path of the Element.
- Border – Uncheck to hide the grey border around the Element.
After added the Element, Please Click Save Button to save the details.
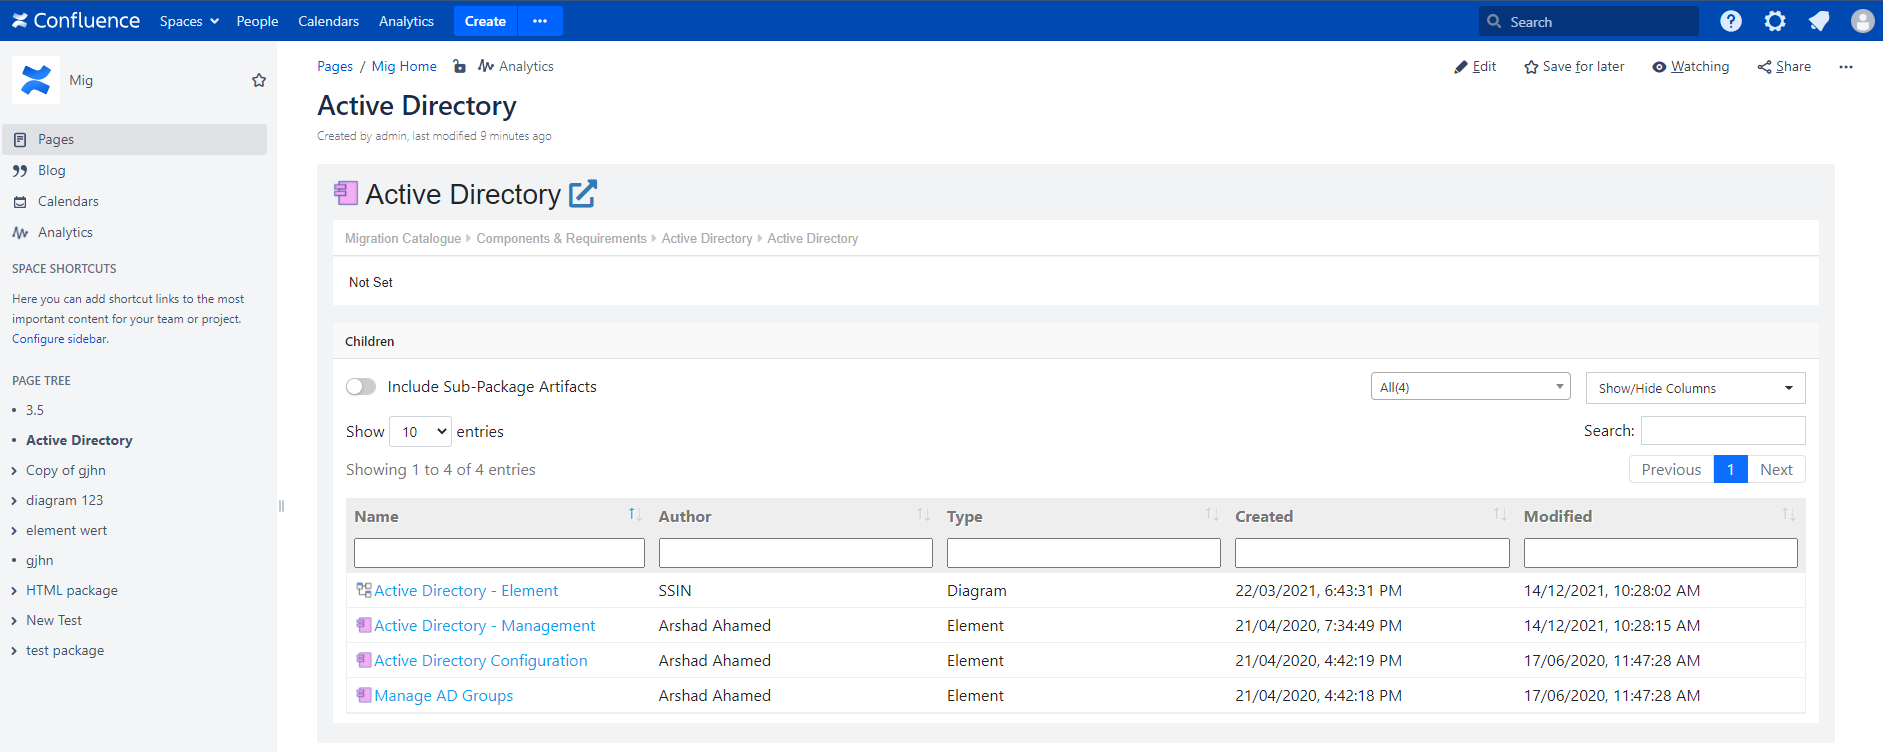
Once User adds the Element and updates the page, the page will display live image of the Element which you have selected.
After User added the Element and updated the page, depending on the configuration, the page will show the Overview of the element and the details of its children in a table view.
Share without Prolaborate Macro
Enable the inbuilt HTML macro in Confluence.
Using Prolaborate links you can share
- Interactive EA diagrams in Confluence.
- Packages
- Custom views of Repositories
- Simple and advanced visualizations
Sharing EA Diagrams at confluence
Let’s have a quick look at how it works before we go ahead:
Follow the steps to share a live Enterprise Architect diagram using the inbuilt HTML macro. While creating or editing a Confluence page,
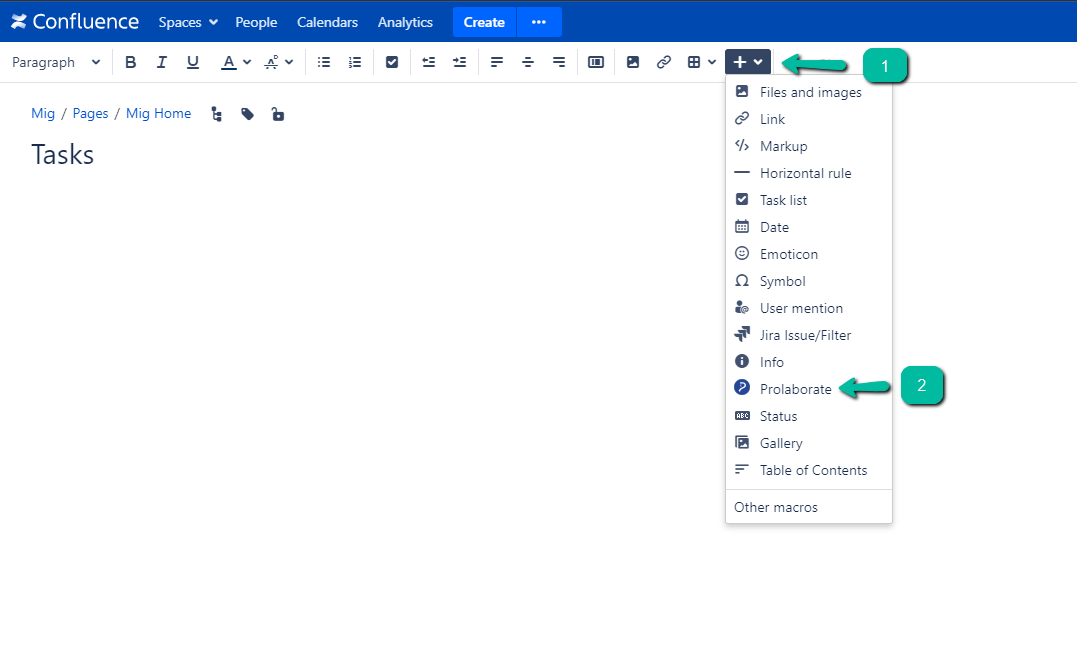
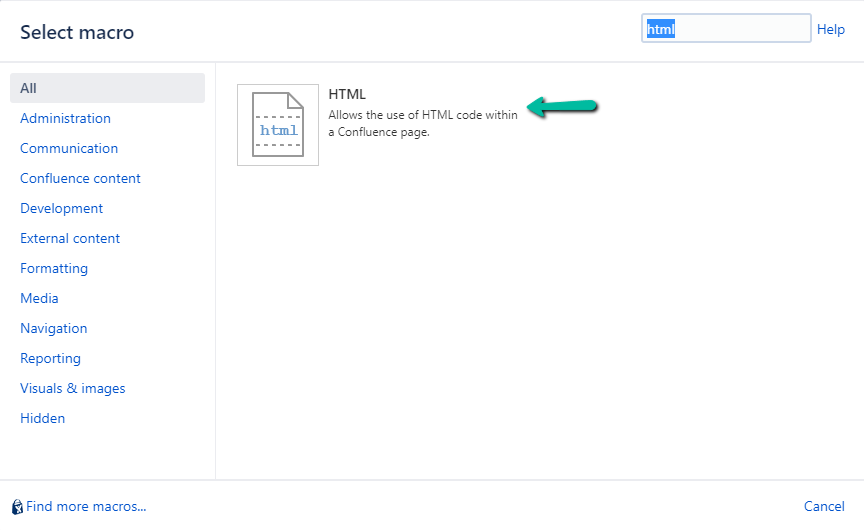
1.Click on Insert more content > Other macros
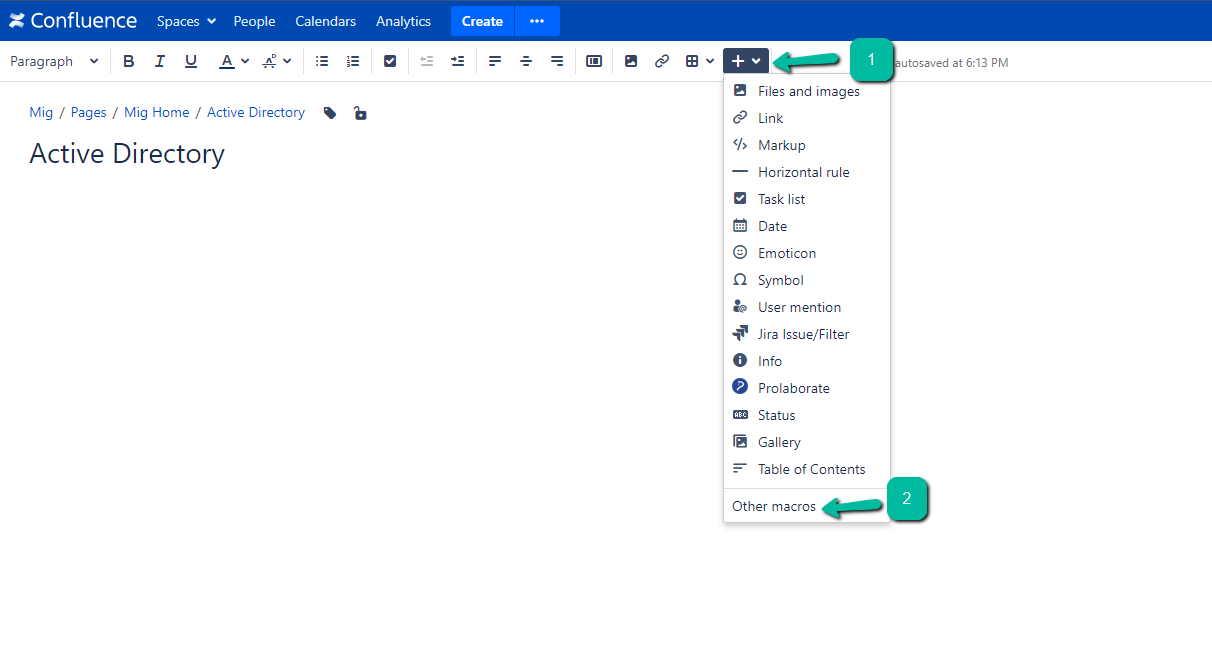
2. Select the HTML macro and click on Insert (If you are not able to find it, here are the steps to enable it)
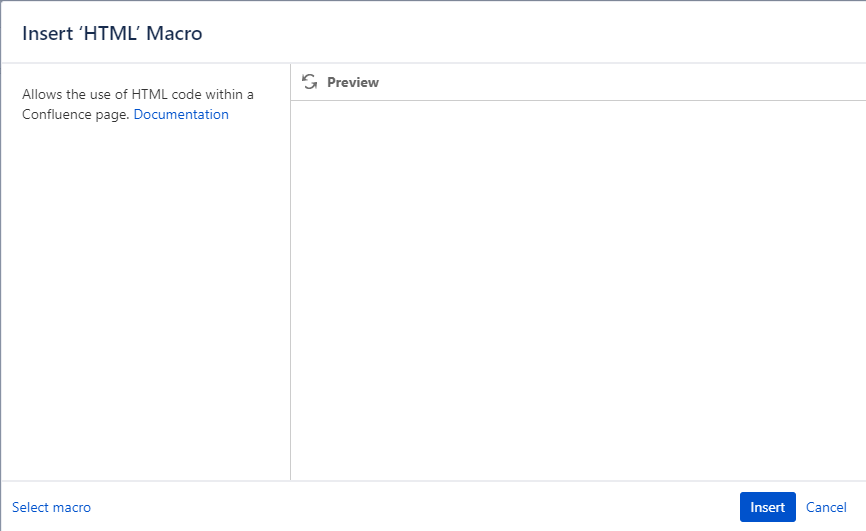
3. Paste Prolaborate diagram link in the macro and adjust the Height and Width as needed
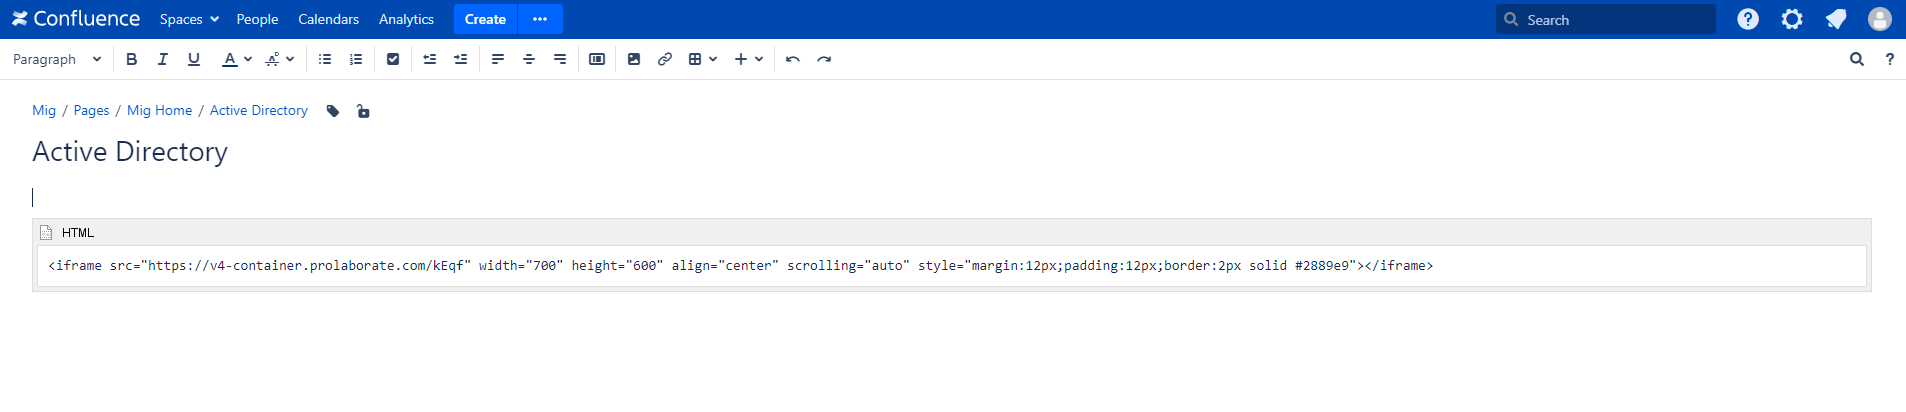
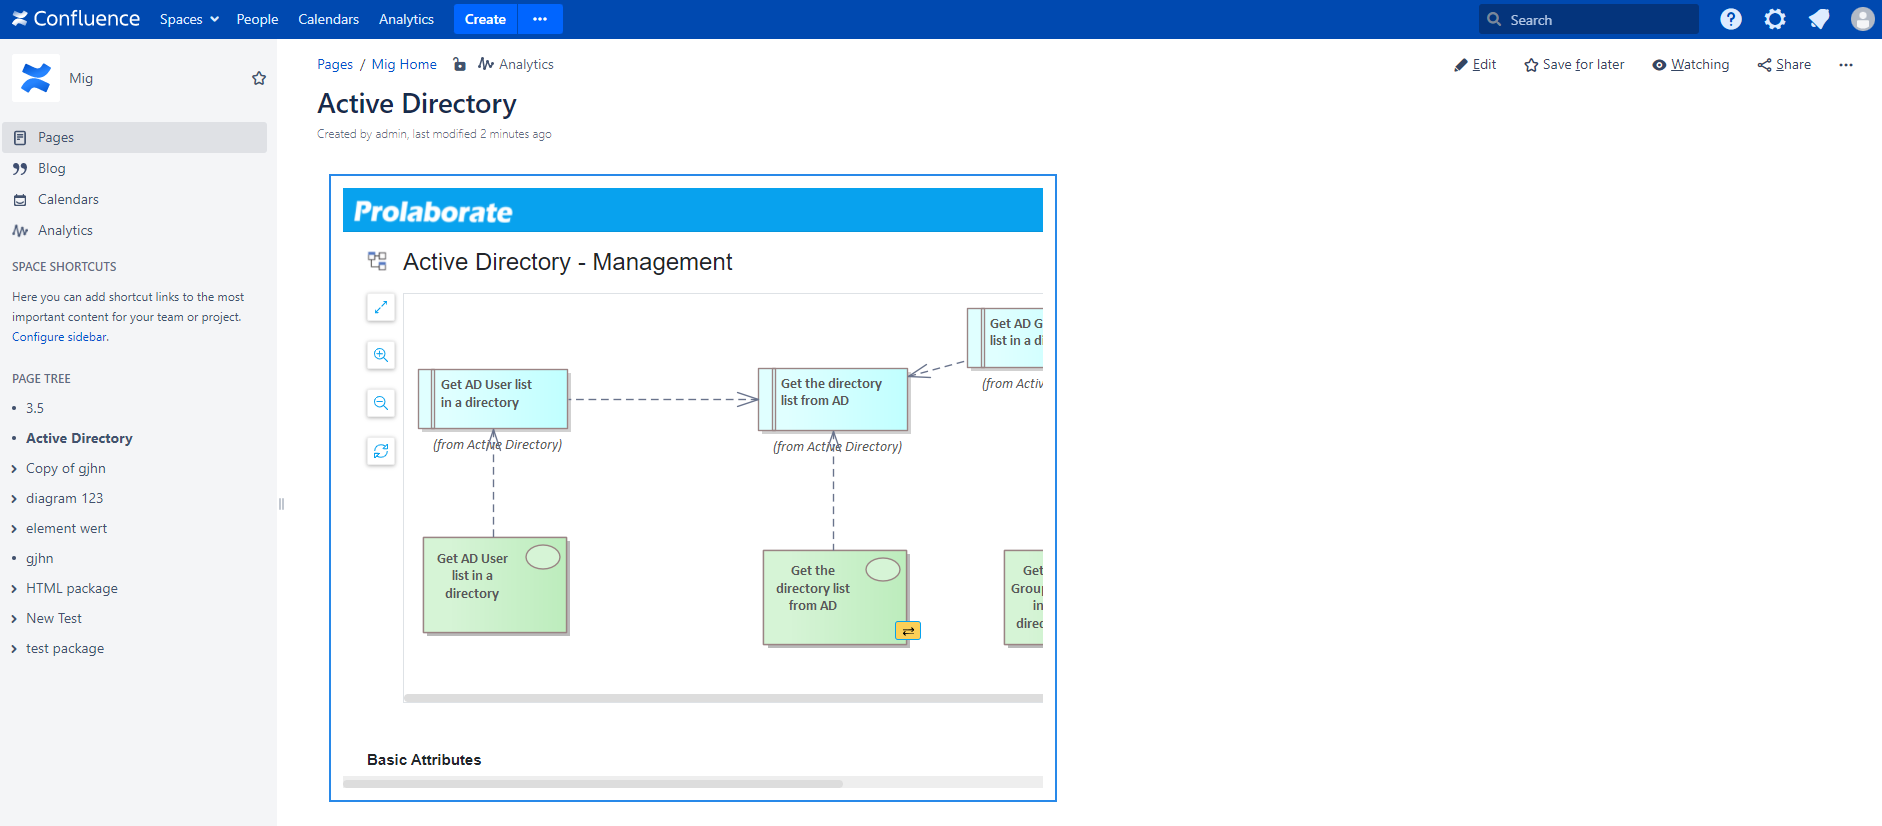
4. After added the HTML Link, Please Click Save Button to save the details.
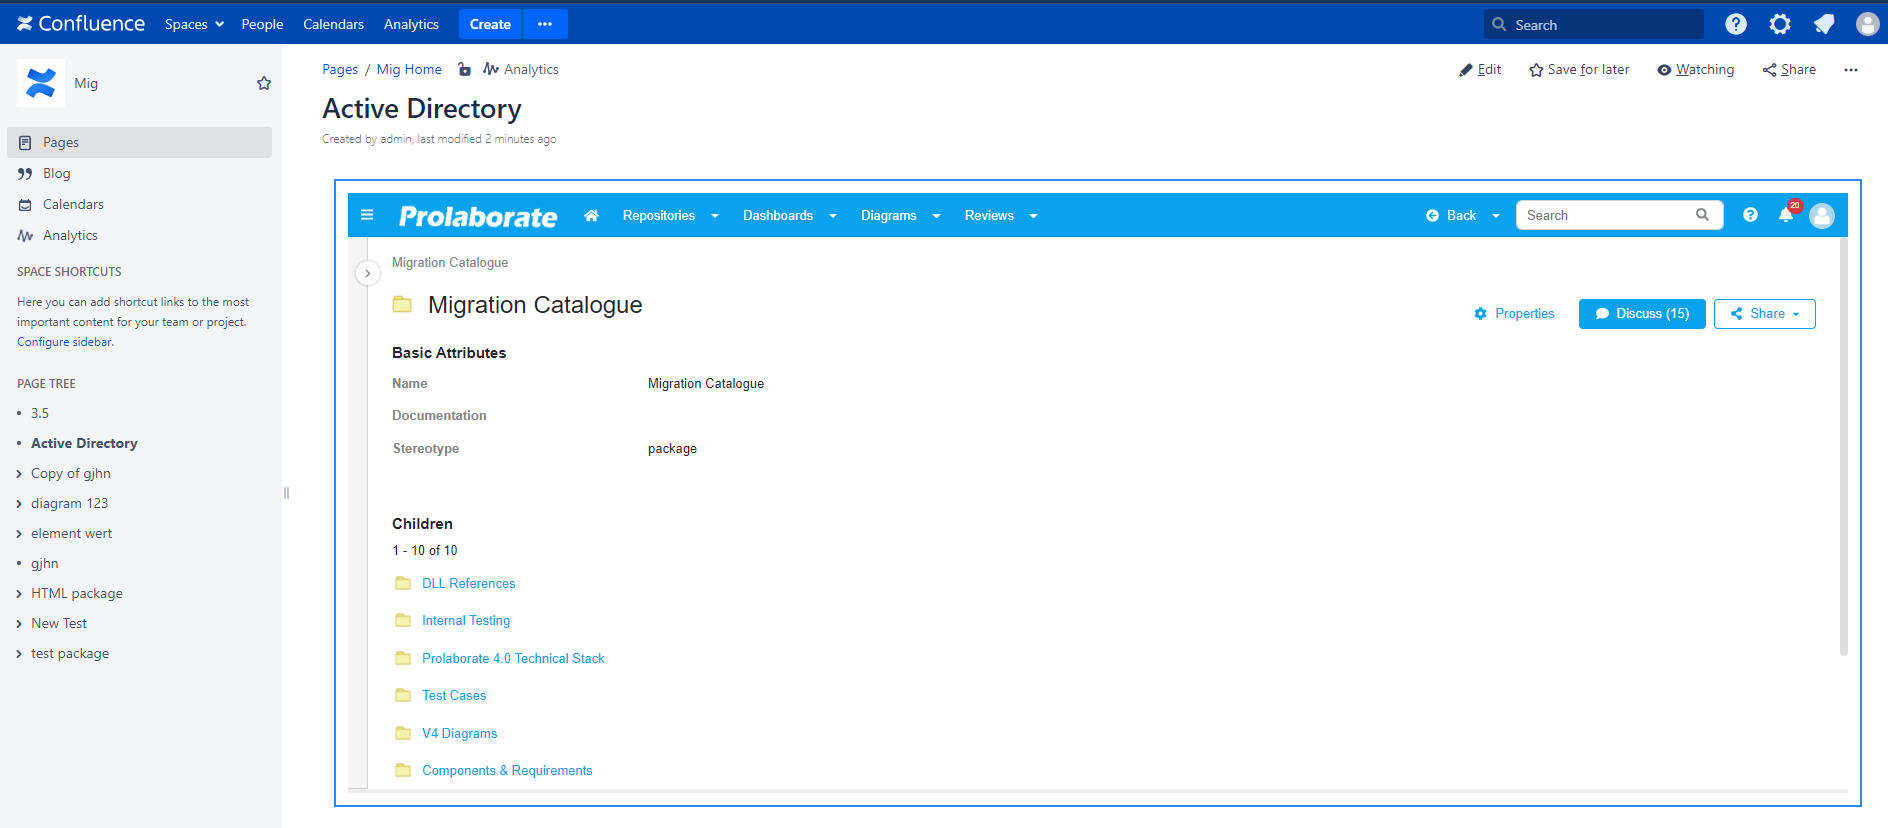
Once User adds the HTML Macro and updates the page, the page will display a live image of the diagram which you have shared from Prolaborate.
To get a link to a diagram, open the diagram in Prolaborate,
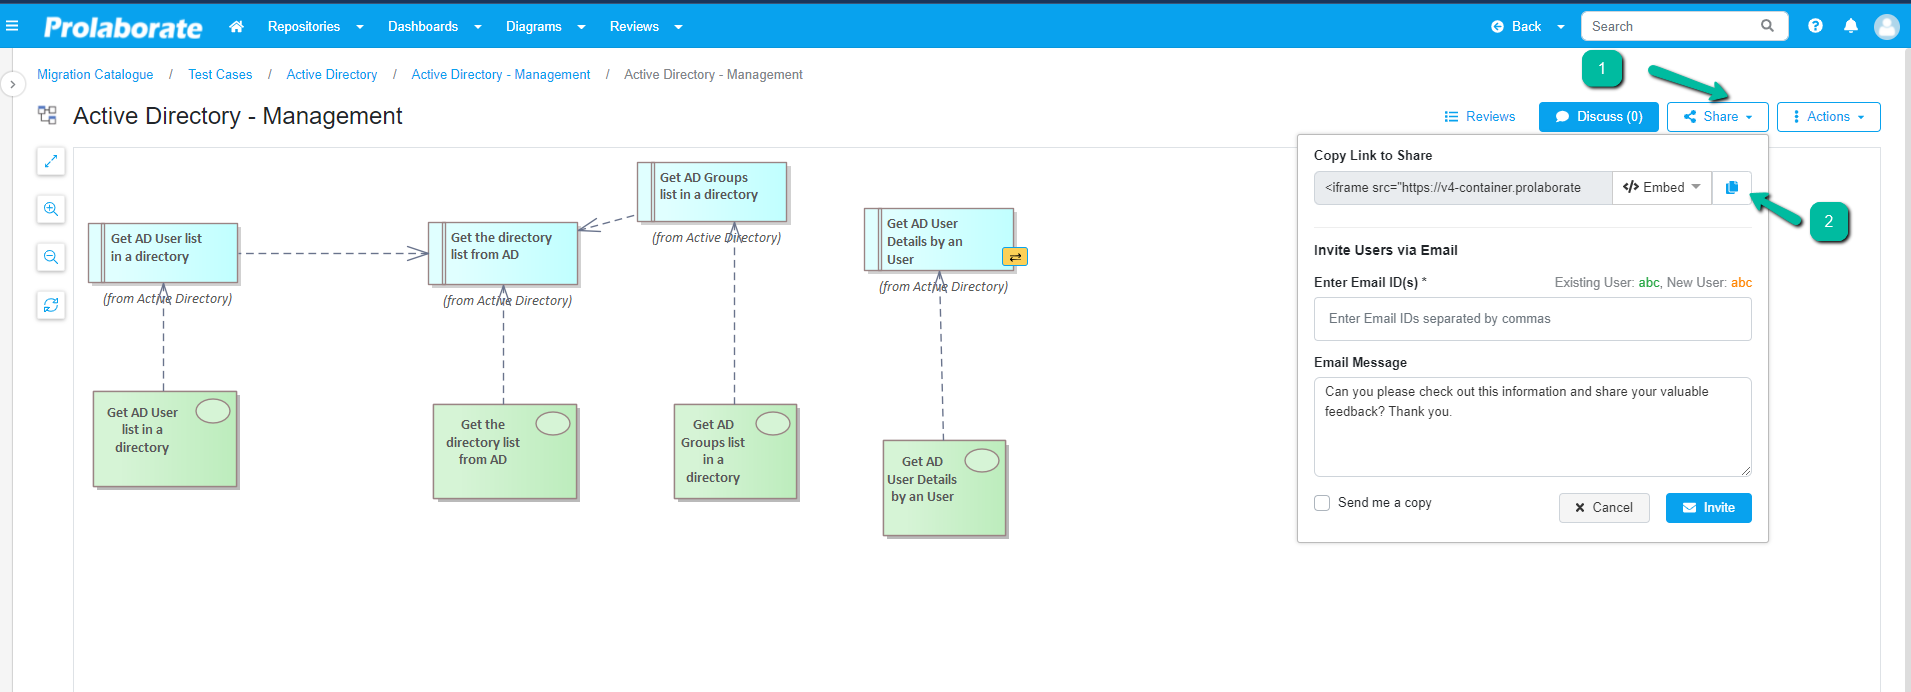
Click on Share button on the Diagram Page. User will get the link to this EA diagram. Read more here on how to standardize shareable I frame code.
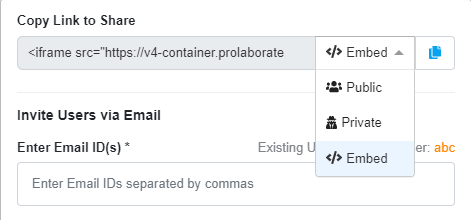
Using Public link is recommended as authentication is not needed to view the contents but if you want your users to authenticate using Prolaborate credentials before viewing the contents in a Confluence page, you can use the Private link.
Prolaborate User can give the Prolaborate experience to your Confluence users. They can click on the objects and explore on their own.

Sharing Packages in Embed Links at confluence
Let’s have a quick look at how it works before we go ahead:
As of now, you can use the URL of package from the address bar and add it to your Confluence page and give the Prolaborate experience to your users.
For Example:
<iframe src="link from Address bar" width="1500" height="600" align="center" scrolling="auto" style="margin:12px;padding:12px;border:2px solid #2889e9"></iframe>
Following image will appear after clicking the Save from the Page.
Sharing Dashboards at confluence
Set the Dashboard you want your Confluence users to see on landing as the Default Dashboard

Disable the Repository browser toggle button from Repository settings. Then Repository Browser will not be visible to any user of Prolaborate.

Click Home Icon.
Click Share Button from the dashboard page.
find the steps in below mentioned image.
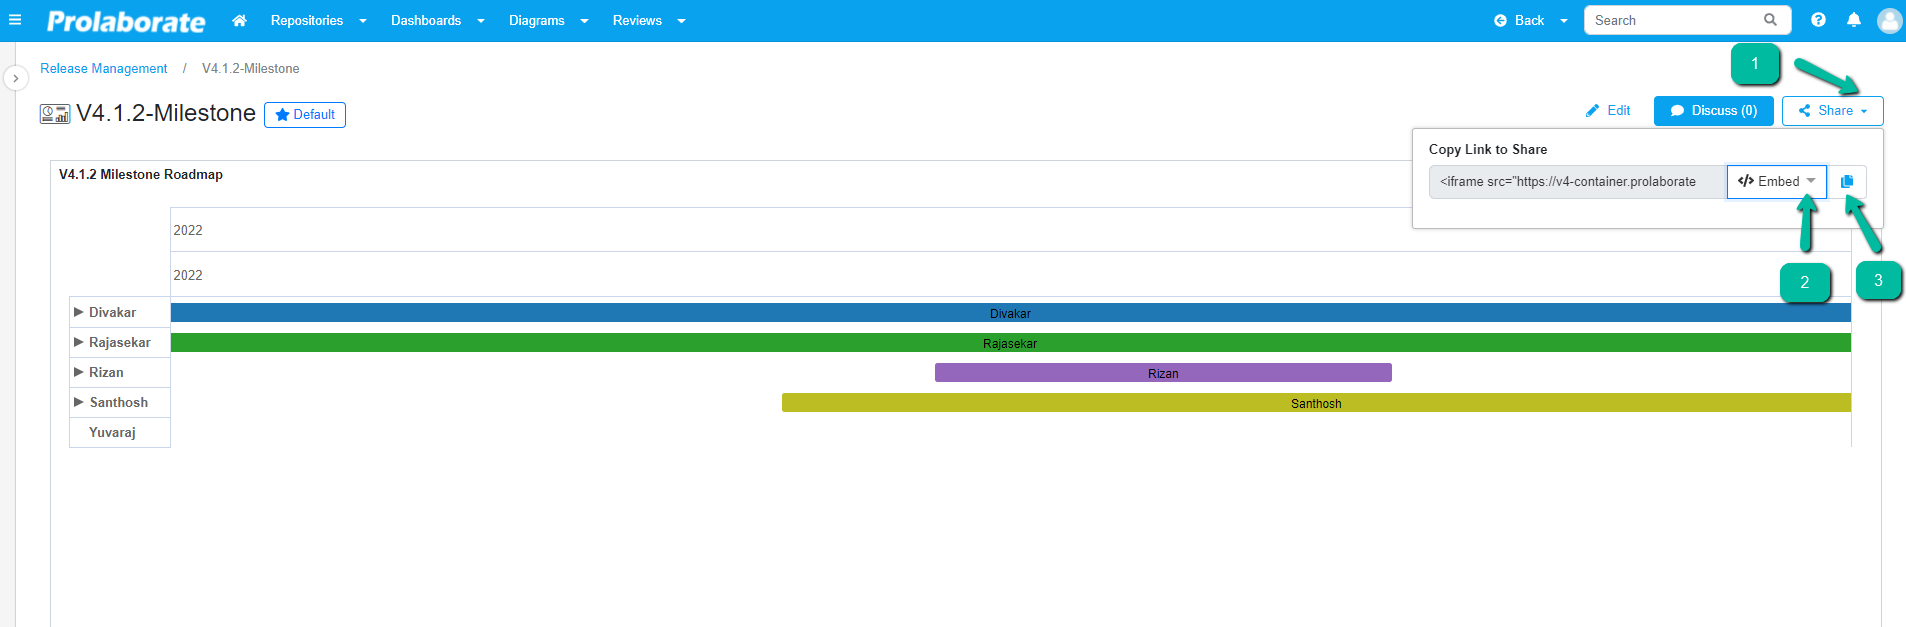
Paste the link in HTML macro and adjust the required height and width as per the requirement.
Click Save once HTML link configured.
Once all these steps are followed, here is what the users will be able to do with in Confluence.
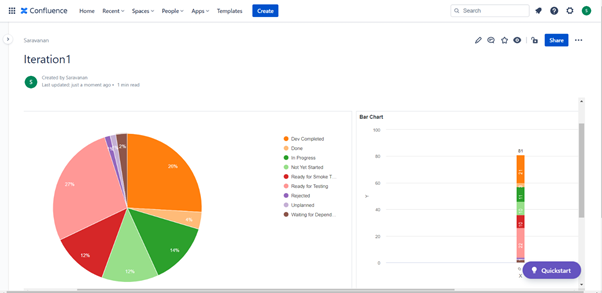
If user try to click the Chart to see Report. It redirects into the login page.
Enter the valid login credentials to get seamless access to Prolaborate Application and its Dashboards.
The users can even drill down in the dashboard visualizations.