
Start a Discussion
Collaborate on Enterprise Architect models using the Discussion feature in Prolaborate.
Prerequisites
User must have access to EA Repository in Prolaborate.
To reply to the discussion, the user should have the Collaborate access permission for the repository.
Initiate a Discussion
In this section, the following workflows and capabilities will be explained:
- Discuss on EA Artifacts
- Discuss on Reviews
- Discuss on Dashboards and Widgets
- Discuss on Diagrams
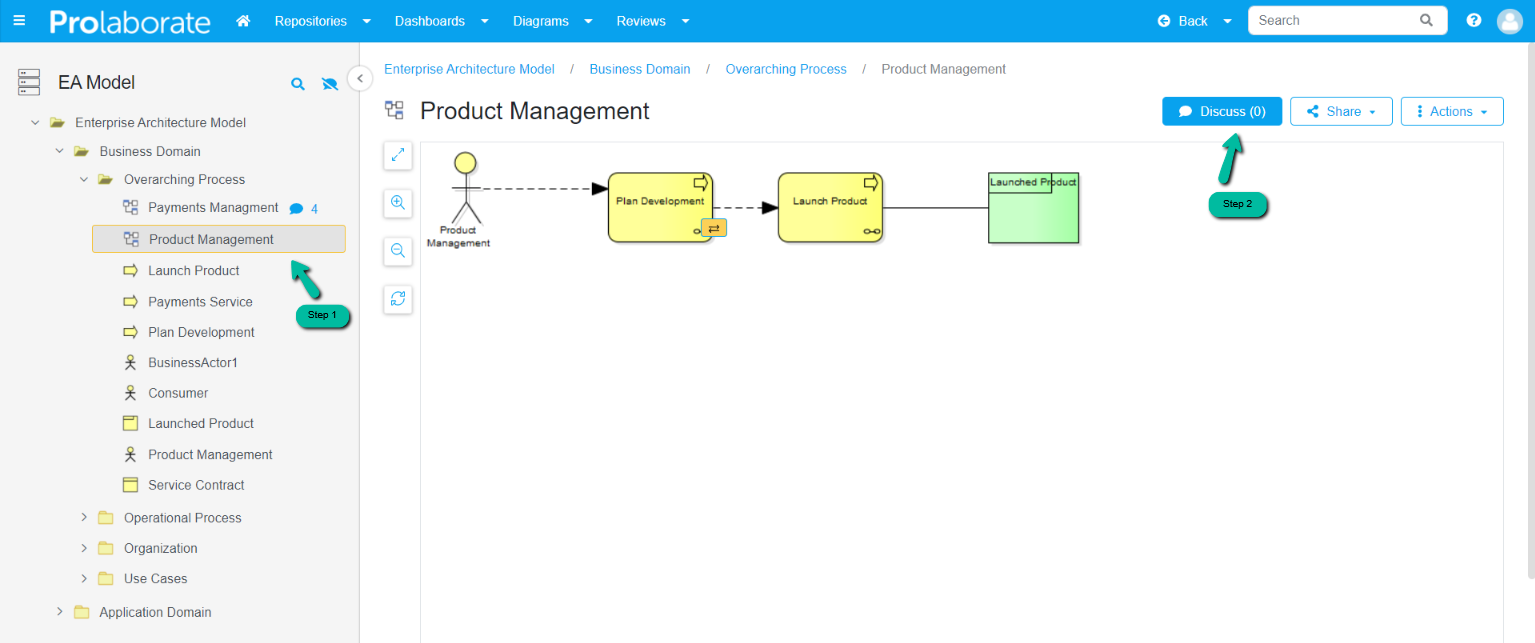
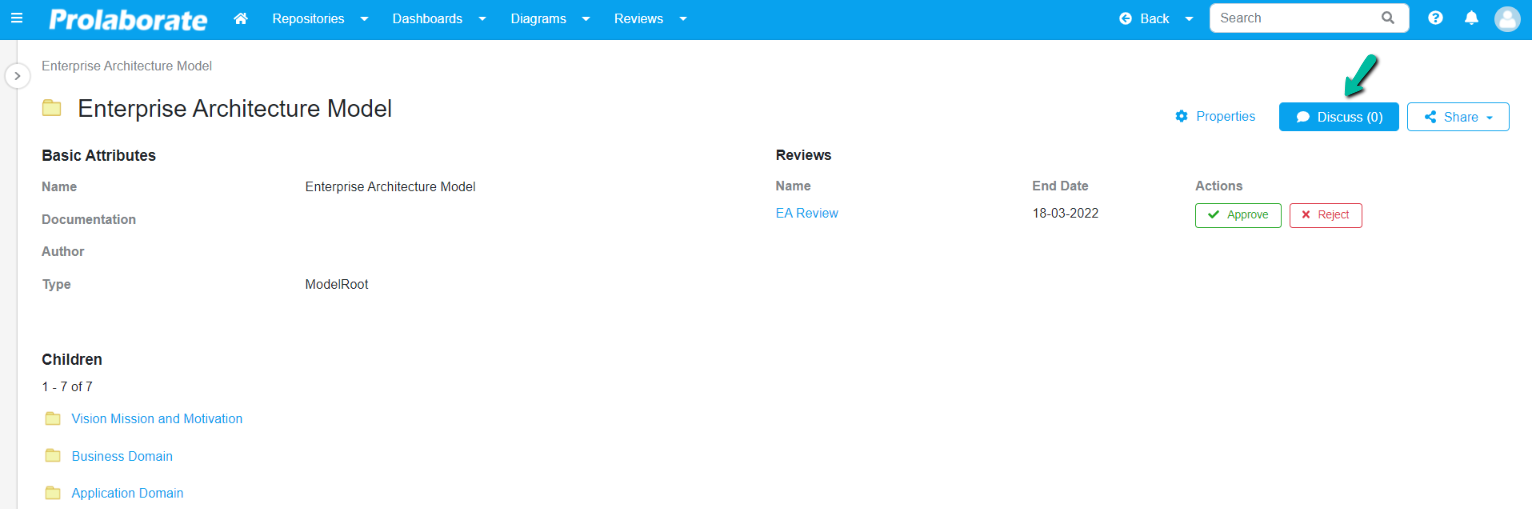
Discuss on EA Artifacts
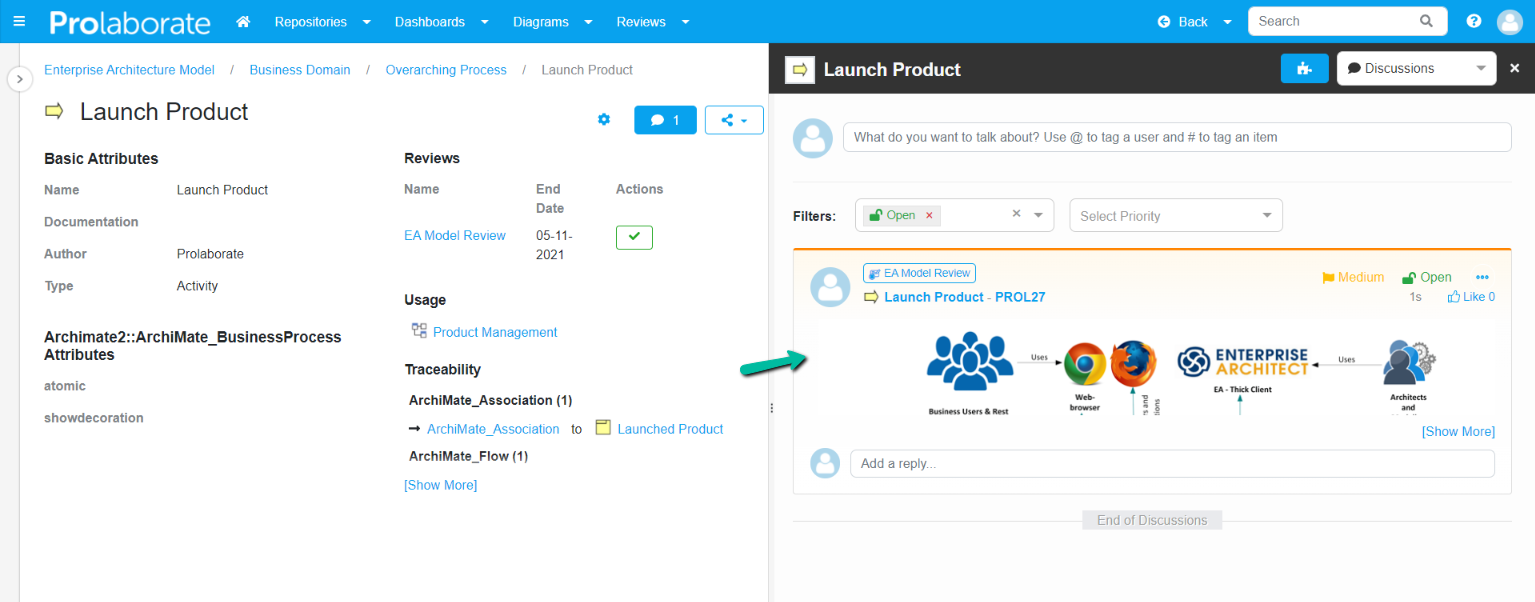
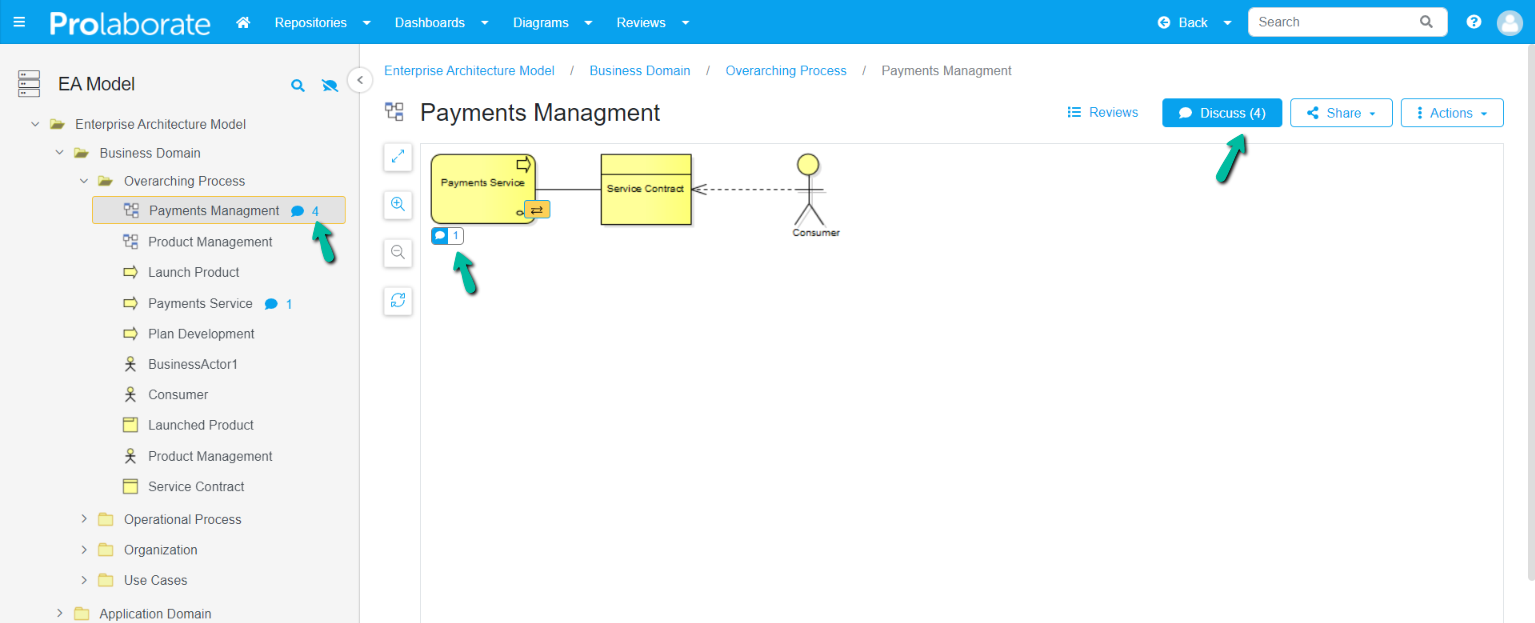
Create discussions on EA artifacts such as packages, diagrams and elements from Prolaborate. To start a discussion, select the required artifact and click Discuss.


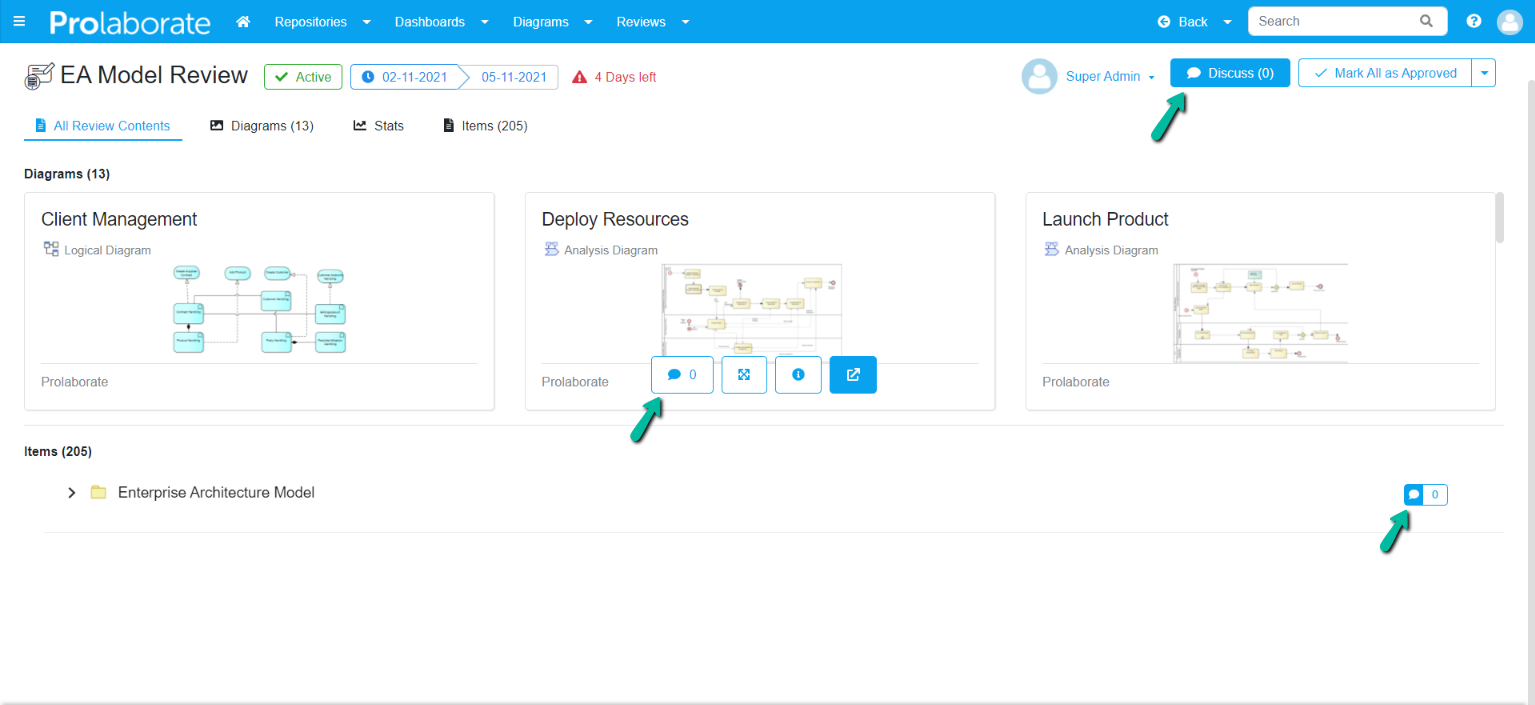
Discuss on Reviews
Create discussions on reviews that include artifacts such as diagrams, elements, etc which are subject to review.
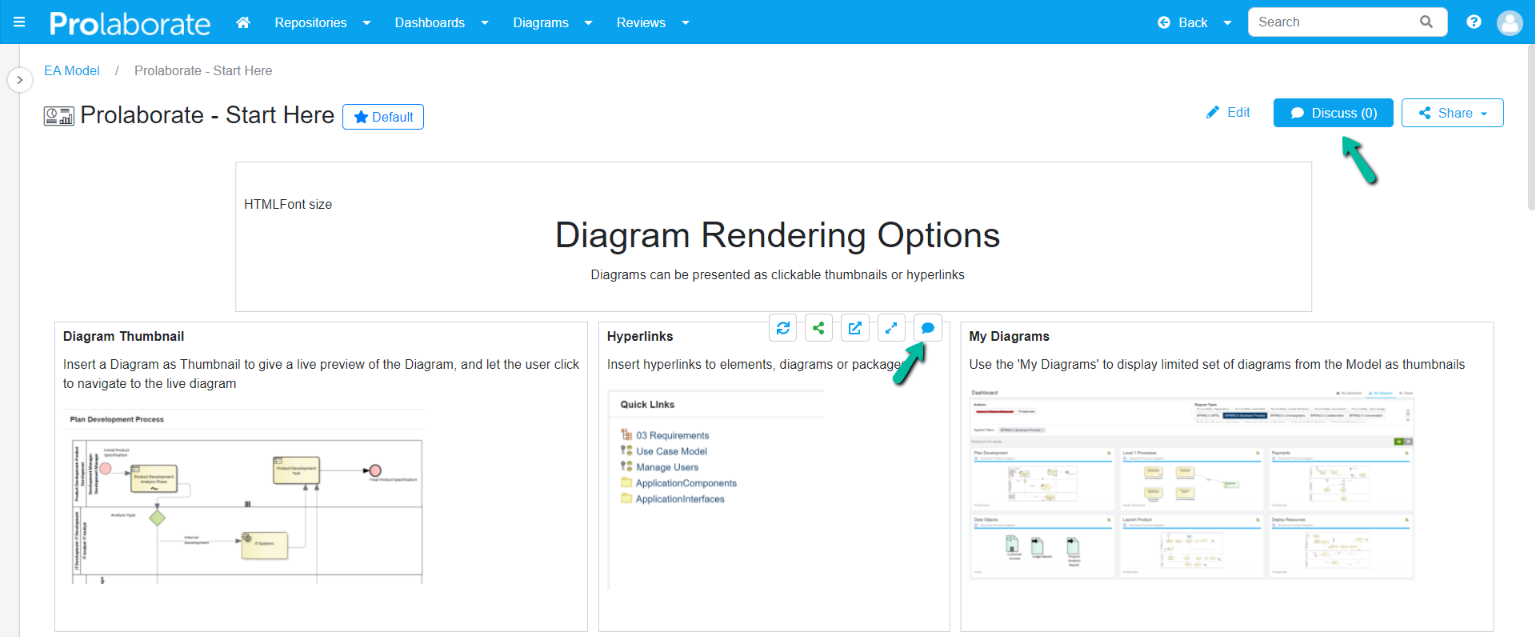
Discuss on Dashboards and Widgets
Create discussions on dashboards and widgets. Click Discuss button or hover on the widget and click the Discuss icon to start the discussions.
Discuss on Diagram
To create a discussion on a diagram, hover over a diagram to view the Discuss icon. Click on it to open the discussion tab.

Create a discussion
To initiate a discussion on a package, element, or diagram click on Discuss button on the overview page upon selecting the artifact.
Add discussion text and Click Post to start a discussion.
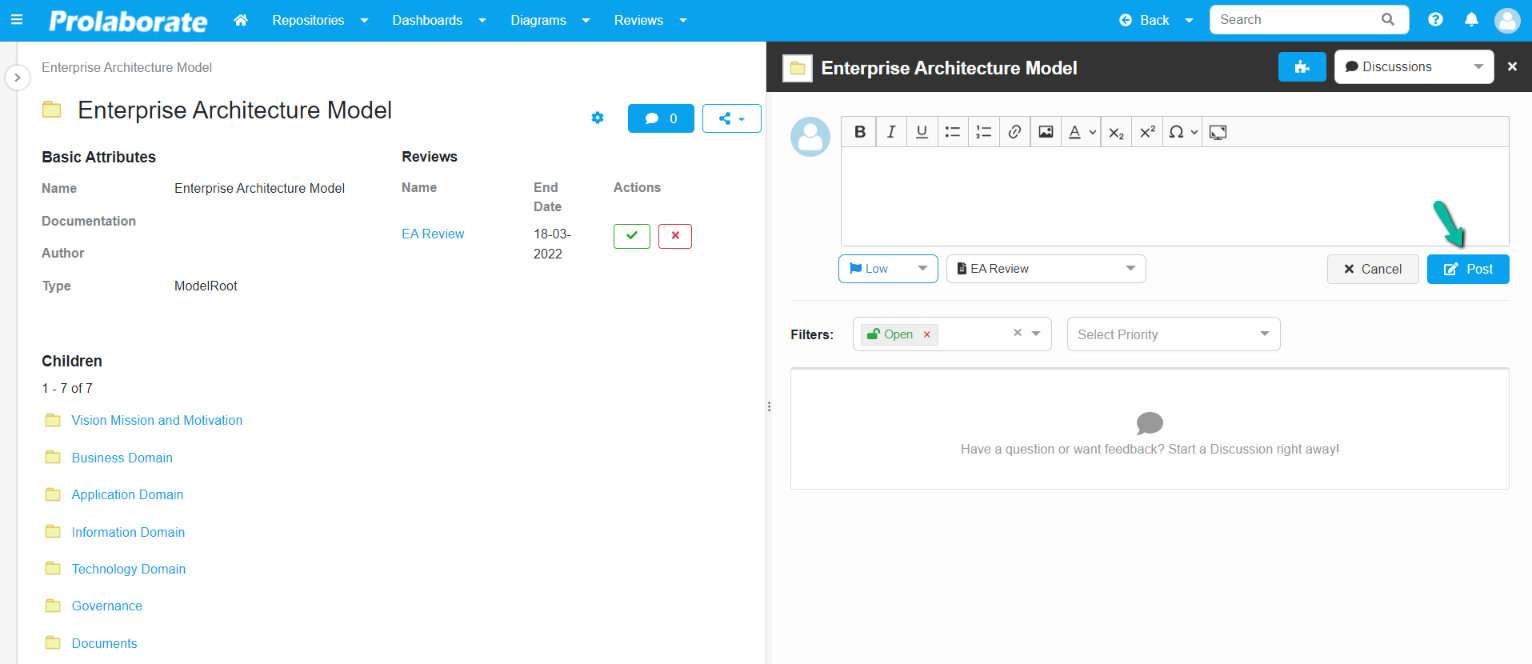
In a discussion, author can tag a user, refer to EA resources, set priority, etc and those options are covered in detail in the below sections.
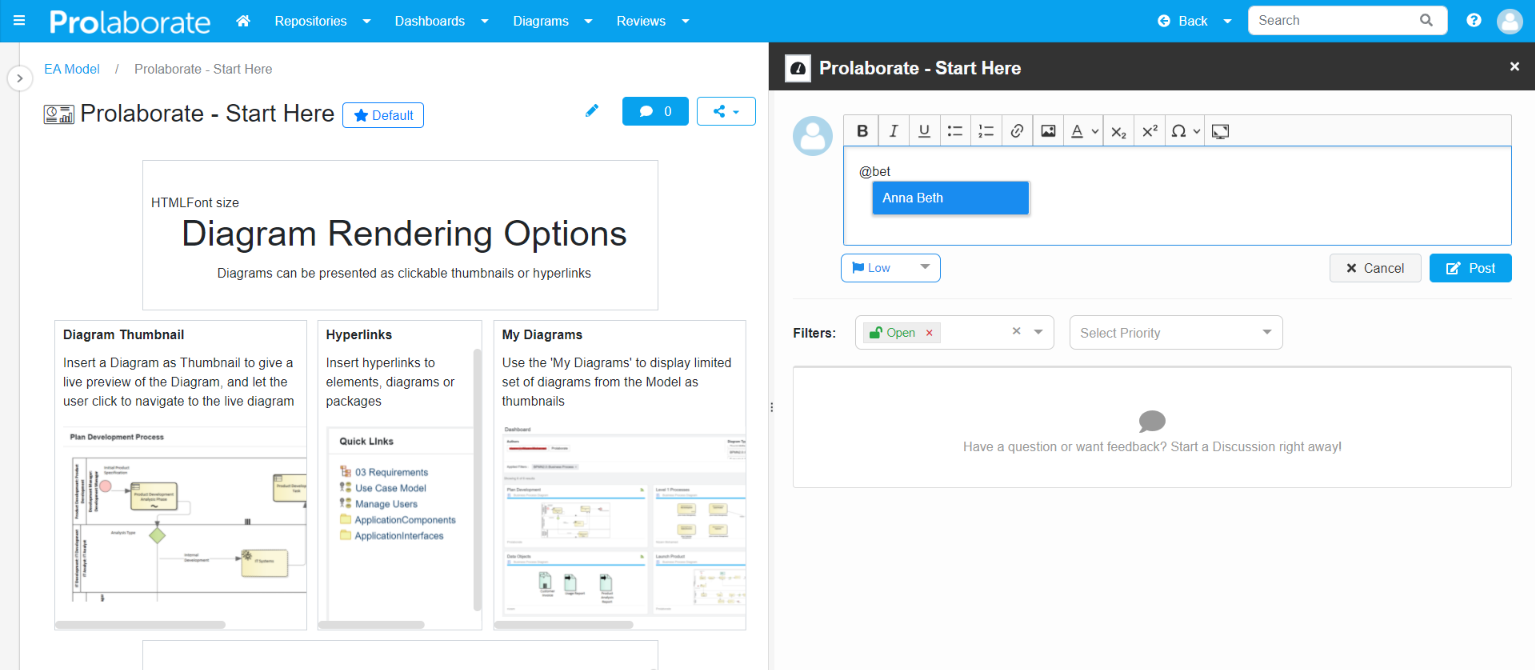
Tag Users
To tag Users, type @ as a prefix followed by the username in the comment field box.
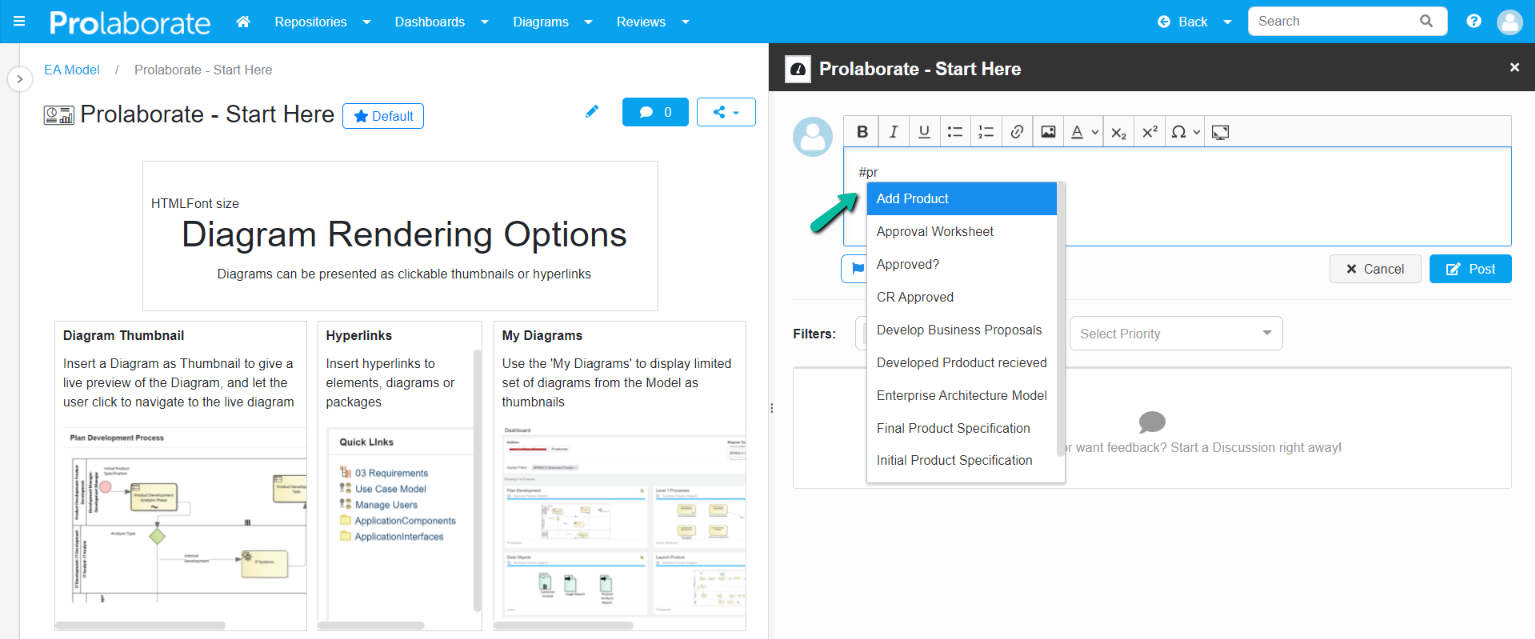
Tag Resources
To tag resources, type # as a prefix followed by the resource name in the comment field box.
Formatting Text
Change font styles & formats such as bold, italics, bullet list, numbered list, and font colour for the text to format the discussion text as required.
Insert EA Diagram or Image
Insert an image or multiple images into the discussions by clicking on the Image icon.
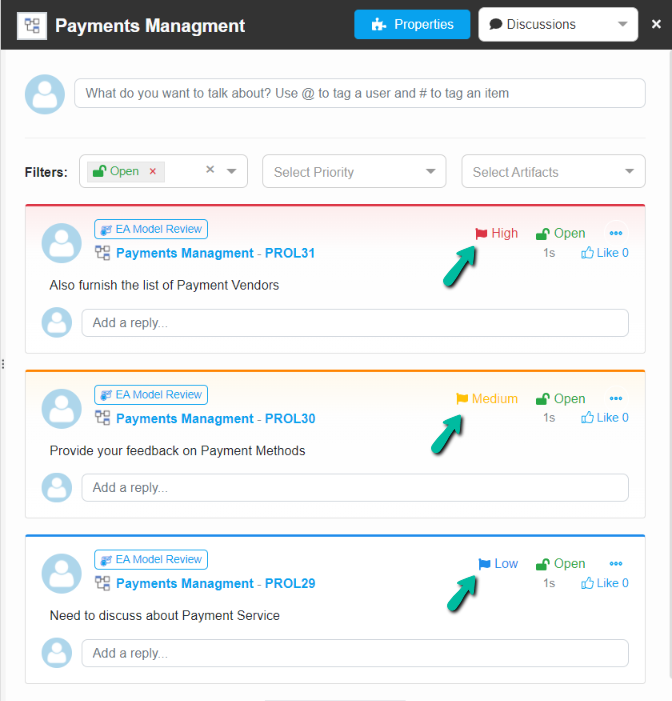
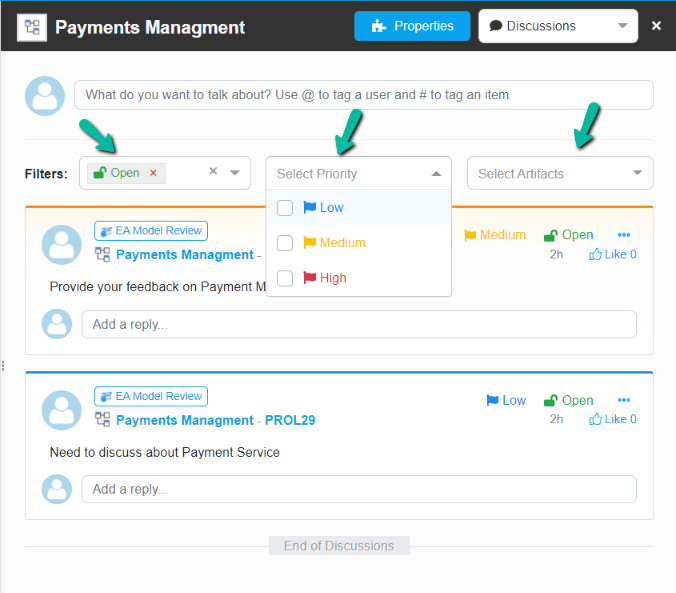
Set Priority
Set priorities for discussions such as Low, Medium, and High as required.
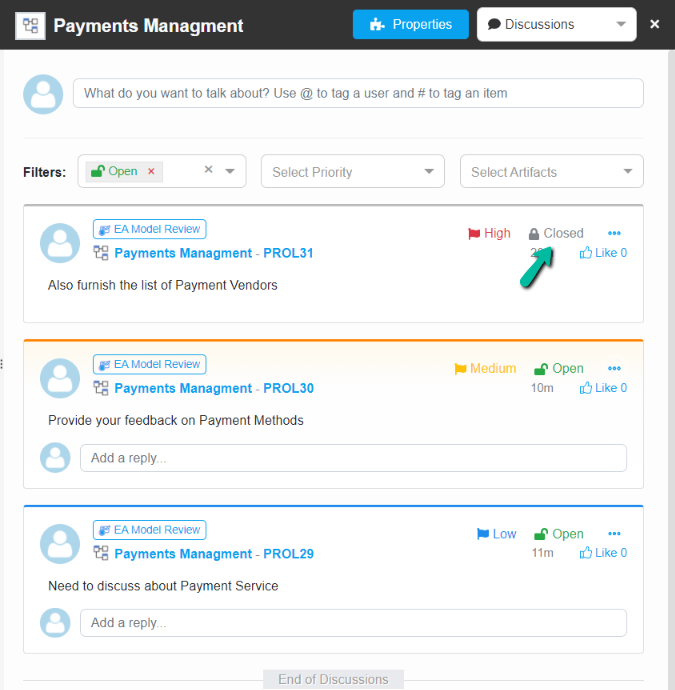
Set Status
Users can close a discussion that is fulfilled. To close the discussion, click on the vertical ellipsis icon and click on Edit.
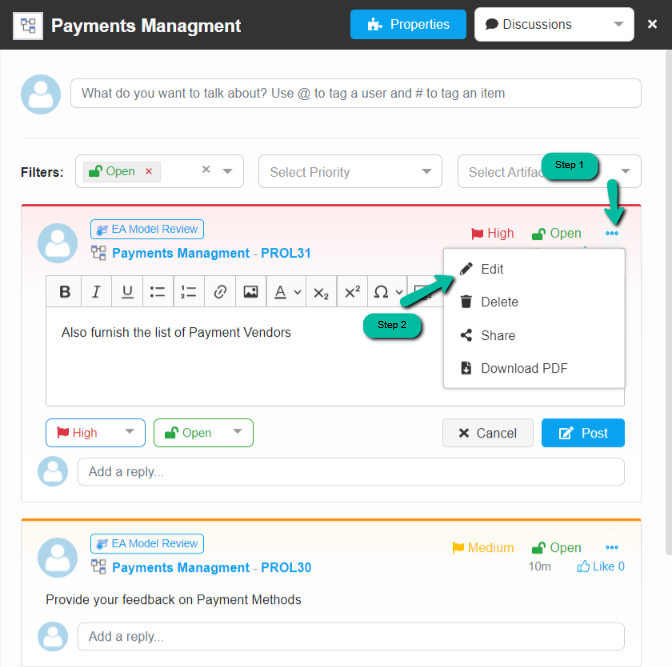
Then choose Close on the status dropdown.
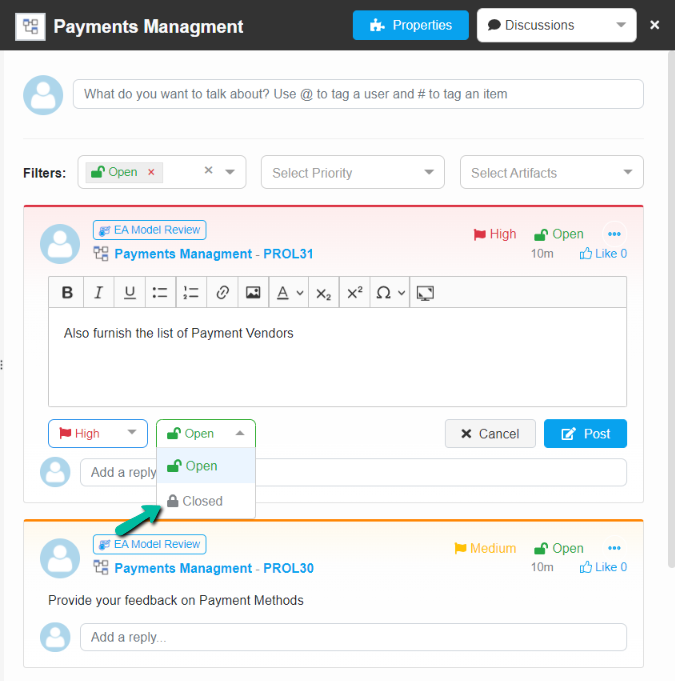
The status will be marked as closed as shown below
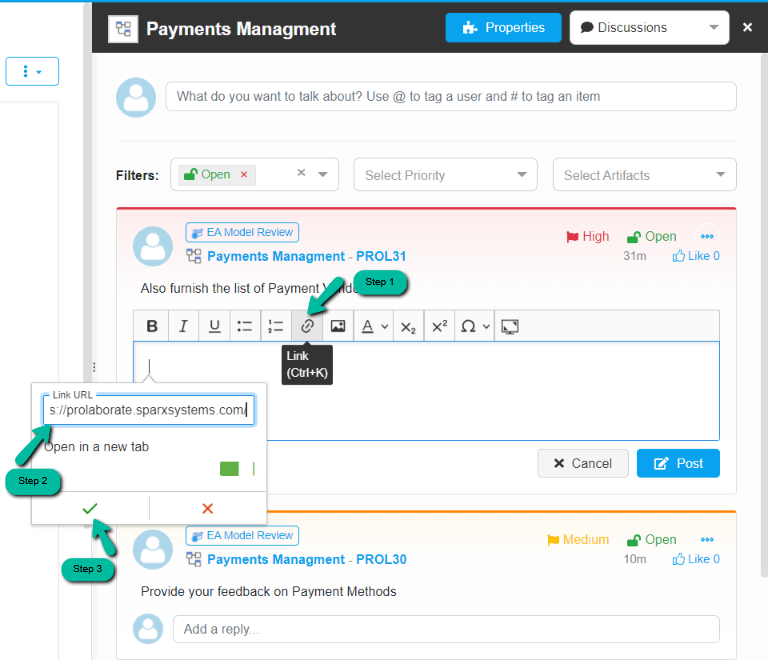
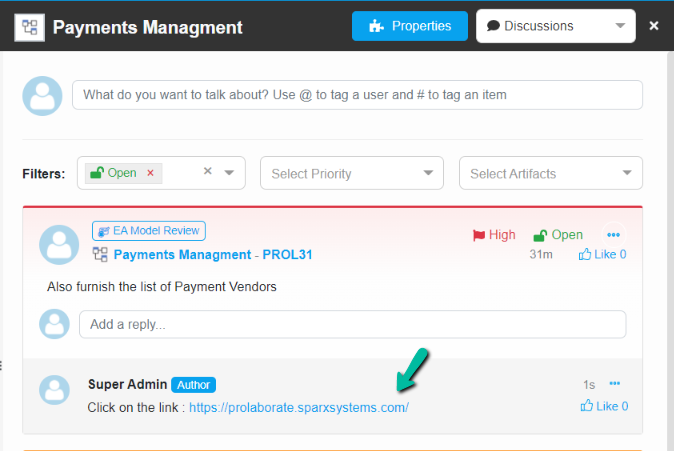
Insert Hyperlinks to Resources
To add hyperlinks to a discussion, click the Link icon and then paste the link URL, and then click on the Right icon.
By default, a new tab will be opened when the link is clicked. If you want to stay on the same tab when you click on the link, toggle the Open in a new tab option.
Edit Hyperlink
To edit the hyperlink, click on the vertical ellipsis icon and click on Edit. Now place the cursor on the link to reveal the Edit icon. Click the Edit icon to edit the link.

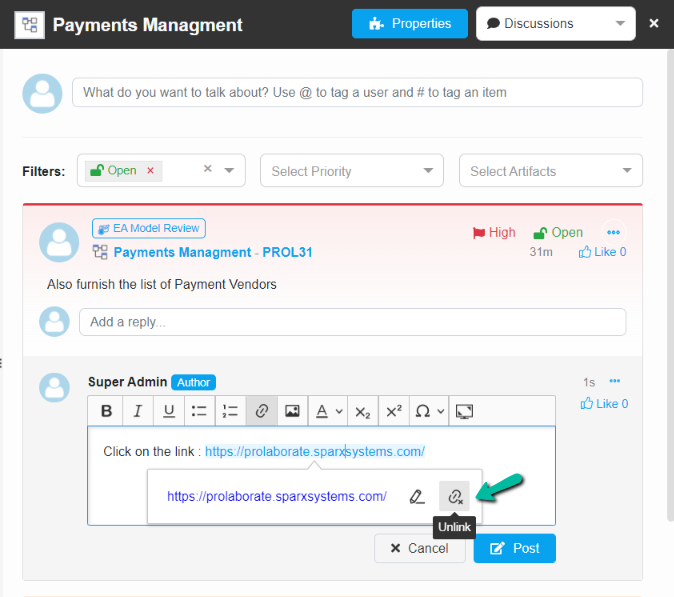
Unlink Hyperlink
To unlink hyperlink, click on the vertical ellipsis icon and click on Edit. Now place the cursor on the link to reveal the Unlink icon. Click the Unlink icon to remove the hyperlink.
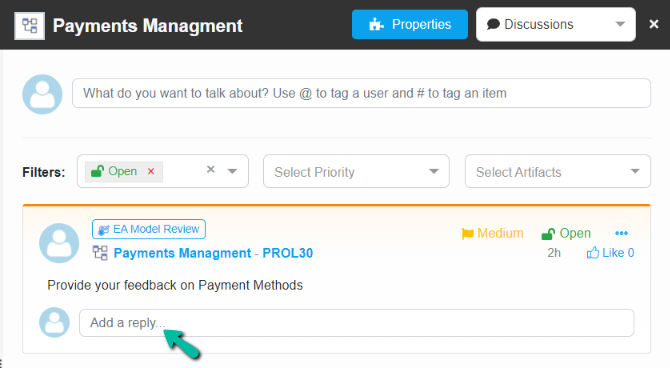
Reply to a Discussion
The stakeholders can give their feedback or comment by replying to a discussion that the user had created. To reply to the discussion, click on the Add a reply text box and enter text as required.
Edit Discussion
To edit a discussion, first select it, then click the vertical ellipsis icon, and then click Edit.
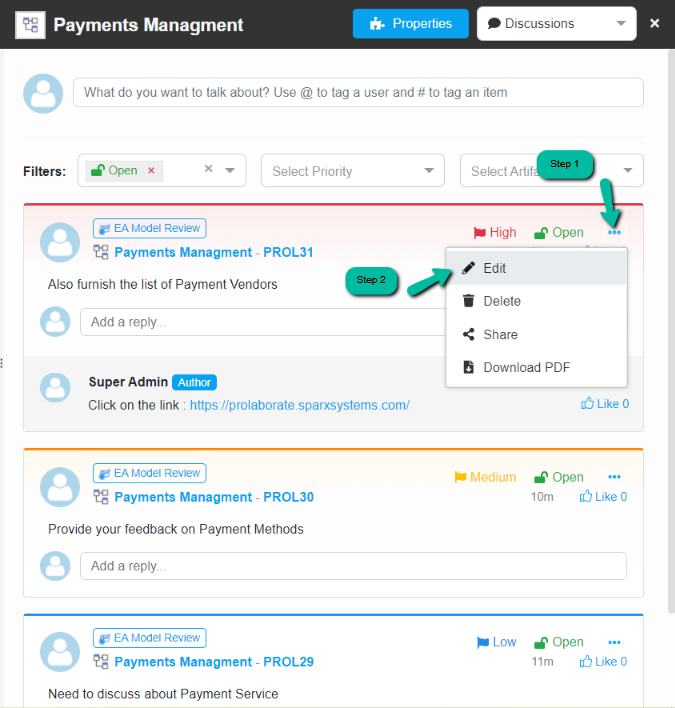
Delete a Discussion or Reply
To delete a discussion, click on the vertical ellipsis icon and click on Delete.
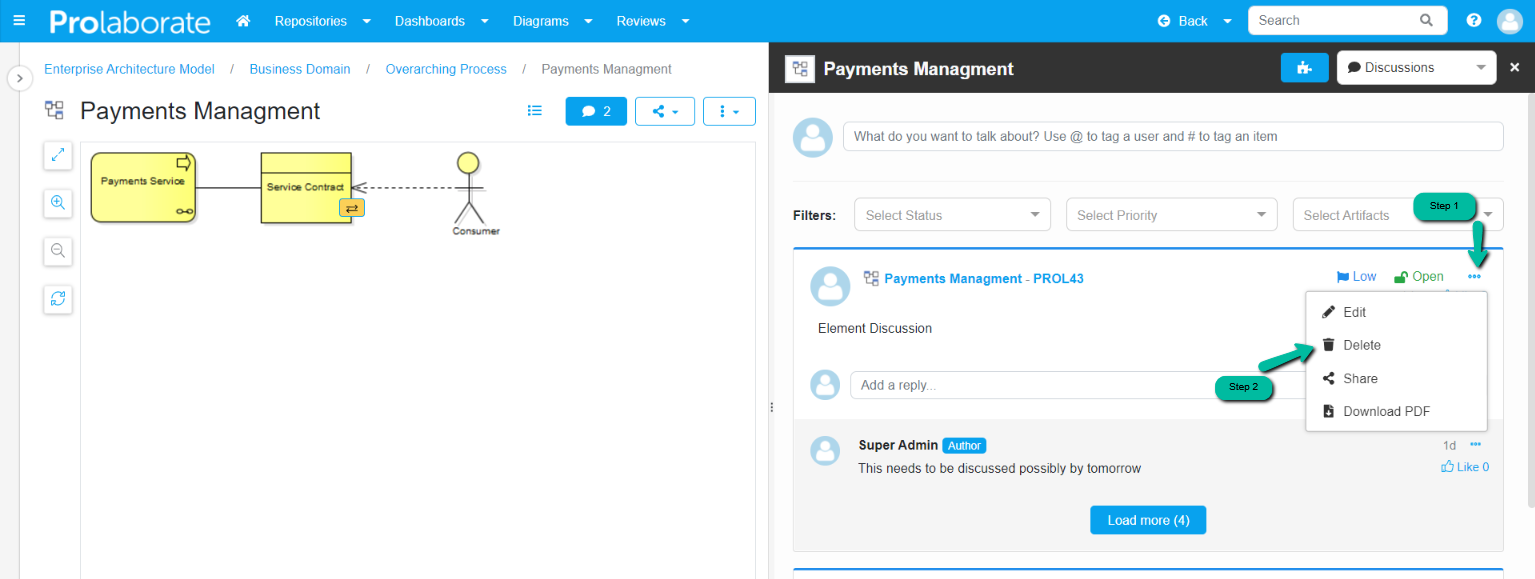
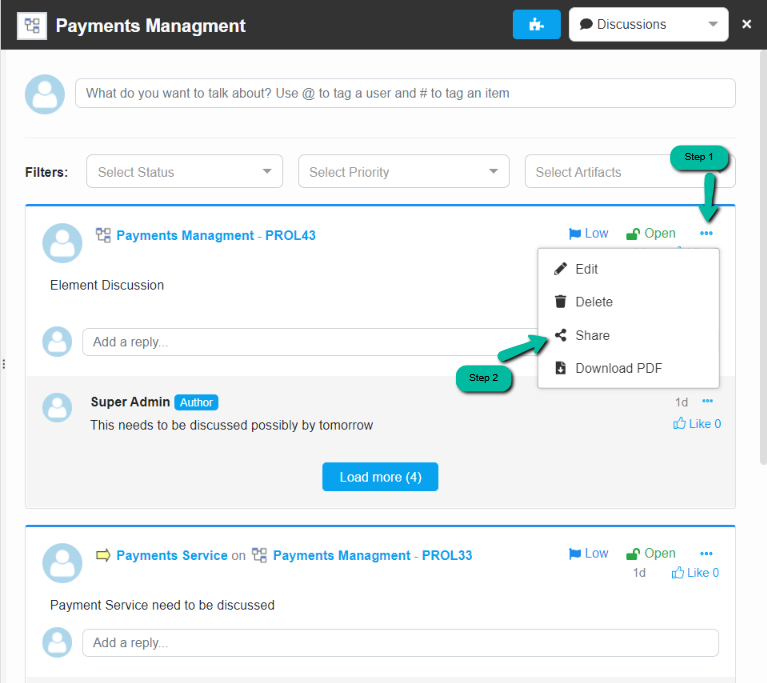
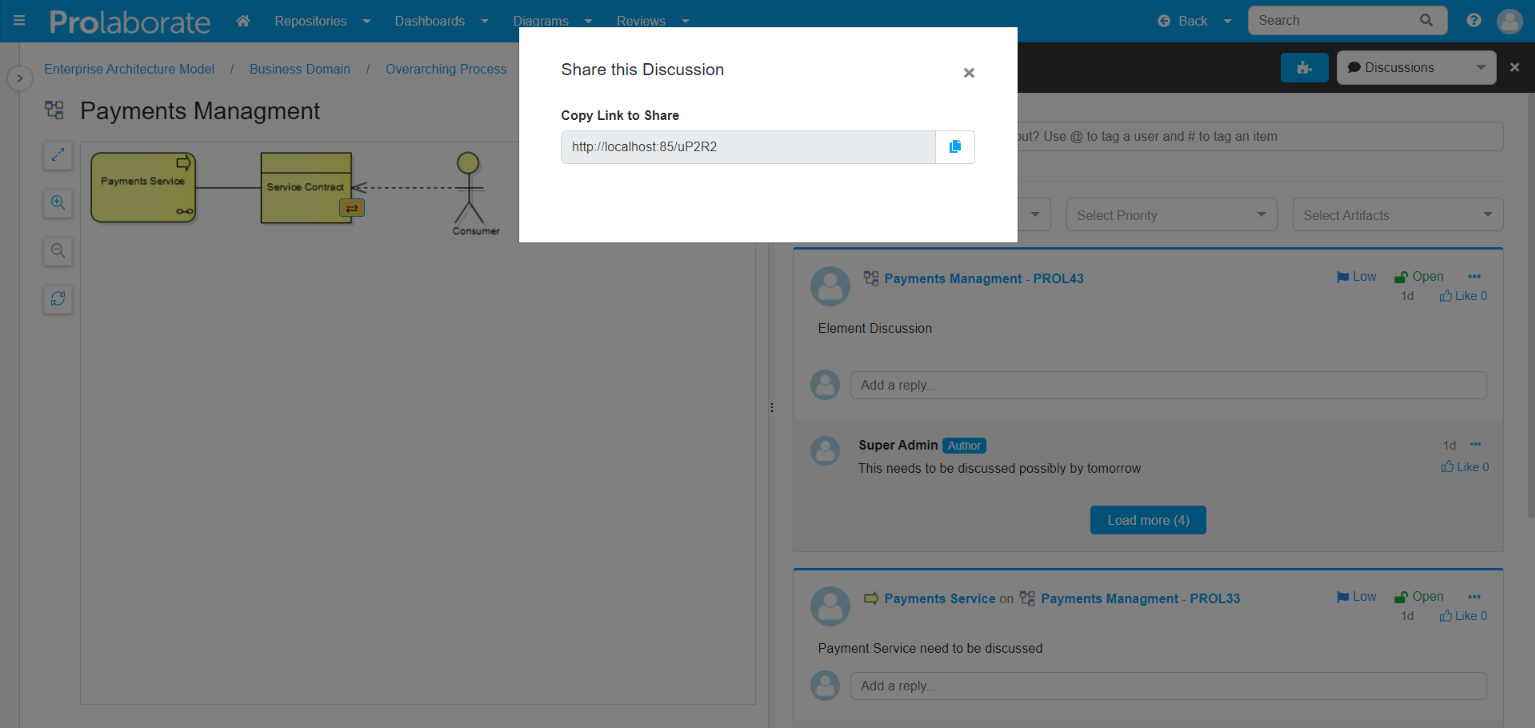
Share Discussion
Users who want to share a discussion can do so by copying the URL of the discussion. The shared discussions can only be viewed if the user has the login credentials, and the user must have collaborate access permission to further collaborate on the discussion (i.e., reply to the discussion). To share a discussion, click on the vertical ellipsis icon and click on Share.
Note:
- If Open Community Access (OCA) is enabled, all the discussions collaborated on the artifact will be displayed upon clicking the shared URL, as OCA provides read-only access to the entire repository in Prolaborate. Click here to know more.
Get a short URL to share with your peers as shown in the image below.
Discussion Count Indicators
This feature allows you to quickly determine which artifacts are being discussed and takes you those discussions with a single click. The option is disabled by default. Enable Discussion Overlays option in the Repository Settings page to show discussion count indicators. Once enabled, the discussion count will be shown next to the Discuss icon in the repository browser, diagram and also on the Discuss button. button.
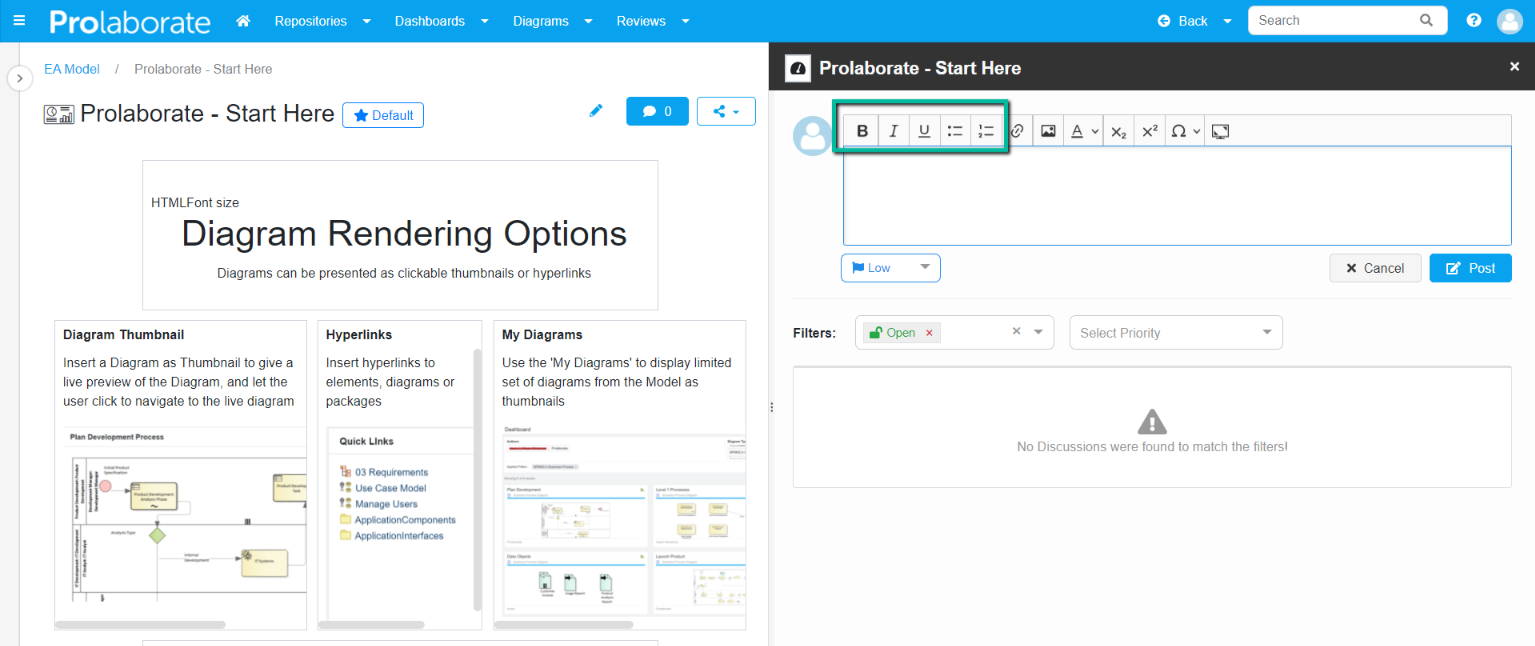
Filter Discussions
Filter discussion based on status, priority, and artifacts. The artifacts based filter is available when discussing on diagrams.
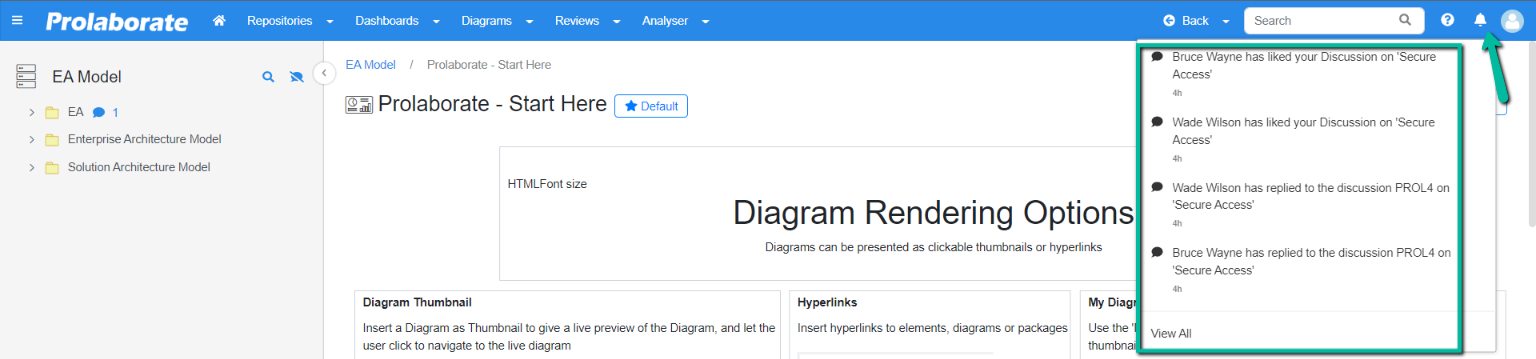
In-app and Email Notifications
Always be informed about the ongoing disucssions through in-app and email notifications. Just read the notifications and act quickly if required.
If Mailer Configuration is enabled, users will receive notifications via email with the link. Just click the click to open the discussion shared in it.
Incase if you are overwhelmed by too many notifications, Prolaborate allows you to control what type of notifications you want to receive through Notification Settings.
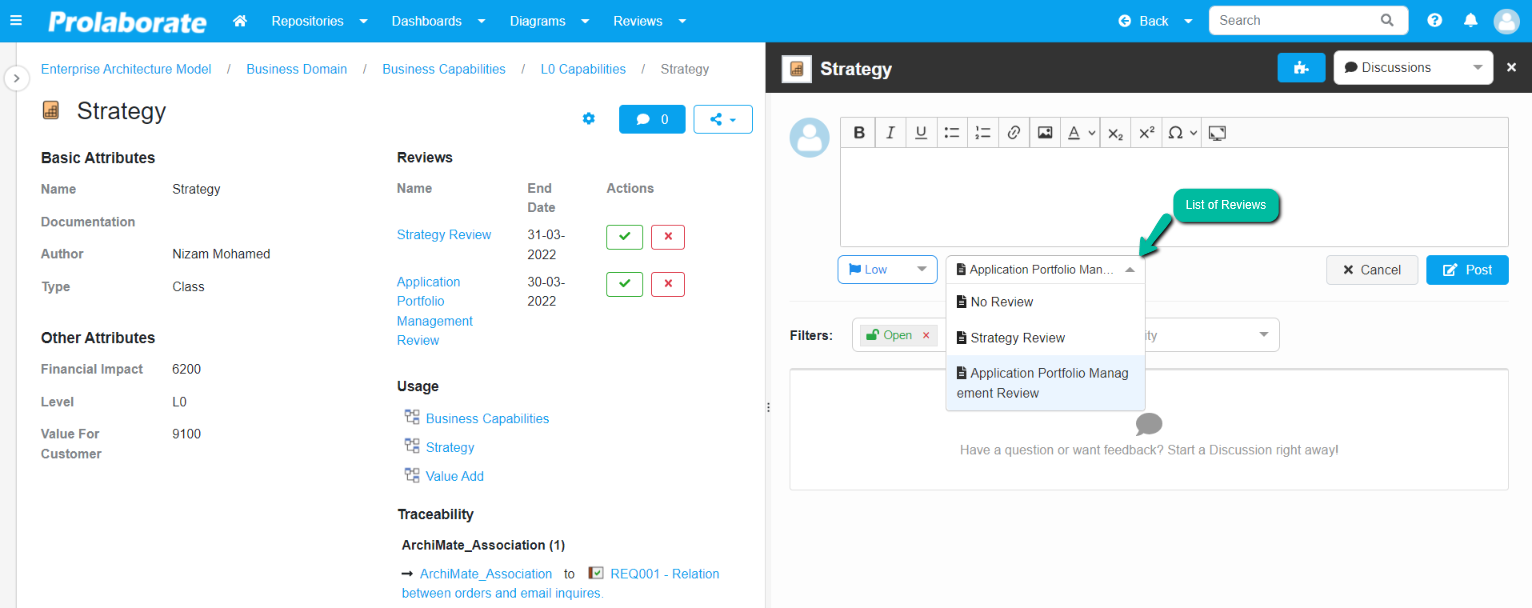
Notify Users on the Discussion Panel
When starting a discussion, the discussion panel will list all of the reviews for which the artifact has been marked for review.
While initiating a discussion, select the review from the list that needs to be notified to the user, or select “No review” if the review does not need to be notified to the user.
Export a Discussion as a PDF
Discussion threads can be exported as a PDF document in Prolaborate. To export a discussion, click the vertical ellipsis icon and select Download PDF.

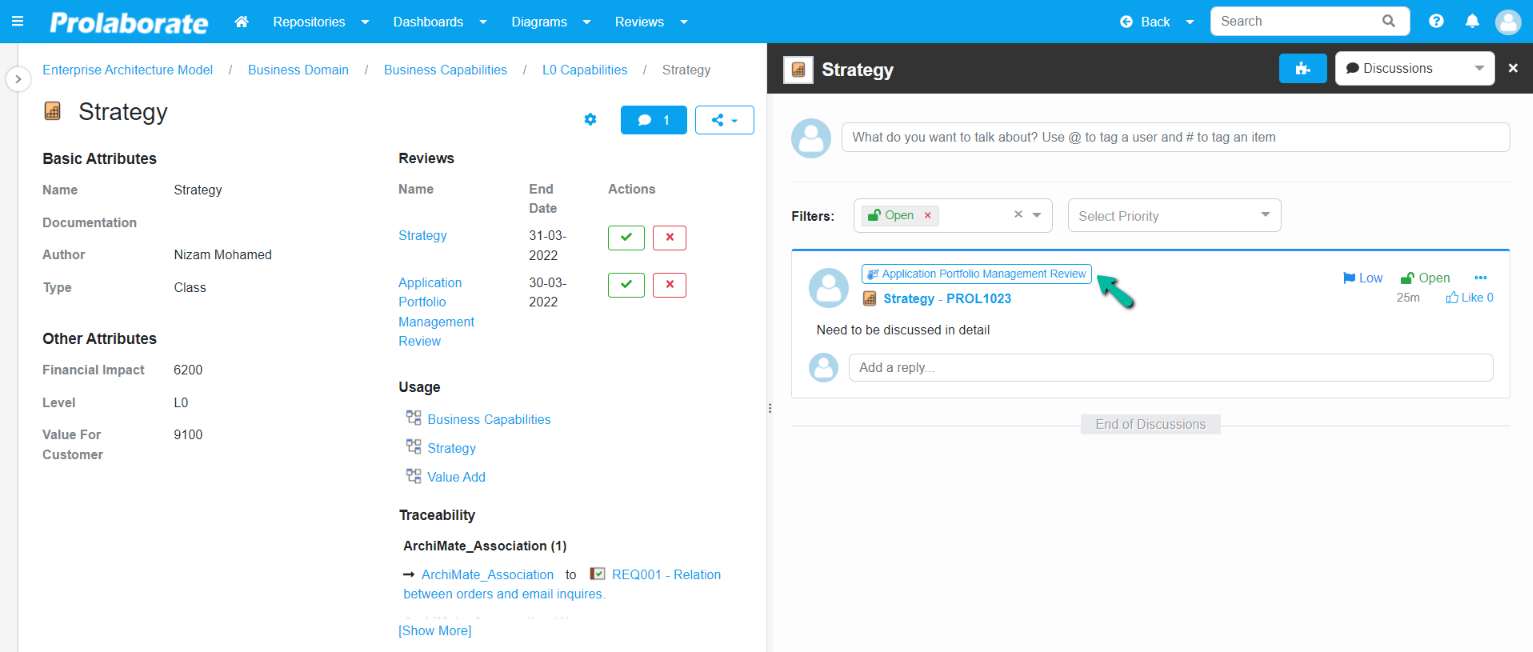
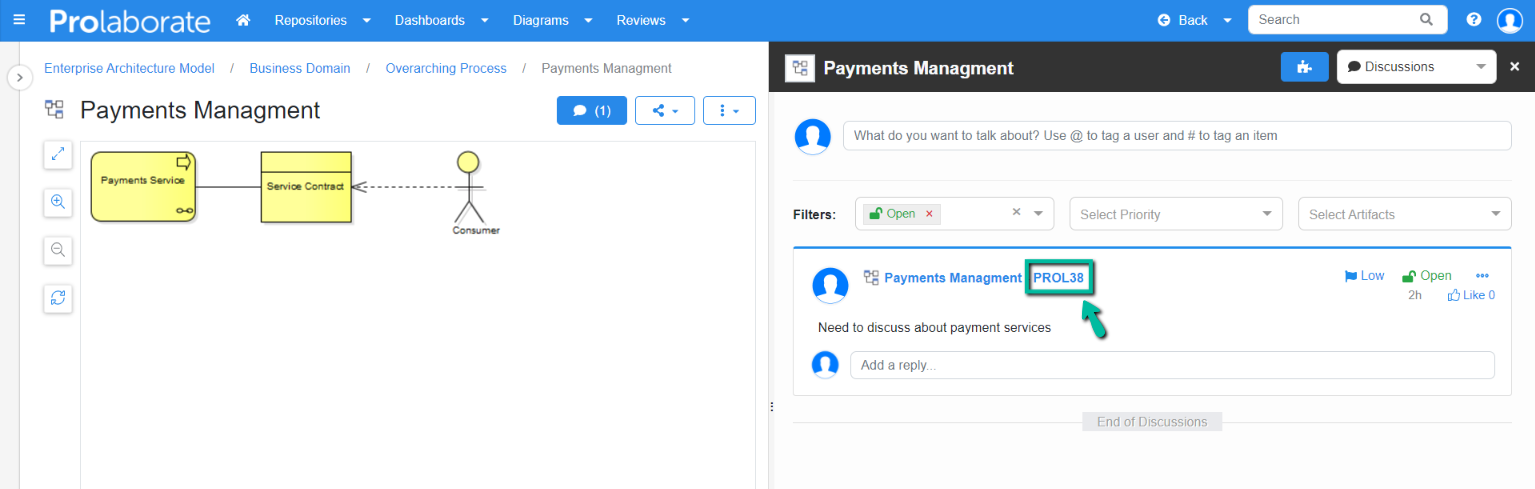
Change Discussion Identifier
By default, PROL is the prefix of a discussion’s unique identifier, but it can be changed as required.
To change the prefix, click the Menu > Repository Settings > Discussion Identifier Prefix and change the prefix as required.
