Pro Cloud Server Jira Integration
Pro Cloud Server Jira Integration
The Jira integration capability of Pro Cloud Server enables you to integrate your EA models with their corresponding Jira projects.
You can
- Link EA elements with their counterparts in Jira
- Create EA elements based on Jira items and vice-versa
- Sync changes between EA and Jira, as and when needed
- Do a traceability analysis
- Add comments to Jira items from EA
Here are some use-cases:
| Background | Problem | Solution |
|---|---|---|
| We use EA for managing requirements and Jira for managing the changes | It is hard to trace the project tasks in Jira back to EA requirements, changes, and issues | Create EA elements based on Jira items and link them to requirements, changes, and issues in EA. Now, it will be easy to trace the changes and their impact. |
| We use EA for managing the requirements and a tool that can integrate with Jira for creating test cases | There is no efficient way to bring information from EA to Jira to let test teams create scripts based on the requirements | Create Jira stories based on requirements in EA easily. Test teams can view the information in their test tool. Push changes from EA when they are done and add a comment in Jira using EA. Test teams will know the new changes and update the test cases accordingly. |
Setup Integration
Configure Jira
Follow these steps:
- Open Pro Cloud Config Client
- Click on Integration > Add
- Configure the details as shown below
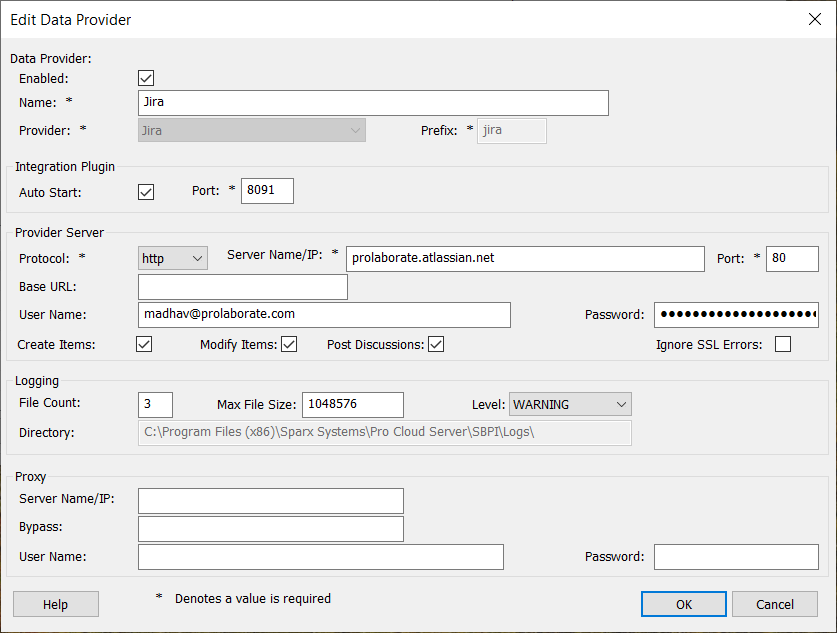


- Enable Enabled
- Give a Name (For example, Jira)
- Enter a Port that is accessible
- Enter Jira website’s details and credentials (Protocol, Server Name, Port, User Name, and Password)
- Enable the capabilities as per your requirements. For example, if Create Items is enabled, EA users will be able to create Jira items using Enterprise Architect.
- Click on OK
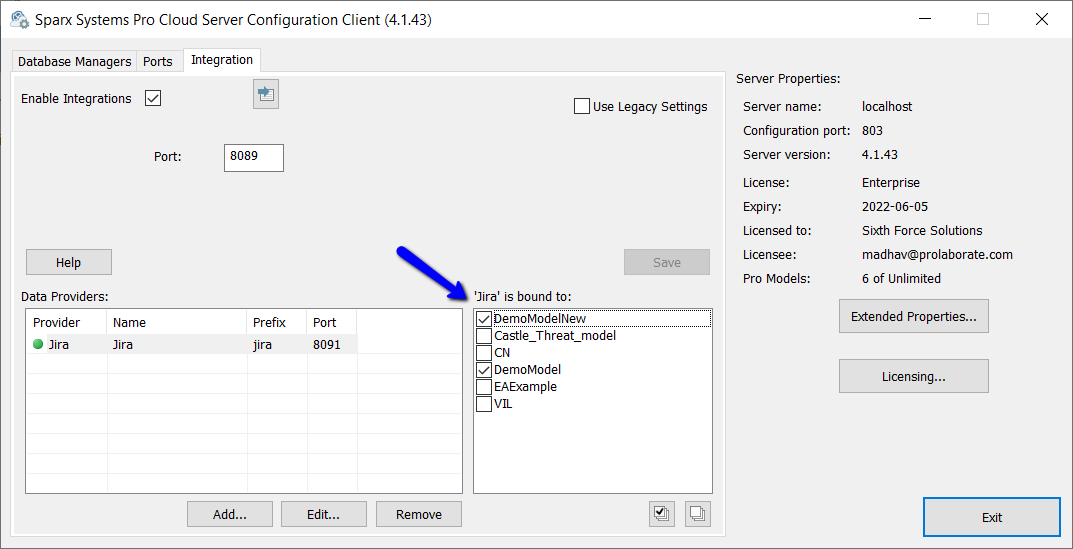
Enable Access
Choose the EA models that needs to integrate with Jira.
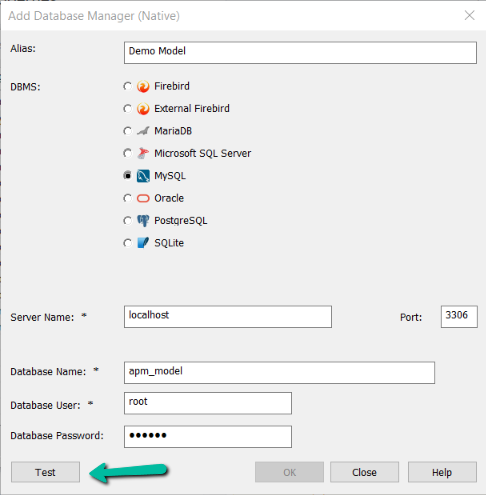
Test Connection
To ensure the setup is done correctly, open Enterprise Architect and connect to any one of the models that has access to Jira.
Click on Specialize > System Integration > Open External Data. Click on Chevron icon
Select Jira > Jira > Chevron icon.
If the connection was successful, you will see the list of projects from Jira.
If no, EA will not be able to connect with Jira and you will not see any details. To troubleshoot, you can refer to the PCS integration logs (Typically located at C:\Program Files (x86)\Sparx Systems\Pro Cloud Server\SBPI\Logs).

Link EA Elements and Jira Items
Prerequisite:
You can view only those Jira items that are part of filters. So, create appropriate filters in Jira. For example, if you want to link EA Requirements to Jira User Stories, create a filter that will show the relevant User Stories.
Click on Specialize > System Integration > Open External Data > Jira > Jira.
Select a Project and open an appropriate filter.
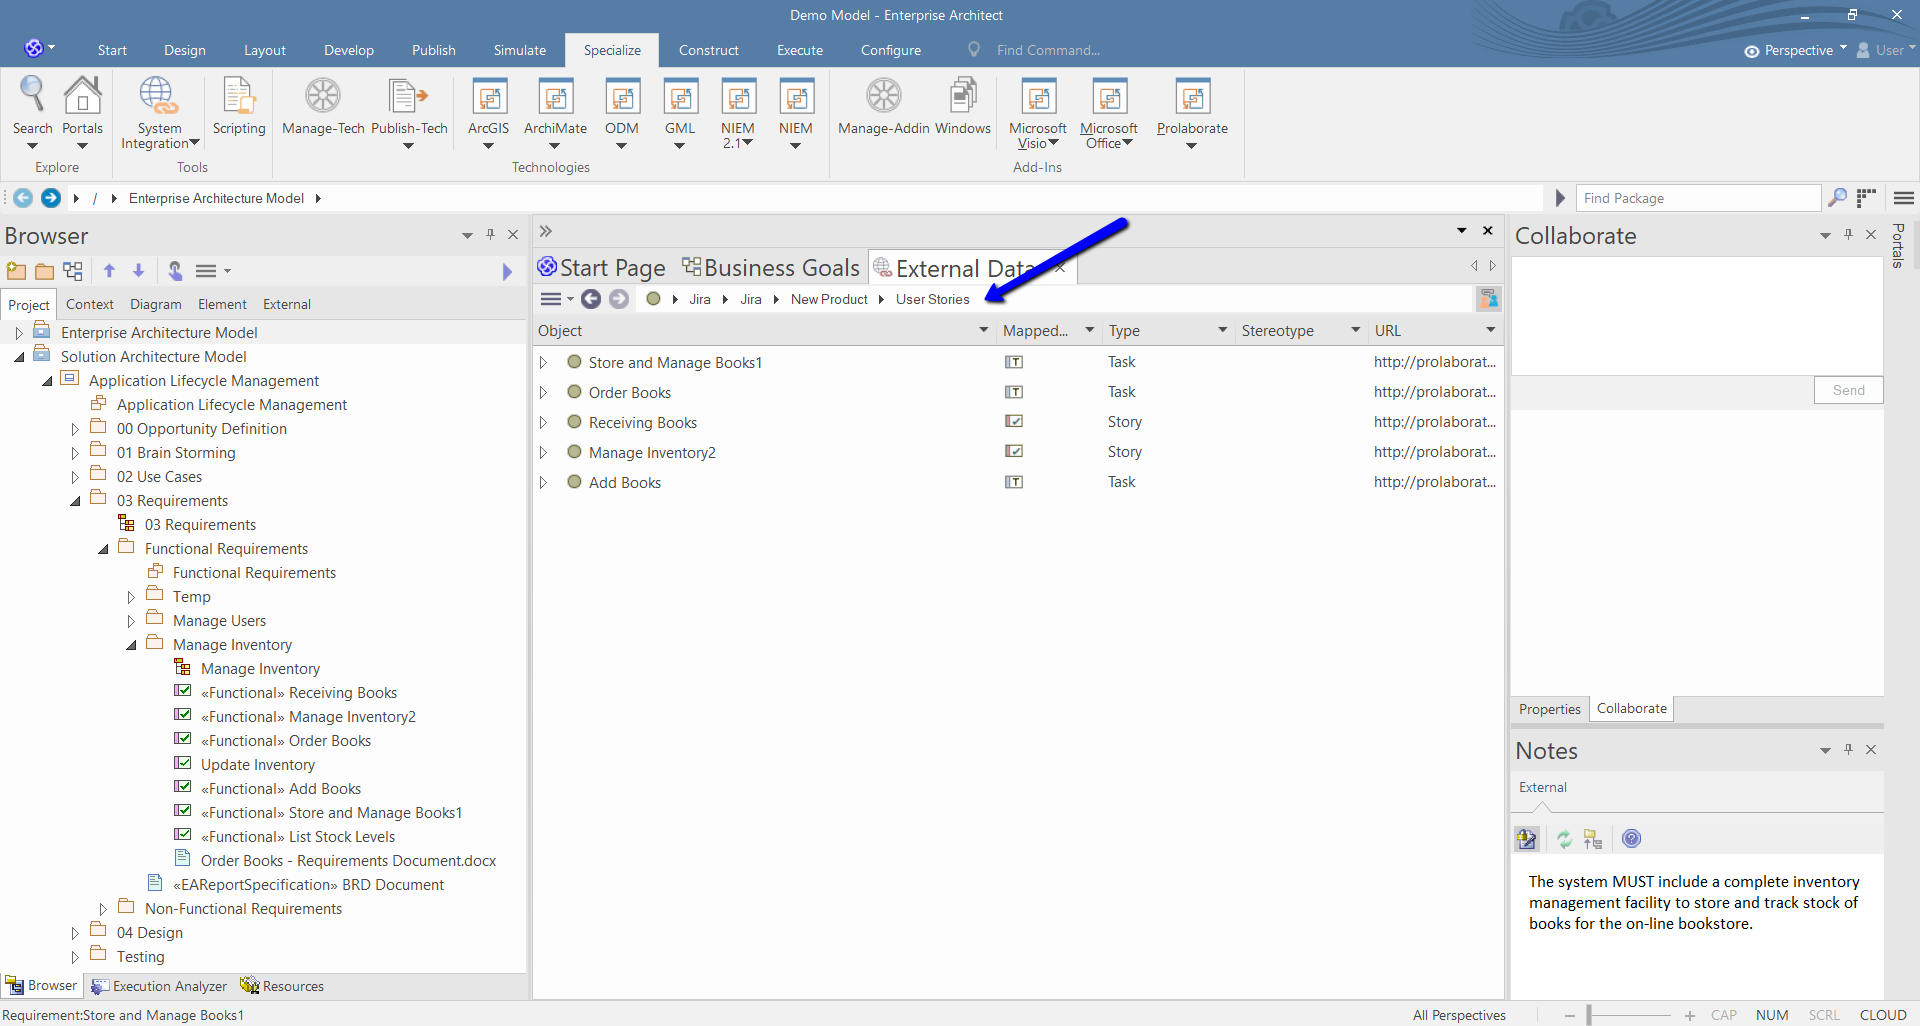
All the Jira items that are part of the chosen filter will show up in EA.
To link an EA element to a Jira item, just drag and drop it. Let’s drag and drop List Stock Levels functional requirement on to its counterpart in Jira.
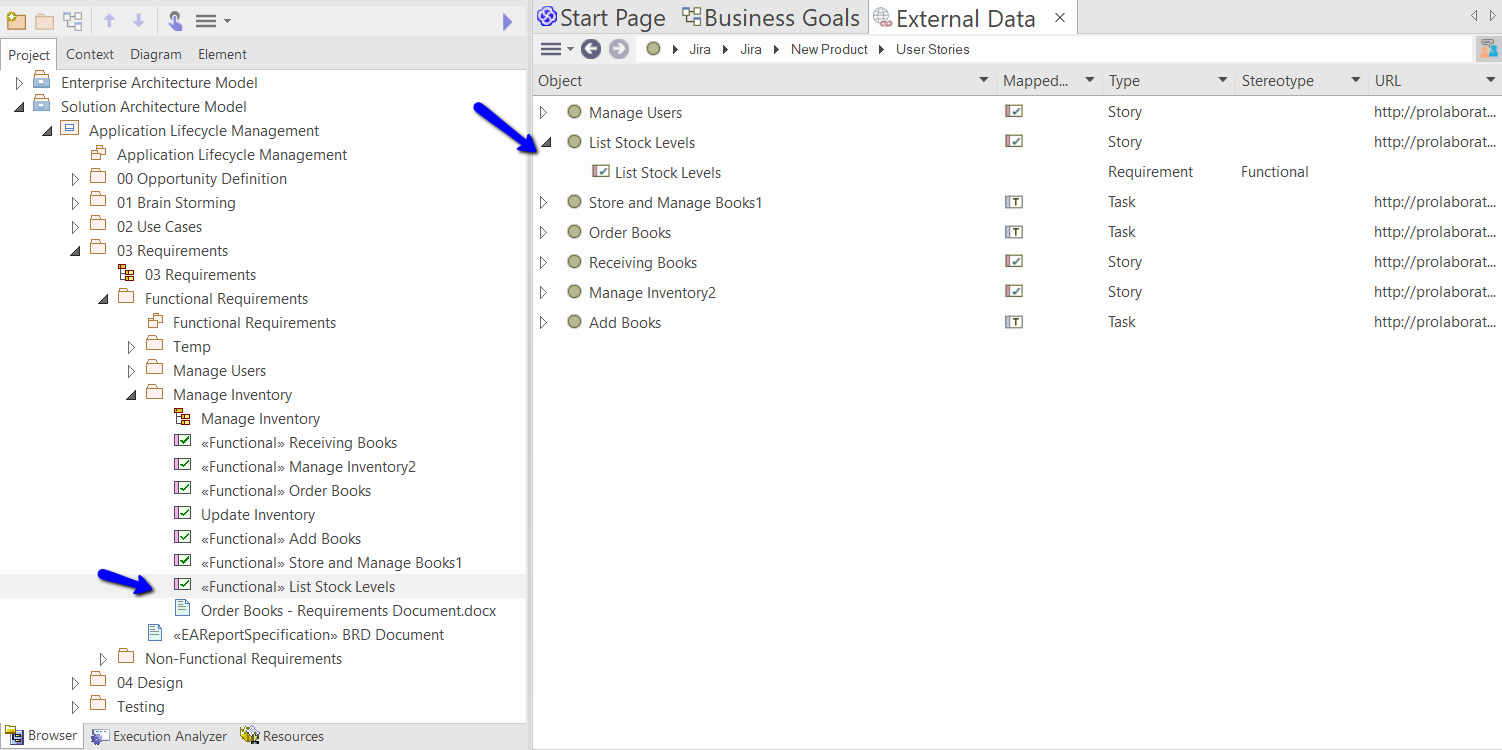
Once the two items are linked. you can do the following.
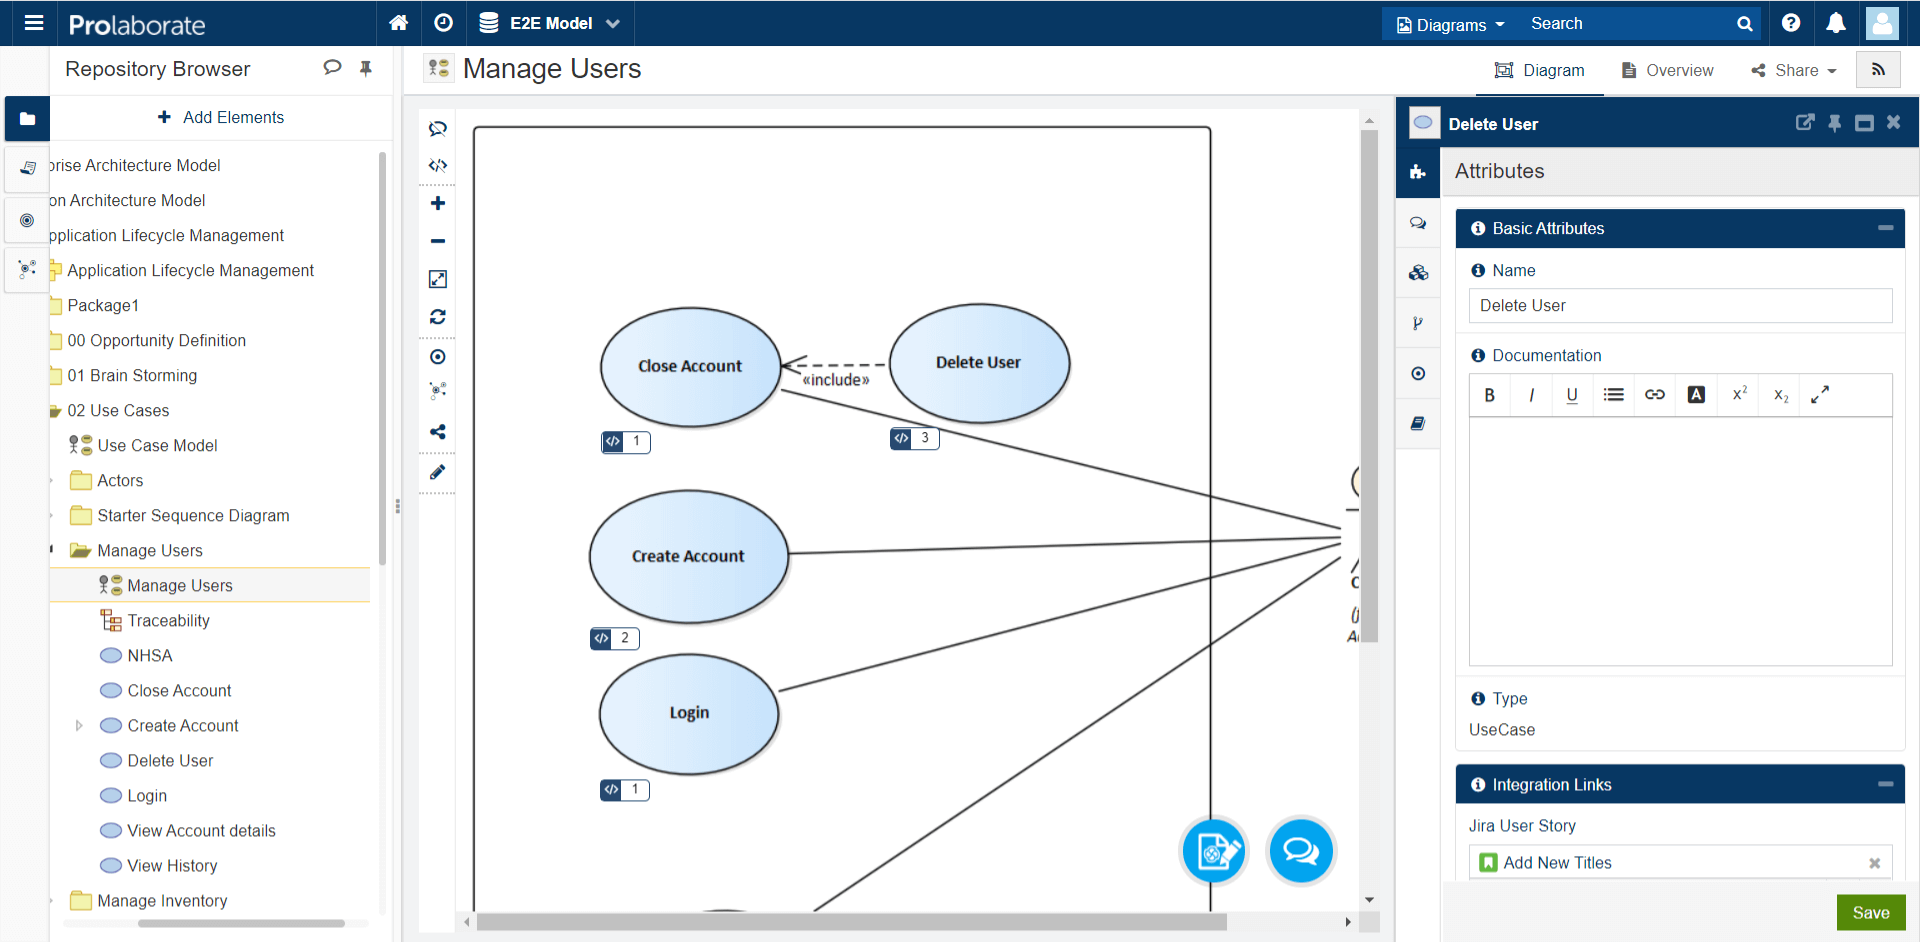
View Jira Item Properties
You can view the properties of a linked Jira item through the following ways:
- Open Properties of a linked EA element and click on External
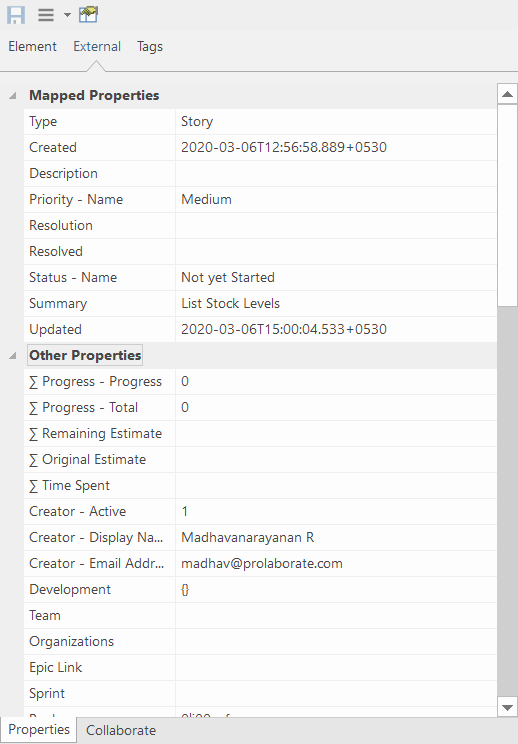
2. Click on a Jira item when Properties window is open
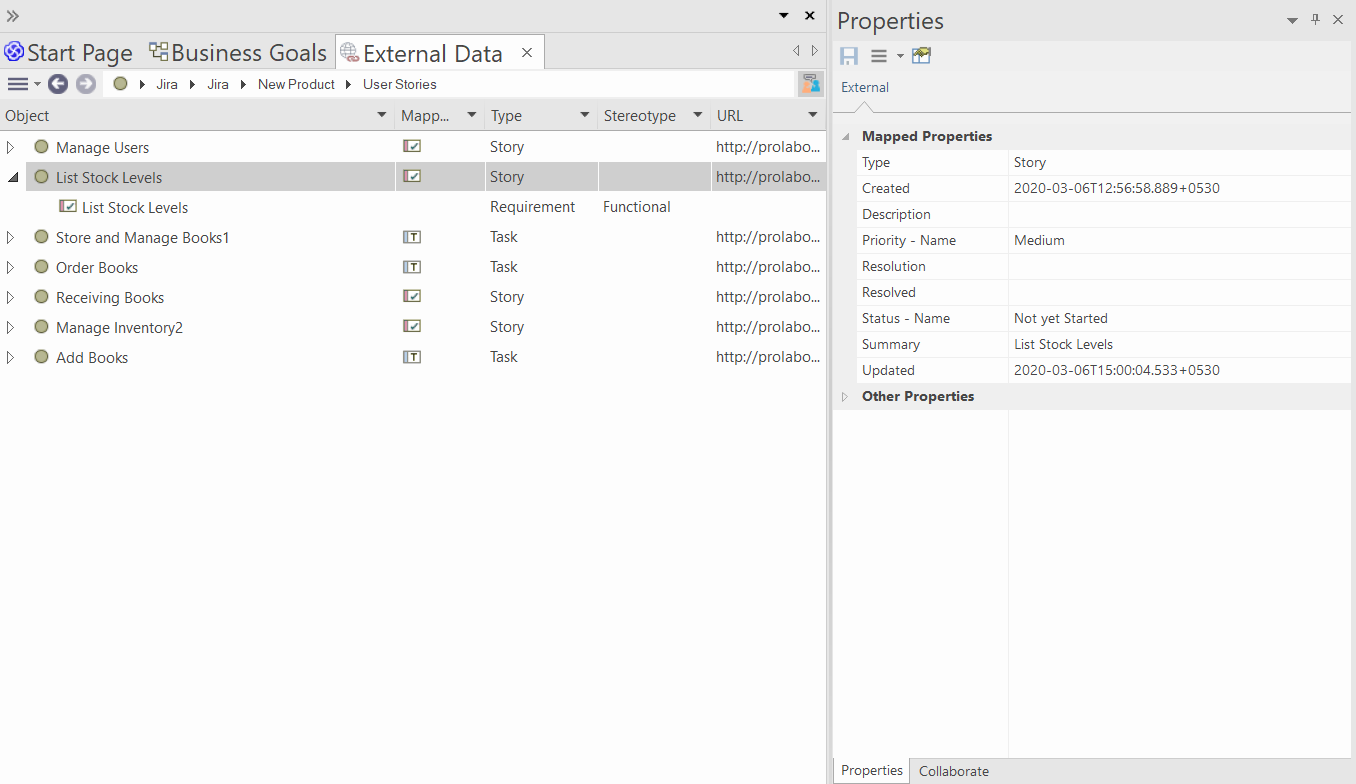
Description of the item can be seen from the Notes window.
3. To view the details of Jira item in a browser, right-click on a Jira item and click on Open in External Browser
Simplify Jira Filter View
If there are too many items in your Jira filter and you want to simplify the view, you can do the following:
- Click on Hamburger icon. Click on Linked Items to just see the list of Jira items that are linked to an EA element. Click on Unlinked Items to see the rest of the items.
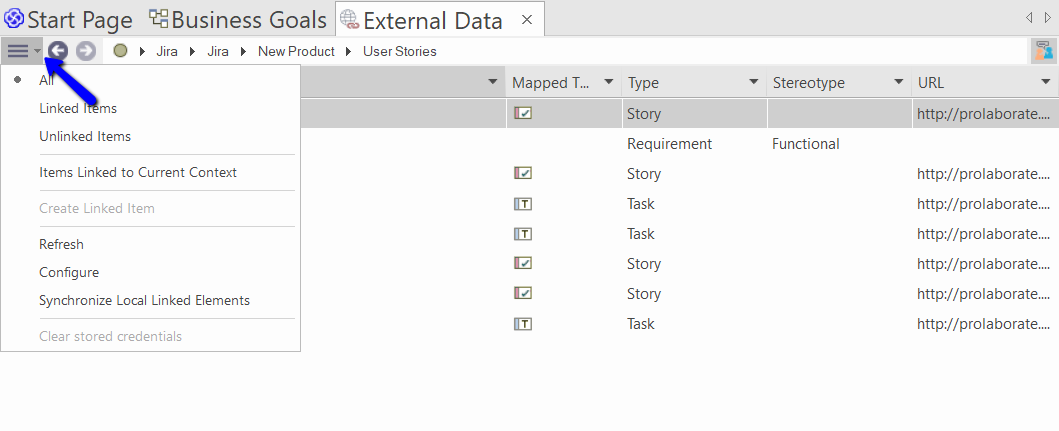
2. You can also click on Items Linked to Current Context to show the Jira items that are connected to the element chosen in the Project Browser.
Create and Link Items and Elements
Prerequisites
Ensure Types and Fields are mapped as per your requirements.
Type Mapping
This mapping will be used when you want to
- Create an item in Jira for an element in EA
- Create an EA element for a Jira item
Click on Hamburger icon > Configure. Select an External Type and map its counterpart using Toolset, Type, and Stereotype.
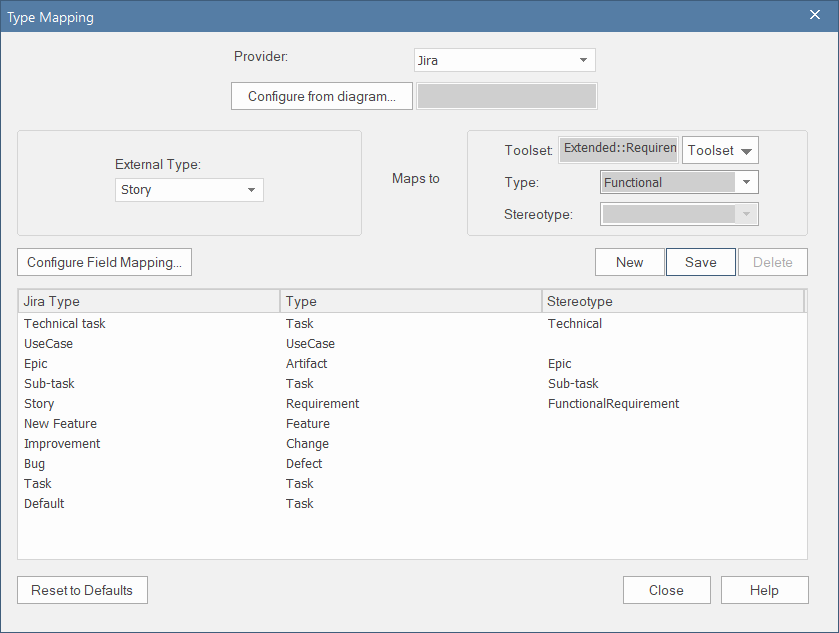
For example, in the screenshot above, we are mapping Jira Stories to Functional Requirements in EA.
Field Mapping
The next step is to map fields between the types. So, click on Configure Field Mapping in the Type Mapping window.
You can map fields from Jira to Properties or Tagged Values in EA.

Learn more about Type and Field Mapping here
Create Jira Items
To create a Jira item (Say a Story, Task, Bug, etc.), just select an element from the project Browser and then click on Hamburger icon > Create Linked Item.
An item will be created in Jira as per the Type and Field Mapping done above.
If there was an issue with the creation, you will see the error in System Output. If you don’t see anything in System Output, the creation is successful.
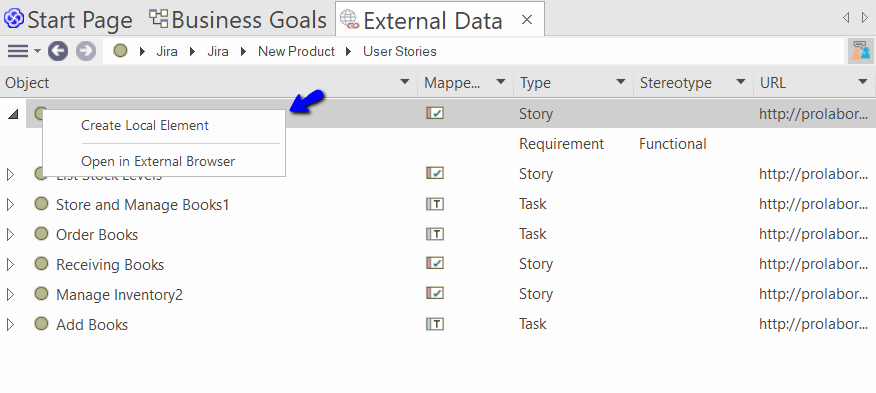
Create EA Elements based on Jira Items
From the filtered view, if you want to create an EA element based on a Jira item, right-click on the Jira item > Create Local Element.
If you want to add to a diagram when the element is created, open the diagram and then click on Create Local Element.
The following window will show up. Choose the Type and Package, select a diagram to add the element to, and enable Info View if needed.
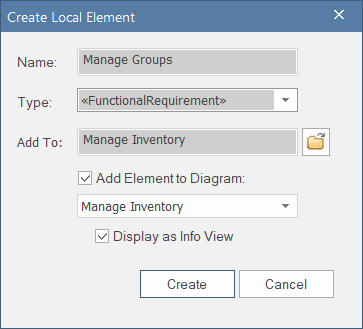
This is the result of the above settings.
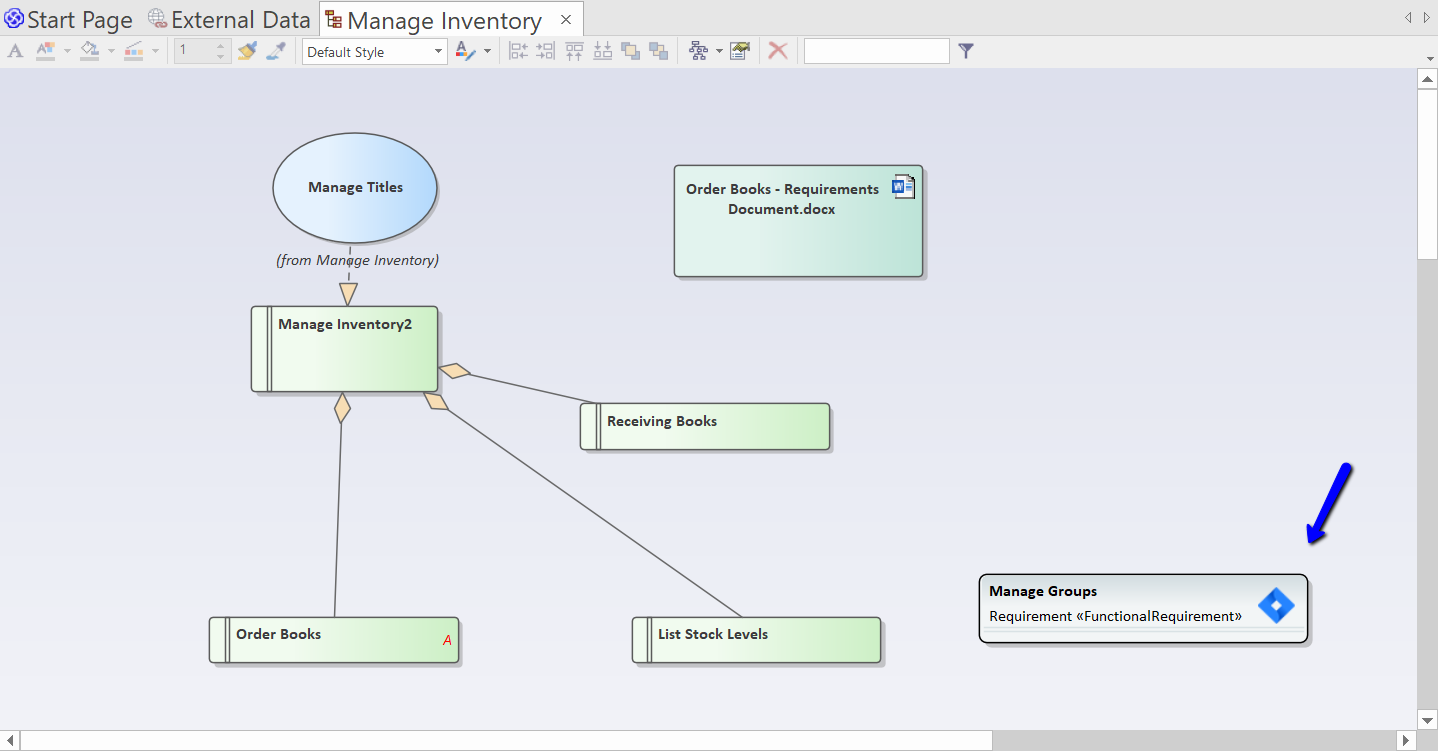
An element will be created in EA as per the Type and Field Mapping done above.
Sync Changes
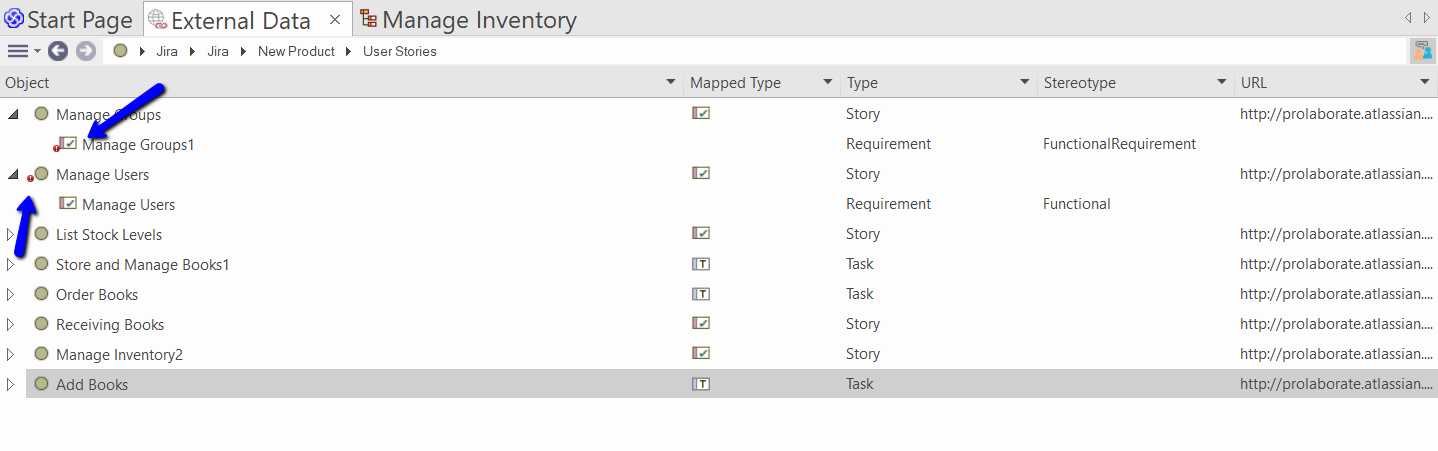
If there are any changes made after the elements and items are linked, you can see a red exclamation icon against them as shown below:
Now, you can do any one of the following:
- Push changes from EA to Jira
- Pull changes from Jira to EA
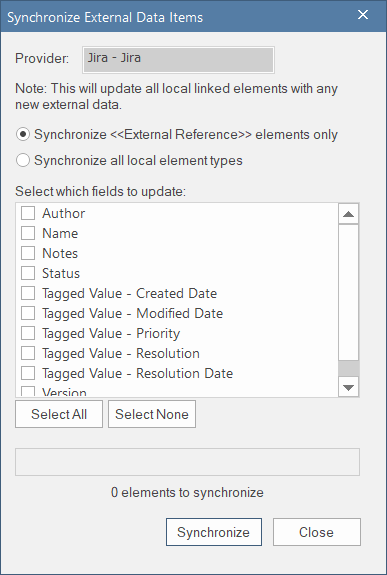
If you want to pull multiple changes from Jira to EA, click on Hamburger icon > Synchronize Local Linked Elements. Select the type of element types, fields to update, and click on Synchronize.
Discuss in Jira from EA
After you have linked an item, pushed an update, or created a new Jira item, you can share your comments in Jira from within EA.
Open Collaborate window and click on a Jira item. If comments are added already, you can see them. You can now add your comments.
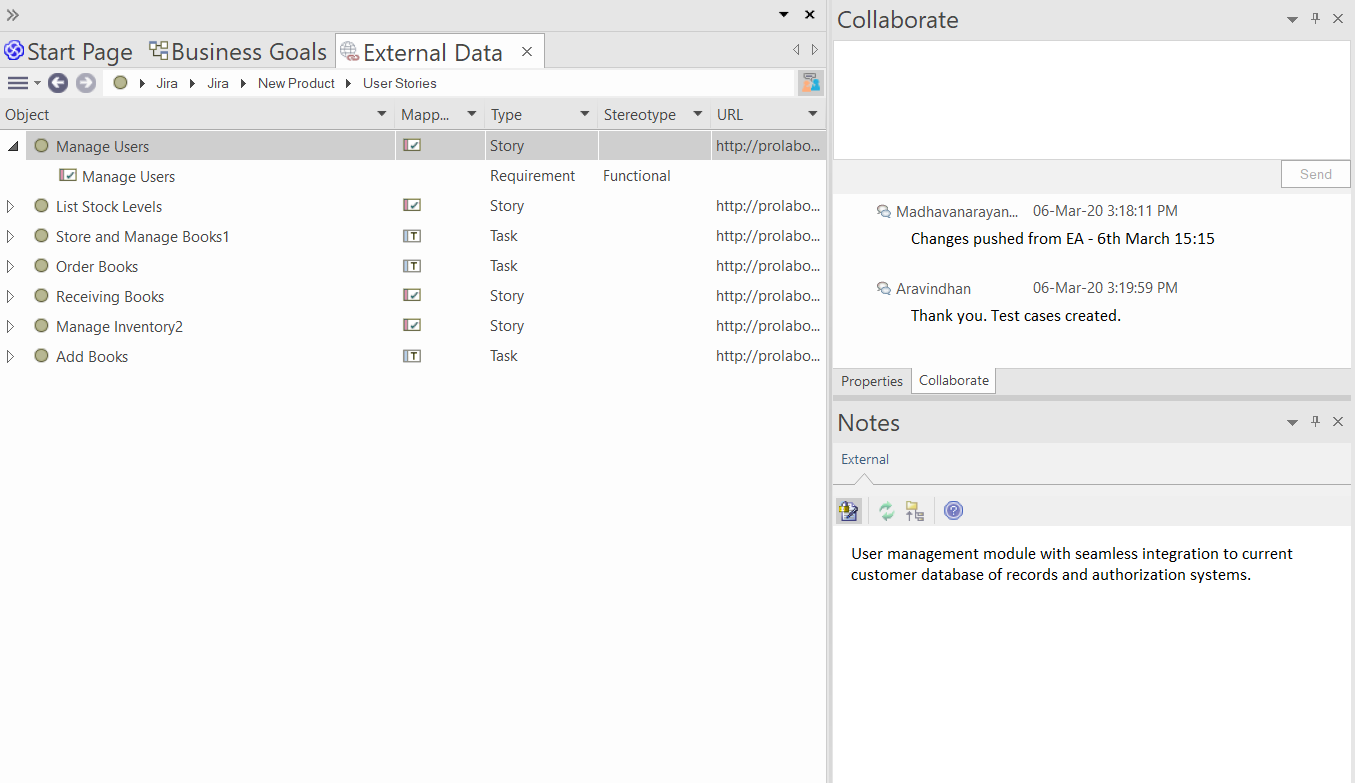
In this screenshot, you can see an user has added a comment about pushing the latest changes from EA to Jira. Then a Jira user has replied to it.
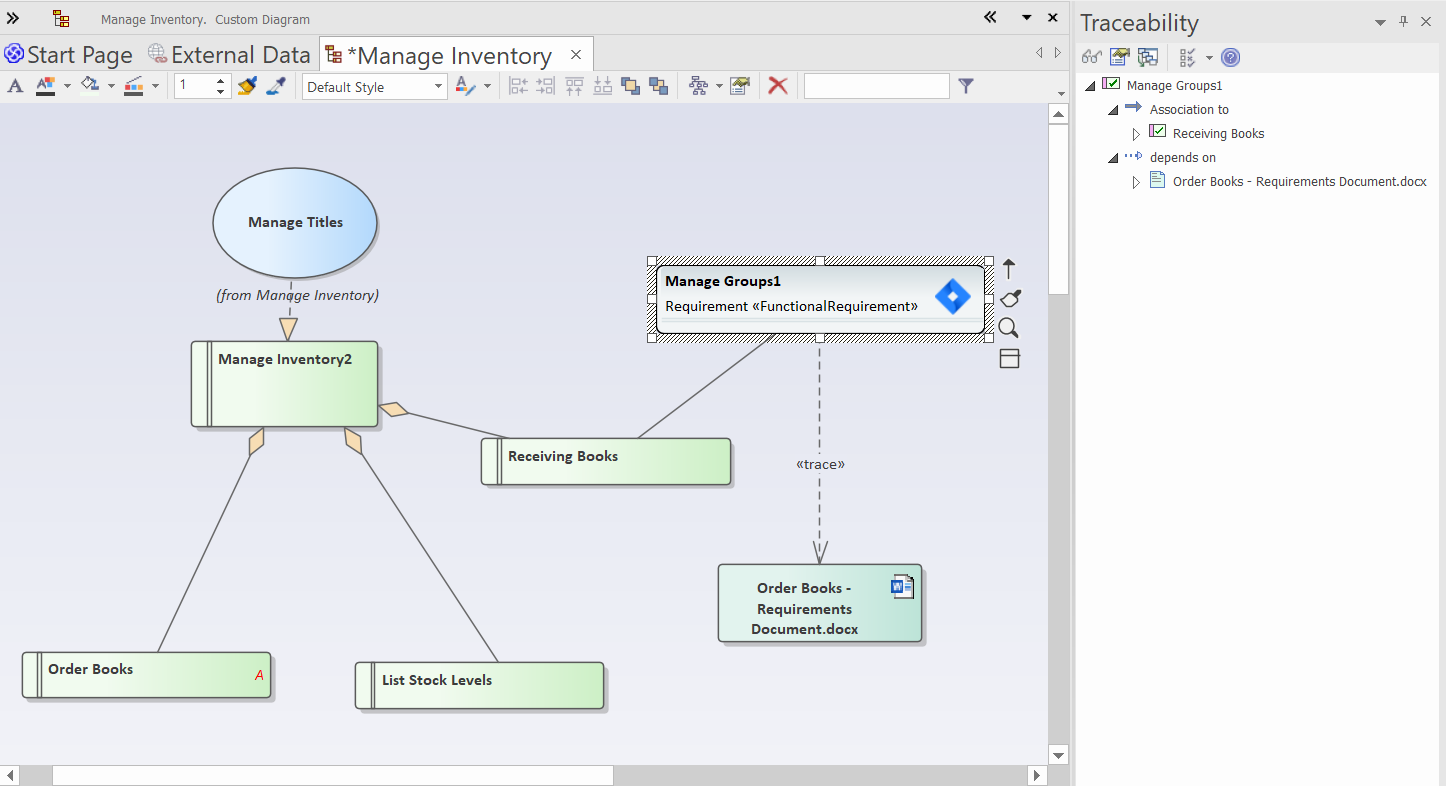
Traceability Analysis
Once you have a local element based on a Jira item, you can connect it to appropriate items in EA and easily do a traceability analysis.