Enterprise Architect Azure DevOps Integration
Prolaborate allows you to integrate Enterprise Architect and Azure DevOps.
Creating a two-way link between Enterprise Architect element and Azure DevOps items just got easier through Prolaborate.
Enable DevOps Integration
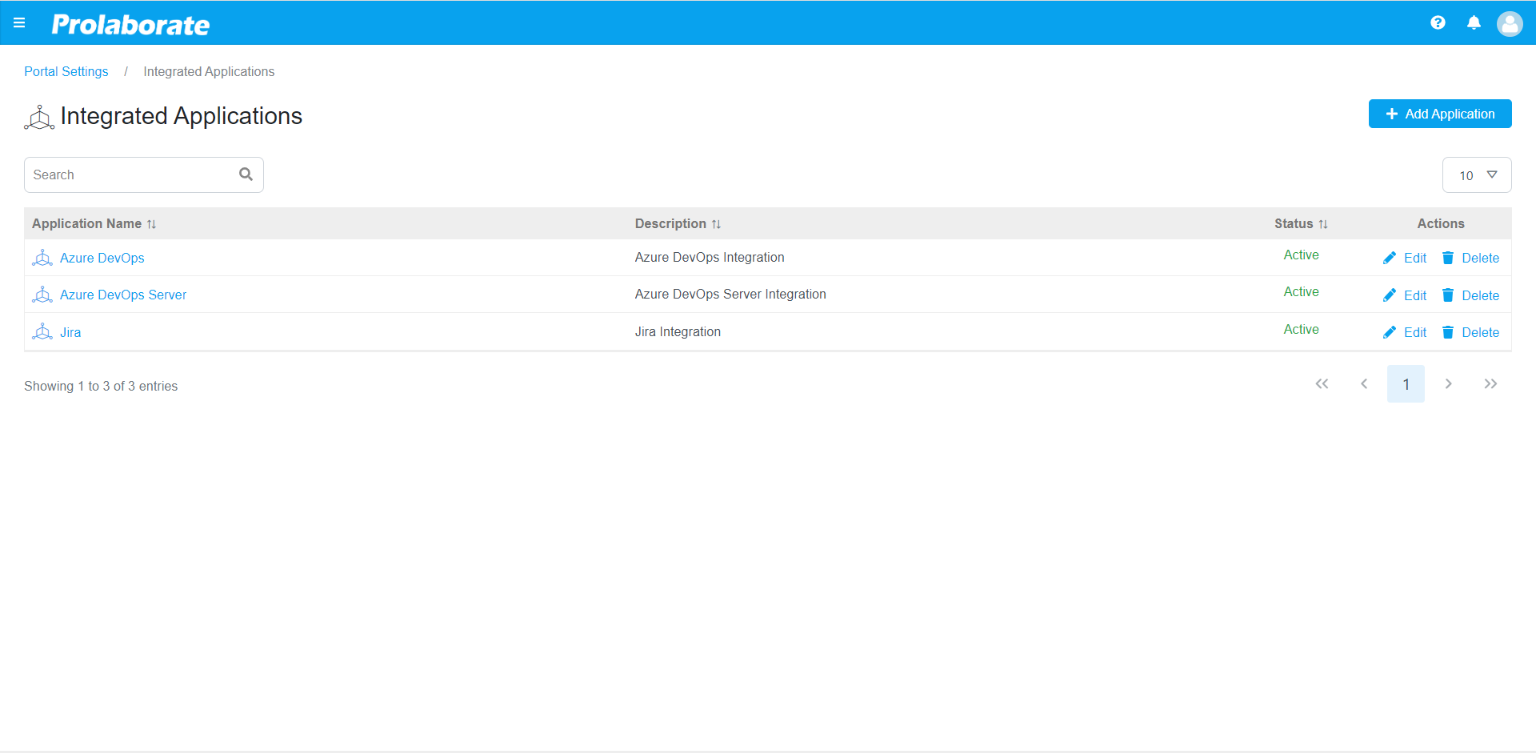
To integrate with DevOps, the integration must be Active first. Click on Menu > Integrated Application under Portal Settings. Thus, user can view the Integrated Application.
Click on Edit and toggle the Status to Active.
Note: Azure DevOps is a preloaded Integrated Application


Add DevOps Account
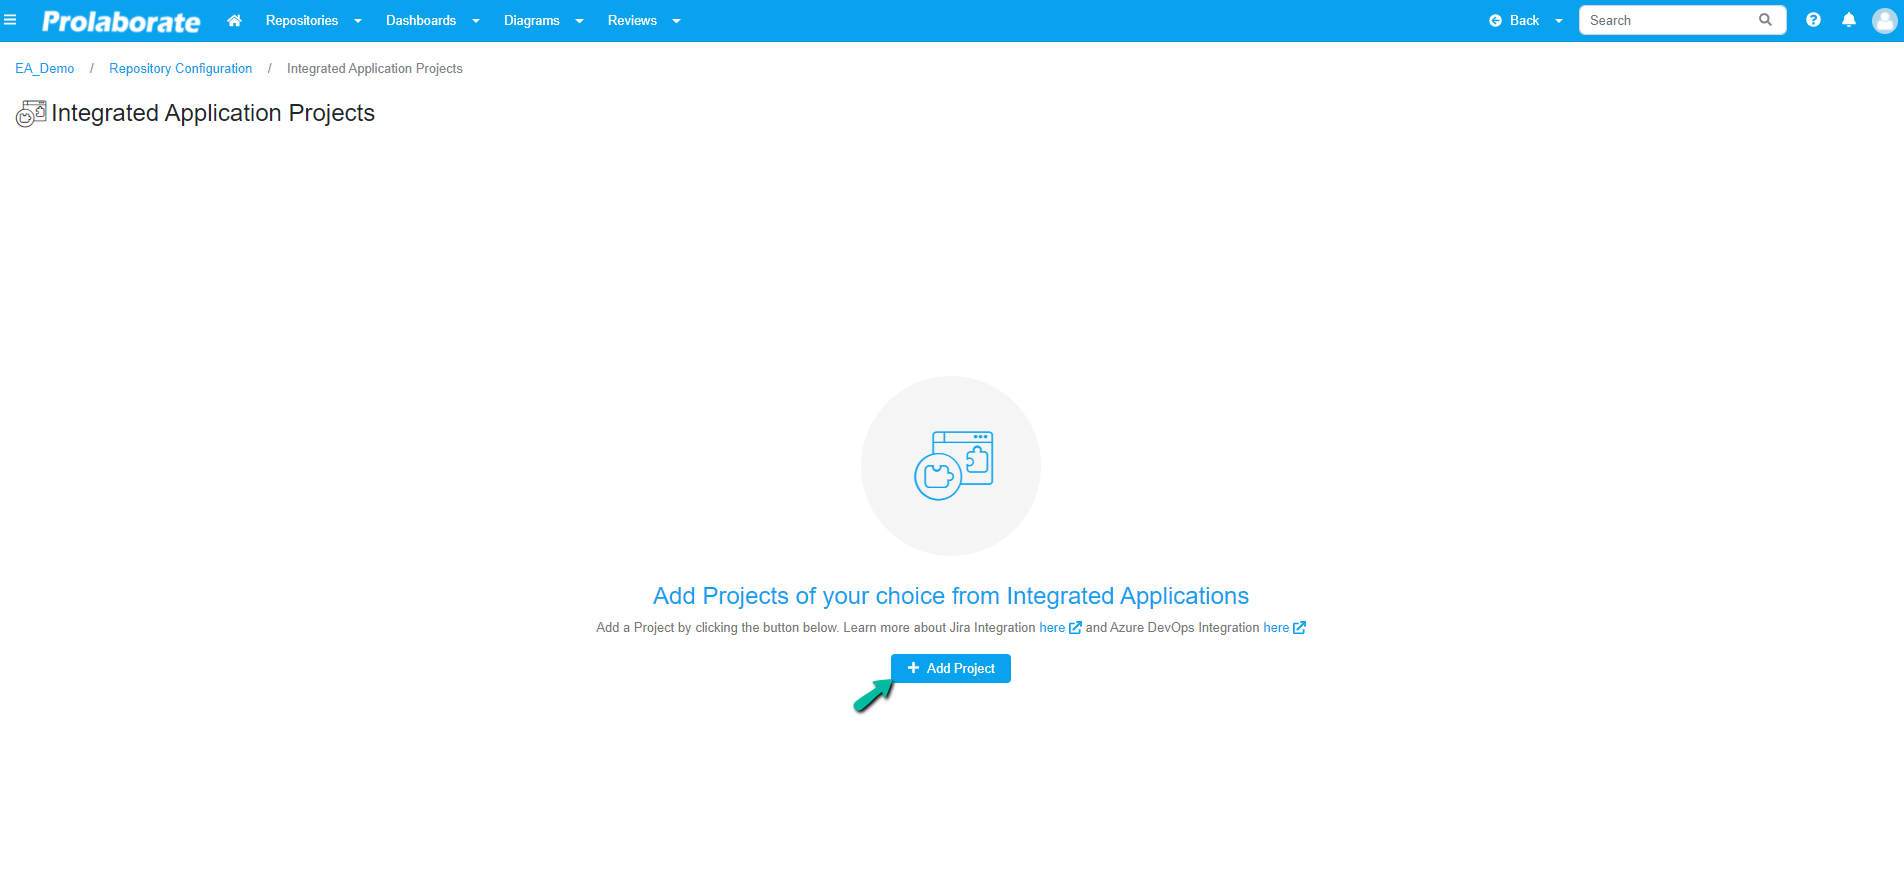
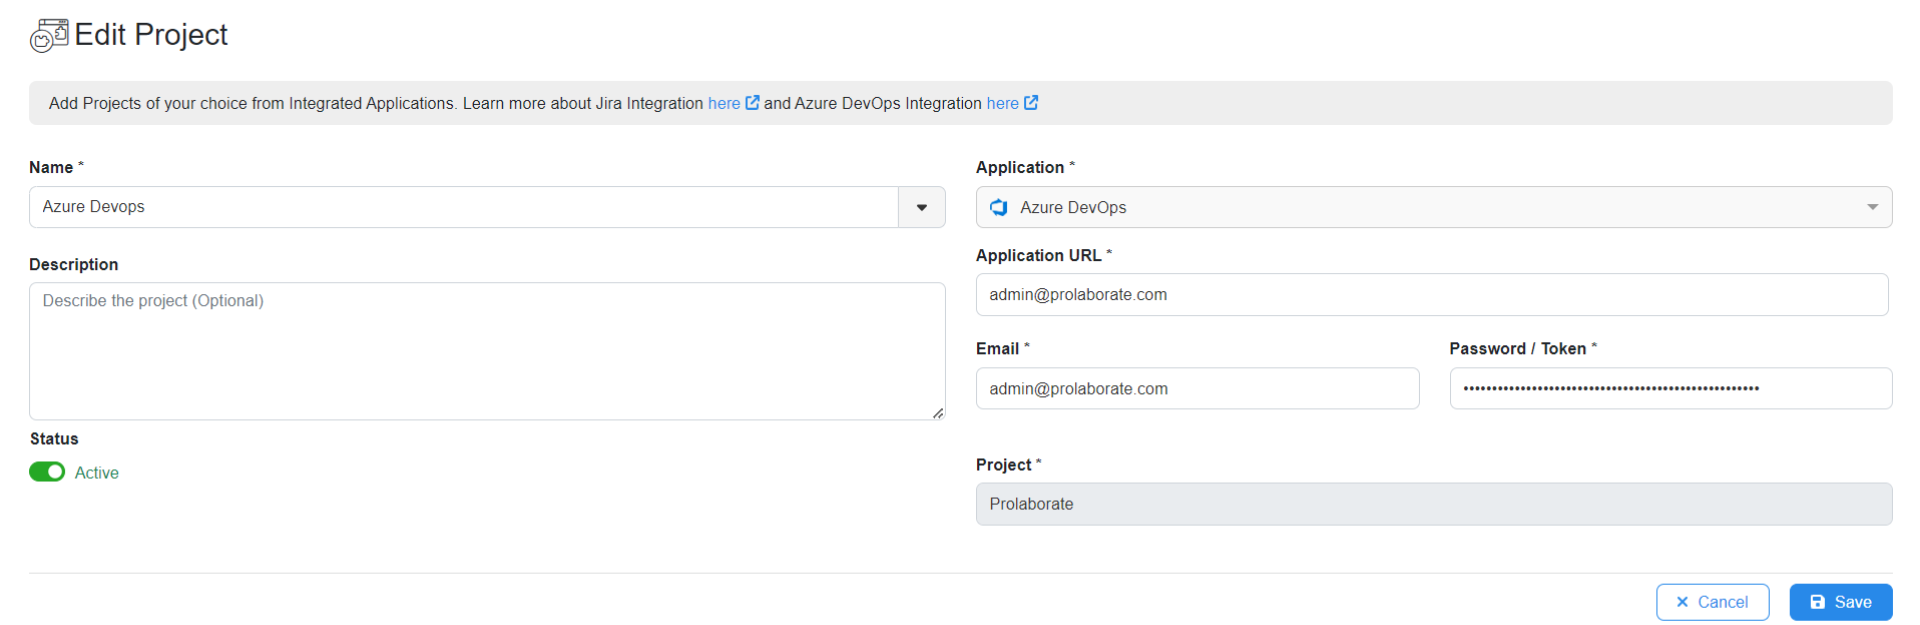
To add a new DevOps Account, click on Menu > Integrated Application Projects under Repository Configuration. Then the user can add the Integrated Application by clicking the Add Project Button from the page.
When the user clicks the Add Project Button, they are taken to the Add Project form, where they must enter information such as:

| Field | Description |
|---|---|
| Name | Enter a name that your users will understand. For example, the name of the DevOps project you intend to choose |
| Description | Give a description to the application |
| Status | It would be set to Active as Default. Please do not change it unless you do not want to use it in Prolaborate |
| Application | Choose Azure DevOps |
| Application URL | Enter the URL of your DevOps account. |
| Enter the Email. | |
| Password/Token | Enter the Personal Access Token generated |
| Validate Connection | Once you’ve entered the Application URL, Email, and Password, click this button. If the credentials were correctly entered, you will receive a success message and the Projects field will be enabled |
| Project | Choose a Project to which you’d like to connect. If you use multiple projects in DevOps, you can add another project in the same way |
| Save | Click it to complete adding the project and the new project will appear on the Integrations page |
Add DevOps Attribute in EA elements
Add Integration Property in Stereotype
To make the DevOps link to be a part of Enterprise Architect’s artifact, one must create a DevOps attribute and configure it for the stereotypes. It is also possible to include the DevOps attribute in all stereotypes. Use Integration Property to achieve this.
Click on Menu > Modeling Languages. Then click on the Custom Property button is on the top and you will see the list of custom attributes that are already created in this repository.
Click on Add Property and choose Add Integration Property. Fill in the following details:

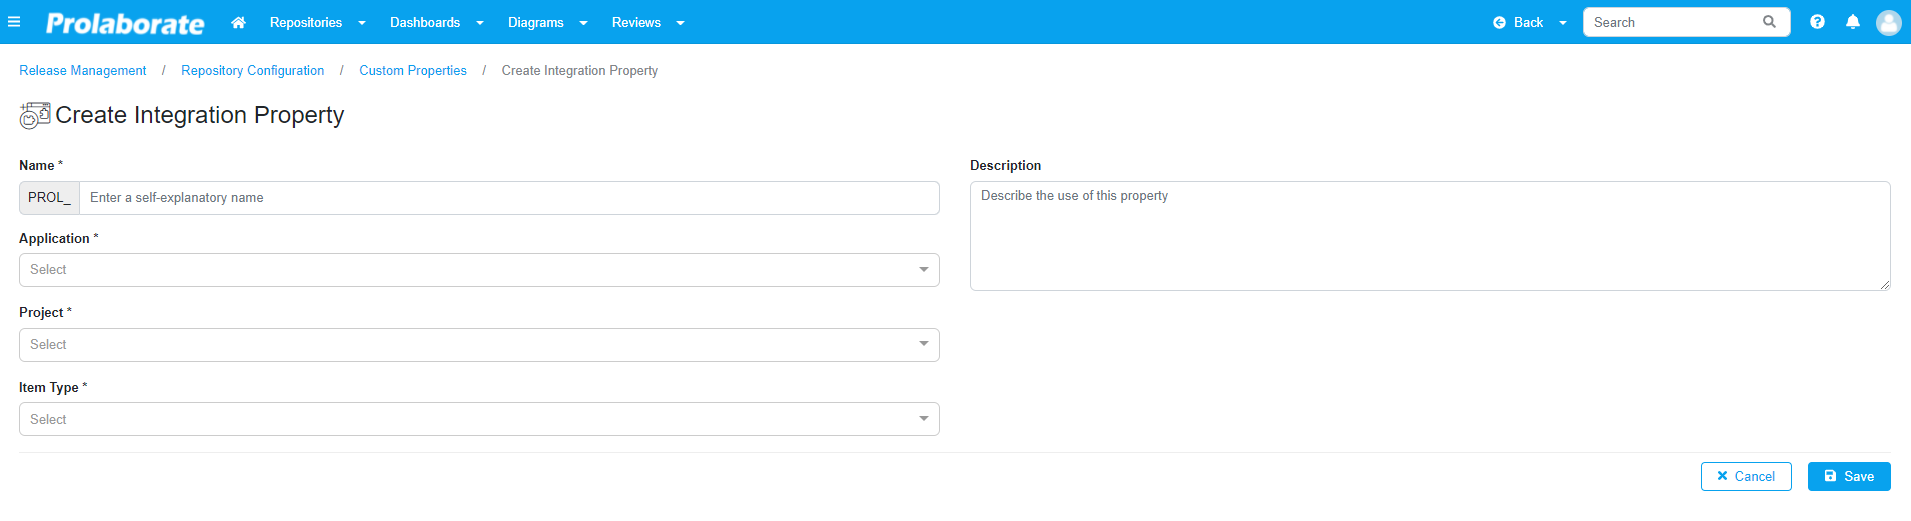
| Field | Description |
|---|---|
| Name | Give a name to the Attribute. “PROL_” will be prepended |
| Description | Add a description for the attribute |
| Application | Select Azure DevOps |
| Project | Select the Project |
| Item Type | Select the Item Type(s) you want to link in Prolaborate. This will be useful if you want to refine the list of DevOps items you want to see in Prolaborate. |
| Save | Click on it to add the new integration Property |
Add DevOps Attribute to a Stereotype
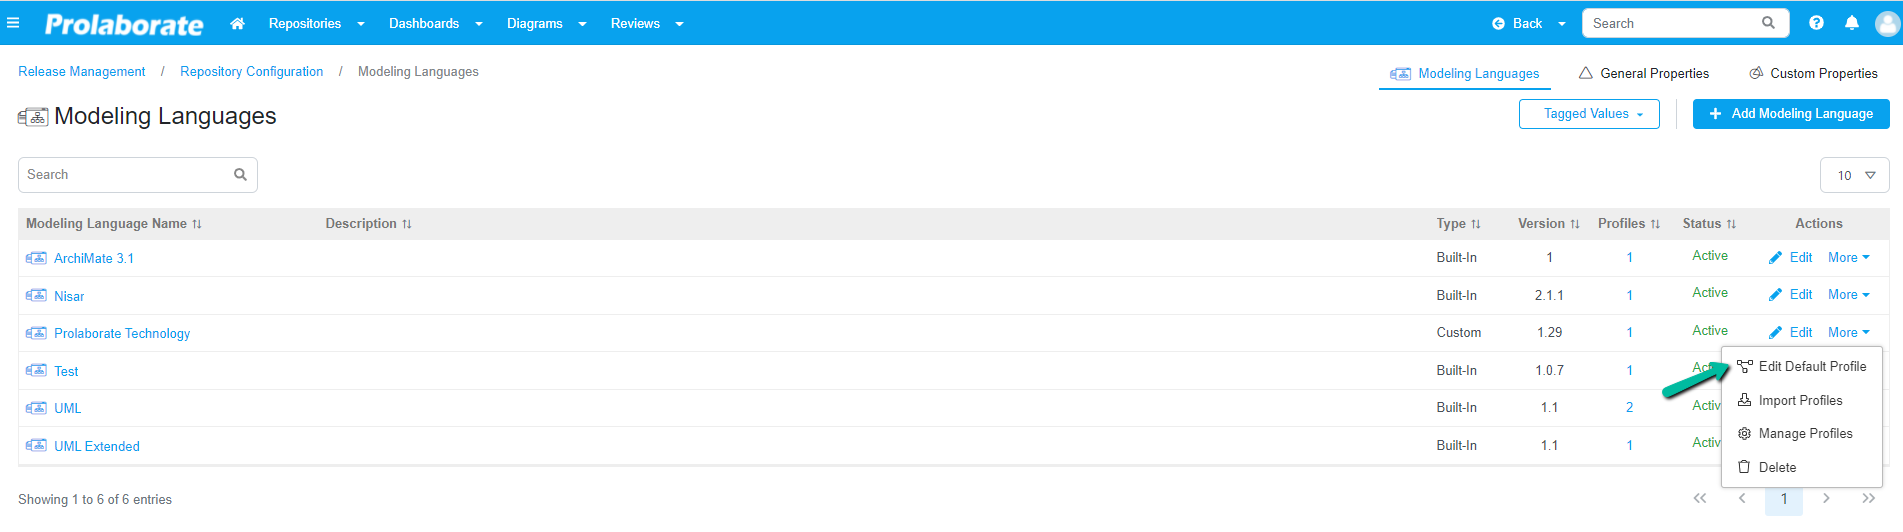
Navigate to Modeling Language from the menu to add DevOps attribute to a stereotype. In the Modeling Languages page, choose a language and click on More to select the Edit Default Profile.
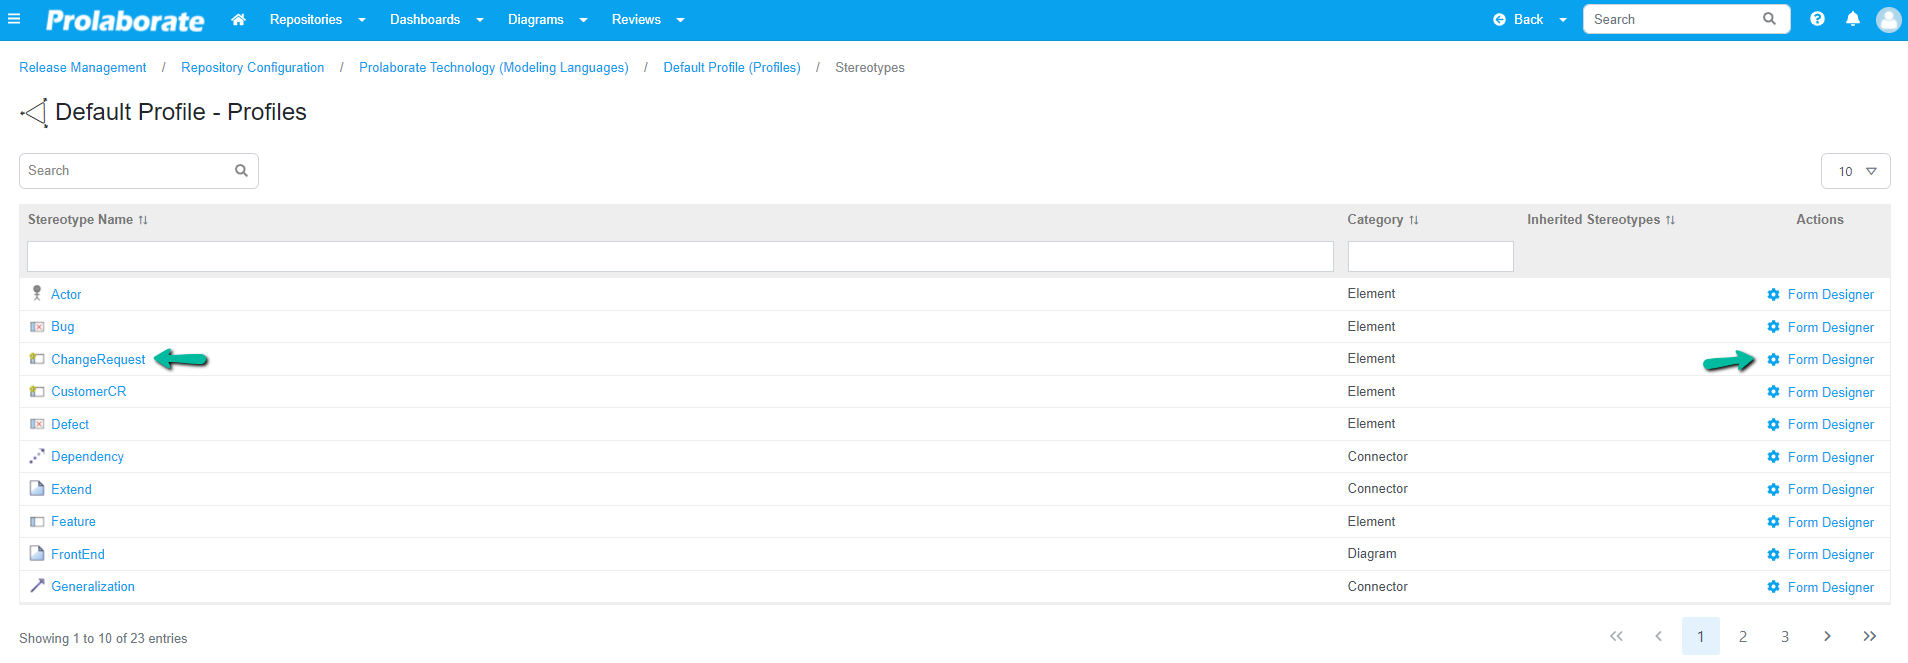
Click the Form Designer of the Stereotype you want to add the DevOps attribute.
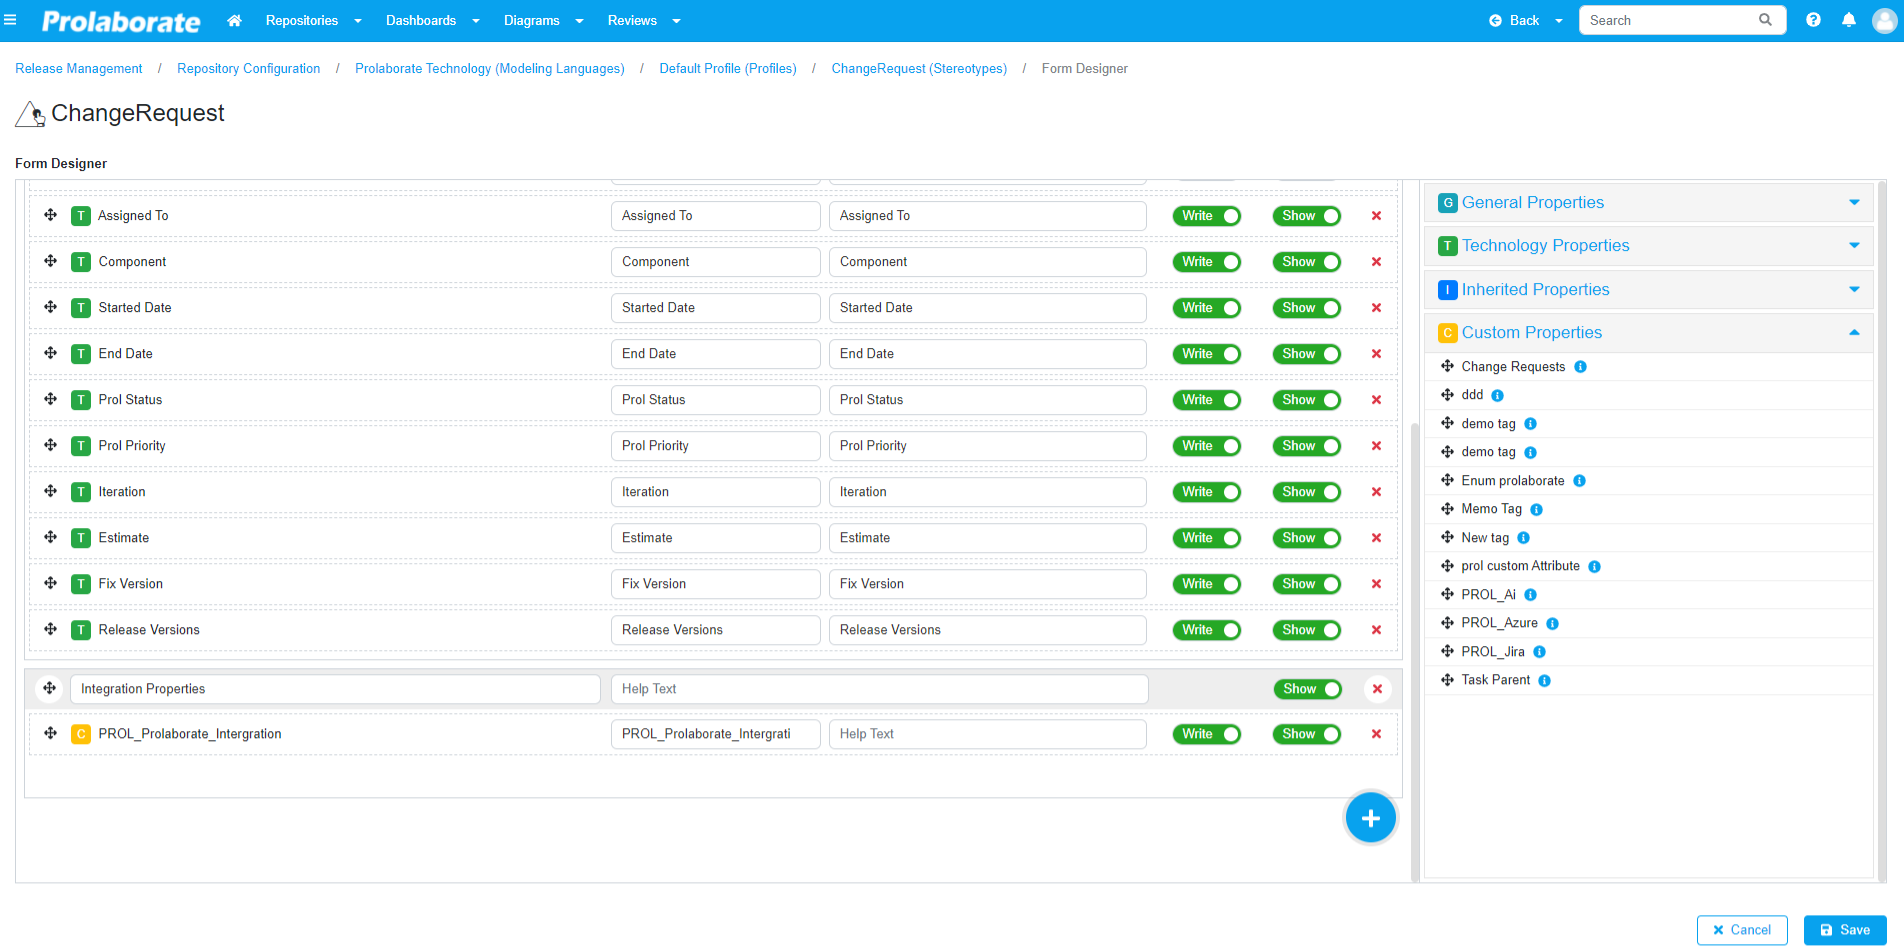
Add the DevOps attribute from the Custom Properties section to the form and click Save.
Link DevOps items to EA elements
Open the properties window of the stereotype in which the DevOps attribute is configured. The added property will be displayed under Integration Properties
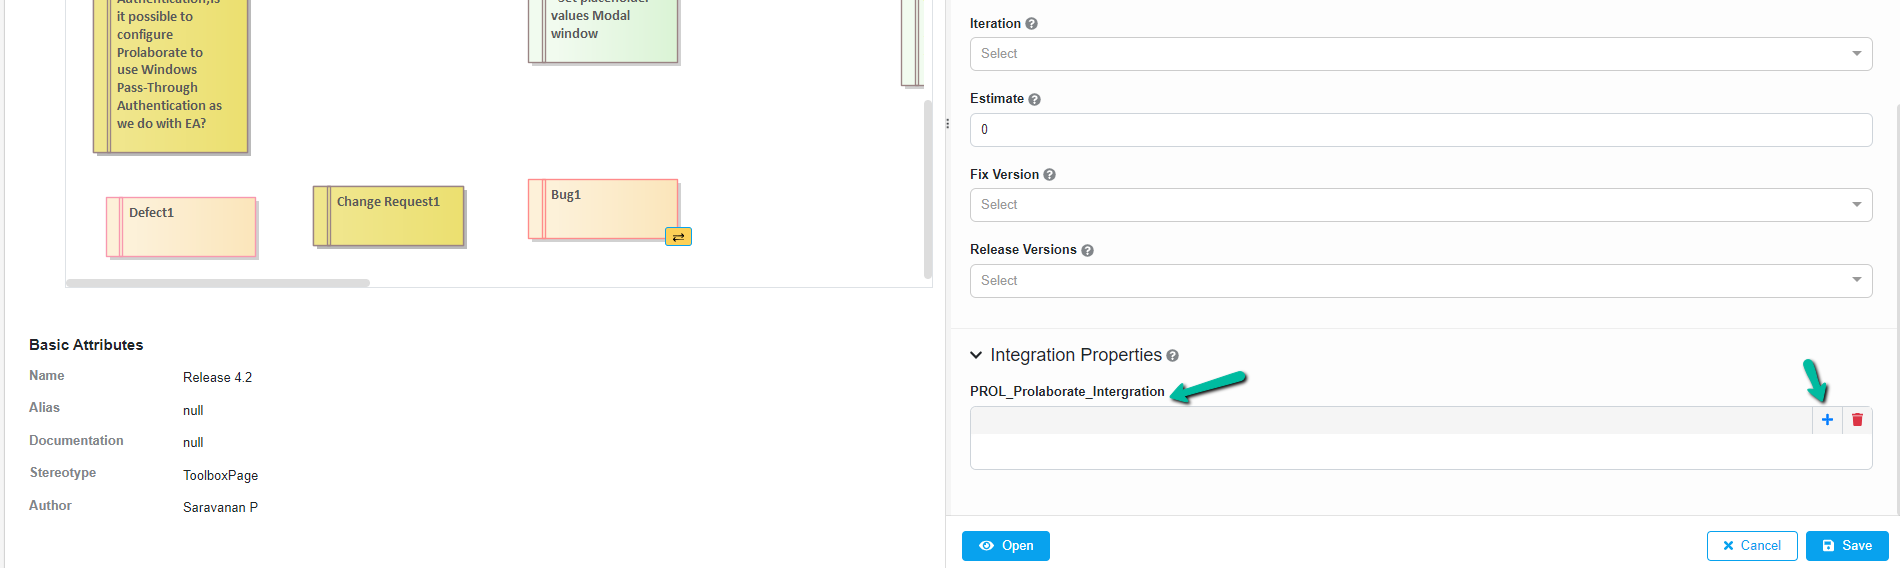
Click the plus icon and select the Project in the Add Links window.
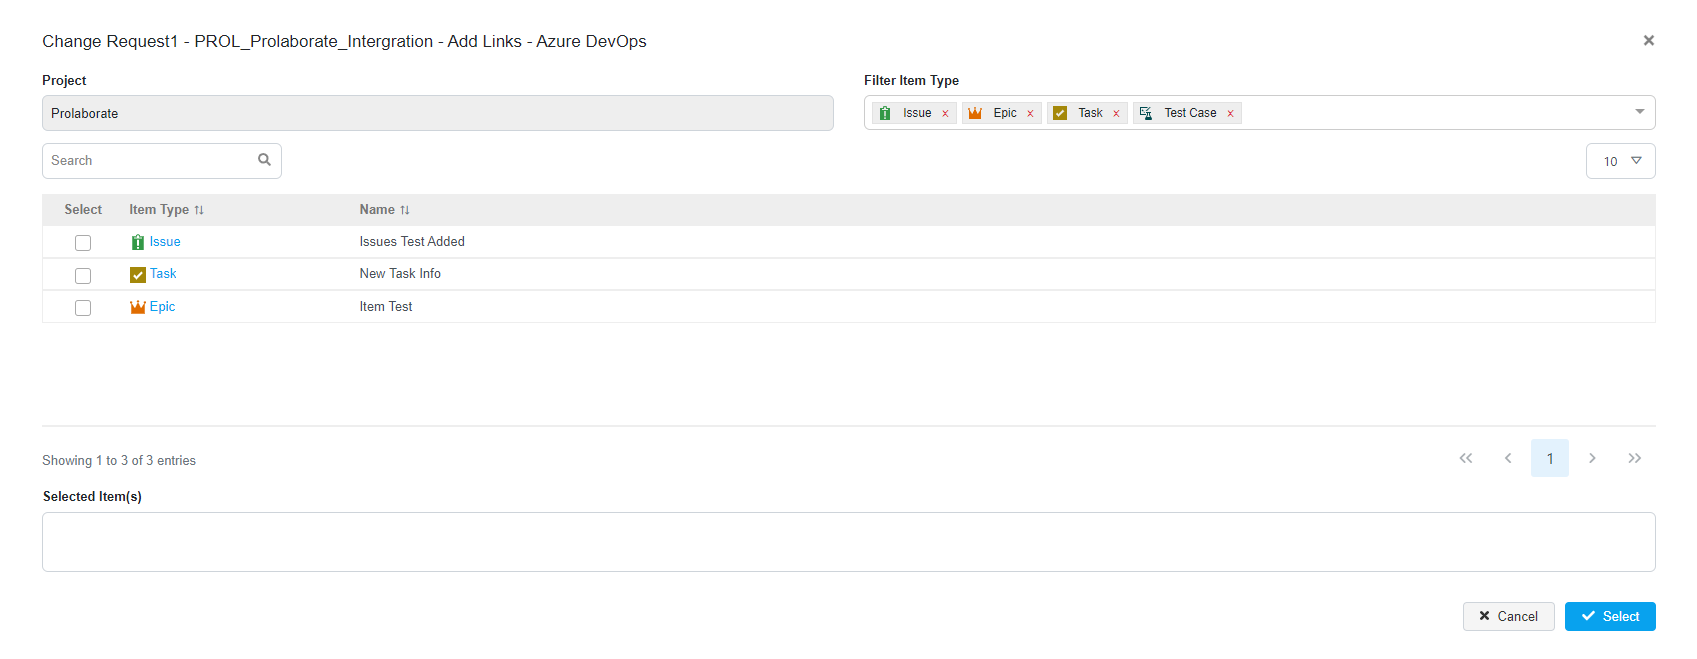
All the items which are part of the Project will appear here. Please Note that the item types which are displayed here will be based on the item types that were chosen when adding this integration property.
You can search for the item if you know the title of the DevOps item.
Select the required DevOps item which you want to link to this Enterprise Architect item. Click on Save in the Properties Window of this item.
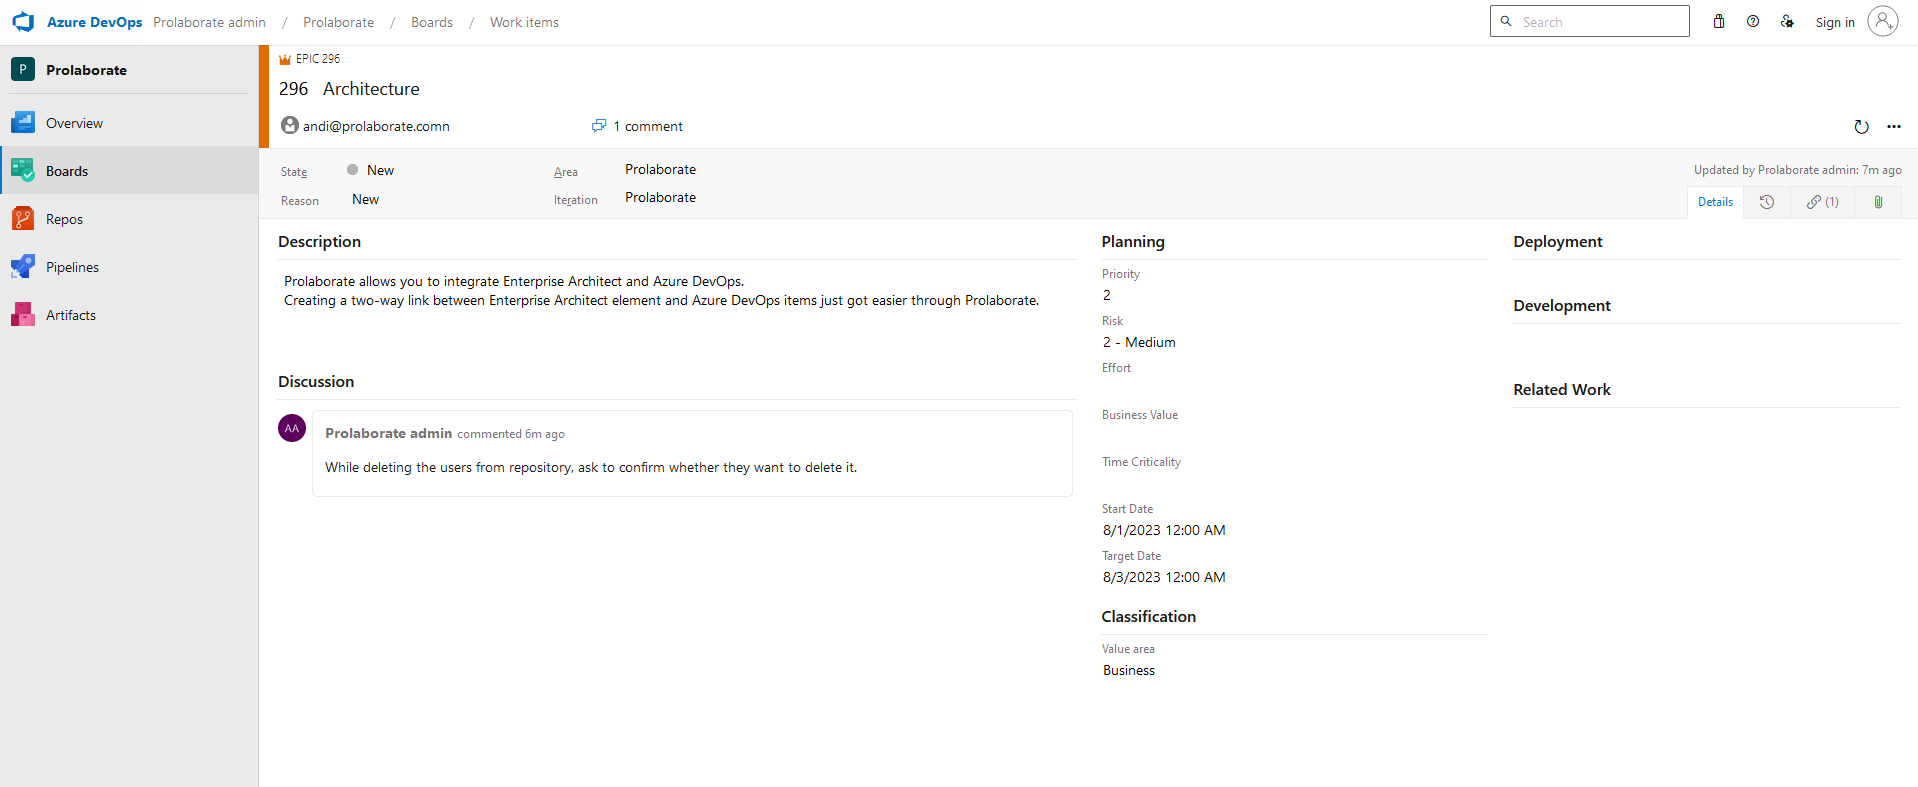
Preview DevOps Integration Items
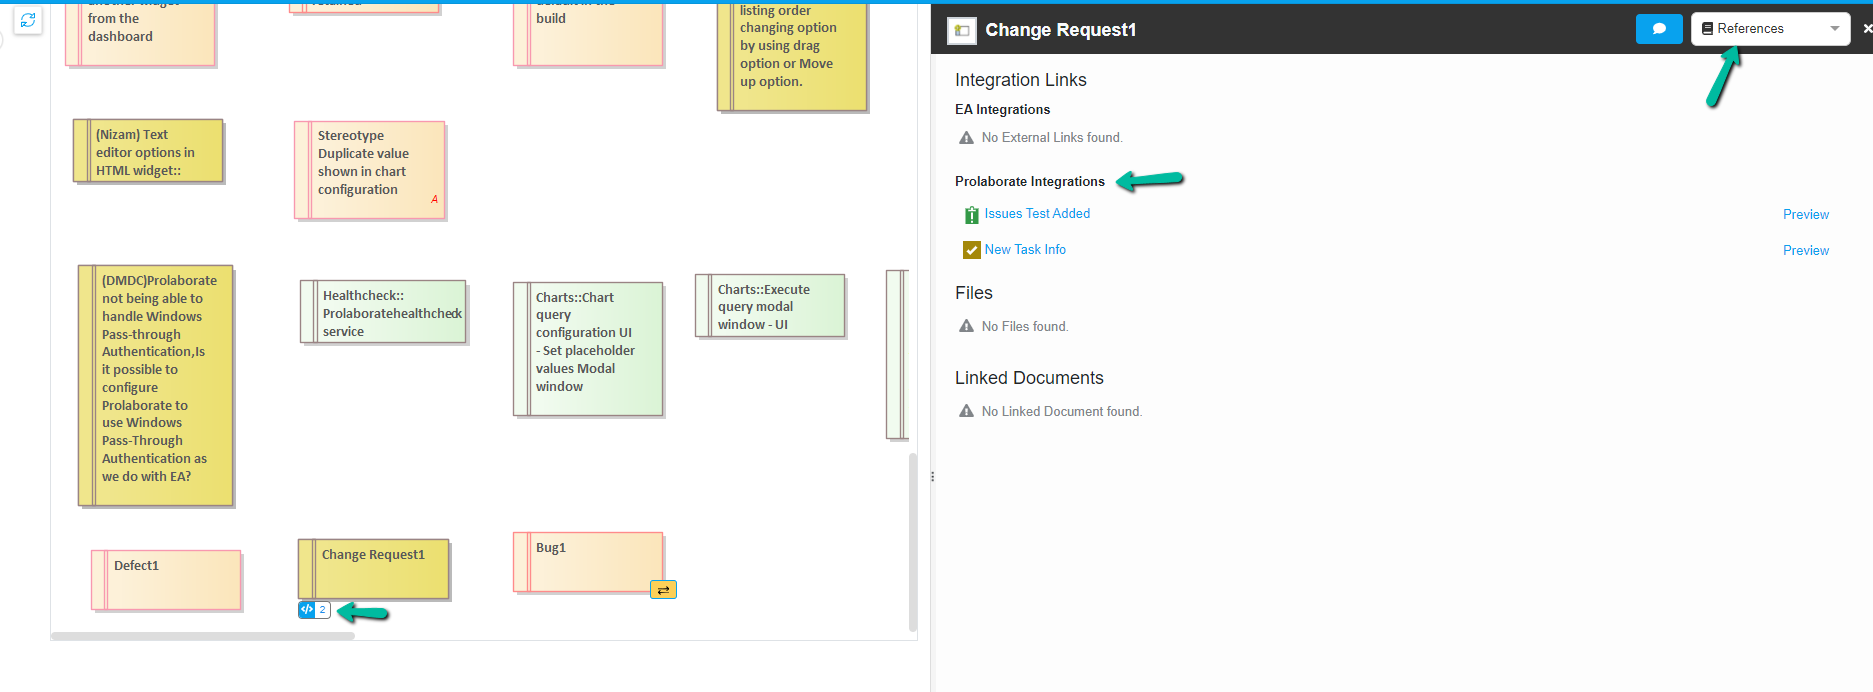
To preview, click on References in the Properties window. All the DevOps items which were added will be visible here and the item count will be visible in the diagram. Click on the eye icon to preview the items that were added.
All the basic details of the item will be displayed in Prolaborate itself. To view the complete details and to edit this item, click on Open in Azure DevOps.
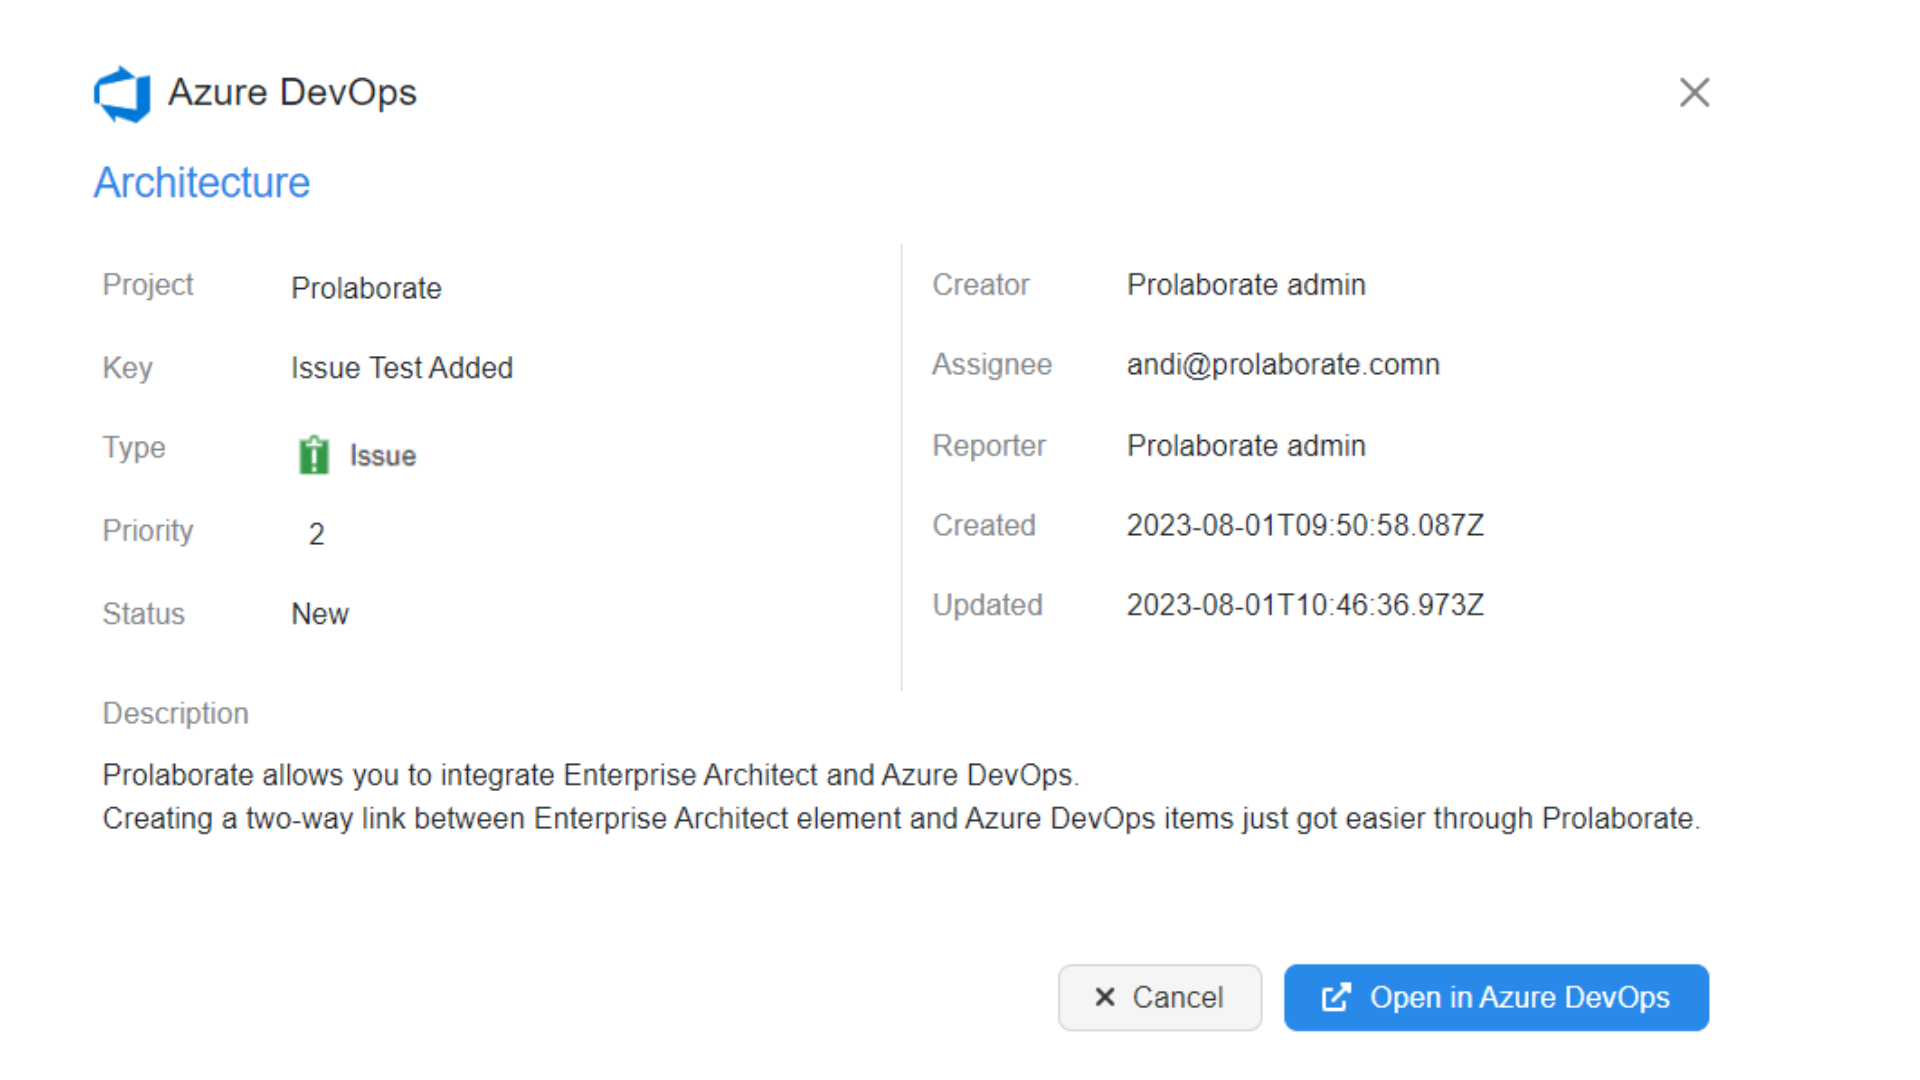
The link will open in a new tab. Also, a link to this Enterprise Architect element will be added.
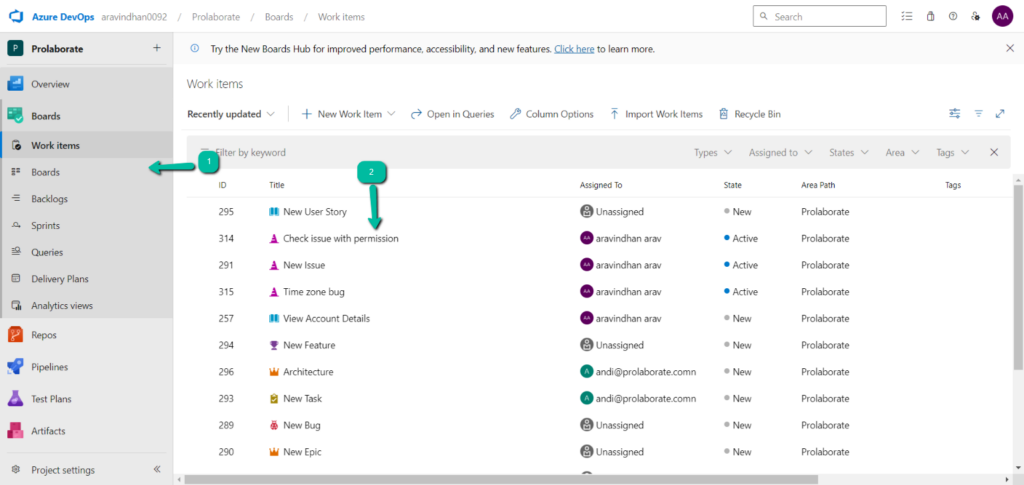
Preview EA Elements from Azure DevOps
Users of Azure DevOps can easily access, and view items linked to their EA elements from the Azure DevOps portal.
To access your EA item in the Azure DevOps portal, navigate to your work item page and select the item that you have linked with EA Element.
Click on the “Links” tab on the overview page, then click on the link under the Hyperlink section.
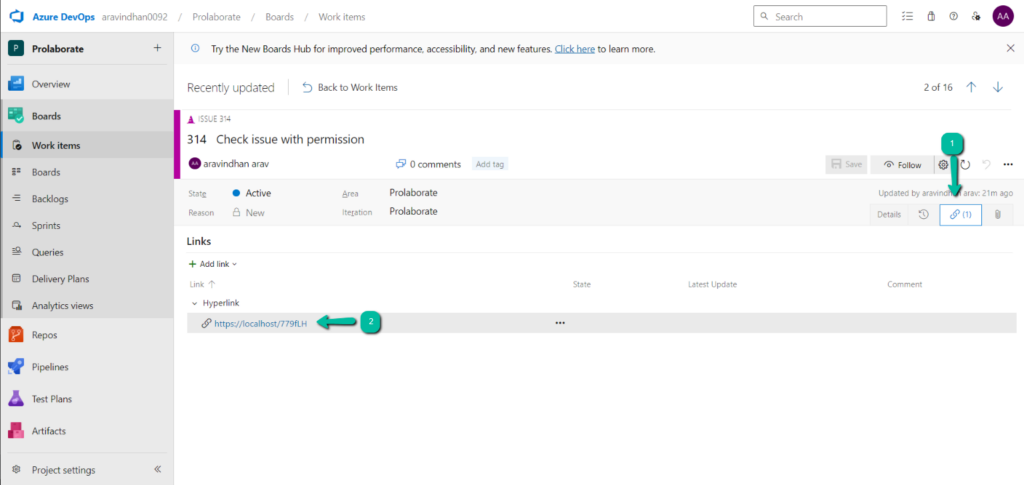
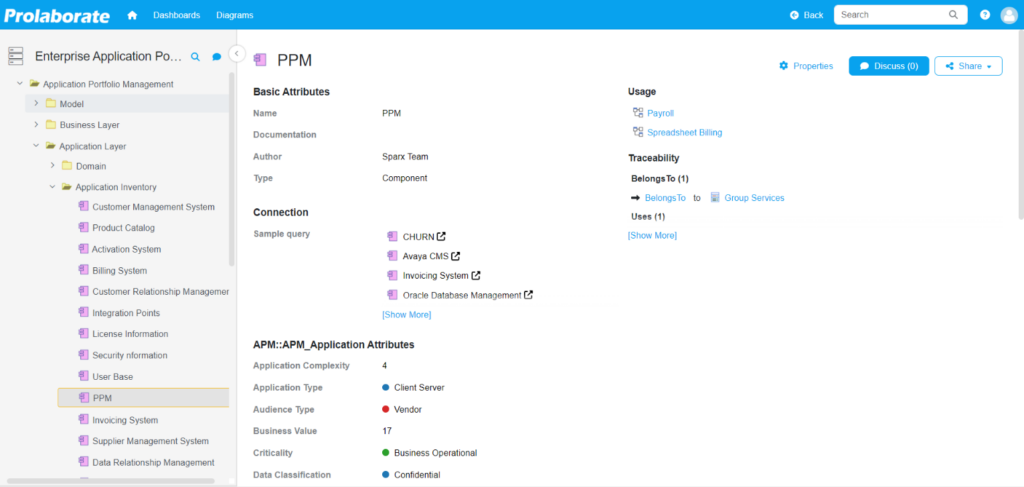
By clicking on the link, you will be redirected to the overview page of the EA element.
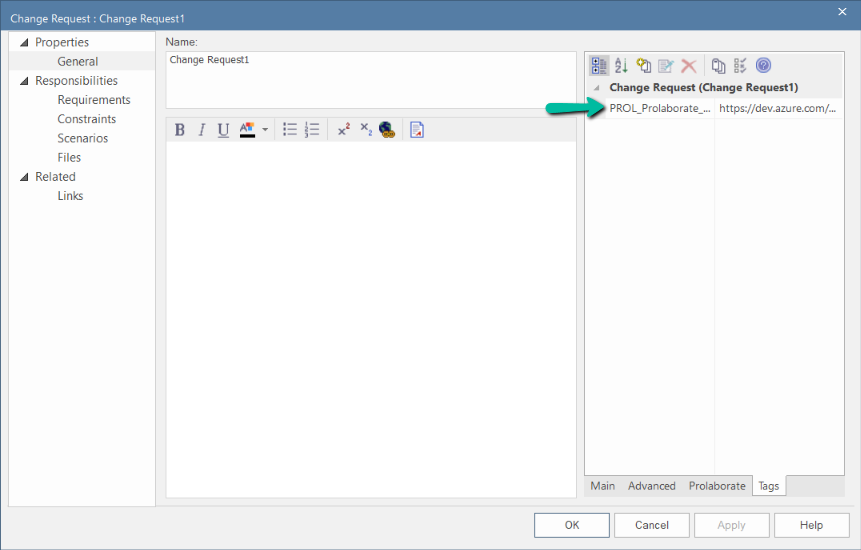
View DevOps item links from Enterprise Architect
Users who are viewing the element in Enterprise Architect will also be able to see the DevOps links added to an element from Prolaborate. The Property will be added as a tagged value and you can click on the browse button to view the item link in a browser.
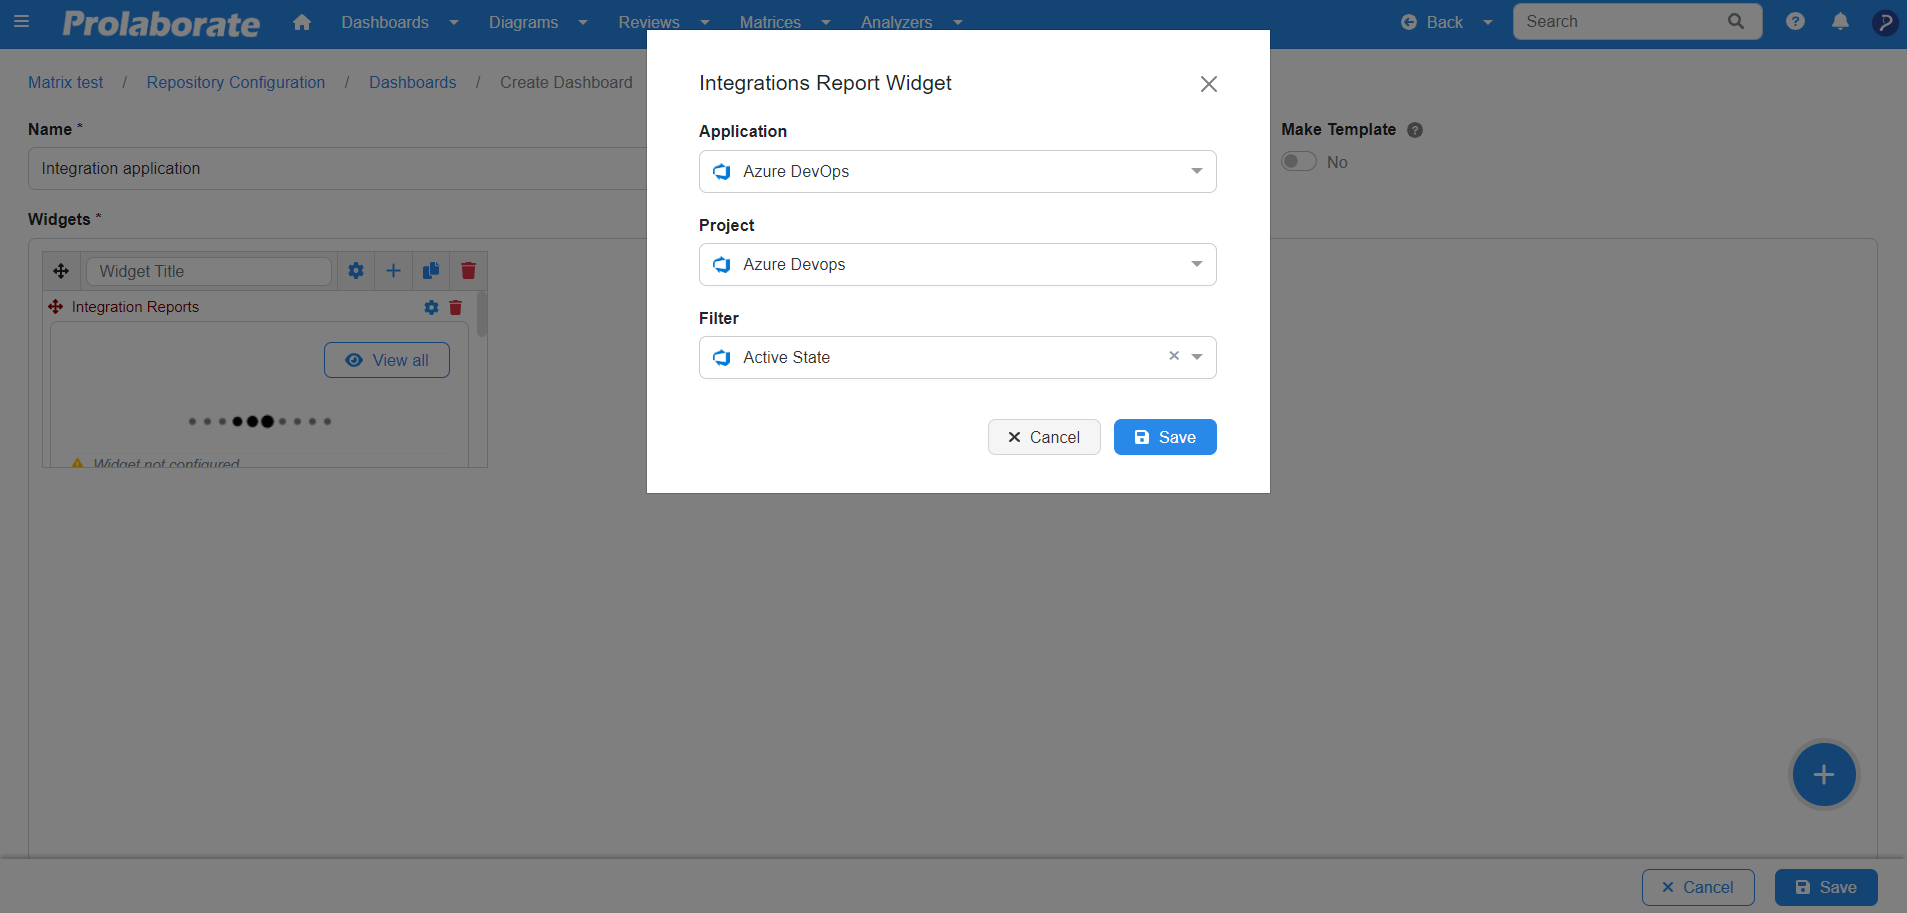
Add Live DevOps Reports in Dashboard
Select Integration Report widget in Dashboard. Read about Dashboards here.
Select Azure DevOps under Application and the Filter. Filters are the Queries from DevOps.
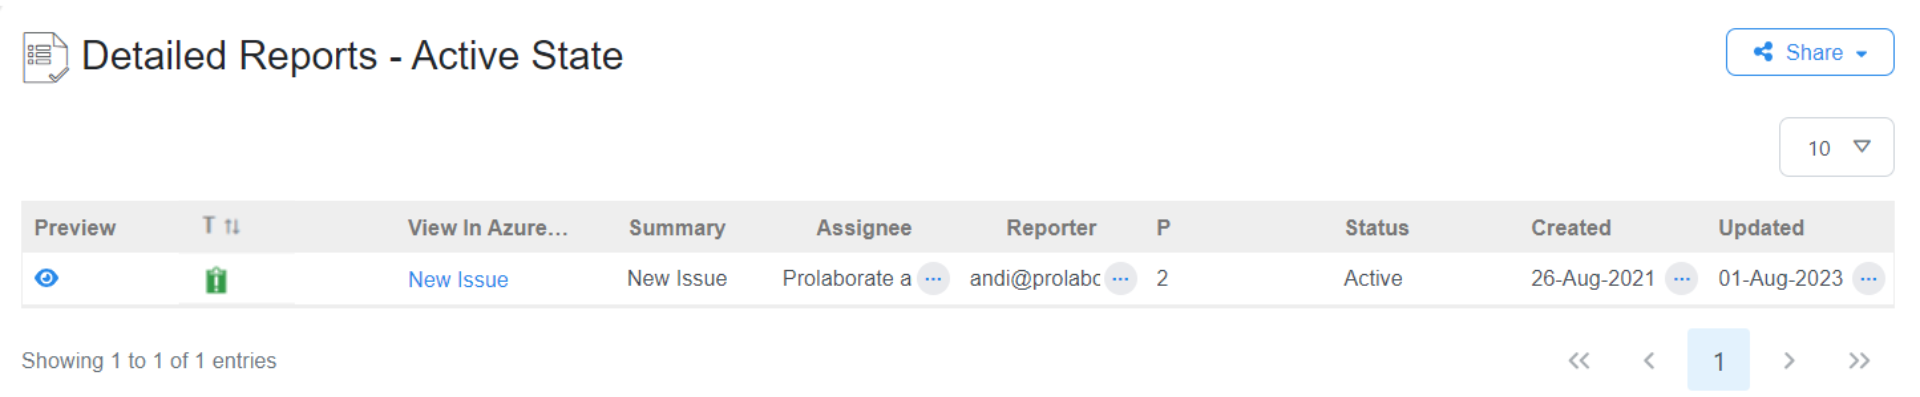
How it looks in the Dashboard?
The complete list of items from DevOps will be shown in the widget.
You can do the below actions:
- Click eye icon to preview the item
- Click on the link to open a specific item
- Click on View in Azure DevOps to open the query in DevOps

4. Click on Table View to see the complete list of items in the dashboard
View All in Azure DevOps works in the same way as View in Azure DevOps in dashboard.
Manage Projects
You can edit or delete the Projects from the Integrations page
Click on theedit icon to edit a project.
Update the password in Prolaborate if your password has expired in DevOps and you have updated it.
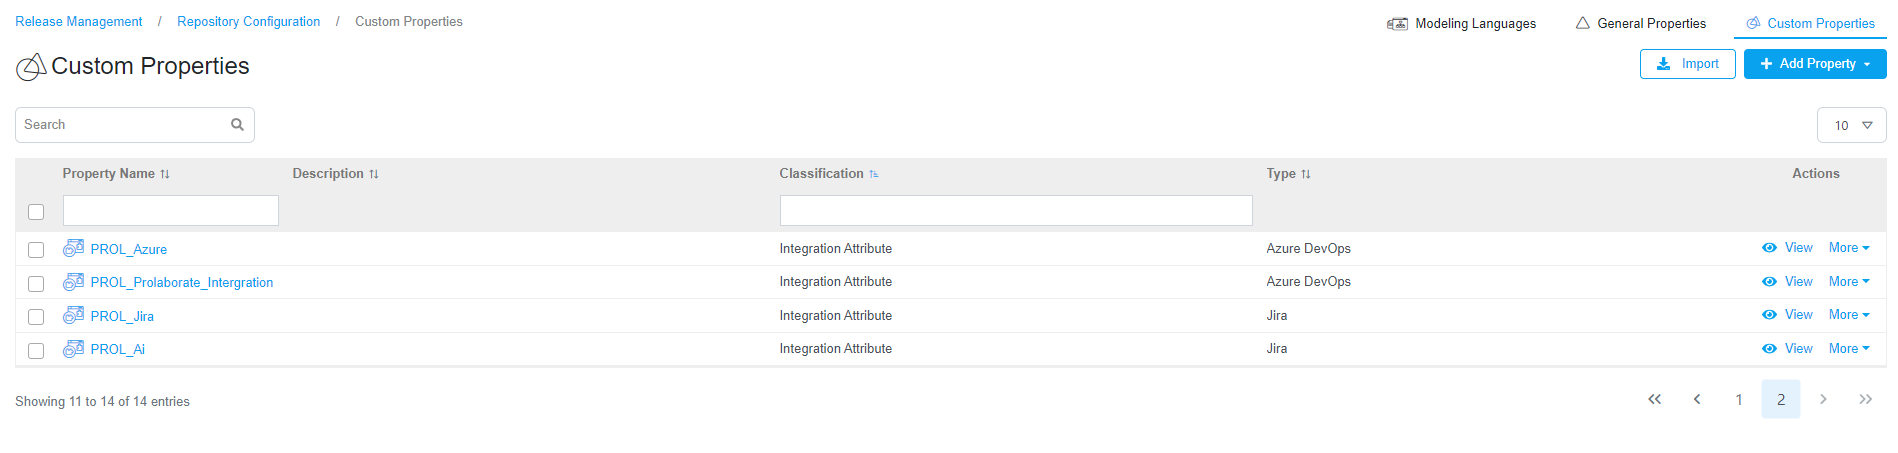
Manage Integration Attributes
You can view or delete Integration attributes from the custom properties window.