Connector in Prolaborate
Prolaborate allows users to create and manage connectors, and the advent of this feature enhances the user capability of Prolaborate attributing to mapping objects, enhancing visualizations, etc.
Prerequisites
- To create a connector from Prolaborate a connector attribute must exist. Connector Attribute is a setting that enables the connector to be visible in the property window and thus enabling us to establish a connection between elements. Connector Attribute creation can be achieved using either the Designer Configuration (Connector Attribute Type 1) or Query Configuration method (Connector Attribute Type 2)
- The prerequisite for the creation of the connector attribute is to know the type and stereotype of the element and connector
Connector Attribute Type 1:Create Connector to Single Element Type and Stereotype
If your objective is to create a connector for a specific type and stereotype element, adopting the designer configuration would be the best fit.
Add Connector Attribute
Follow the below steps to create a Connector Attribute using the designer configuration.
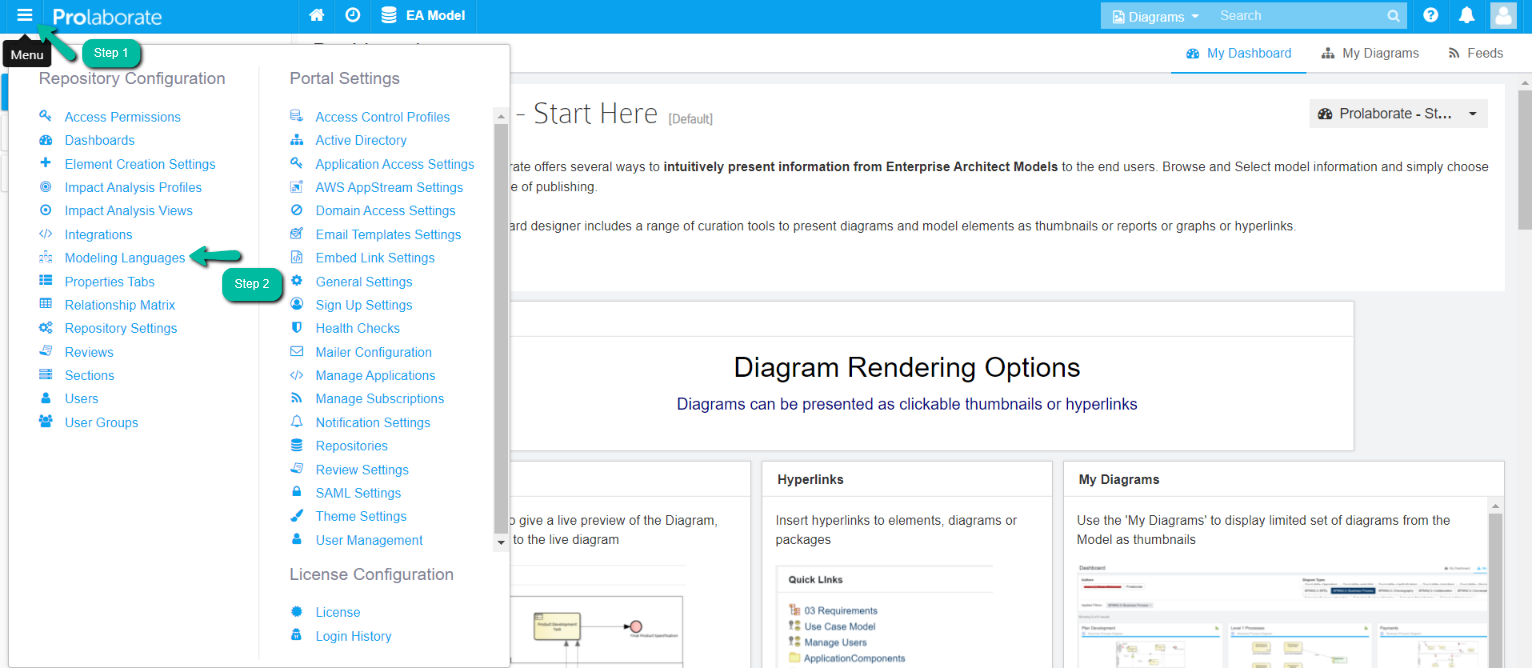
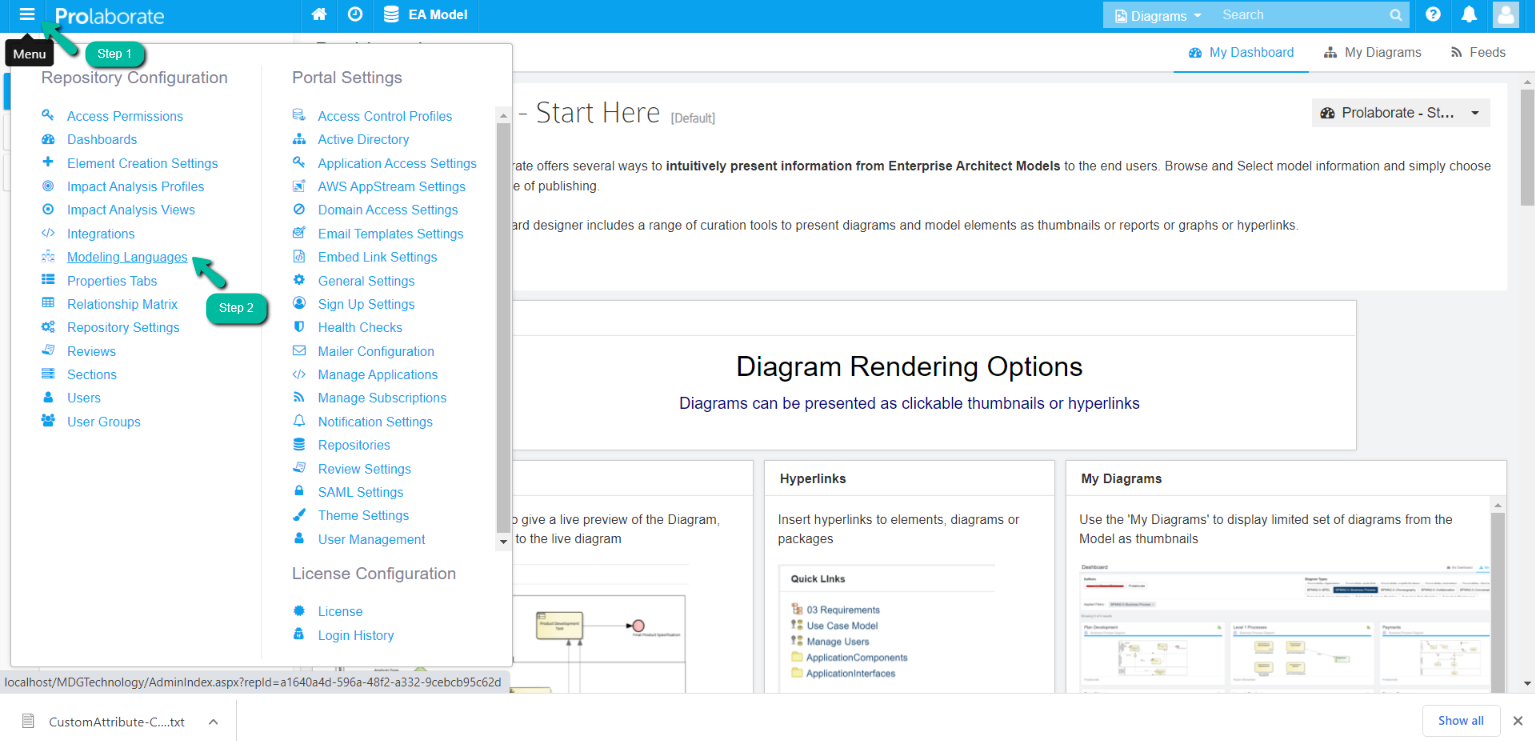
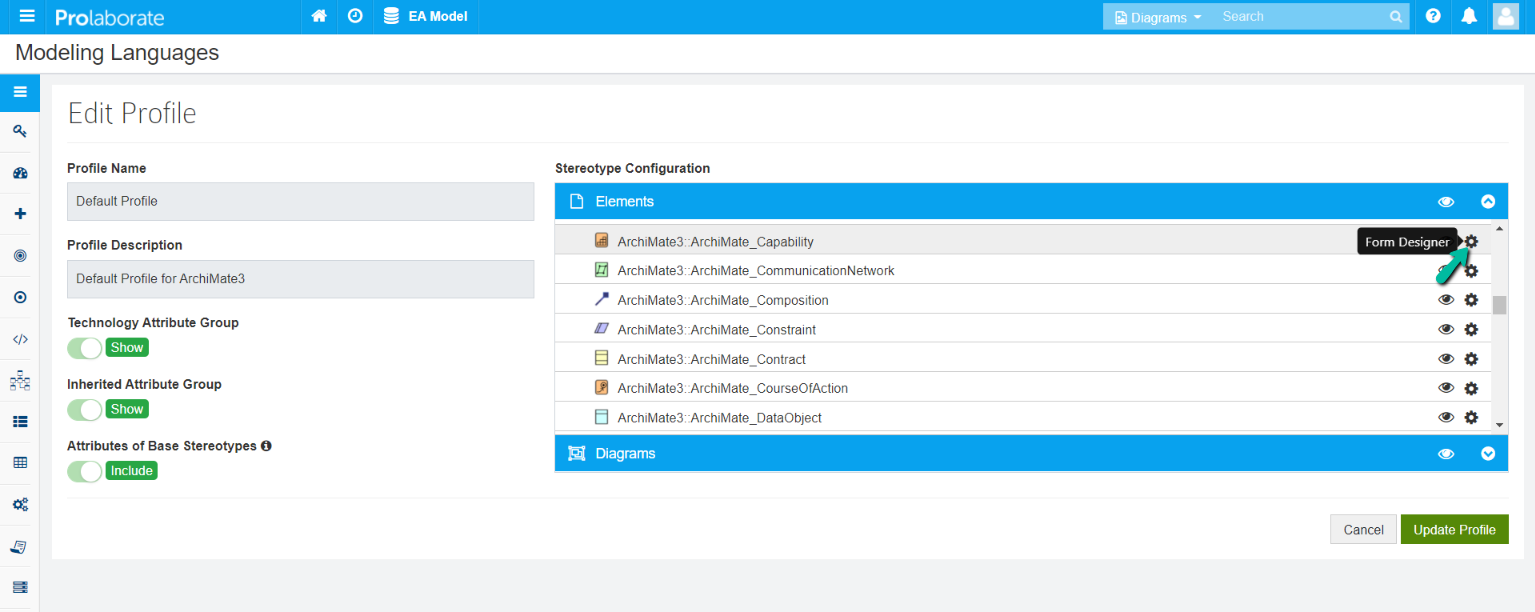
On the repository overview page click on Menu > Modeling Languages


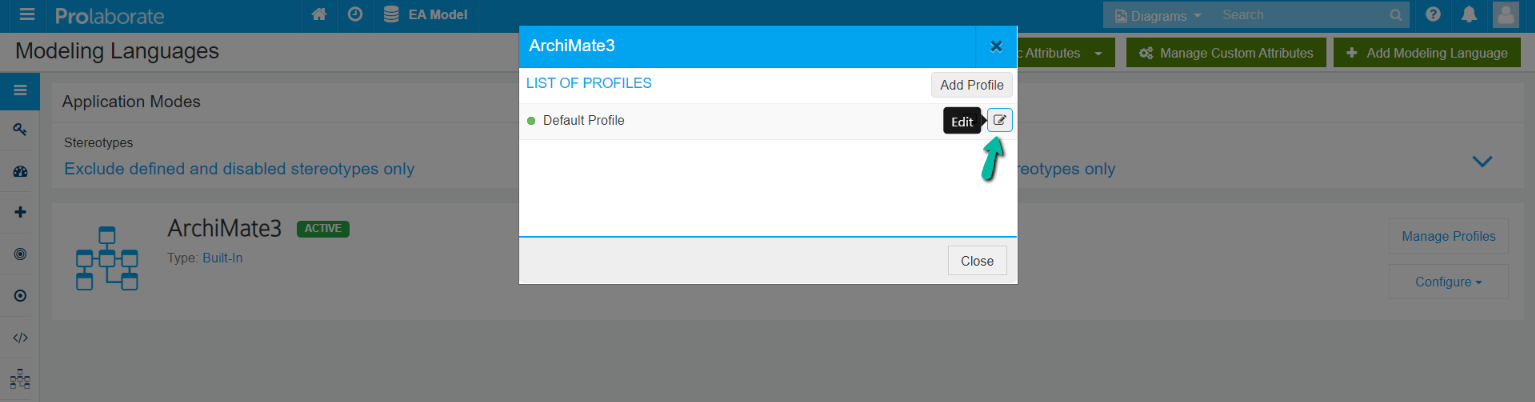
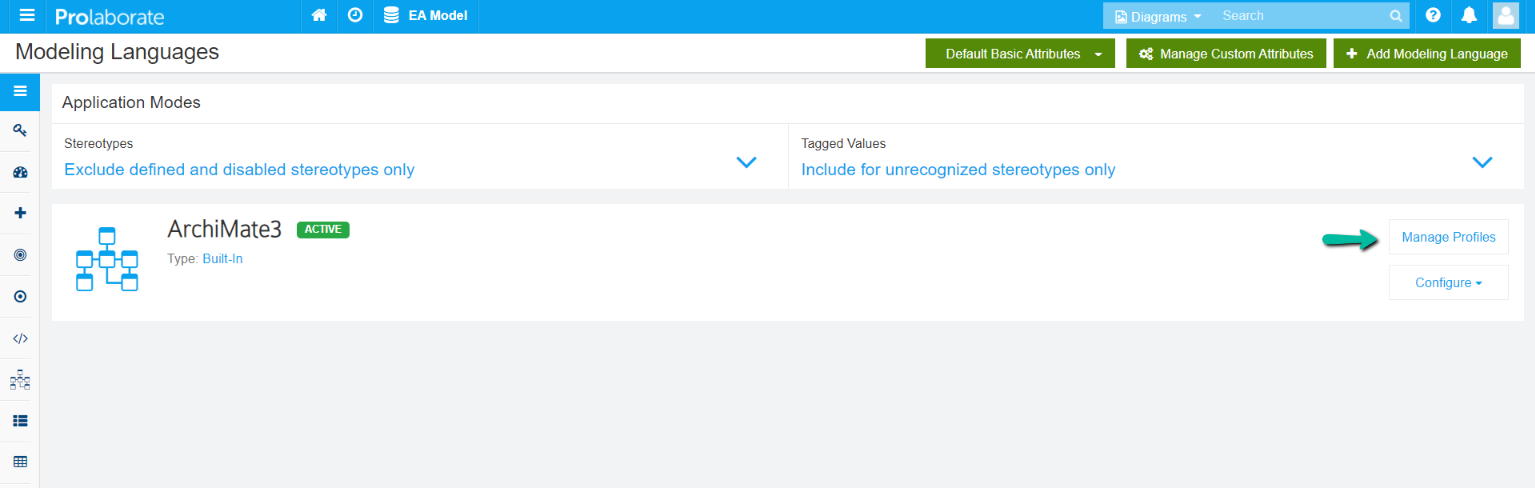
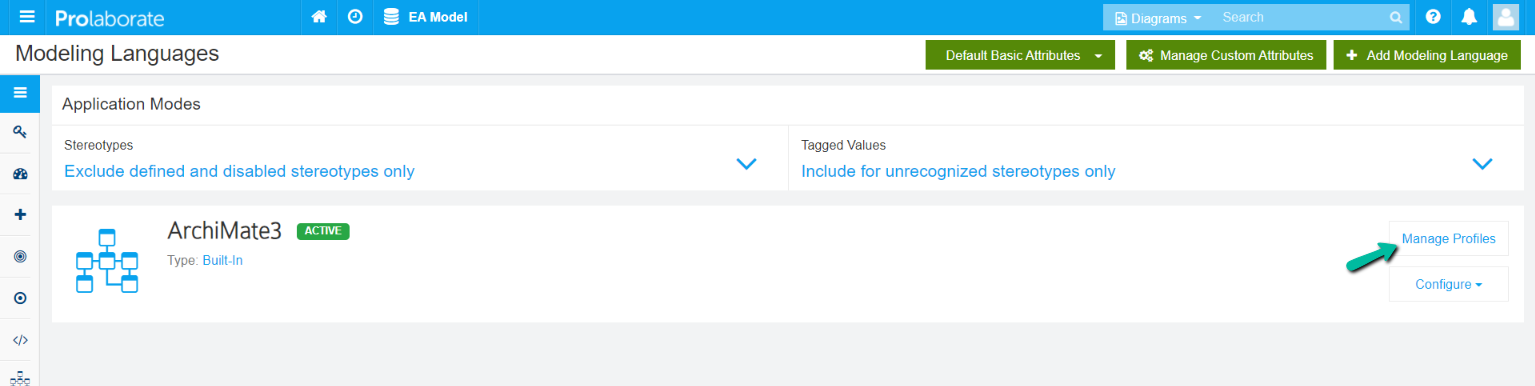
Click on the Manage Profiles on the modeling language for which you want to create a connector attribute.

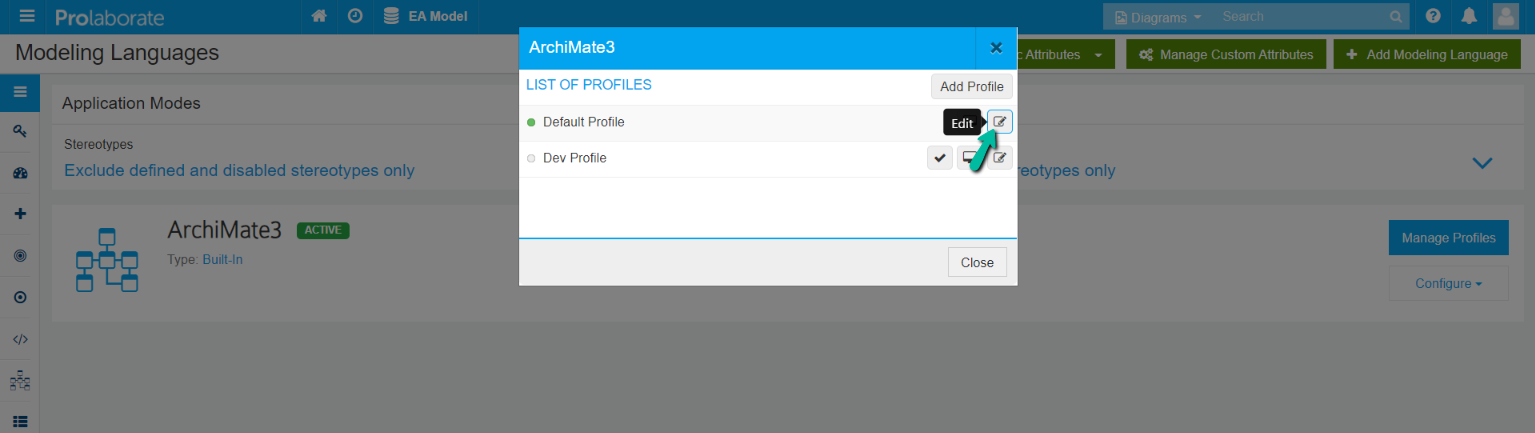
Click on the Edit icon on the overlay window
Click on the Gear icon (i.e., Form Designer) on the corresponding element (type/stereotype) for which you want to create a connector attribute.
Note: The connector attribute will be visible in the Property window only for that specific element
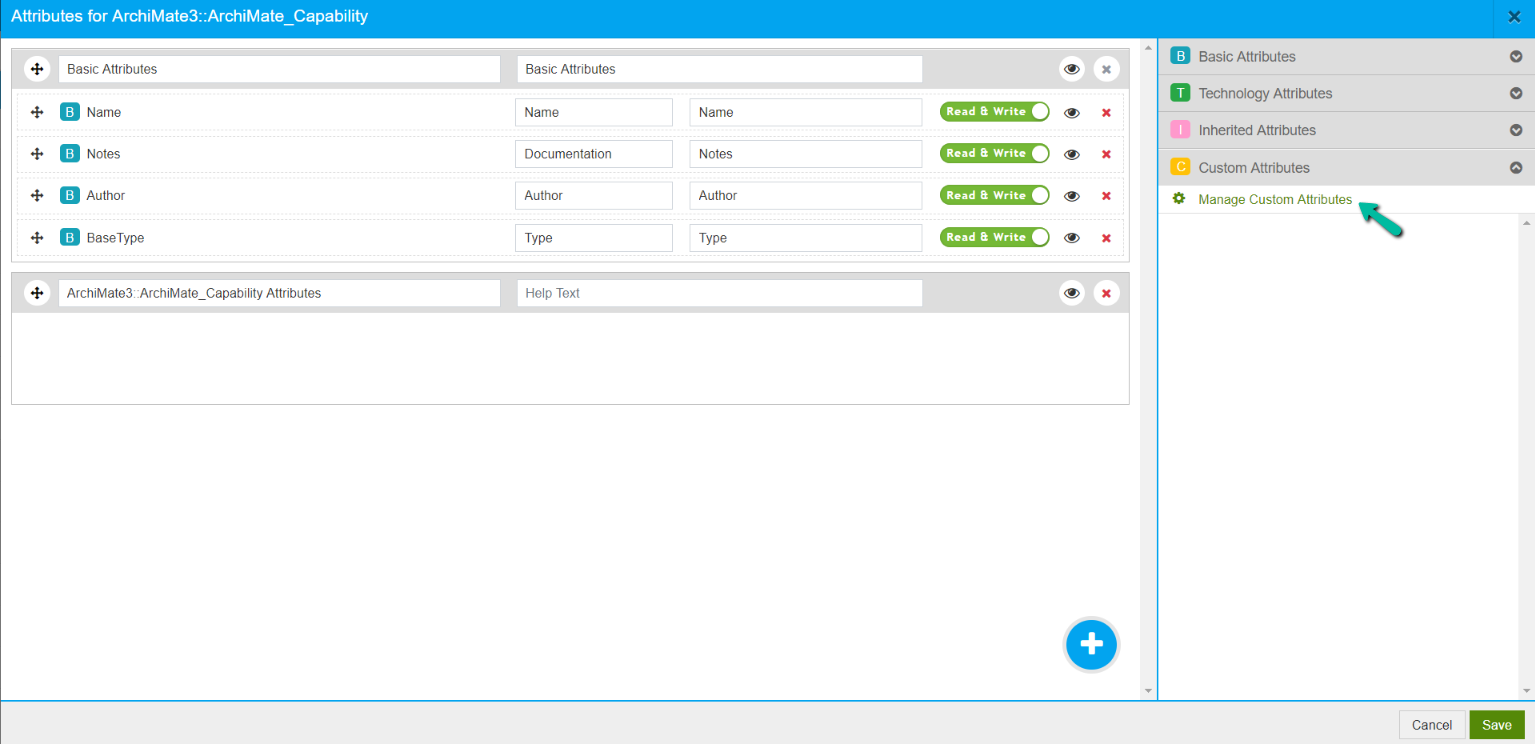
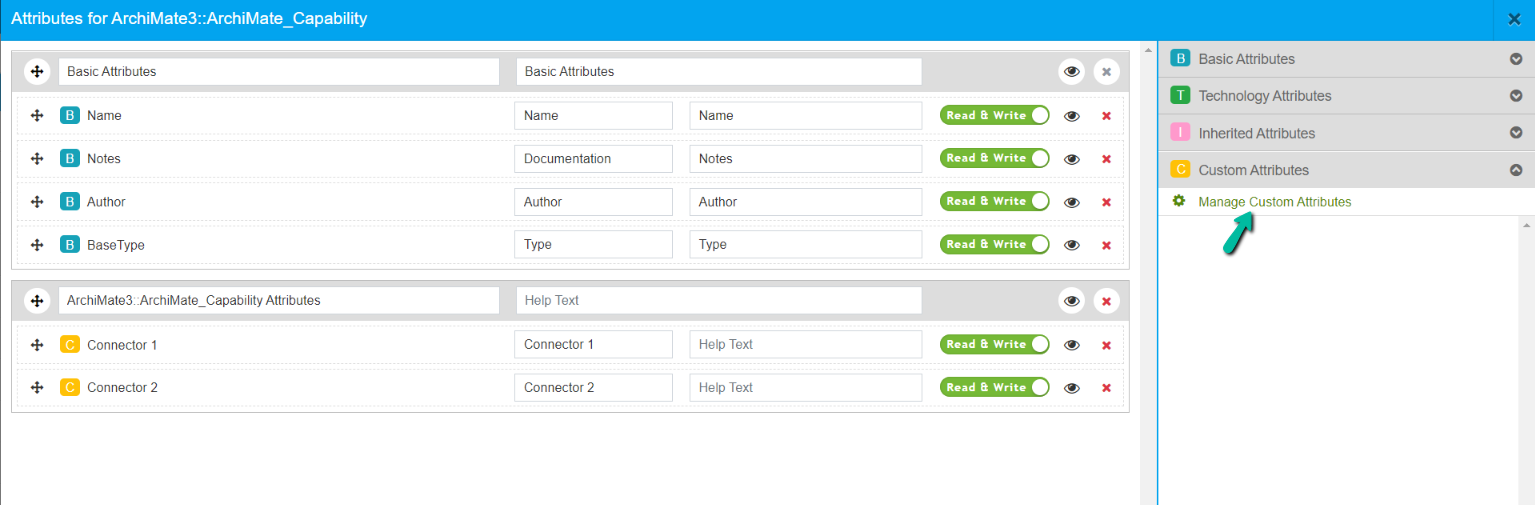
In the Custom Attributes window click on Manage Custom Attributes
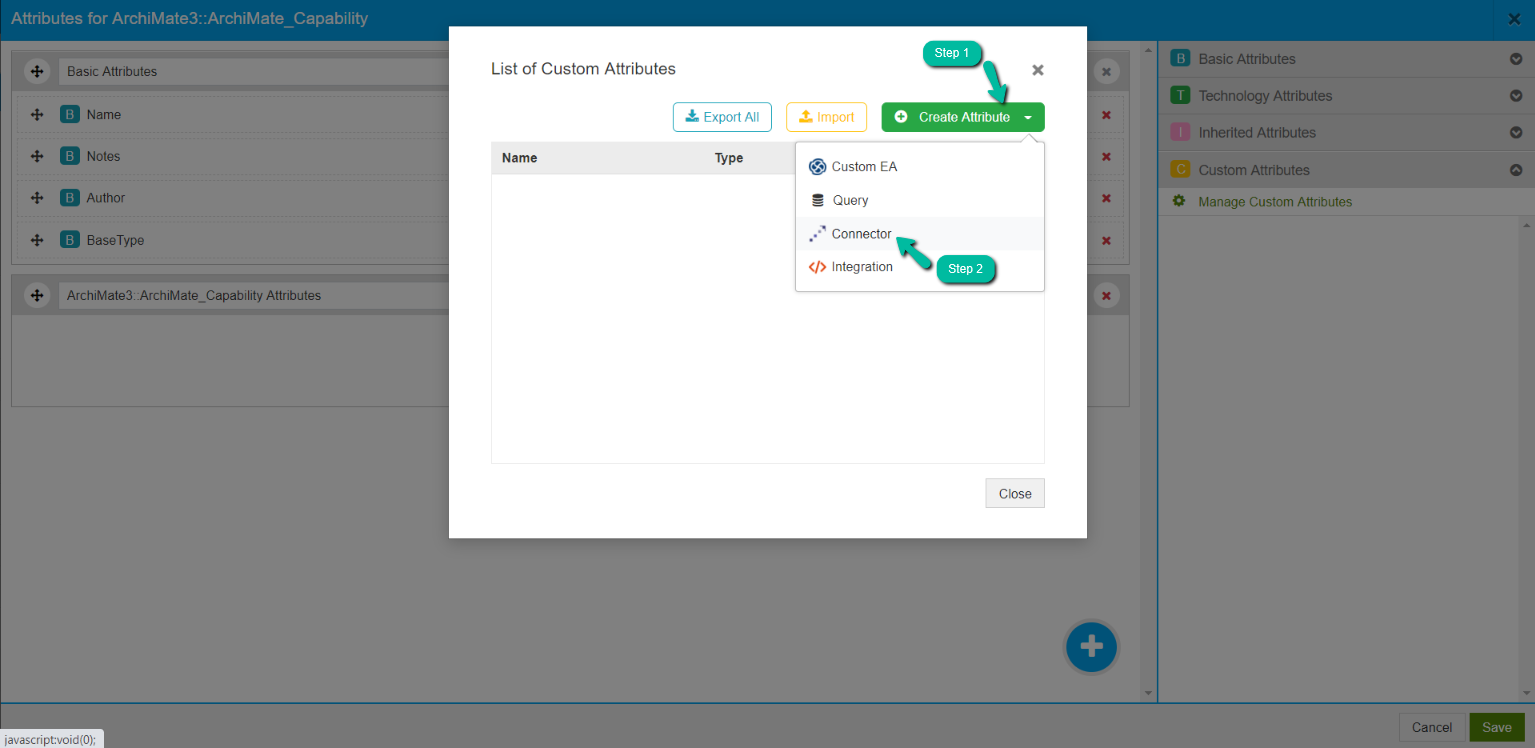
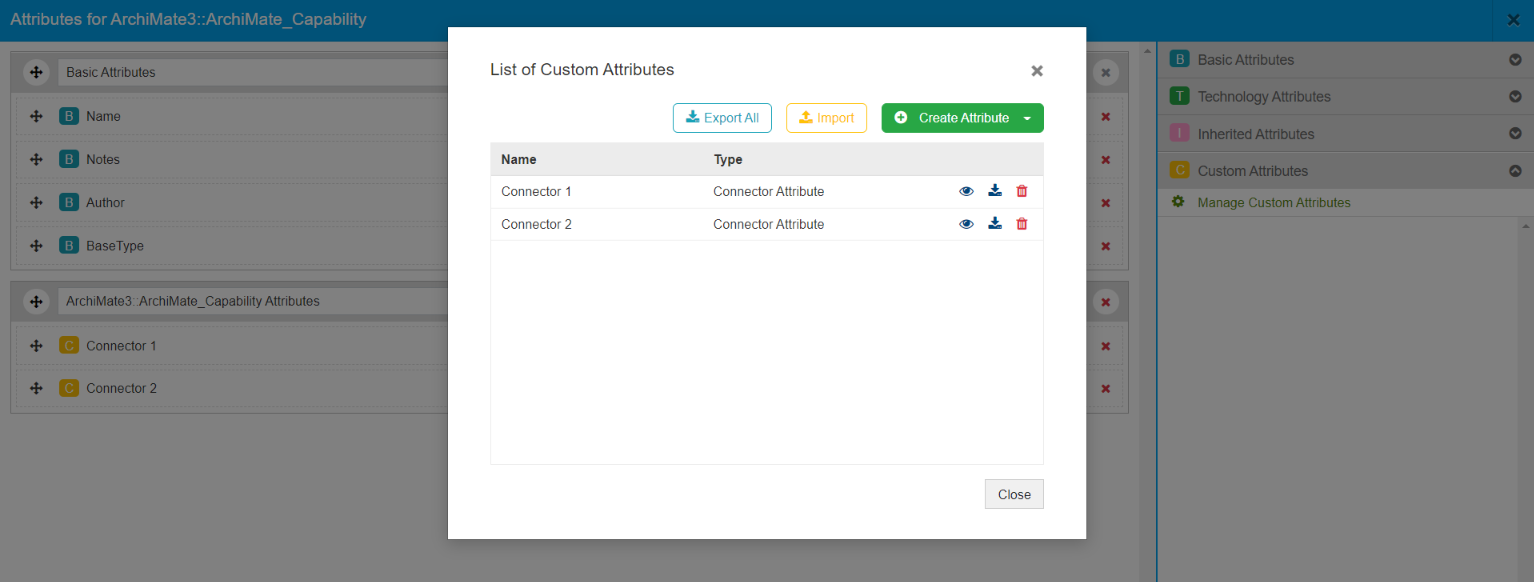
Click on Create Attribute > Connector on the popup window
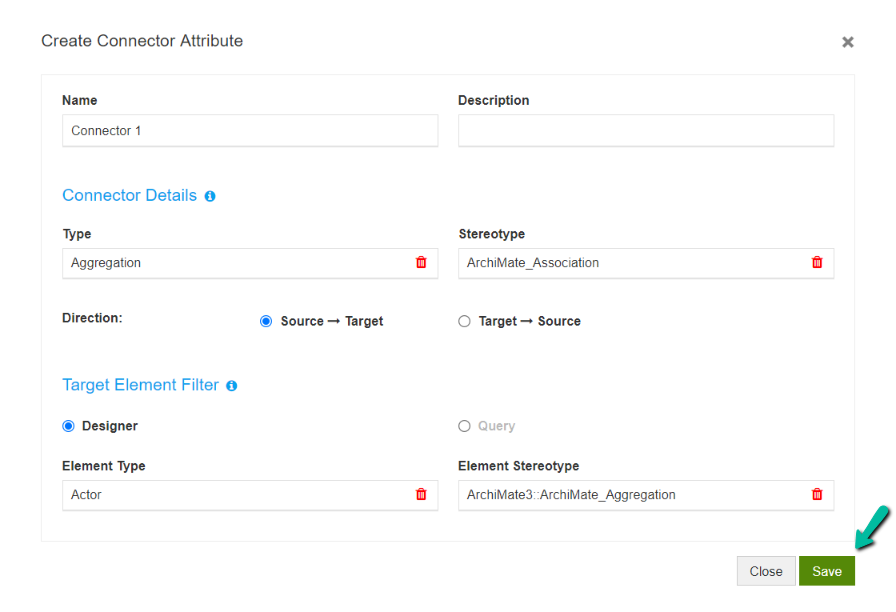
In the Create Connector Attribute form furnish the below details
Name: Give a suitable name for the connector attribute
Description: Write a short description of the connector attribute if required
In the Connector, Details section define the type and stereotype of connector
Type: Upon typing the type you will get the list and you can choose from the dropdown
Stereotype: Upon typing the Stereotype you will get the list and you can choose from the dropdown
Direction: Choose the direction of the connector either Source to Target or Target to Source
In the Target Element Filter, choose the Designer.
The advantage of the designer configuration is, it lists all the types and stereotypes belonging to the MDG as you start entering the type and stereotype of the element thus element type and stereotype can be declared precisely at the time of creating a connector attribute itself.
Click on the Save button.
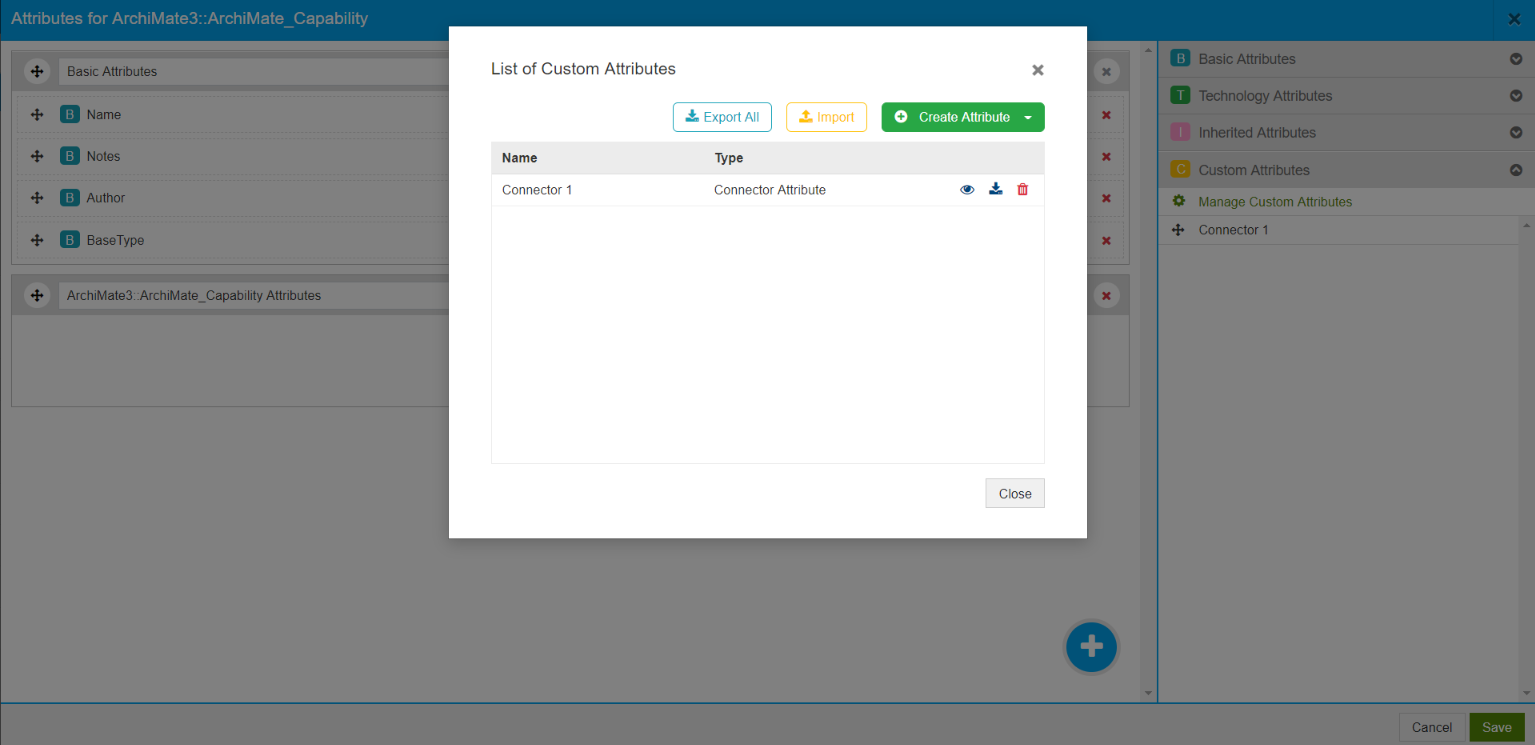
A connector attribute will be created. Click on the Close button in the overlay box to exit.
Use Connector Attribute in Property Window
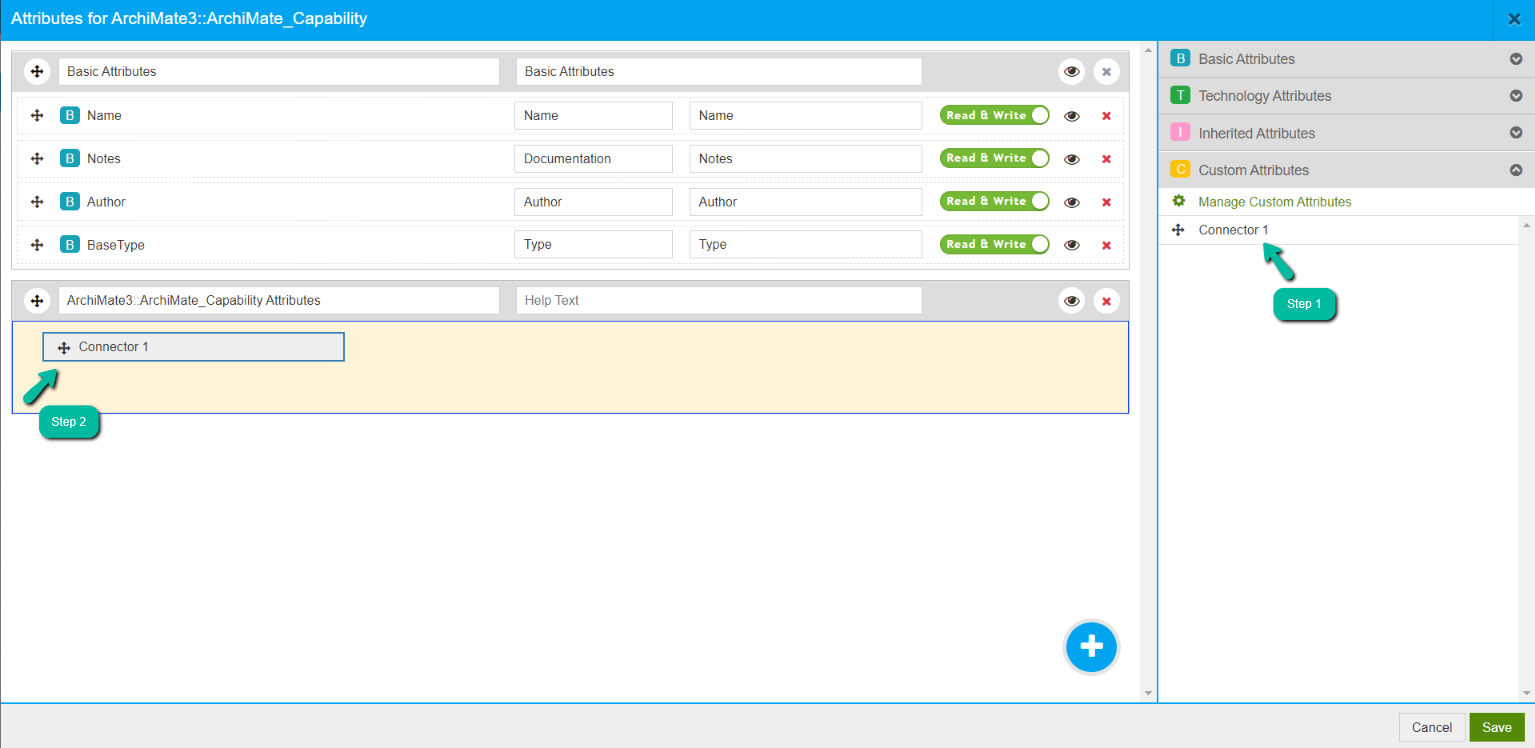
Drag the connector and place it in the attribute section and click on Save. The connector attribute can be viewed in the Property window of the element only when it is added to the attribute section.
Click on Update Profile on the landing page

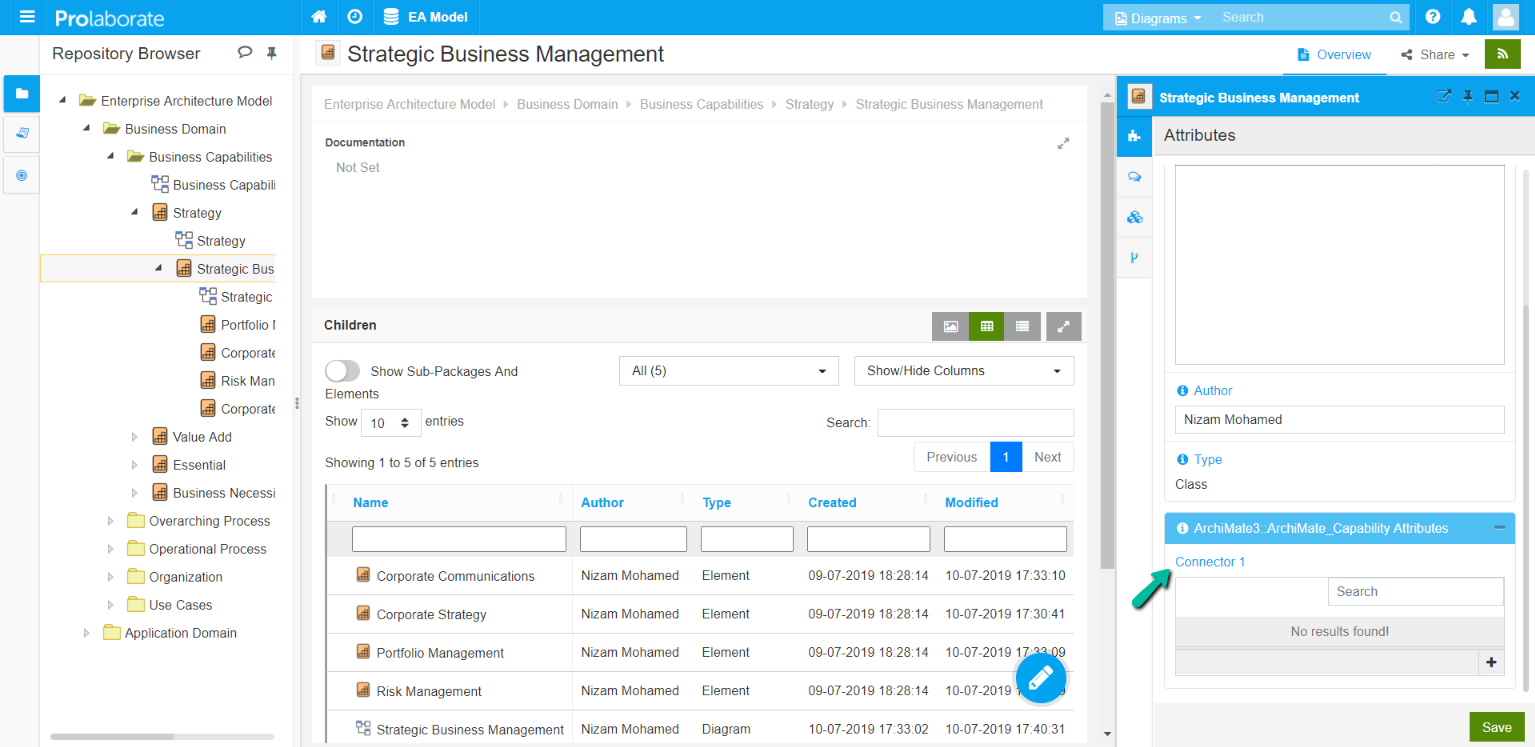
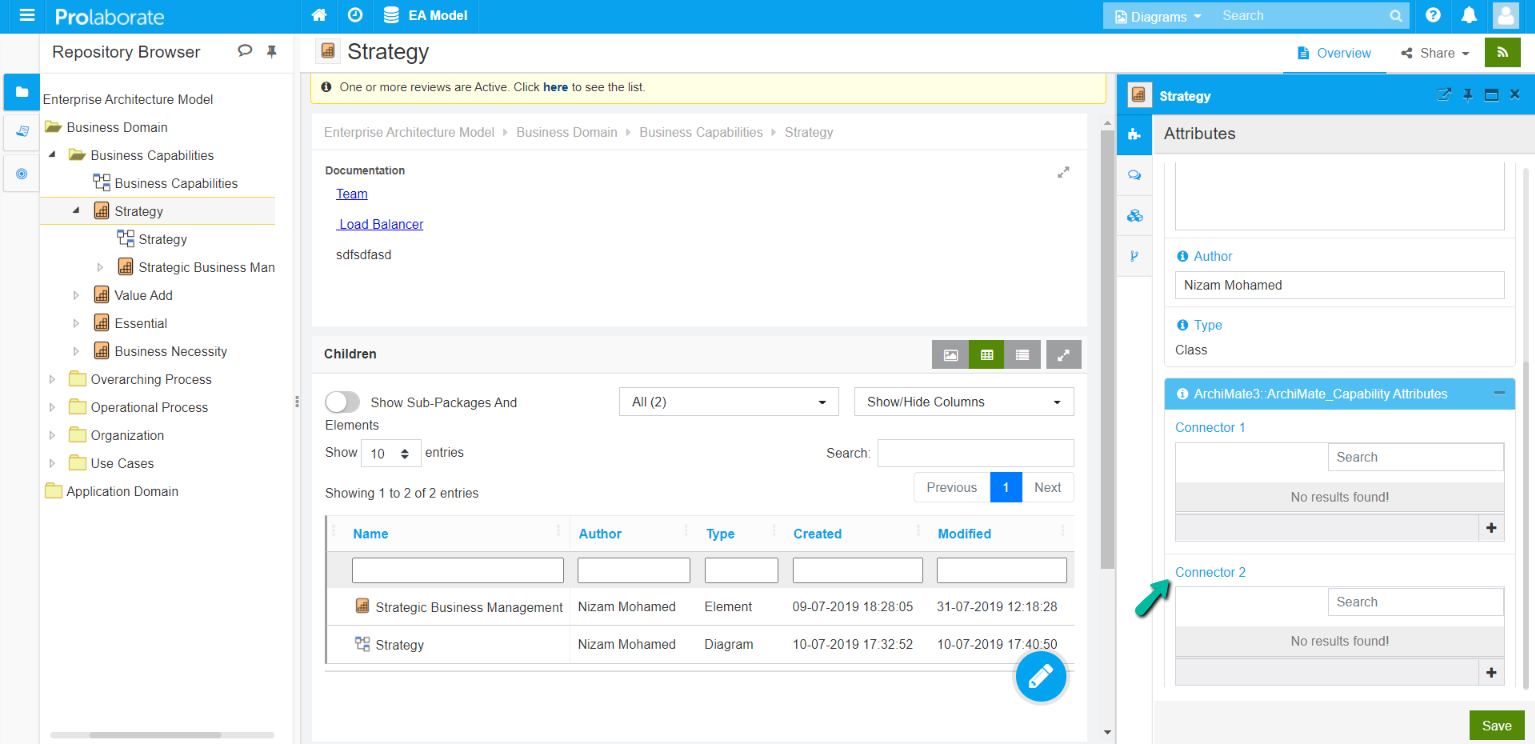
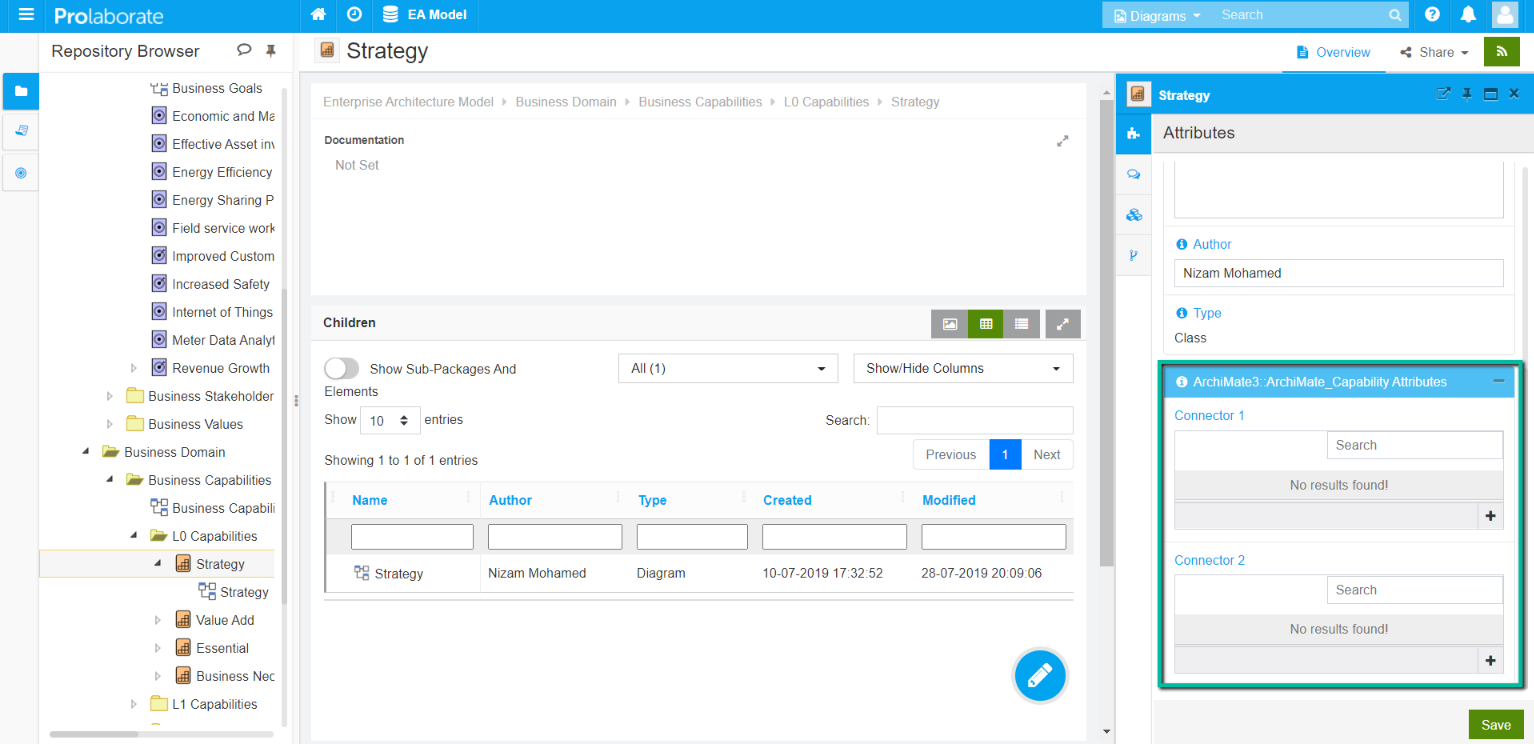
To view the connector, select the element in the repository browser and click on Attributes. The property window displays the connector attribute and allows users to establish a connection between elements refer to this section
Below is the screenshot which shows the connector attribute in the property window of an element.
Connector Attribute Type 2: Create Connector to Multiple Element Type and Stereotype
This advanced connector attribute setting lets you create a connector for multiple-element types and stereotypes. This can be accomplished using the query configuration which allows declaring multiple types and stereotypes at the time of creating a connector attribute.
Add Connector Attribute
Following are the benefits of using the query configuration
- Load multiple element types or stereotypes for connector creation
- Load whole model for connector creation if type and stereotype are left blank
- View connectors in the properties window for multiple-element types and stereotypes
- Elements will be listed in “Table View” facilitating an easy selection of elements at the time of establishing a connection between elements
Sample Query
select ‘Element’ AS Type,Element.Name Name,Element.ea_guid ClassGuid,Element.Stereotype from t_object Element WHERE Element.Object_Type NOT IN (‘Boundary’, ‘Constraint’, ‘Note’, ‘Text’, ‘Package’) And Element.Stereotype in (‘Functional’, ‘internal worker’)
The above query will list all elements which have the Stereotype of “Functional and internal worker” and Type as “Class”.
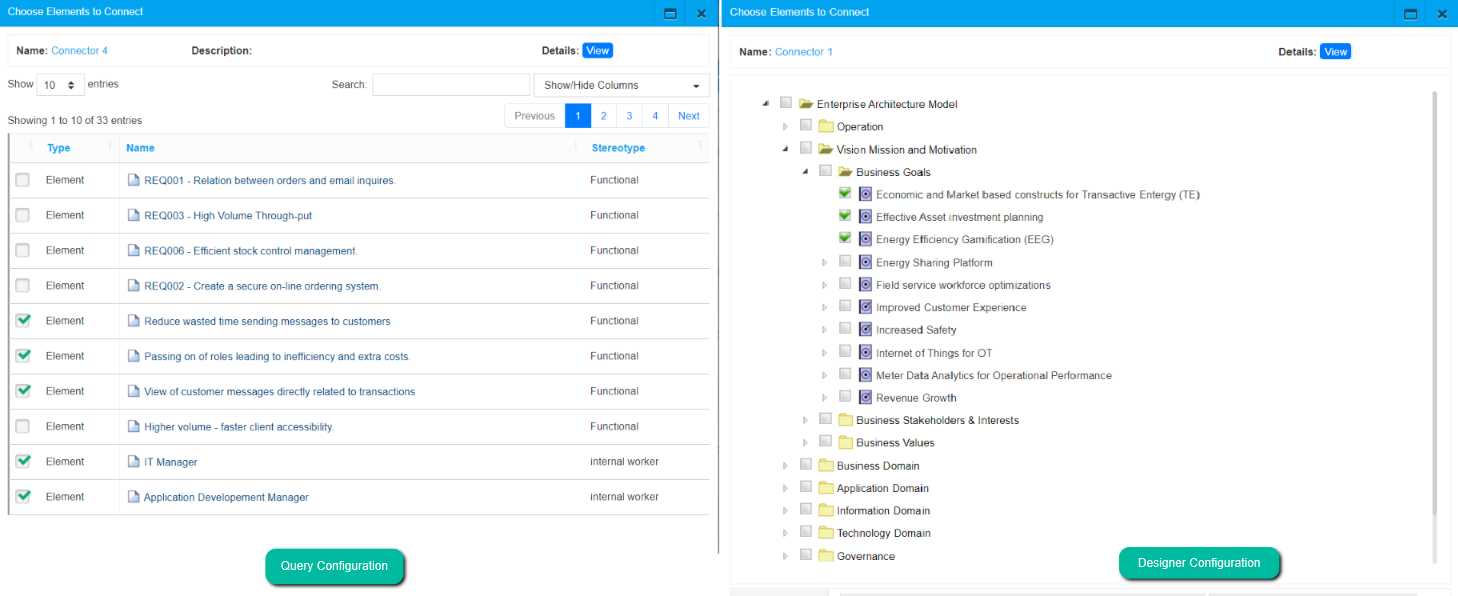
Below is the screenshot which shows the comparison between the query configuration and the designer configuration. As you see the query configuration renders “Table View” of a specific type and multiple stereotypes of an element and the designer configuration displays “Tree View” of a specific type and stereotype of an element.
To create such an advanced connector configuration, click on Menu > Modeling Languages
Click on the Manage Profiles on the modeling language for which you want to create a connector attribute.
On the overlay window click on the Edit icon

Click on the Gear icon (i.e., Form Designer) on the corresponding stereotype for which you want to create a connector attribute.
Click on the Custom Attributes on the landing page
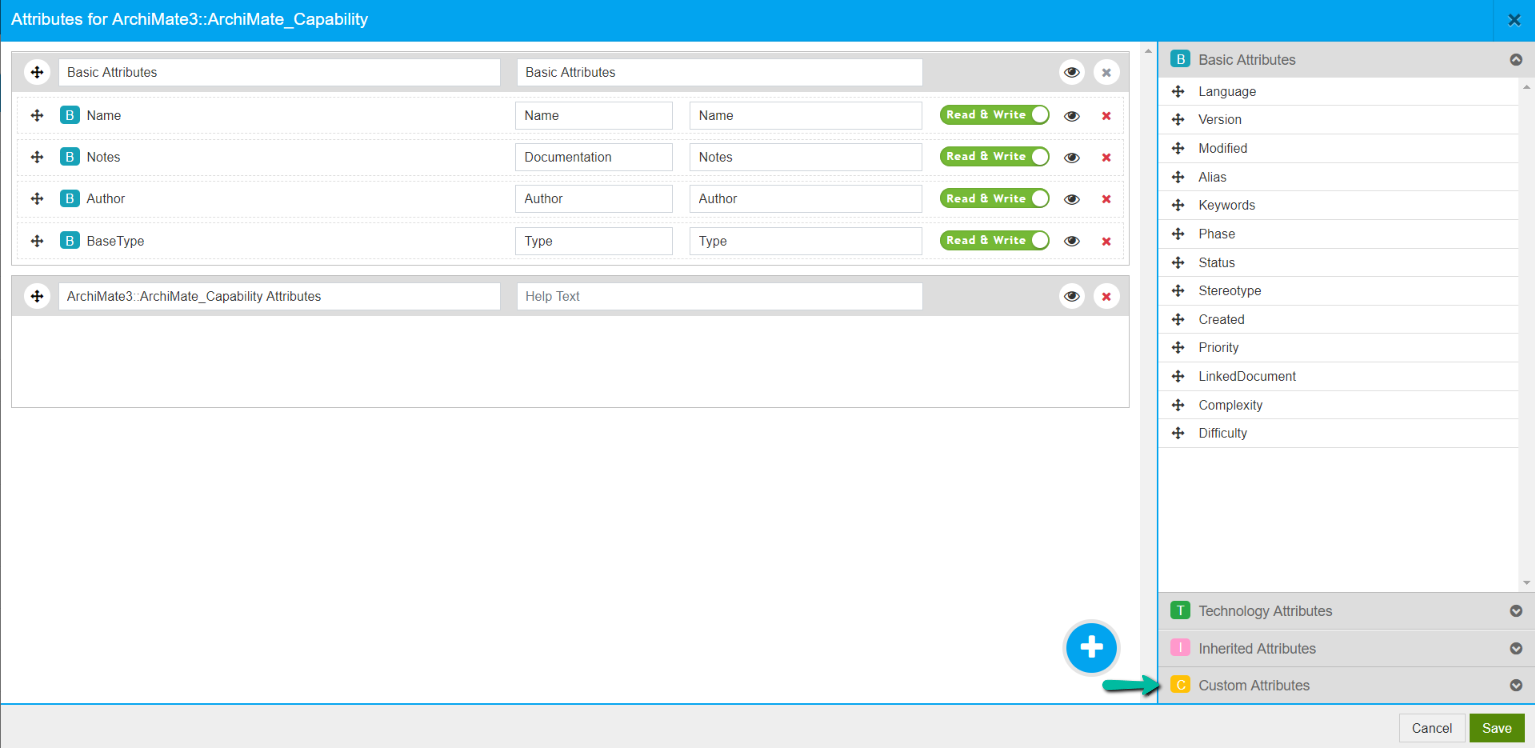
In the Custom Attributes window click on Manage Custom Attributes

Click on Create Attribute > Connector on the popup window

On landing in the Create Connector Attribute furnish the below details
Name: Give a suitable name for the connector attribute
Description: Write a short description of the connector attribute if required
In the Connector, Details section define the type and stereotype
Type: Upon typing the type you will get the list and you can choose from the dropdown
Stereotype: Upon typing the Stereotype you will get the list and you can choose from the dropdown
Direction: Choose the direction of the connector either Source to Target or Target to Source
Below is the screenshot which shows the dropdown in stereotype as the user started typing
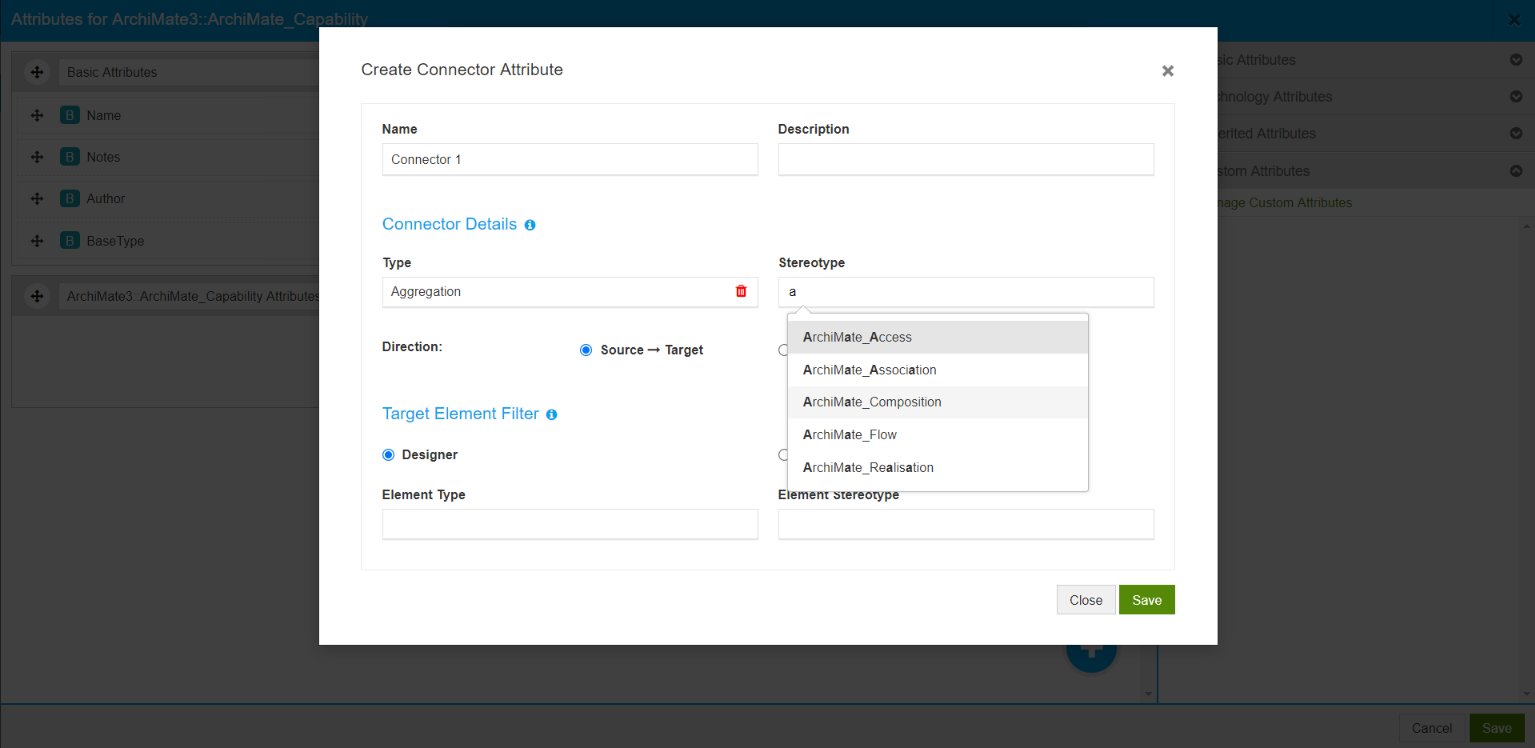
In the Target Element Filter, choose the Query.
Enter the query in the given box and click on the Save button.
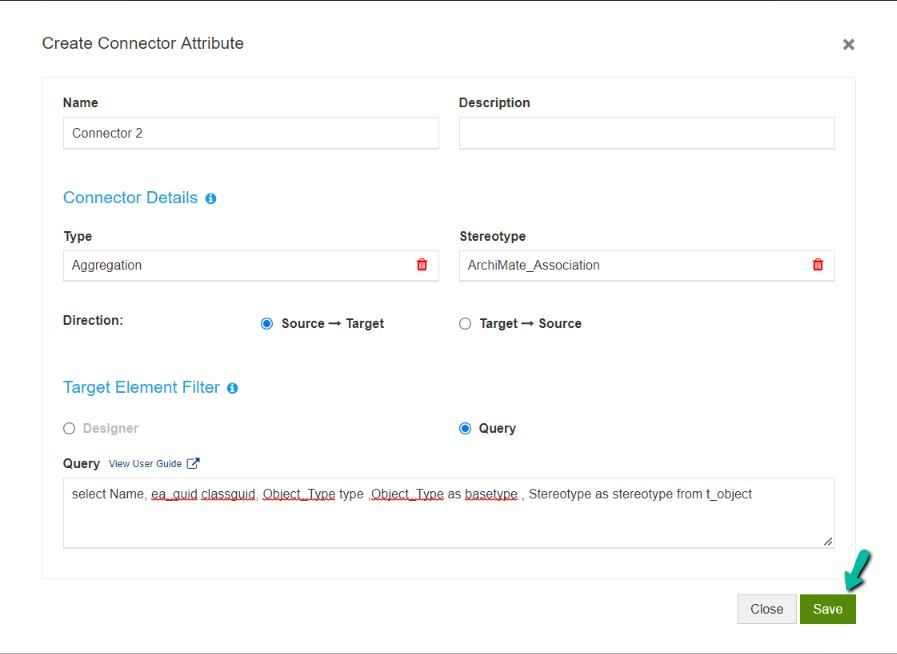
On clicking the Save button your connector attribute will be created and click on Close to exit.
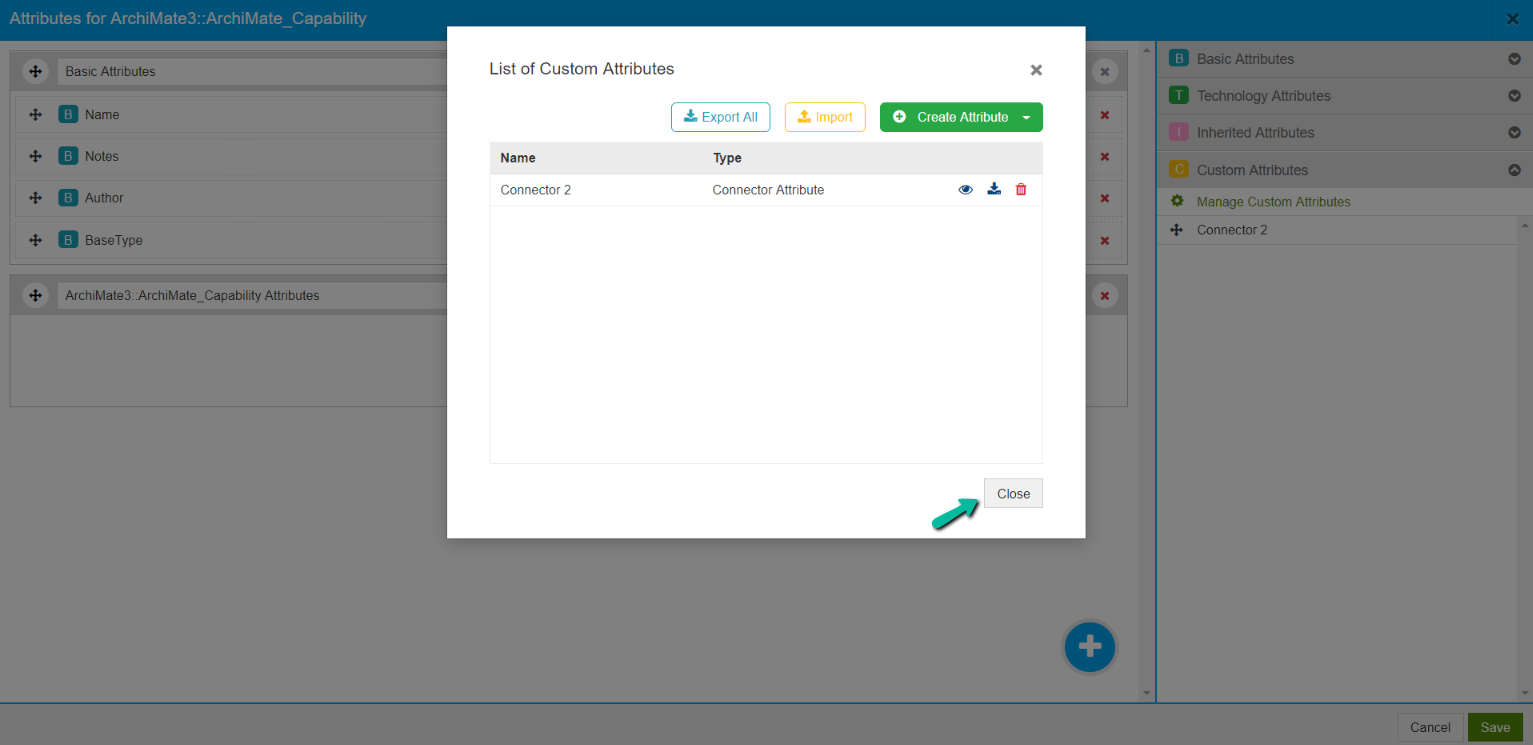
Use Connector Attribute in Property Window
Now drag the connector and place it in the attribute section and click on Save. The connector can be viewed in the Property window of the element only when it is added to the attribute section.
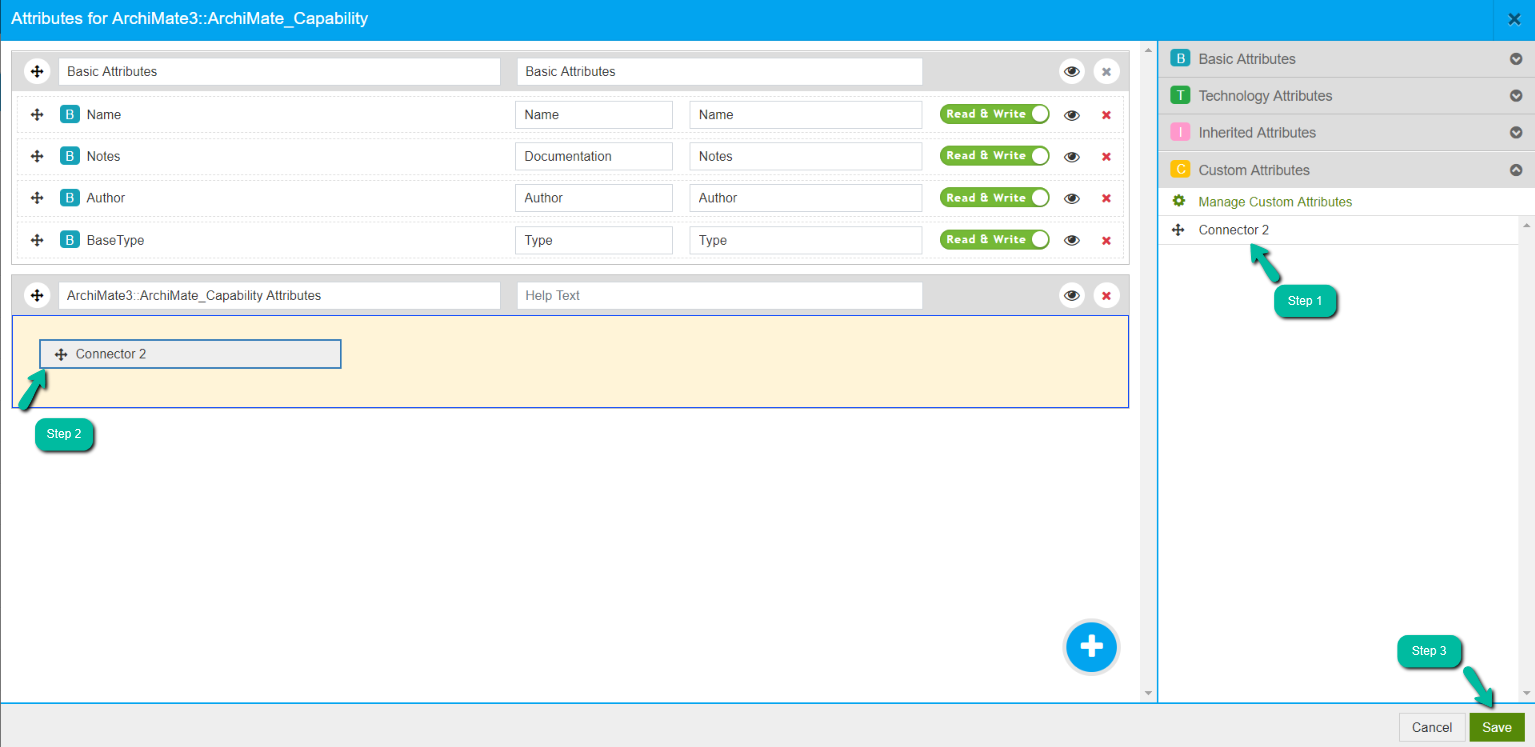
Click on Update Profile on the landing page

To view the connector, select the element in the repository browser and click on Attributes. The property window of the element will display the connector attribute and establish a connection between elements refer to this section
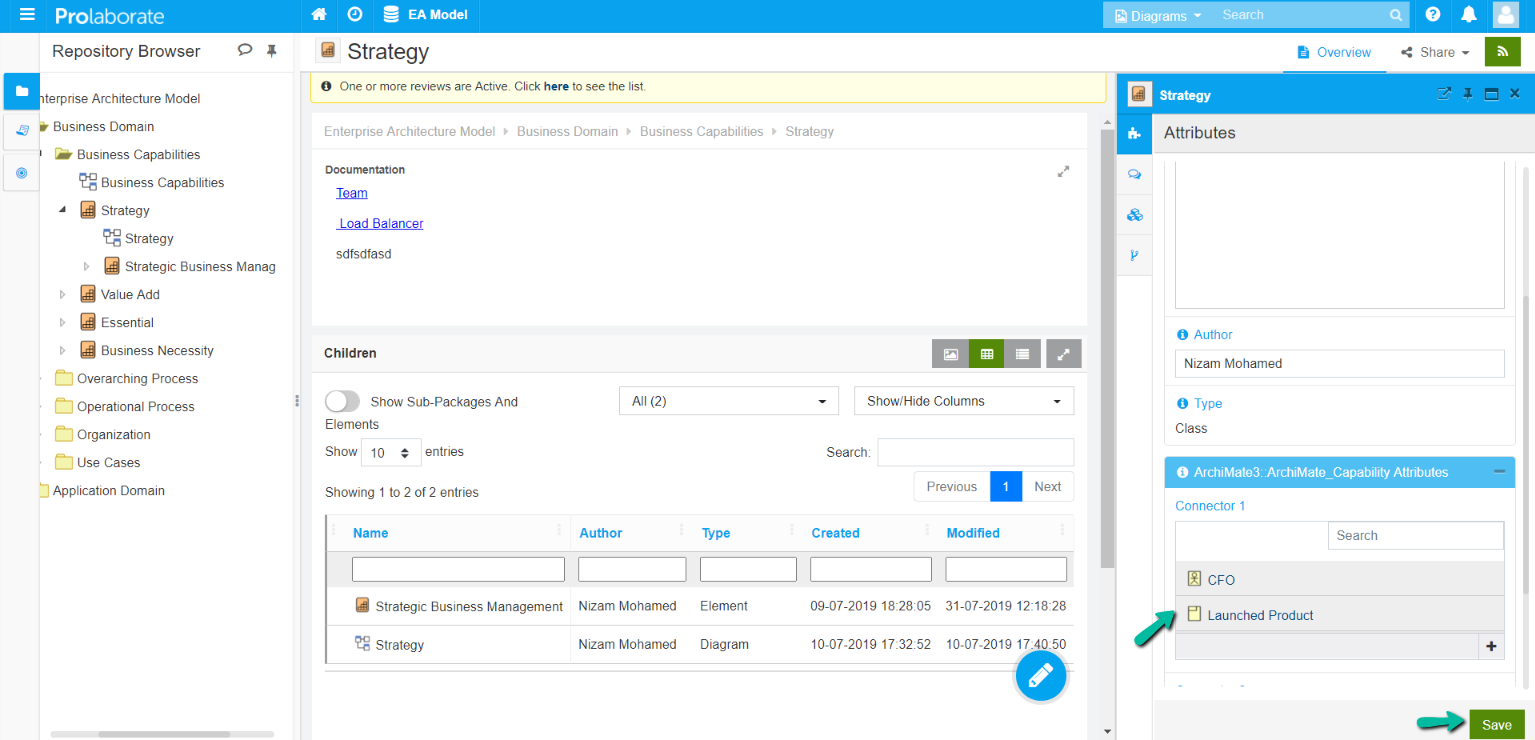
Below is the screenshot which shows the connector in the attribute window of an element.
Manage Connector Attribute
All the connector that pertains to the Modeling language will be listed here, which can be viewed, downloaded, and deleted if required.
To manage connector attributes, click on Menu > Modeling Languages from the repository overview page
Click on the Manage Profiles in the modeling language
Click on the Edit icon on the listed profile
Click on the Gear icon across the stereotype
Click on Manage Custom Attributes
In the overlay window, multiple actions can be performed and they are as follows
View Connector Attribute Details
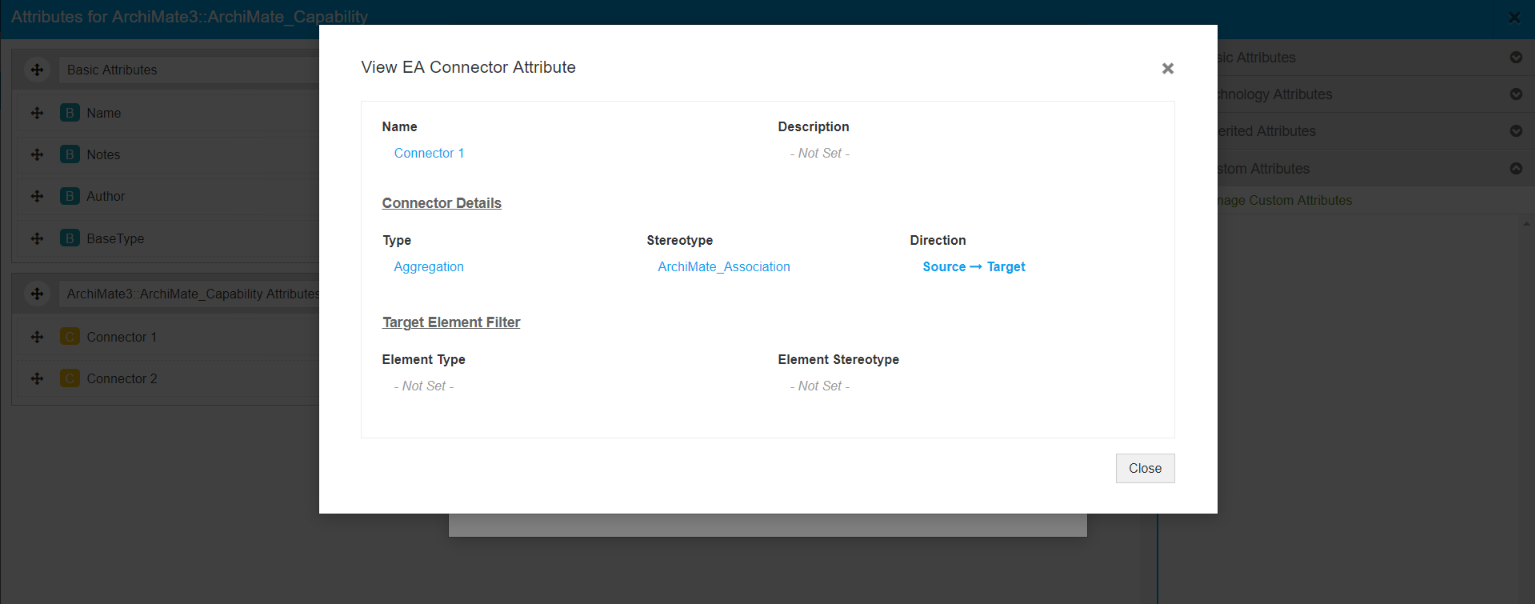
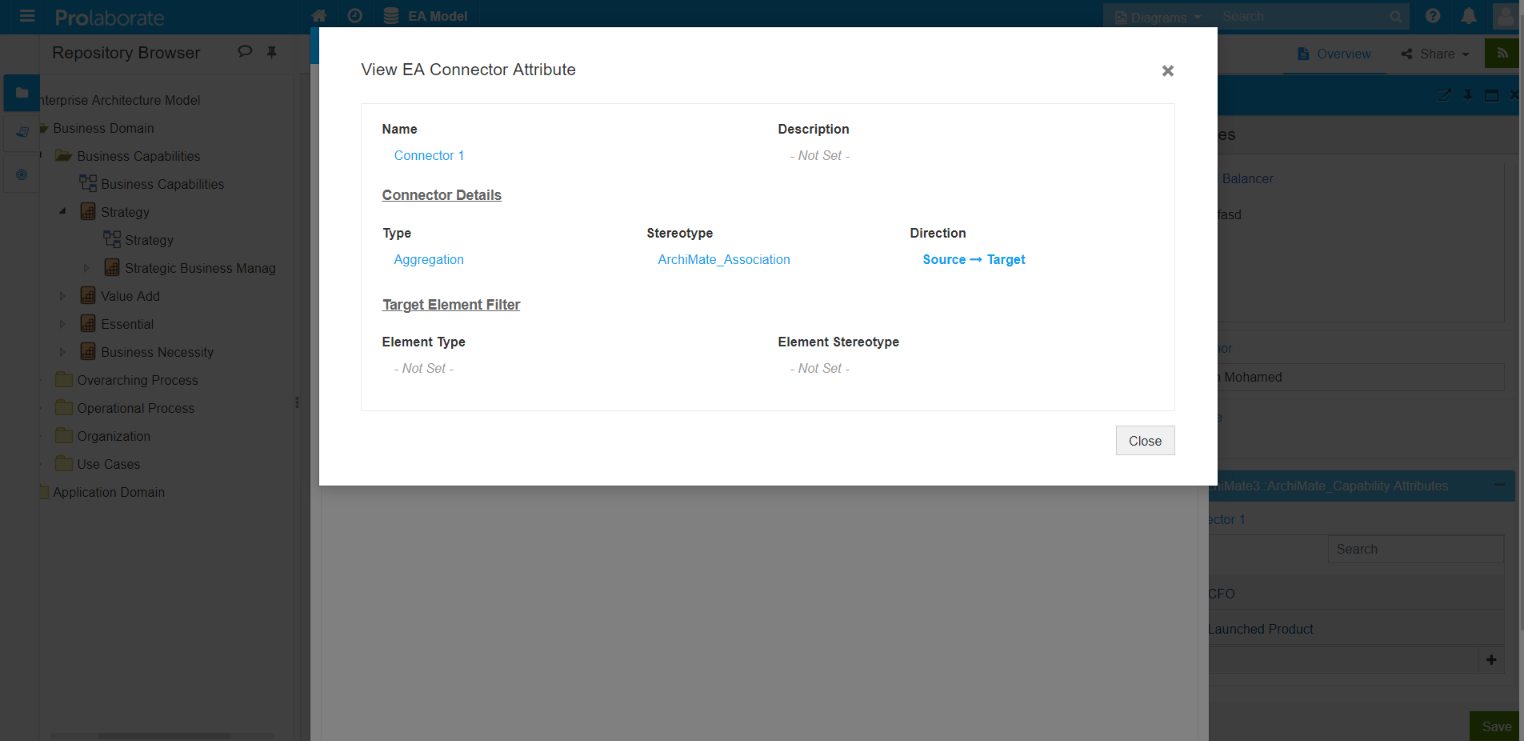
Clicking on the Eye icon lets you see the connector details including the type, stereotype, direction, etc.
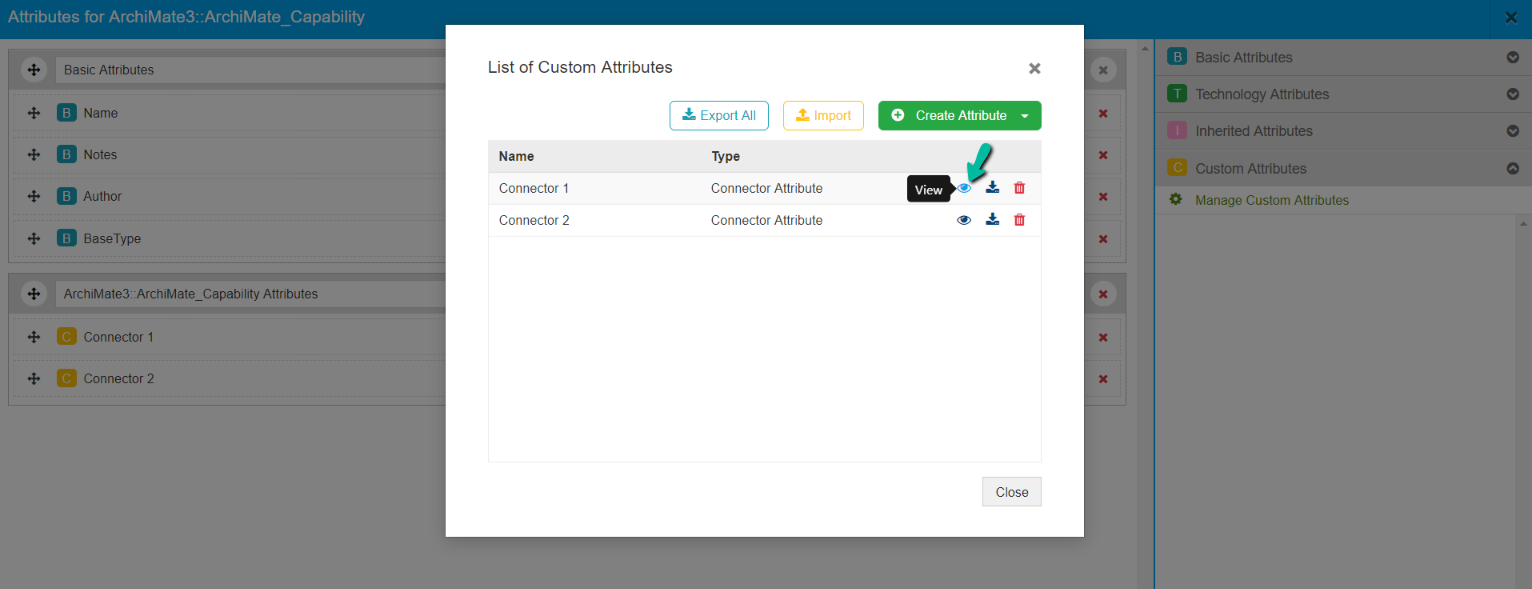
Below is the screenshot which displays the details of the connector upon clicking on the eye icon.
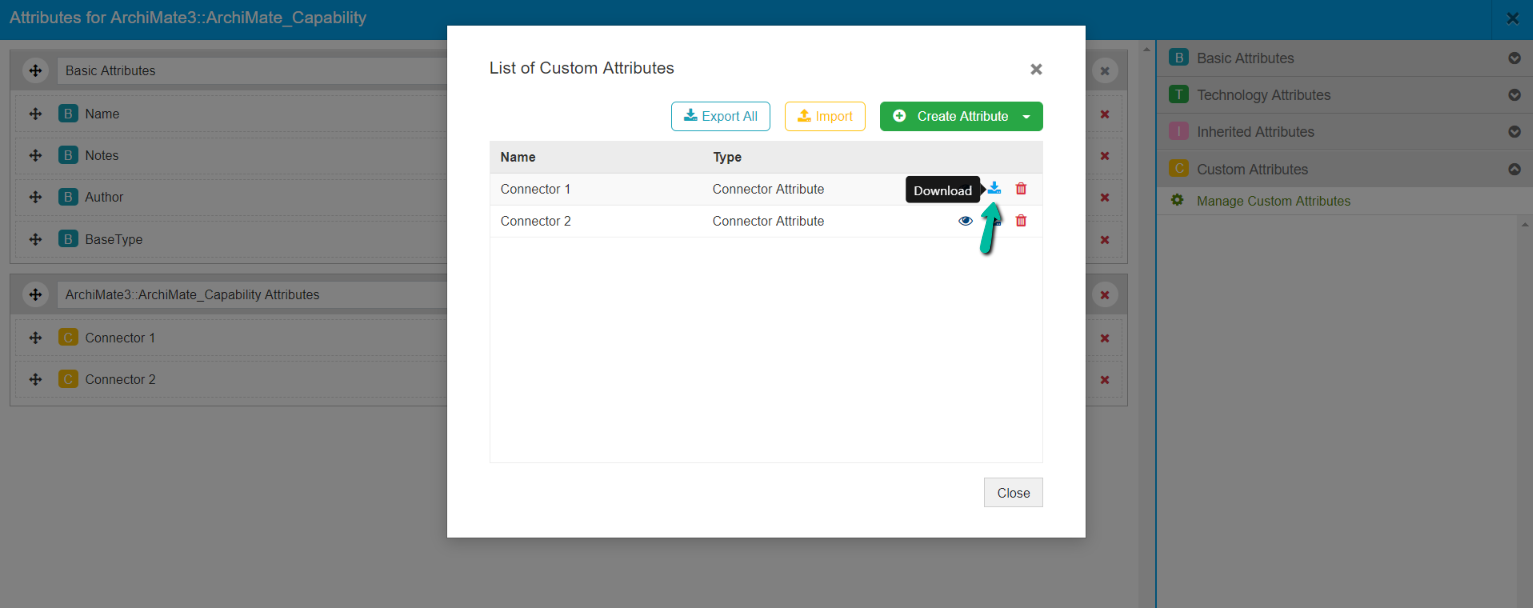
Download & Reuse Connector Attribute
This feature will let you download the connector attribute for reusing it in the future and to download the connector attribute click on the Download Icon.
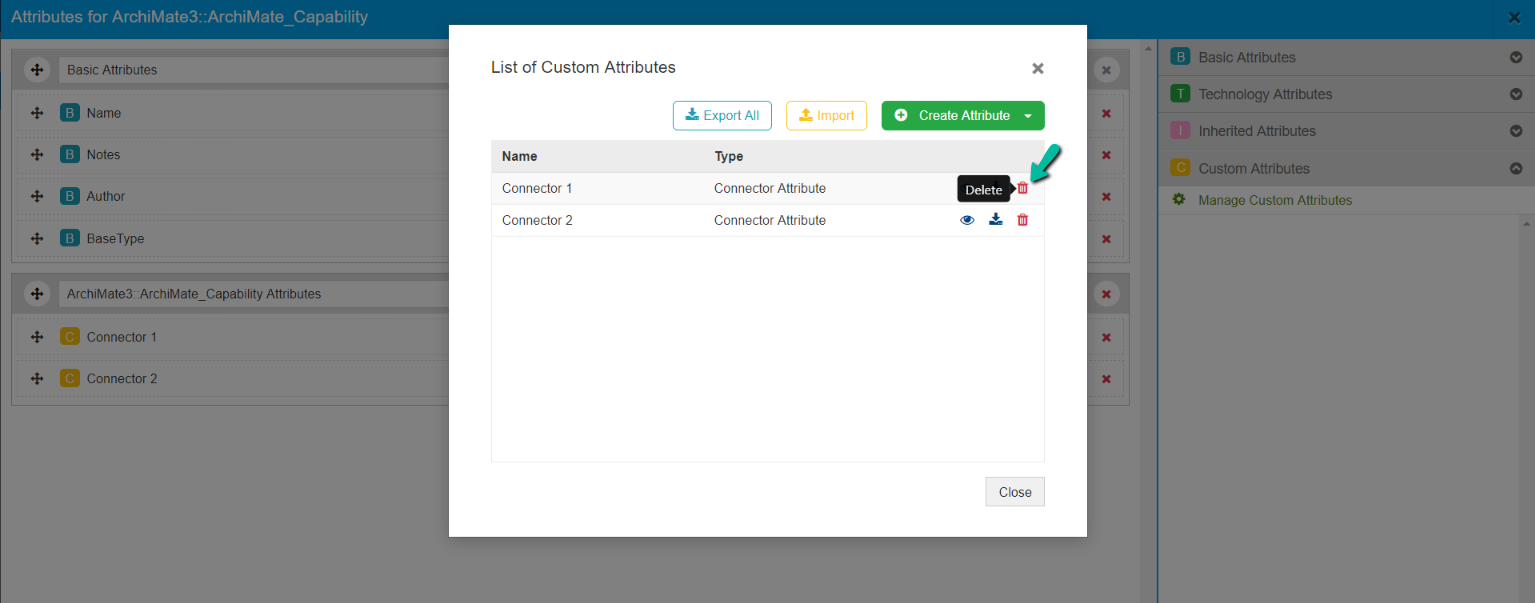
Delete Connector Attribute
To delete a connector attribute, click on the Trash icon.
Connector Property Window
The Connector Property window allows users to view the connected target element, search and create a connector between the source and target element. When a connector is created in Prolaborate the same is reflected in the EA model as well, and it can be viewed and deleted in Prolaborate when it is not required.
Pre-Requisite:
As a prerequisite, you should have configured at least one connector attribute under the Modeling Language for the specific source element to establish a connection between elements. Please Refer to this Section
Create Connector Between Elements
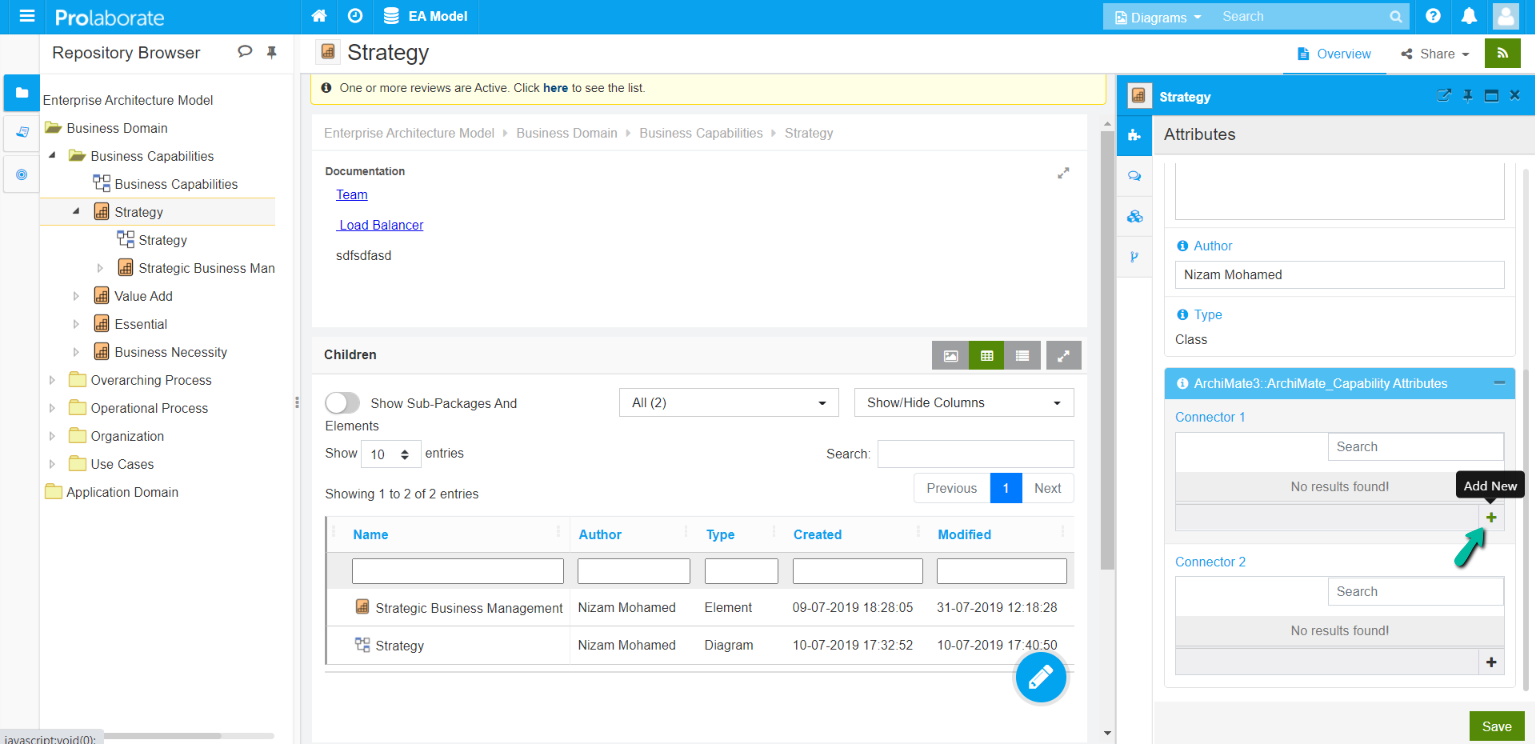
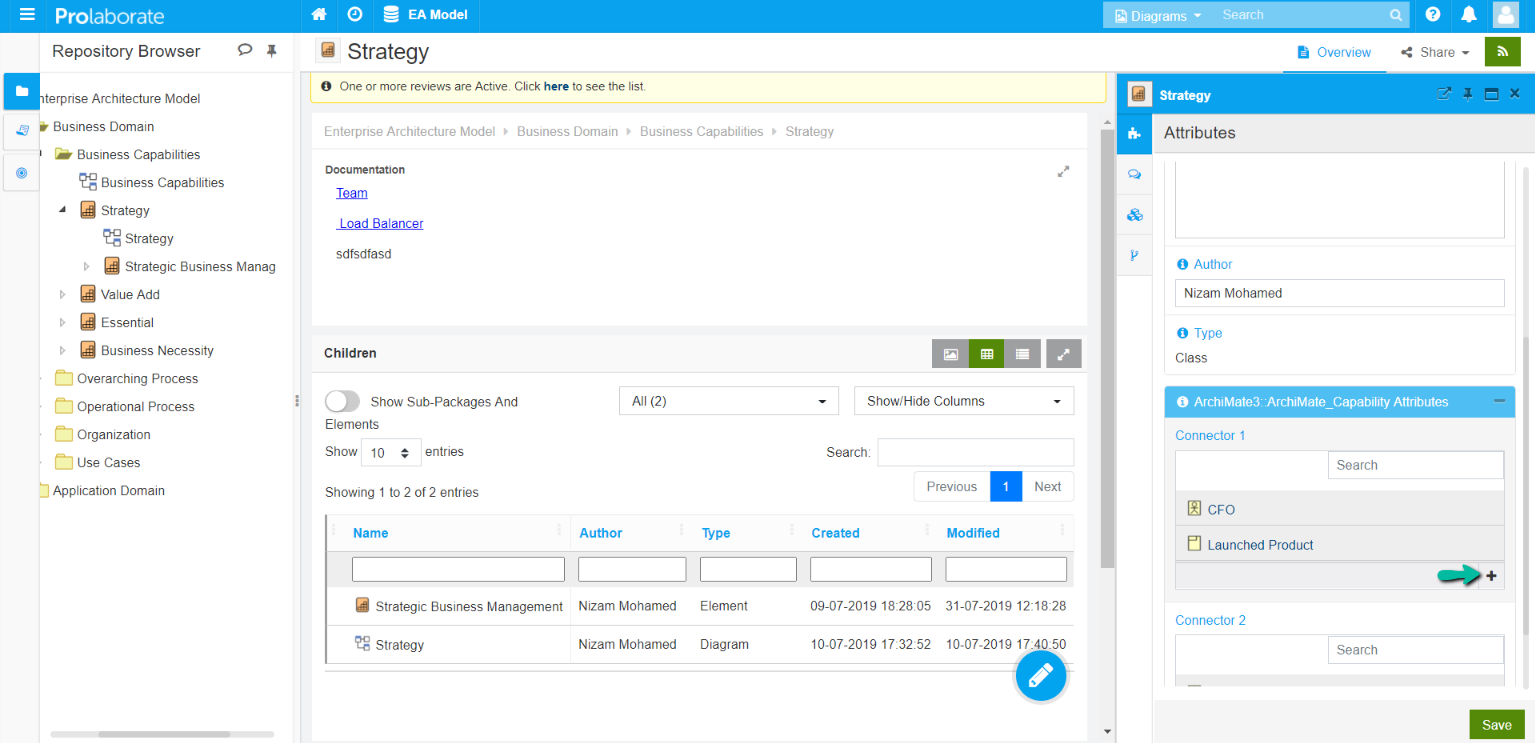
To establish a connection, select the element in the repository browser and click on Attributes in the properties window and click on the Plus symbol in the connector.
Landing on the Choose Elements to Connect page “Tree View” will be exhibited when using the designer configuration and “Table View” upon using the query configuration.
The below screenshot shows the “Tree View” when the designer configuration is used.
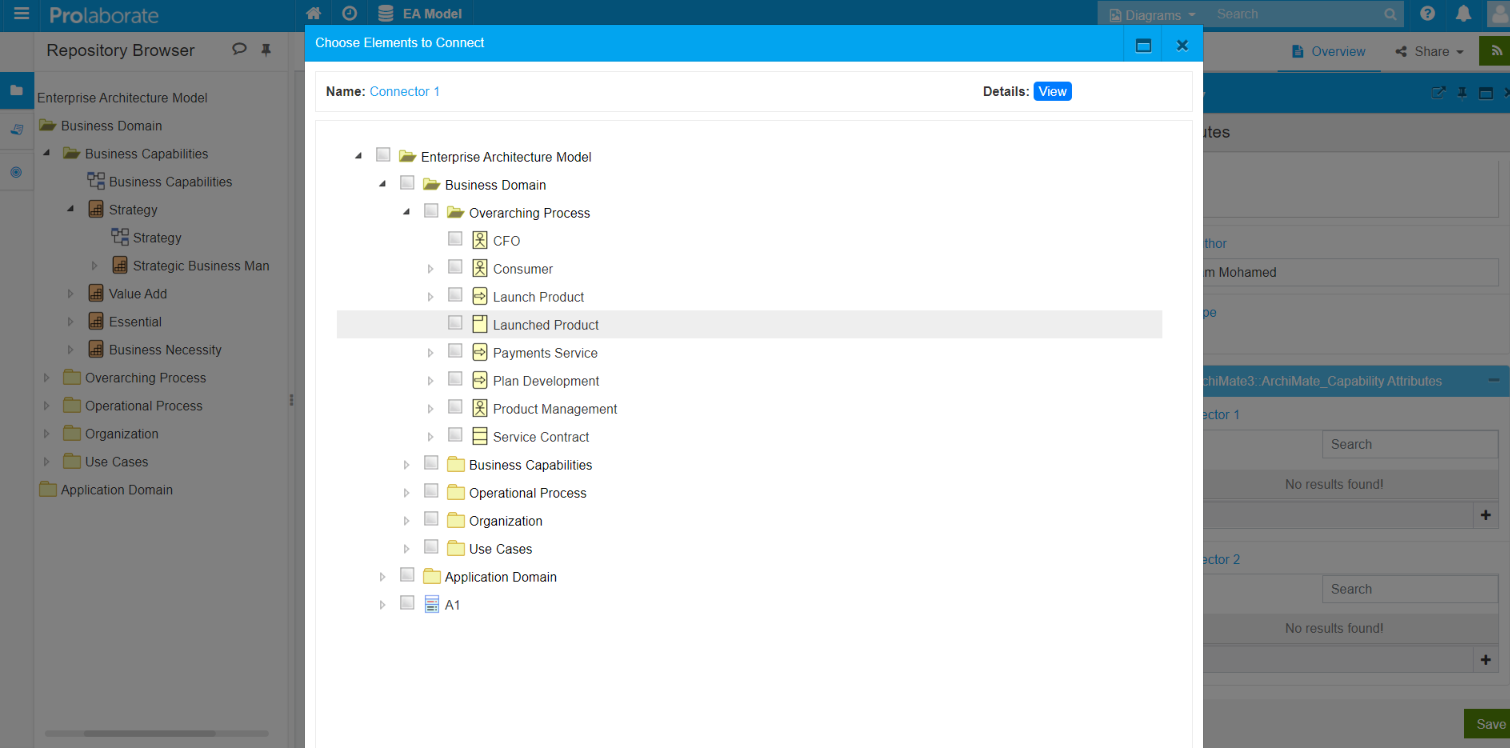
The below screenshot shows the “Table View” of elements when the query configuration is used.

Choose the element for which you want to establish a connection and then click on Save.
Once the connection is established the same will be reflected in the properties window box and click on Save
Find Connector Attribute used by Connector property window
Upon selecting the element click on the Attributes and click on the Plus symbol.
On the landing page click on
View
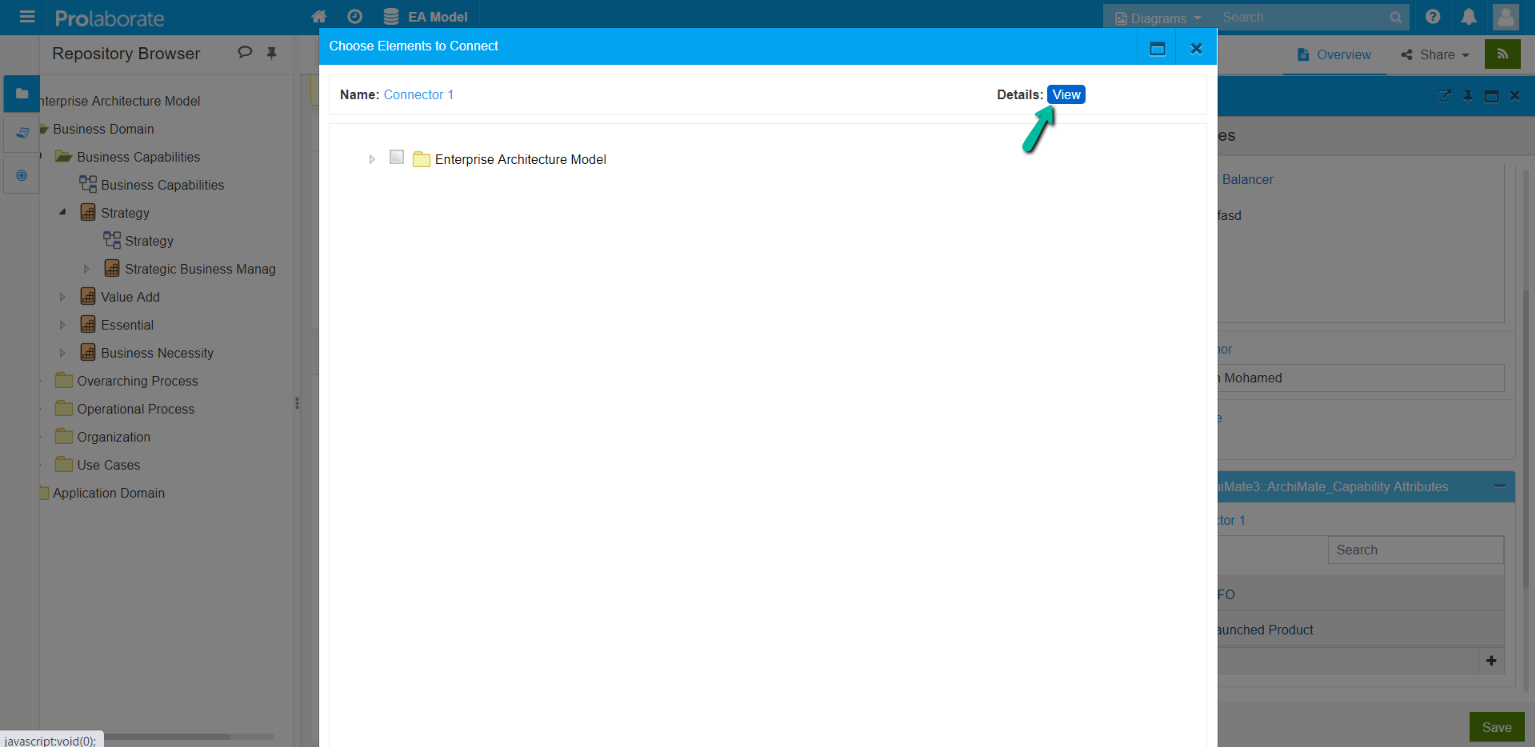
You will now land on the page which displays the connector details
View Connector
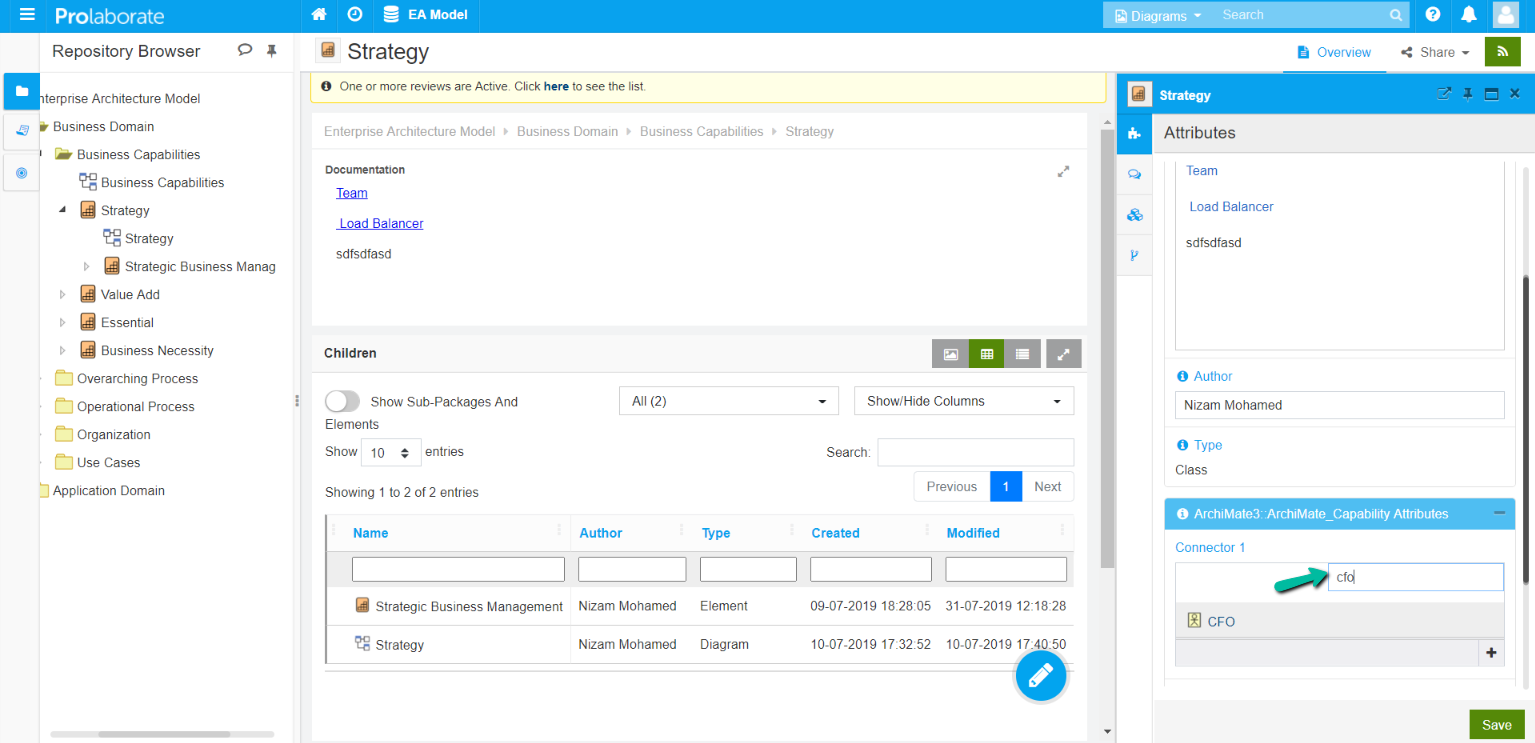
Connectors that are created under a Modeling language will be listed under the Properties window upon selecting an element.
Search Connector
On having multiple connections, you can search for the artifact using the search field. Upon selecting the element in the repository page click on the Attributes and type the connector name to be searched in the search box.
Note:
- Search option is not available in v3.7.
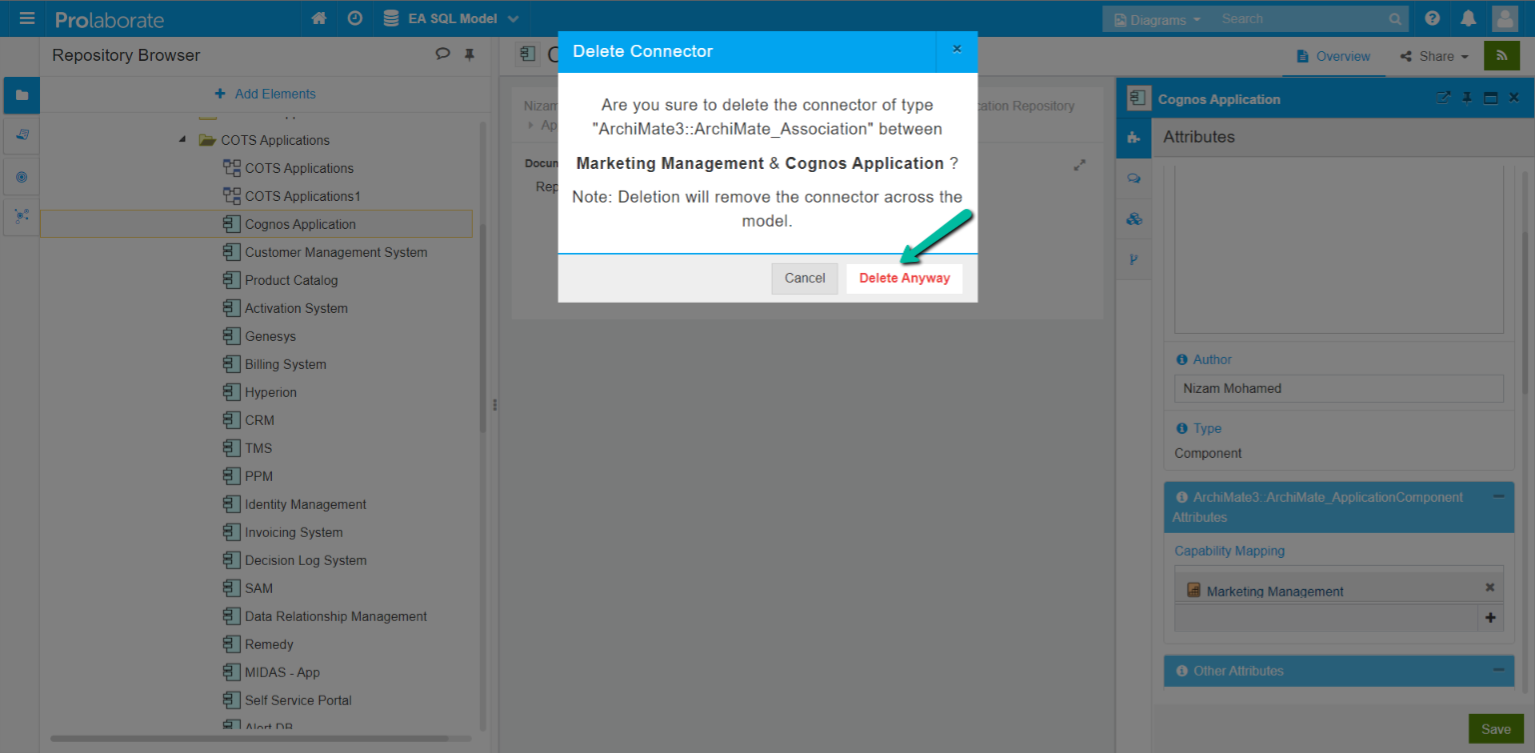
Delete Connector
From Prolaborate version 3.7 onwards, connector can be deleted in the model from the application itself. A Cross icon will be visible next to the element in the connector attribute.
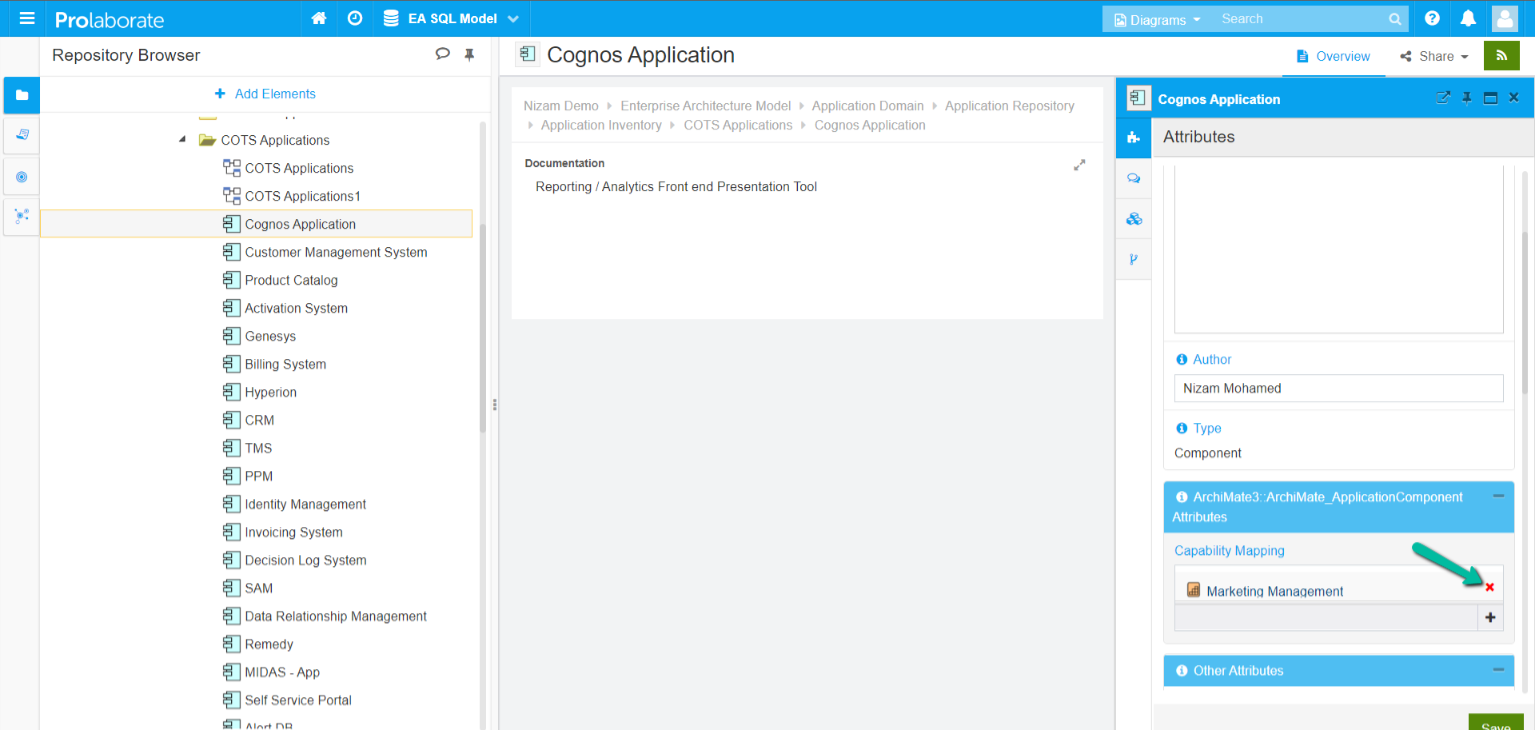
A popup will appear to confirm the deletion. Click Delete Anyway to delete the connector permanently from the model.