
Add User
Users
This guide will help you understand how to manage users and user groups in Prolaborate.
To know how to manage Active Directory Users and Groups, refer to this guide.
To know how to manage SAML based Single Sign-On apps, refer to this guide.
In case you don’t use Active Directory or a Single Sign-On, you can let users sign up on their own rather than asking the admins to add them one by one. Refer to this guide to learn more.
Add New Prolaborate User
Click on Menu > User Management to go to he Users page. This is where you manage all the users and licenses.
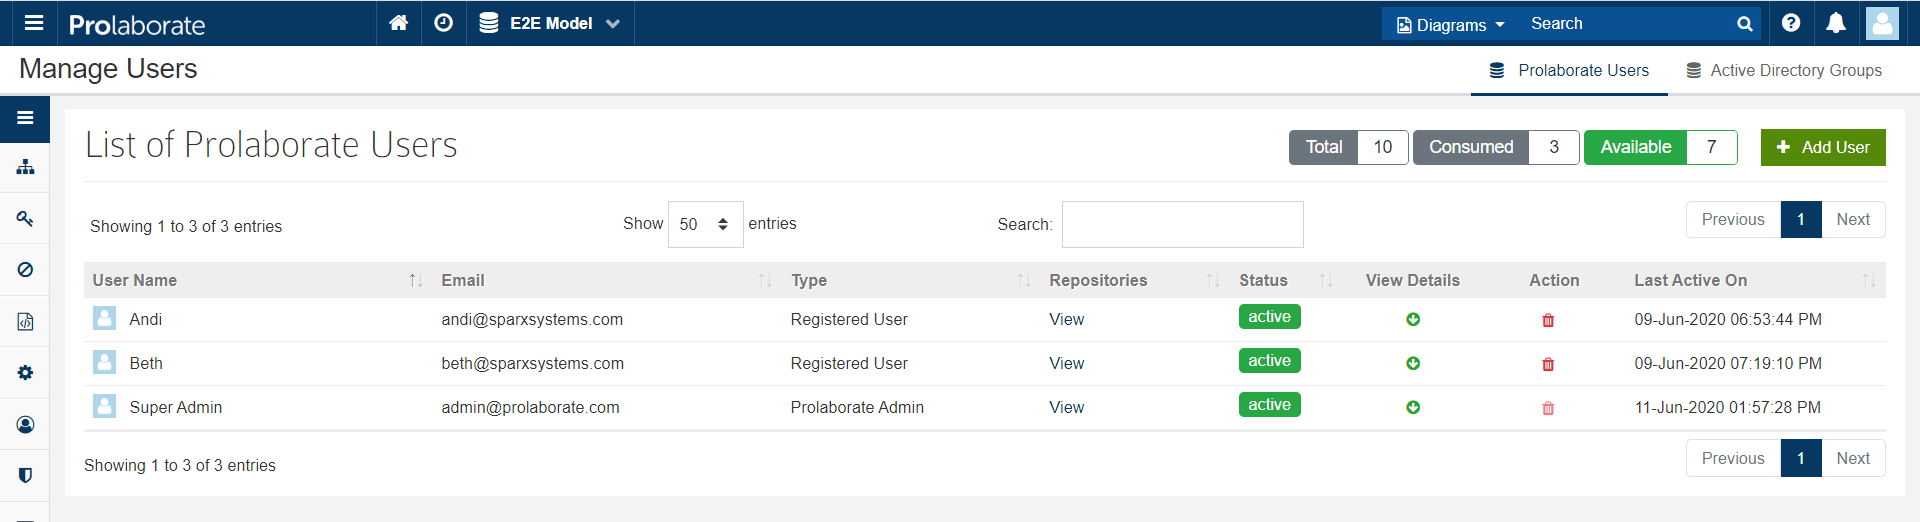


It lists all the users added to Prolaborate.
From this page, you can
- add new users to Prolaborate
- Add users and groups from Active Directory (AD)
- view details of users and
- edit details of users.
To add a user, click on Add User.
In the Add User page, you can add a new user, or add users from Active Directory
Use Add New User option to add a new user.
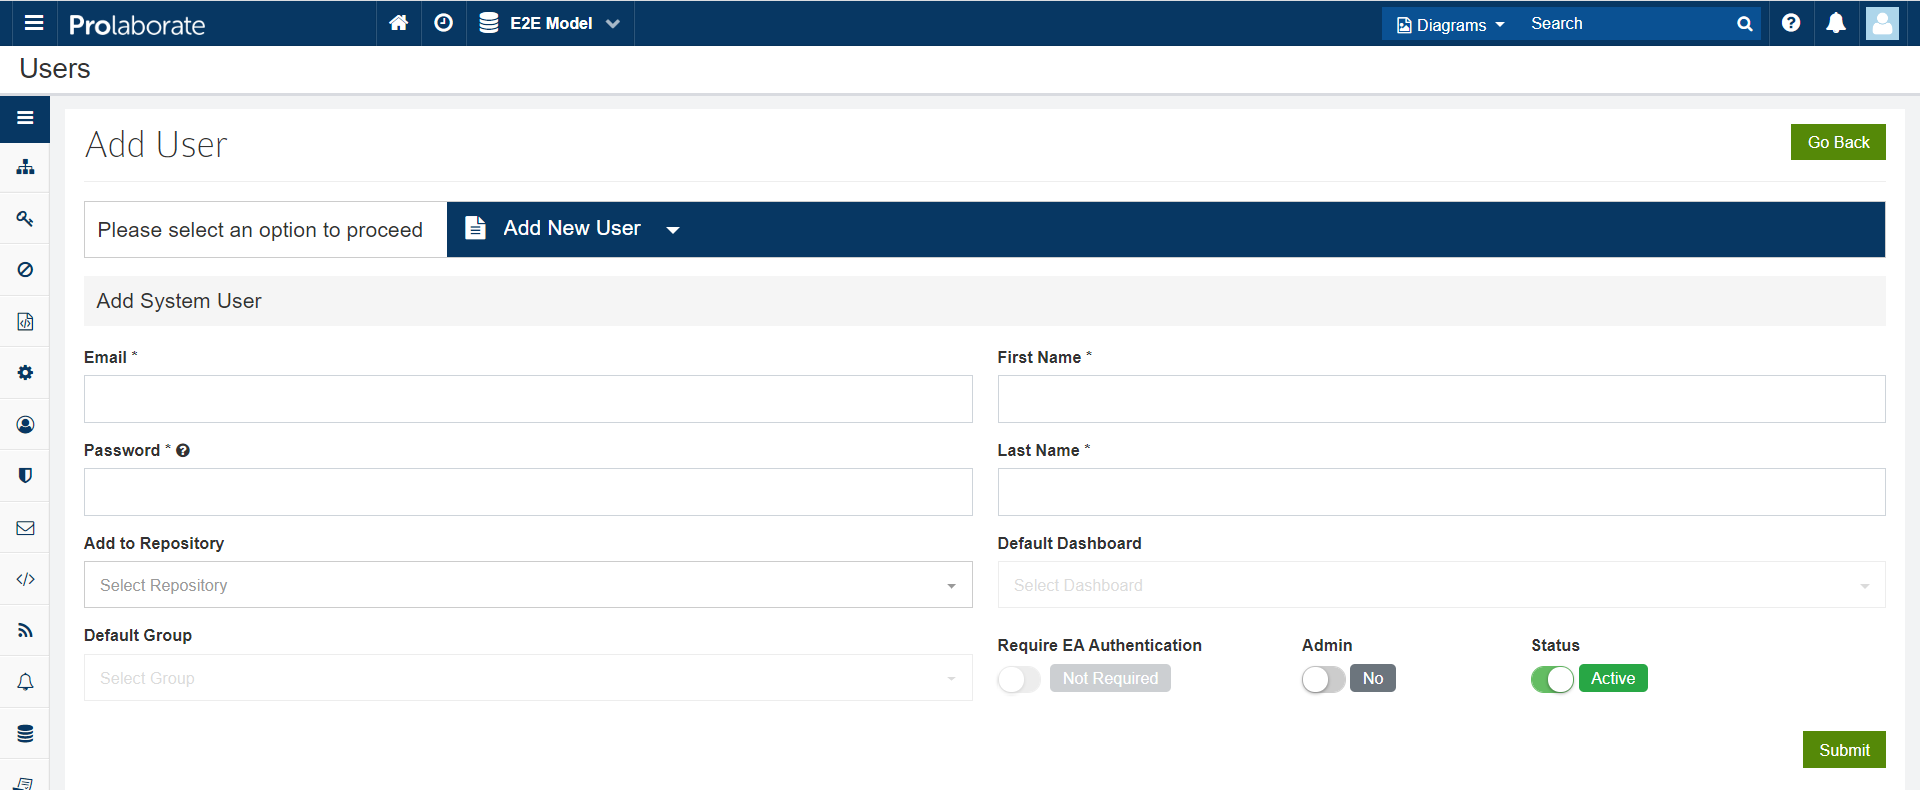
To add a new user,
- Enter the Email address of the new user
- Enter the default Password. The user will be asked to change this password on their first login.
- Specify their First and Last Name
- Select the Repository to which this user should be added
- Select an User Group to which this user should be added to
- Enable Require EA Authentication only if you want this user to be prompted for Enterprise Architect credentials when opening the selected repository.
Please note this option can be enabled only if EA Security is enabled for this repository. - Enable Admin option if you want to make this user an Admin
- Click on Submit and the user will be added.
- A welcome email will be sent to the user.
Add Users to a Repository
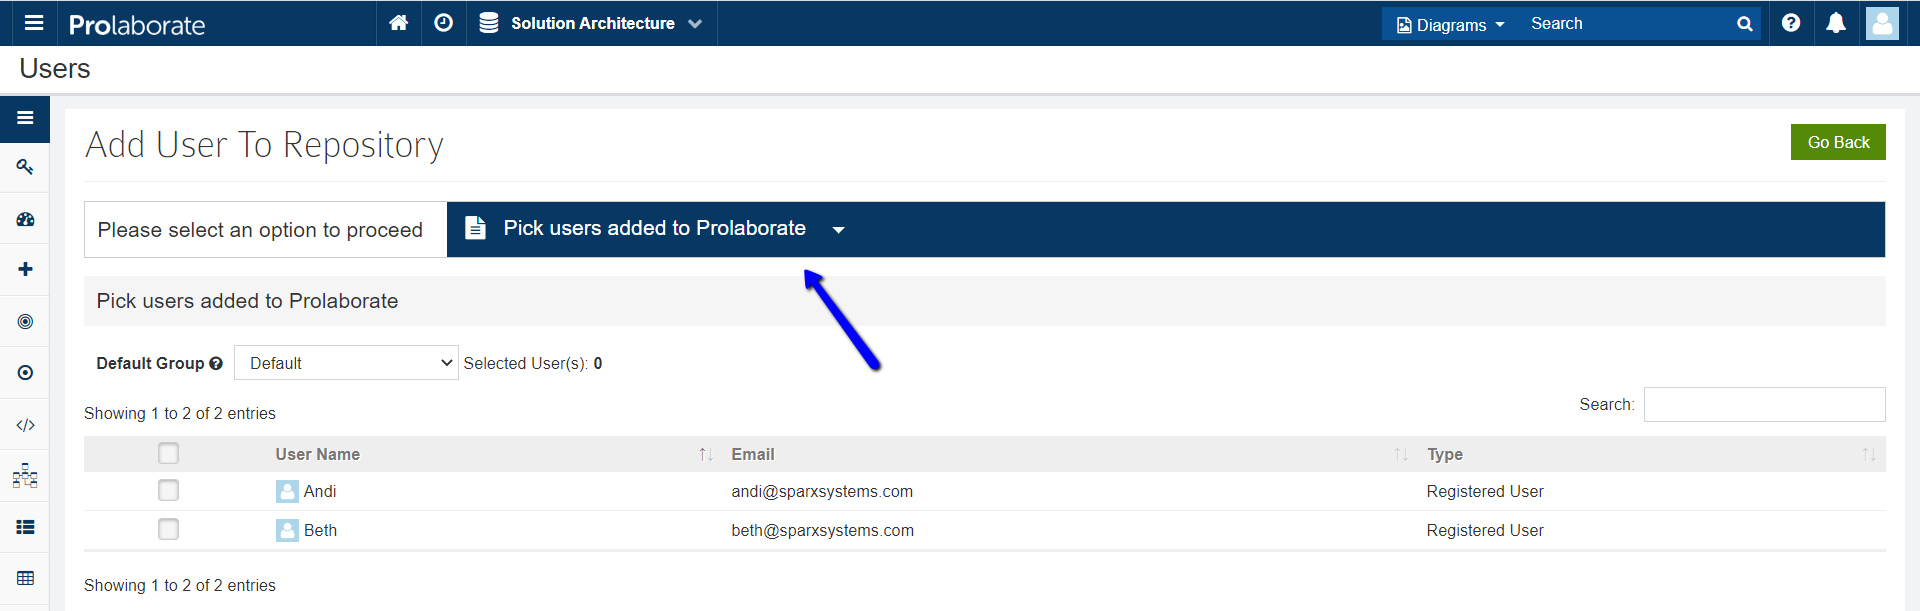
An user once added to Prolaborate need not be added again in each Repository.
Open a Repository.
Click on Menu > Users. (This is where you manage the users added to a specific repository)
Click on Add User. Select Pick users added to Prolaborate. Select the users you want to add and click on Add icon.
Manage Users
Go back to the User Management page.
You can view the complete details of a user by clicking on the down arrow icon under View Details.
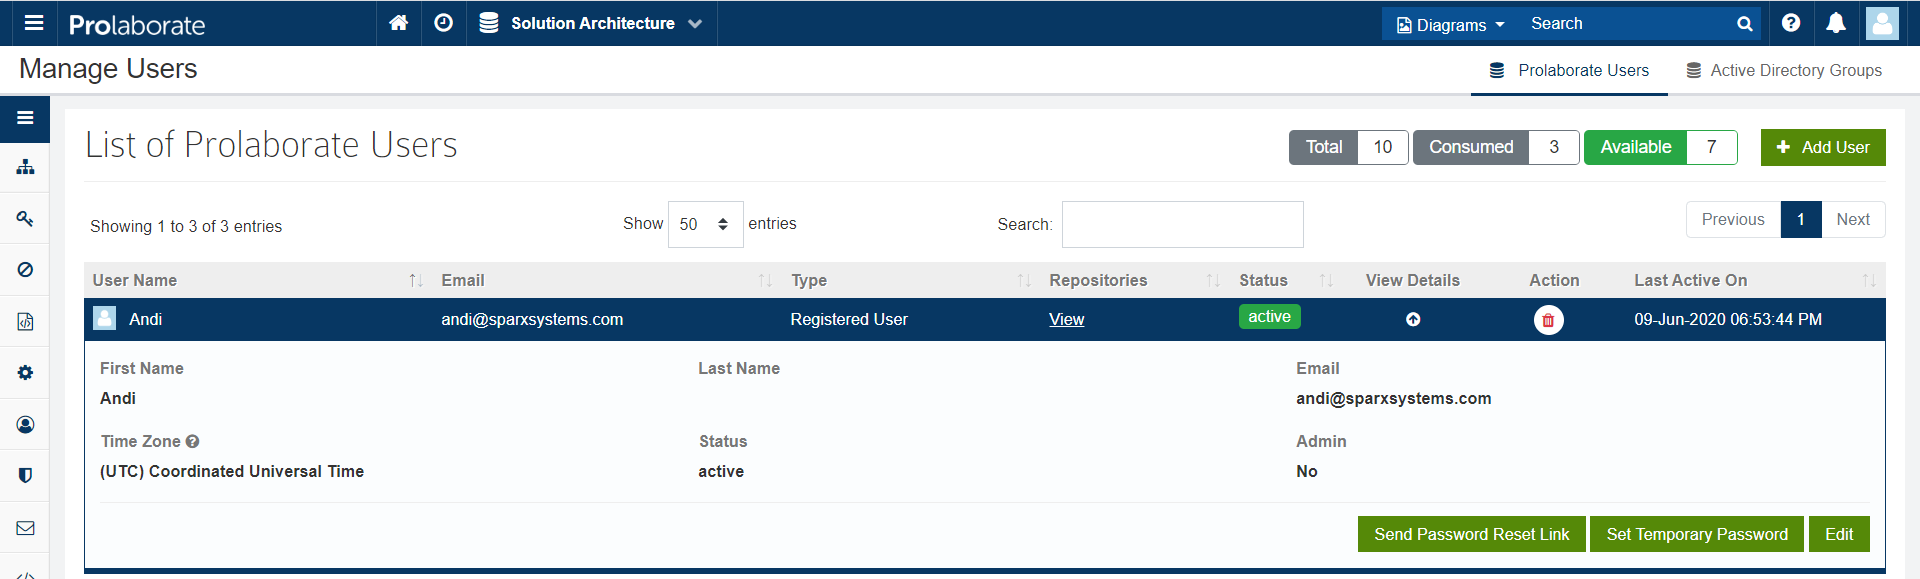
In the expanded view, you can
- View the list of Repositories this user is part of
- Edit First name, Last name, and Email.
- Edit the Status. Users with who are Inactive will not be able to login to Prolaborate
- Make this user an Admin.
- Click on Send Password Link to send a password reset link to the user.
- Set a one-time password using Set Temporary Password. The user can login to Prolaborate using the temporary password but he/she will be prompted to change the password.
- View the Type of user. There are four types of users:
- Prolaborate Admin – Administrators with complete access to the application
- Registered Users – All users except Admin and AD users belong to this type
- Active Directory User/Group – User or Group added from Active Directory
- Collaborate User – Users invited using Invite Collaborators option and have registered in Prolaborate
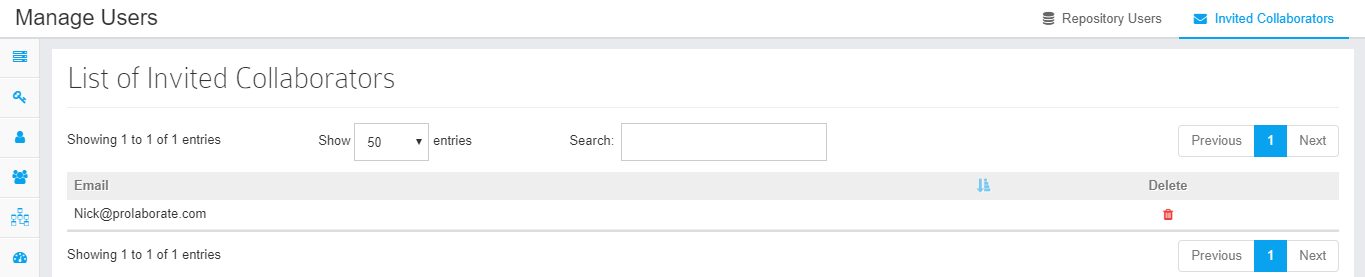
Manage Collaborators Invited to a Repository
All the users who have been invited for Collaboration using the Invite Collaborators option and have not registered yet will appear in Users page inside a Repository.
User Groups
User groups help you treat a set of members as a single entity. This will be extremely helpful in cases like assigning access permissions to packages or dashboards.
You can assign access at once rather than assigning access one by one to individual users.
Add User Groups
To go to the List of Groups page, click on Menu > User Groups.
List of Groups page displays all the groups in the current repository.
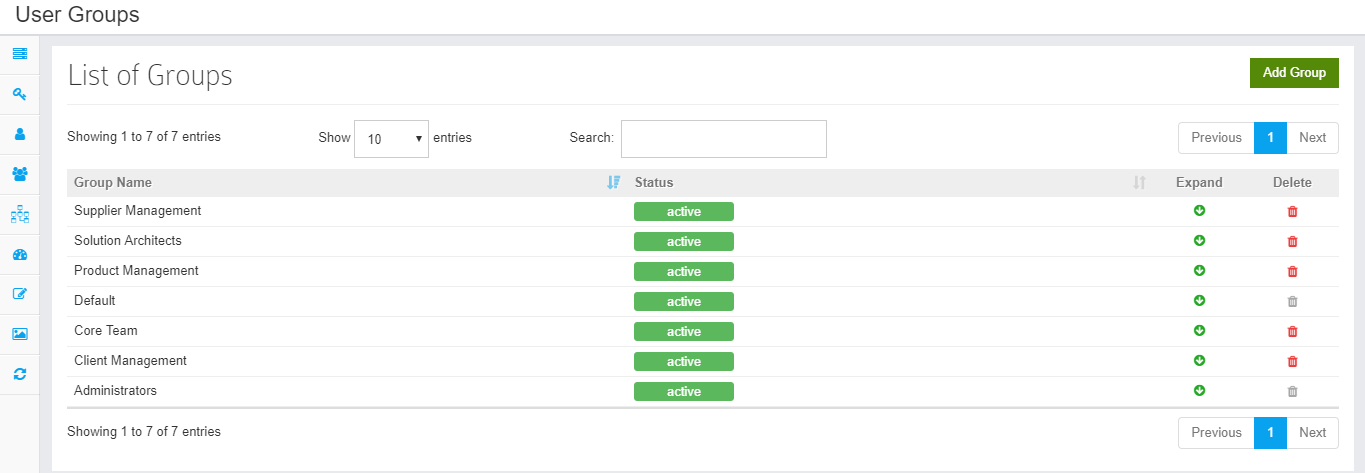
To add a group, click on Add Group.
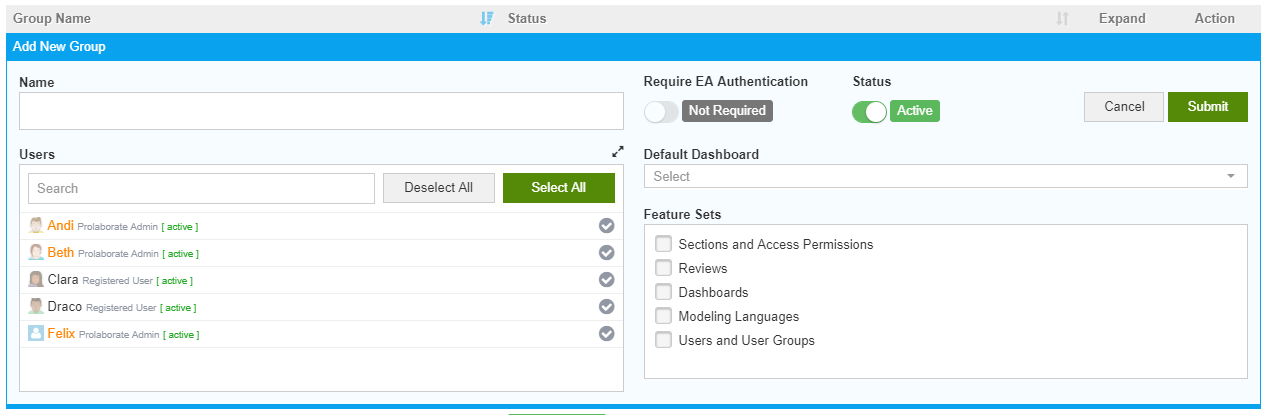
Fill the following details and click on Submit to create a group.
- Mention the Name of the group
- Add the Users whom you want to be part of this group
- Enable Require EA Authentication if you want the users of this group to be prompted for Enterprise Architect credentials when opening this repository. Please note this option will be enabled only if EA Security is enabled for this repository.
- Set the status – Active or Inactive. Please note making the group as inactive does not make its members inactive. If a group is inactive, the permissions given to that group will be revoked and that group will not be available anywhere in the system.
- Set the Default Dashboard for this User group
- Select the Feature Sets you want this group to have access to. For example, if you select Dashboard Management, this group members will be able to add, edit, delete and set default dashboards
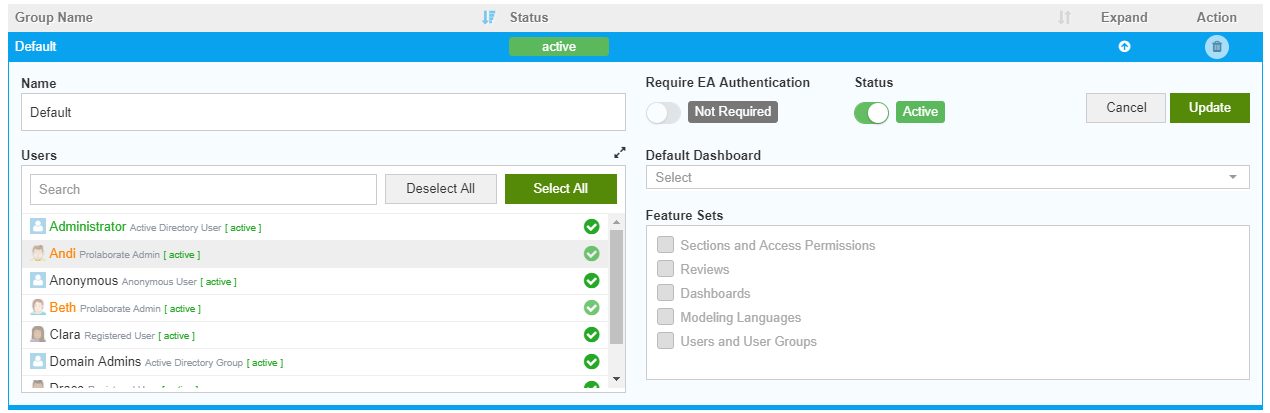
Manage User groups
The newly created group will appear in the list now.

To view the details of a group, click on Expand icon. You can edit all the details of a group.
Feature Sets – Role-based Admin Access
This feature lets you give a admin access to a specific capability to a group of users in a repository.
For example, if you want a user group to just manage access permissions but not add or remove users, it can be enabled using this feature.