
Query Property
Why to use Query Property?
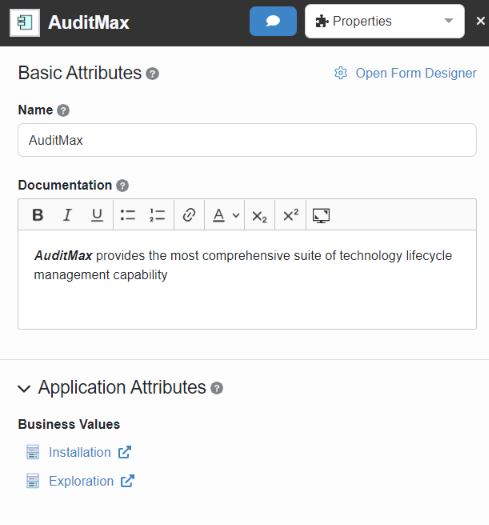
EA Model is more complex than directly connected elements, and it’s imperative to have the ability to publish more complex information for Model artifacts. With the use of Query Property, which is a very flexible feature, users can view information more easily by having it displayed as a list. The Properties tab and Overview page make it simple to see any query properties that have been added to a stereotype with just a click.
The example below shows how a 2nd level connected information (Business Values corresponding to Application) is presented in a simple way to foster understanding.


Prerequisite
A prerequisite, Query Property must be created and added to a stereotype in a Modeling Language.
Create and Configure Query Property
Step 1: Create Query Property
First step is to define a Query Property using SQL query.
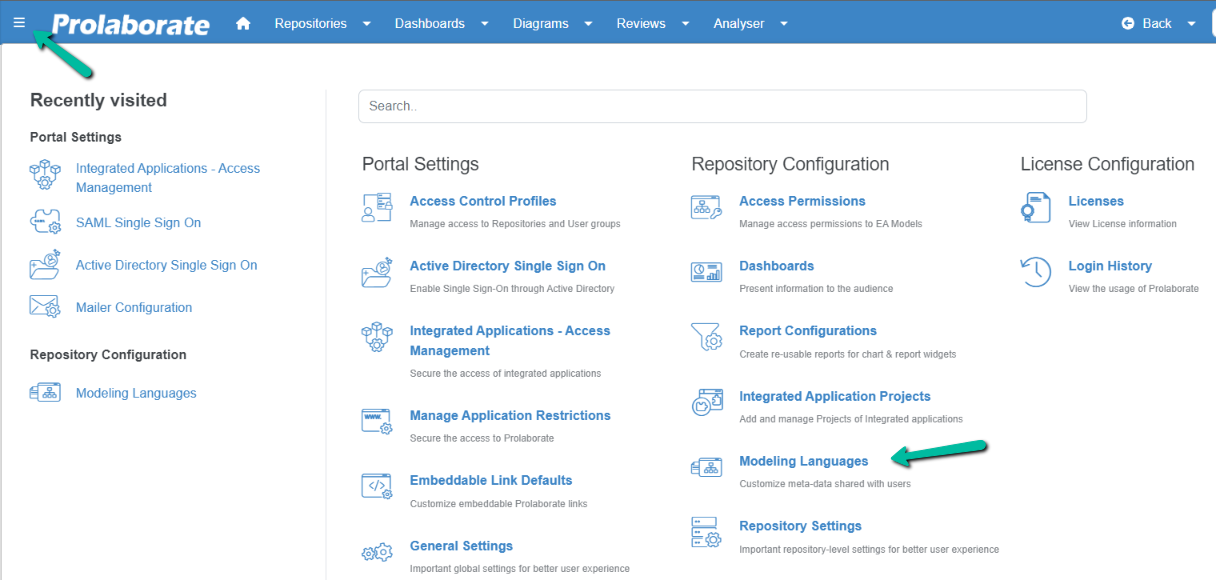
To create a Query Property, click on Menu > Modeling Languages under Repository Settings.
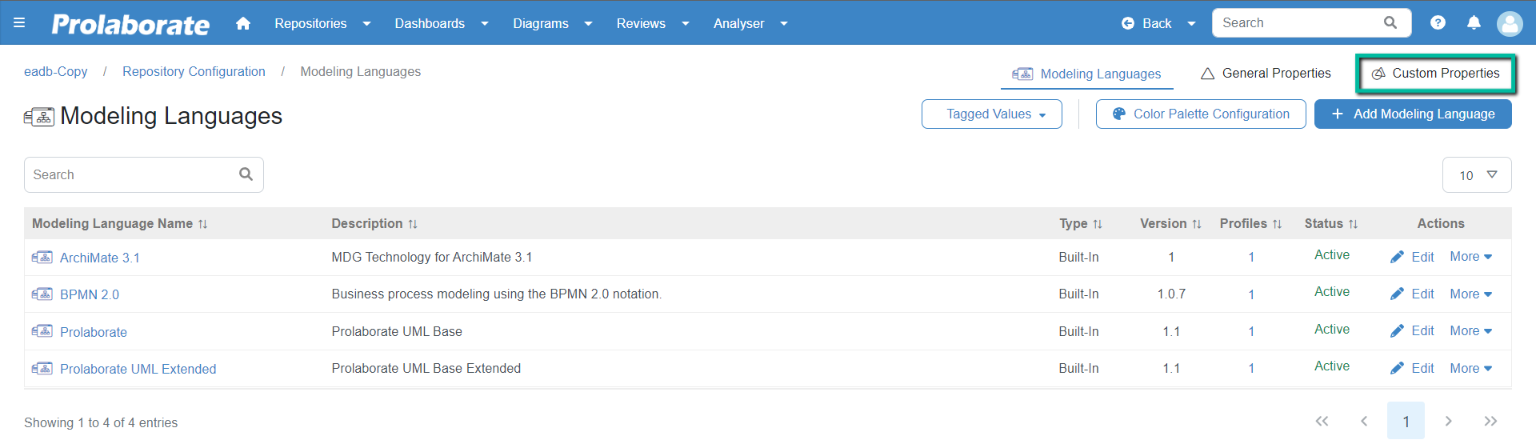
Click on Custom Properties at the top right corner of the page.
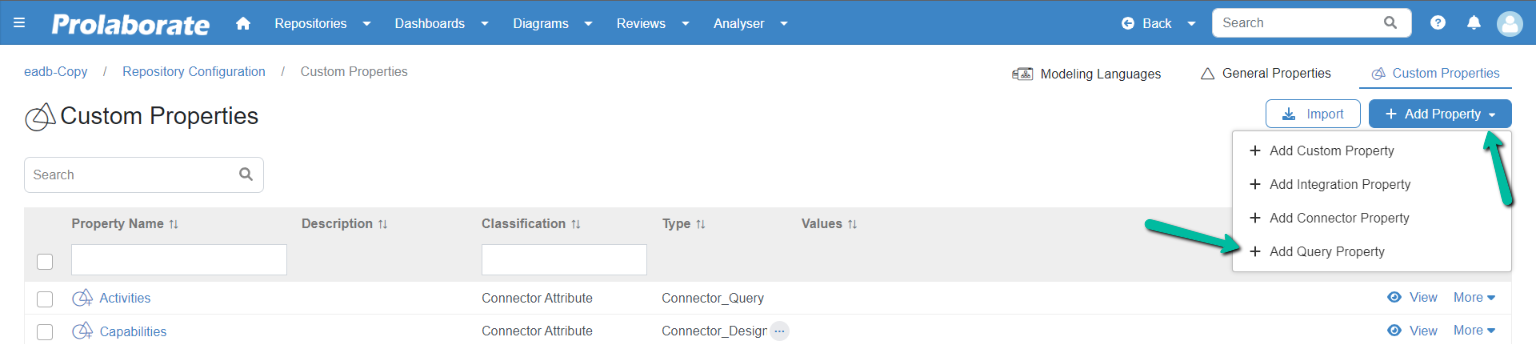
Click on the Add Property dropdown and choose Add Query Property.
In the Create Query Property page, enter a suitable name and description for the property. Write the query based on your requirement in the field.
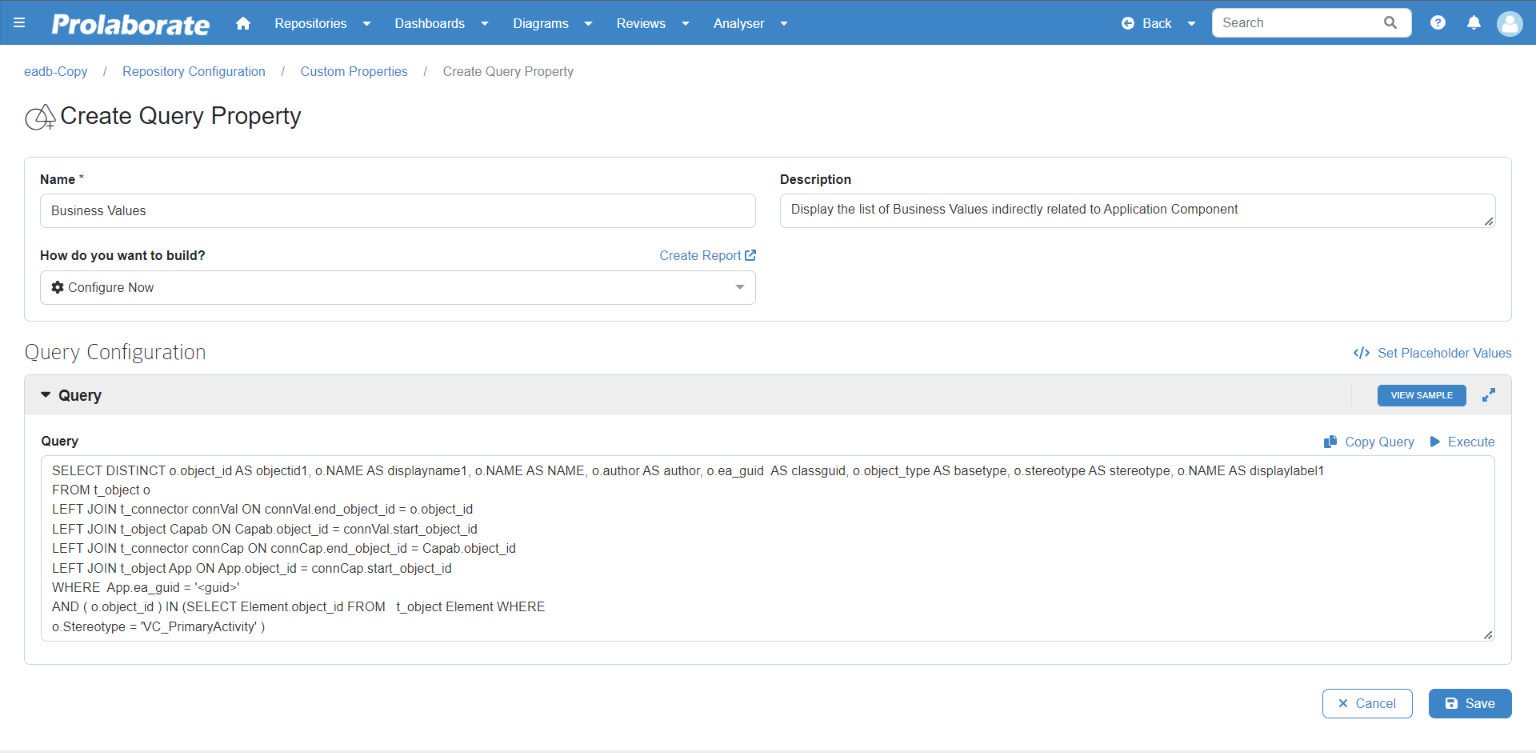
Sample Query
SELECT DISTINCT o.object_id AS objectid1, o.NAME AS displayname1, o.NAME AS NAME, o.author AS author, o.ea_guid AS classguid, o.object_type AS basetype, o.stereotype AS stereotype, o.NAME AS displaylabel1 FROM t_object o LEFT JOIN t_connector connVal ON connVal.end_object_id = o.object_id LEFT JOIN t_object Capab ON Capab.object_id = connVal.start_object_id LEFT JOIN t_connector connCap ON connCap.end_object_id = Capab.object_id LEFT JOIN t_object App ON App.object_id = connCap.start_object_id WHERE App.ea_guid = '' AND (o.object_id) IN (SELECT Element.object_id FROM t_object Element WHERE o.Stereotype = 'VC_PrimaryActivity')
Note:
- The query is specific to the model and the SQL syntax is defined according to the chosen DBMS (Postgres, MySQL, SQL Server, PostgreSQL, Oracle)
- Name alias, GUID, Basetype, and Stereotype should be mandatorily part of the SELECT statement
- should be added to the WHERE condition to dynamically view the results when clicking the artifacts
- The GUID and Basetype respectively make it possible to navigate to a listed element and show the icon.
Click Save to create the Query Property. After clicking Save, the Query Property is saved as a report in Report Configuration.
One can edit the saved report from the Report Configuration page and the edited changes are reflected to the property. The changes reflect wherever the property is used and is visible in the Properties Window, Overview Page, etc.
Reuse Report to Create Query Property
Users can reuse an existing report instead of recreating it, for this Users must use predefined and reusable reports from Report Configuration to create Query Property. To know more about Report Configuration, click here.
For Query Property, the app displays only single level report of type query. The column (Levels) denotes the number of levels configured in the report.

Report can also be selected by selecting Choose a Report from the dropdown How do you want to build? option
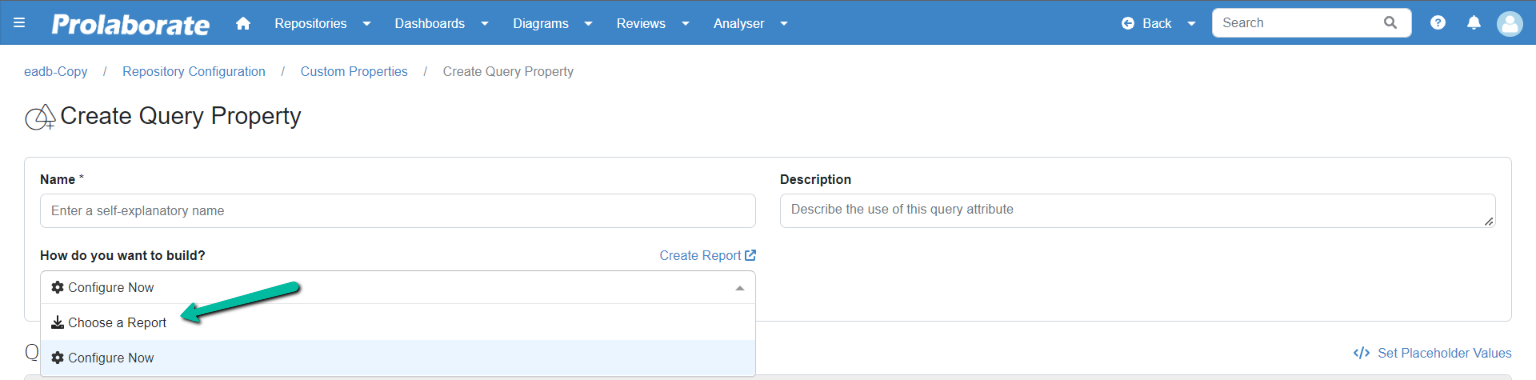
Click Save to create the Query Property after choosing a report.
Step 2: Configure Query Property to a Stereotype
To display a query property on a Properties Window or on an Overview Page, the user must add the Query Property to a stereotype in Modeling Language.
In the Modeling Languages page, select a MDG and a Profile.
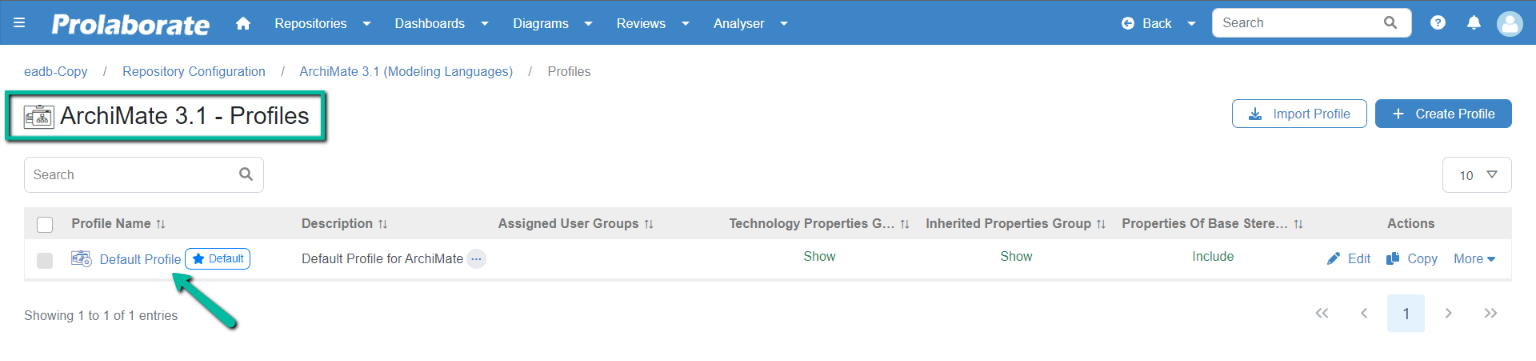
Open the required profile and choose a stereotype to which the Query Property needs to be added. Click on Form Designer to edit the attribute list for that stereotype.
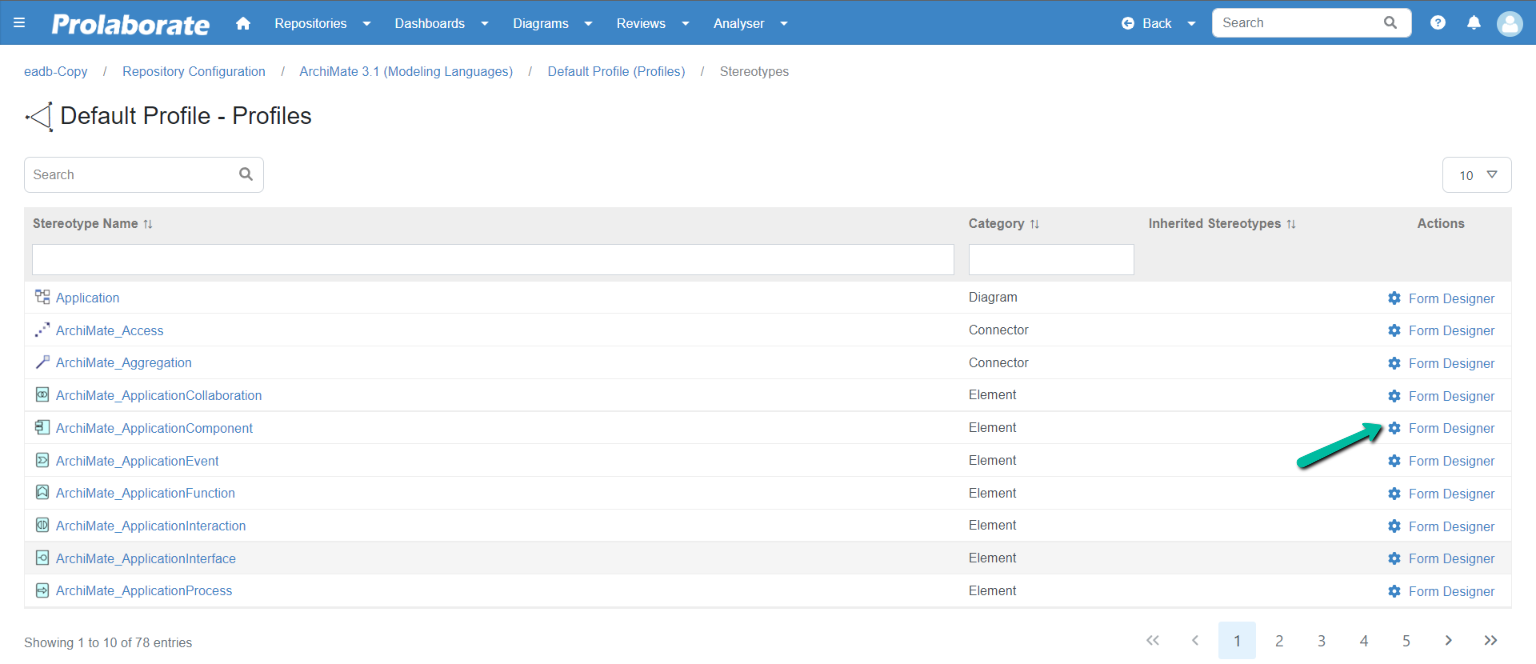
The Query Properties are available under the Custom Properties section on the Form Designer page. Drag and drop the required Query Property to add to the stereotype.
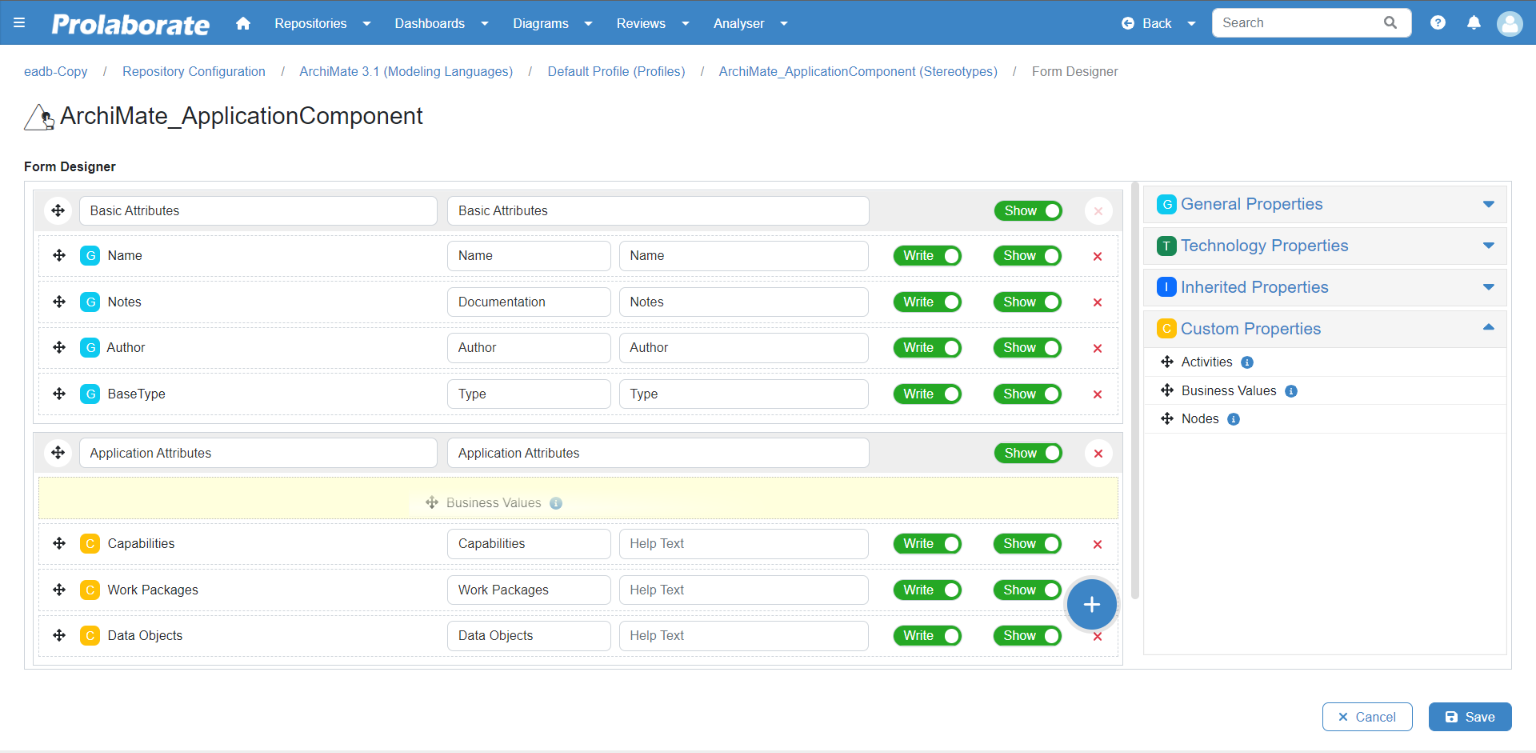
The Toggle button with Show/Hide for each property helps to set the visibility of the property in the Properties Window and Overview Page.
Click Save to save the configurations.
Modify Query Property
When you save a Query Property, the query entered is saved as a report in Report Configuration. Users can edit the report to modify the configurations. The changes are reflected in the Properties window and Overview page where the Query Property is used.?
Manage Query Property
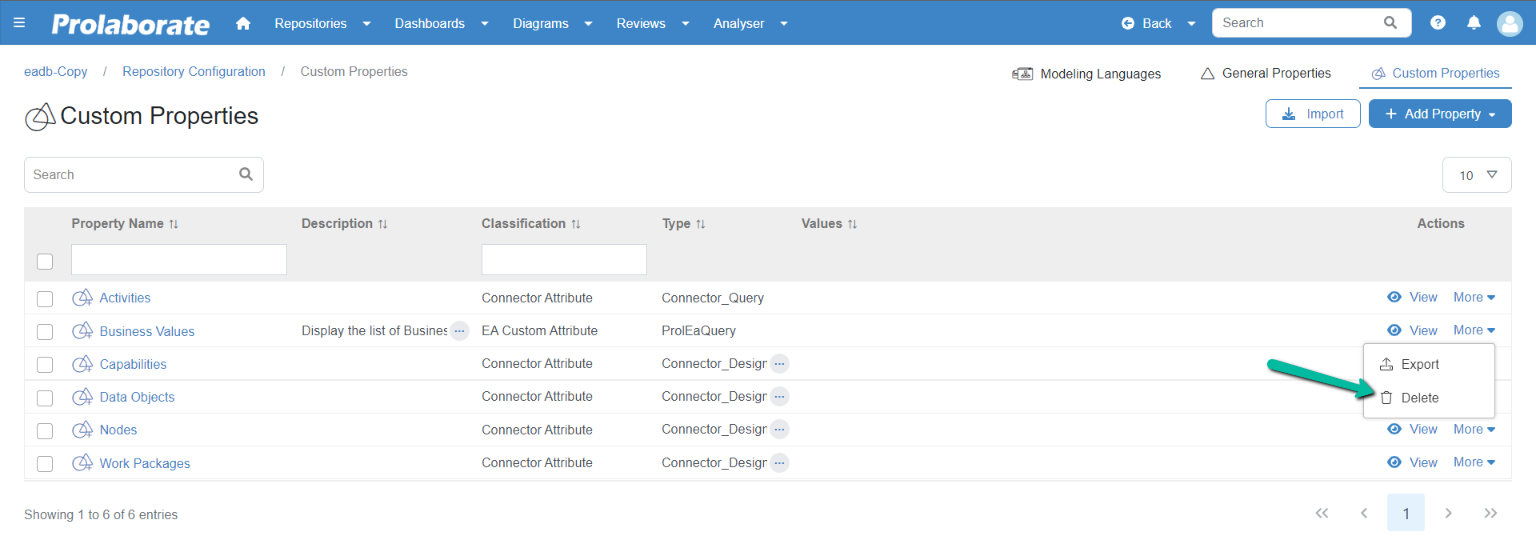
All the Query Properties created in Prolaborate are listed on the Custom Properties page. It shows the Query Property name and description if added. The type of Query Property is ‘ProlEaQuery’.

Users can perform the following actions,
- View the Query Property
- Export
- Import
- Delete
View Query Property Details
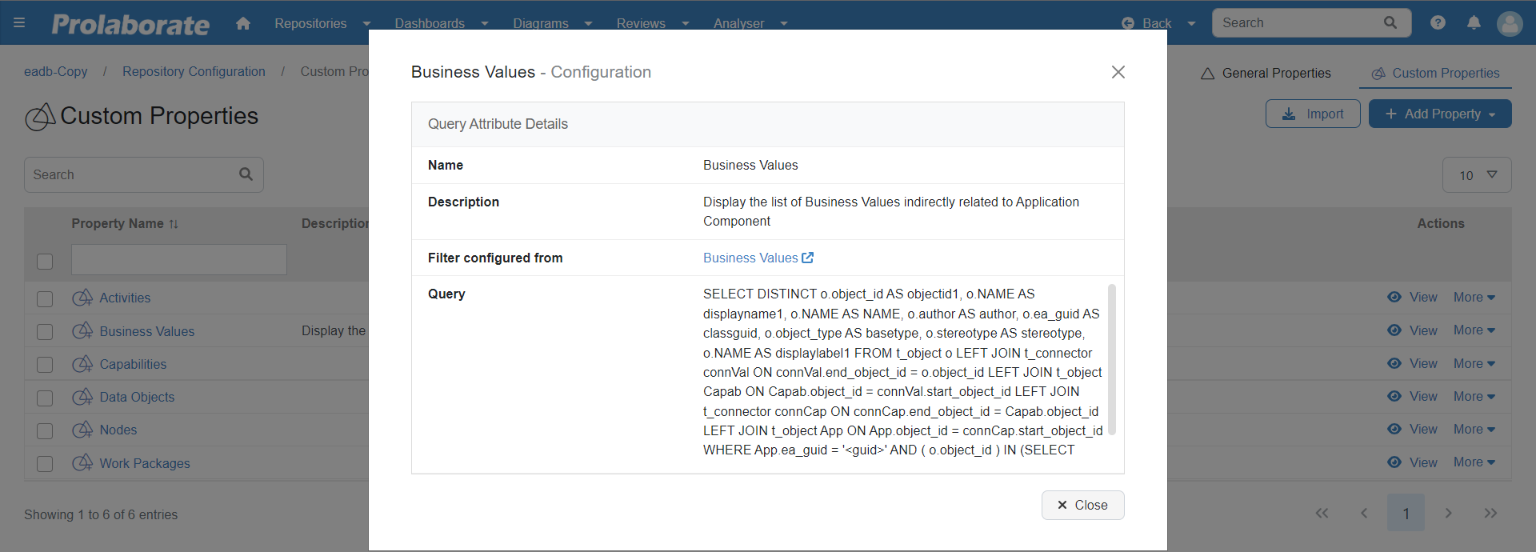
Click on the Eye Icon to see the Query Property details including the report name and query.
A popup window opens to show the configurations.
Export & Reuse Query Property
Export the Query Property to reuse it across repositories or instances. Click on the Export option under Actions to export the properties individually.

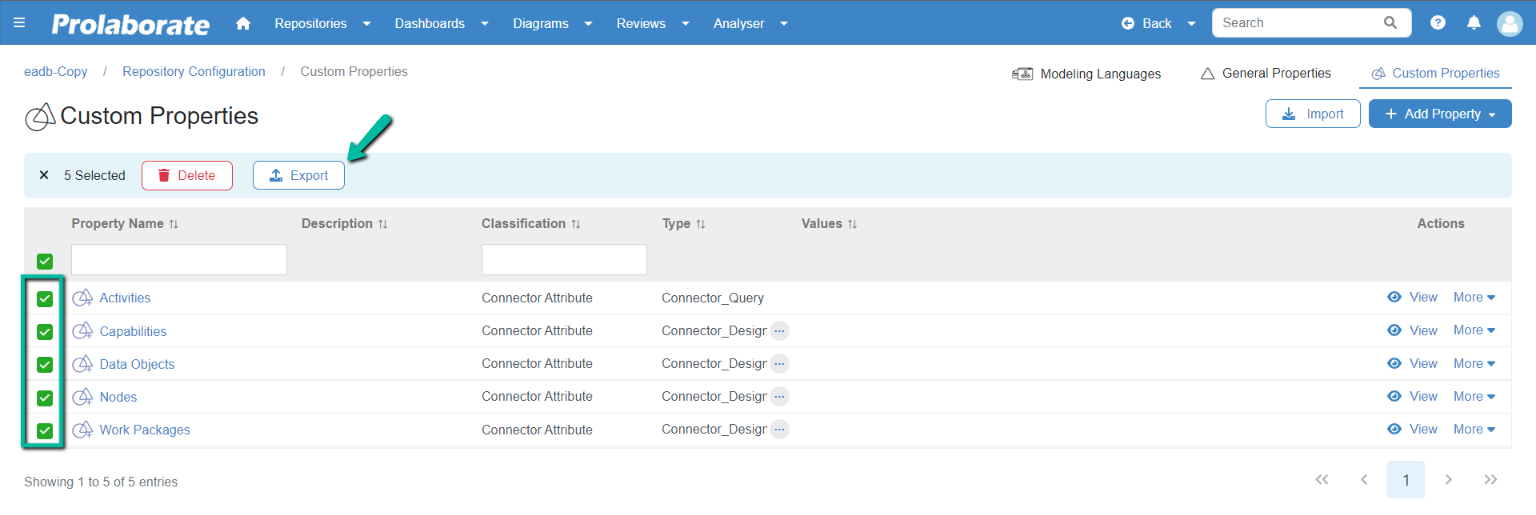
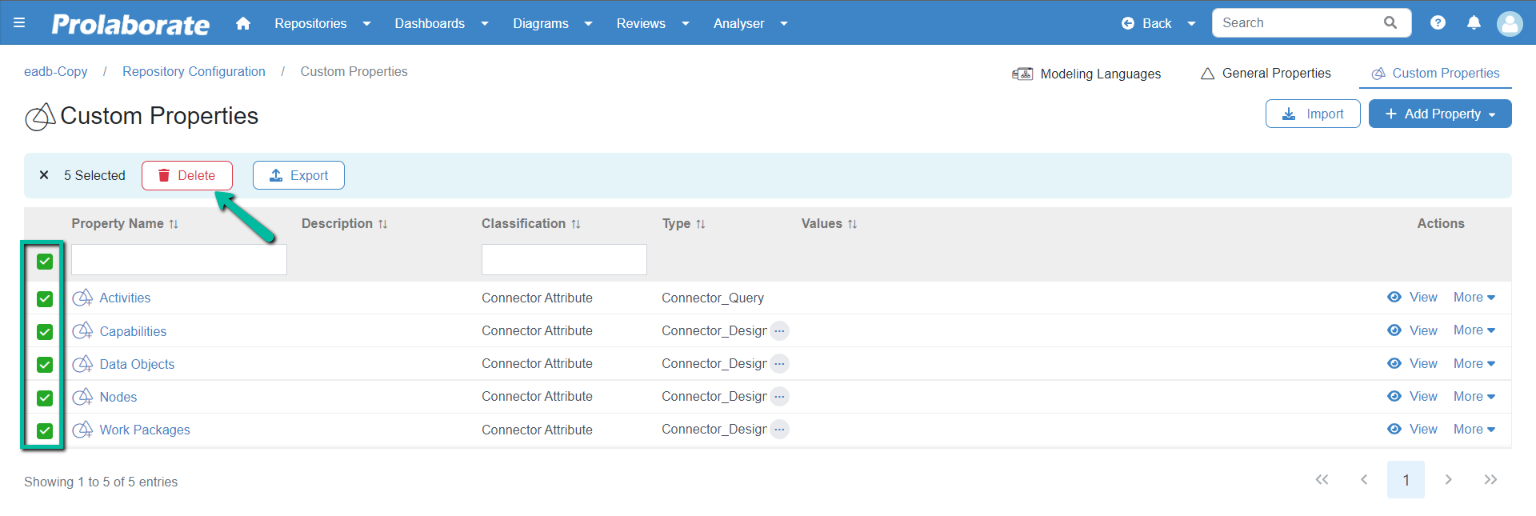
Properties can also be exported in Bulk. Select multiple properties and click Export.
Delete Query Property
To delete a Query Property, click on the Delete option under Actions to delete the properties individually.
Properties can also be deleted in Bulk. Select multiple properties and click Delete.
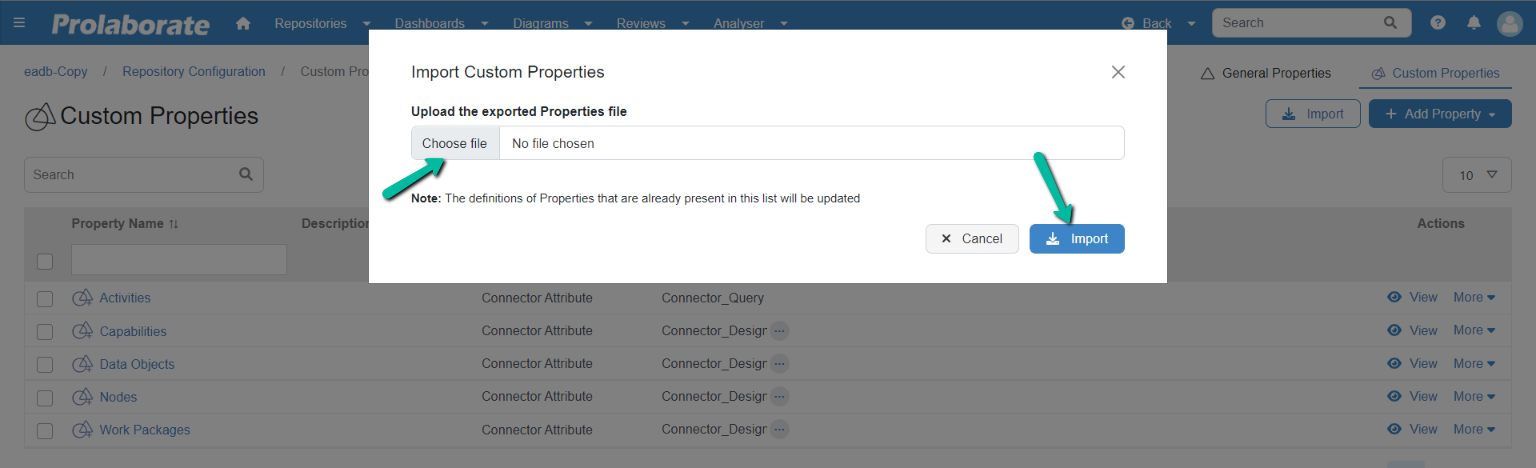
Import Query Property
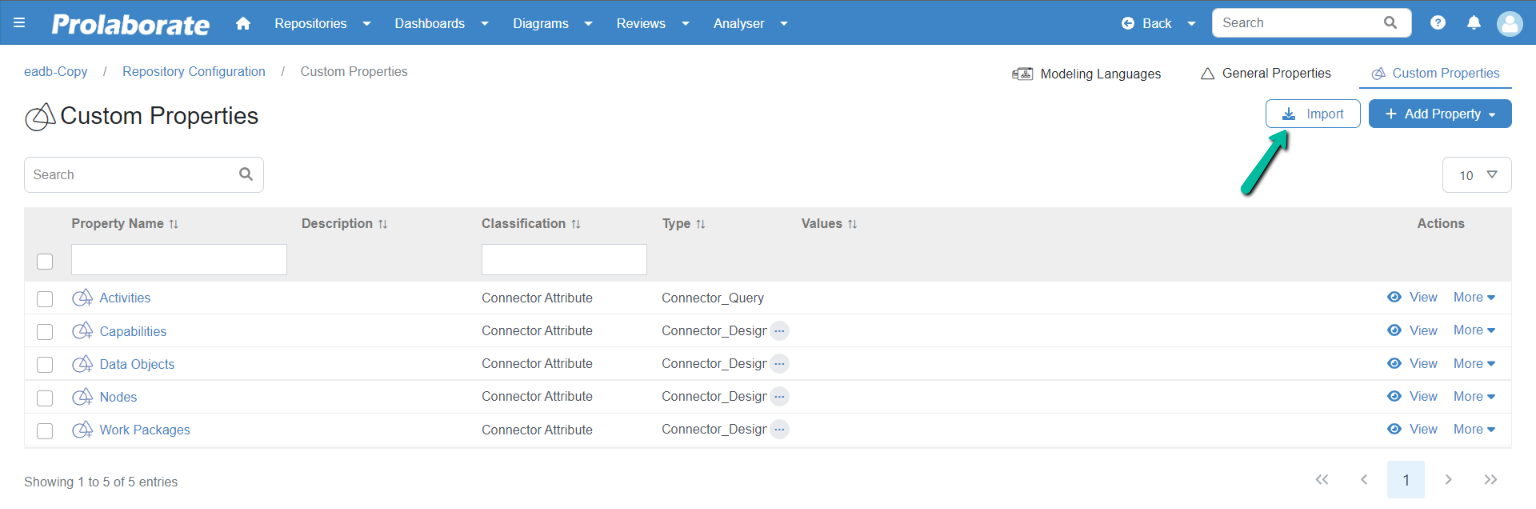
Choose the xml file to upload and then click Import to add the properties.
Query Property that is imported does not create a report in Report Configuration and therefore, the imported Query Property cannot be modified.
To enable editing for such imported queries, one must import the report along with the properties to create a reference. This allows the users to modify the query for the imported Query Properties.